

Are you looking to cut mailbox licensing costs for your Office 365 tenants admin mail accounts? Well, look no further, and I will share a few ways for you to save money on Exchange Online licensing fees for your admin accounts that need to exchange e-mails.
So what do I mean by “admin accounts”?
In this case, the admin account (sometimes referred to as an ADM account) is a separate privileged account used by IT staff to perform their privileged duties. These account types are a standard security measure implemented in many companies, and in some cases, they need to be mail-enabled.
Some valid reasons for needing to mail enable an admins account is:
- To receive Microsoft Notifications.
- Third-party admin tools that don’t support alternative e-mail addresses.
- OTP messages sent to the account.
- Using the account UPN in places that require you to fill in an e-mail.
But mail enabling does not necessarily mean having to purchase a license for Exchange Online!
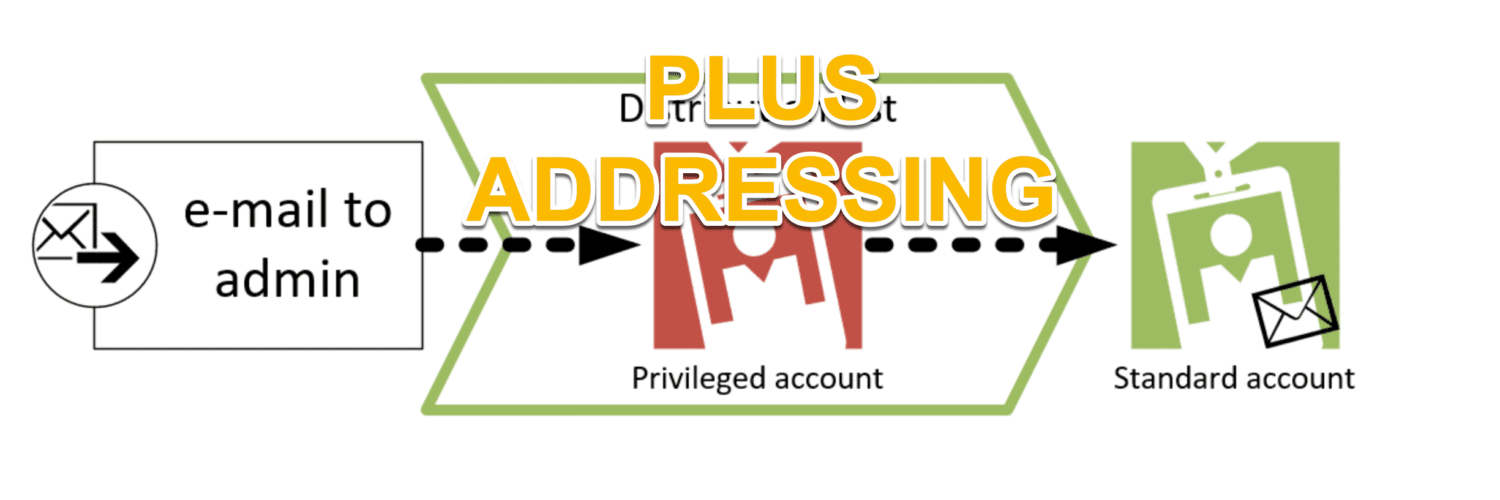
One way for you to avoid excessive licensing for Exchange Online is to redirected emails using Distribution Lists.
By redirection, I mean mail destined for your admin account goes to your regular non-privileged account instead.
IMPORTANT UPDATE
These solutions below worked for many years but are <maybe> no longer needed. A much simpler solution is now available to tenants that have “plus addressing” enabled. I have left the original part of this article below the purple line, just for historical reasons. The following is the “new” simple way of doing this. But notice that e-mail sent directly to the UPN will not be delivered, in this case you need to use one of the other options.
A “plus” address is simply a “tag” that is added to the incoming e-mail, but when added to the admin account, Entra ID will pass the check for duplicate mail address values, and allow you to add the “same” mail account to two different objects in Entra ID.
Enable Plus Addressing
Requirements: Exchange Administrator Role
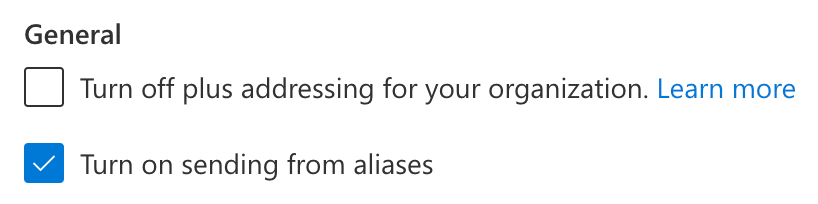
To begin with, we need to verify if the tenant allows “Plus Addressing”. It is enabled by default in most tenants, and you can read more about it here: Plus Addressing in Exchange Online | Microsoft Learn
- Access the Exchange Online Admin Center via https://admin.exchange.microsoft.com
- In the menu on the left, find the “Settings” button, indicated by a “gear” icon, and click it.
- Inside “settings”, find the “Mail flow” option indicated by an envelope icon, and click it.
- You should see a fan-out menu with the “plus addressing” option shown at the top. Make sure that the box next to it is clear. Clear it if needed.
Add a “plus” Address to the Admin Account so you receive “admin mail” on your regular users inbox.
Adding a “plus” address to the admin account, so you receive e-mails in your “regular” mailbox, is as simple as these steps:
- Go to the Microsoft Entra Portal: https://entra.microsoft.com
- Find the user account in your list of users and open up the account page
- Click on the “properties” tab found on the overview page.
- Find the “Contact information” edit “pen” and click it.
- Now simply type in your regular account e-mail but add the “plus” tag as well. see example below, where my regular e-mail account is “[email protected]” but I added a “+admin” tag, right before the @-sign.
- Afterwards, click “save” and you are done!

Now you will receive e-mails on this address inside the normal user account mailbox. The added benefit of “plus” addressing is that you now have a tag that you can use to sort your e-mail on.
!!!! OLD ARTICLE BELOW !!!!
Using Distribution Lists to redirect e-mail has several advantages:
- Easy to set up with PowerShell or EAC.
- Redirect without storing a copy.
- Supports “send as” or “on behalf.”
- Supports “Hide from Global Address List.”
- Generates the least amount of system clutter.
- No license consumption required!
You might be wondering why this single problem had med choose Distribution Lists over other tried-and-true solutions? I explain that and other solutions, at the end of this article. It’s up to you to decide if you think another solution is a better fit for your organization.
Now that most of the admin portals in Microsoft 365 and Azure no longer required admins to have an active license assigned. You cloud be looking into removing Exchange Online Licensing from your admin accounts and switching to Distribution List redirection or similar solutions to save money.
The solution
I have opted into using PowerShell for this solution, but you could use the Exchange Admin Center instead. This is, however, not explained in this blog post.
The following PowerShell code should get you off to a good start. Use it to build a neat solution in Azure Automation, and have it execute every time you add a new admin account. That is sure to impress the boss!
Automation is king – only your imagination will limit you…
The requirements
- Azure Subscription (free is sufficient).
- Alternatively, connect using the Exchange Online PowerShell Module V2.
- Exchange Online Administrator Privileges.
- A basic understanding of PowerShell script variables.
The steps
- Log on to Azure Cloud Shell via https://shell.azure.com
- Run the command: Connect-exopssession (UPDATE: removed in latest version of cloud shell, where you will have to install exchangeonlinemanagement PS module manually!)
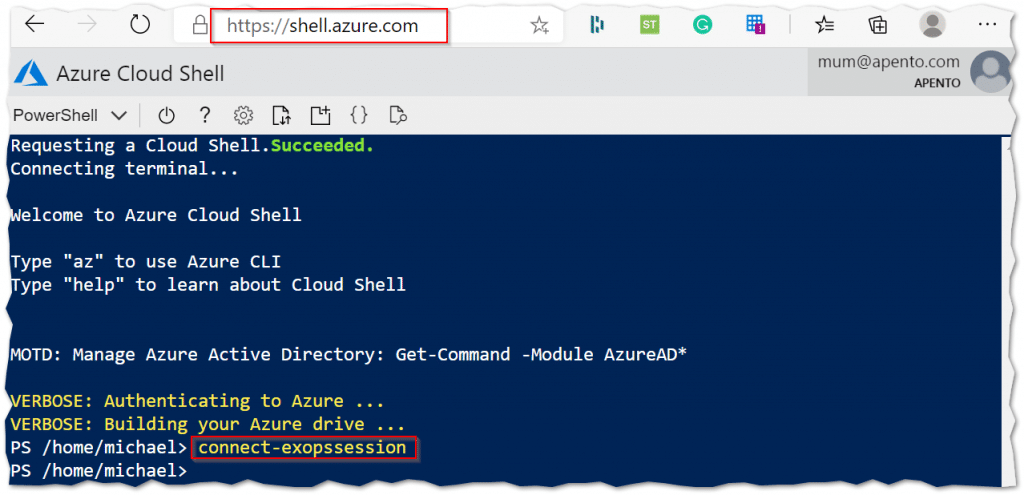
After completing the above steps, you can interact with Exchange Online PowerShell.
Before you go off and execute the script below, you first need to understand the variables that it uses.
$adminMail = "[email protected]"
$userMail = "[email protected]"

$name = ($adminMail -replace "@","_").Replace(".","-")

New-DistributionGroup -Name "Redirect for $name" -Alias "$name`_admin" -PrimarySMTPAddress "$($adminMail)" -ManagedBy "$userMail" -CopyOwnerToMember -MemberDepartRestriction "Closed" -MemberJoinRestriction "Closed"

Set-DistributionGroup "Redirect for $name" -HiddenFromAddressListsEnabled $true -GrantSendOnBehalfTo "$userMail" -RequireSenderAuthenticationEnabled $false
You will need to modify the variables in the script above, according to your requirements.
- $adminMail. This variable is the e-mail address you wish to assign to the Distribution Group. This should be the same as the UPN address of the admin account.
- $userMail. This variable is the non-privileged account e-mail. This account must have an Exchange mailbox and should only belong to the same person owning the admin account if you like staying compliant.
- $name. This variable is my way of auto-generating a name for the Distribution List; you can modify it if you like, but you must understand the impact yourself.
Troubleshooting
- No e-mail coming through from the Internet.
- Unfortunately, it can take a while for your newly created Distribution Lists cleared for unauthenticated external e-mail. So, give it some time.
- Admin e-mail address already in use in the organization?
- If you previously had this e-mail address receiving e-mail, you will need to track down the location of the e-mail attribute and remove it from whatever crevice it resides in – e-mail addresses are unique throughout Exchange Online.
- Remember to back up any existing mail data if you already had a license assigned to the admin account.
- You might have leftover attributes from past licensing on your admin account. Clean them out by temporarily adding a license and running the “Set-User [email protected] -PermanentlyClearPreviousMailboxInfo” command from Exchange Online Powershell.
- You are out of luck? – delete the user and create from scratch.
- Unable to remove the Exchange Online license from the admin account.
- You might have group-based licensing enabled in your tenant.
Other solutions – pros/cons
As with all things Microsoft, there are several ways to achieve a solution to a problem, so in the spirit of sharing my thoughts, here are some other possible solutions.
Please keep in mind that you might be required to adhere to specific compliance requirements, such as accountability, traceability, retention, backup licensing, exit strategies, and separation of privileges.
Security compliance is why I ended up choosing Distribution Lists. Also because they have the smallest footprint vs. usability.
Transport Rule
Pros:
- Requires no license.
- Easy to implement.
Cons:
- Can’t use “Send As” and “On behalf of”.
- Clutter in the rules list. Can you imagine having 99 admin accounts and this problem?
- You are limited to 300 rules in Exchange Online.
Shared mailbox
A classic solution to saving on Exchange Online licensing, but it did not support my requirements of not being able to store email – it came close though!
Pros:
- Requires no license.
- Can store a hierarchy of mail items in folders.
- Easy to configure and maintain with PowerShell.
- The first 2 cons are also a pro depending on how you view it.
- Can have a very small visual footprint in the admin interface.
Cons:
- Requires a user account to be present and disabled for mailbox login in the Azure AD users list. This could very well be the admin account, as it will still be able to log into the portal (Thanks to John Walmsley on FB for pointing this out).
- The admin UPN can only be added as a secondary Alias. And as such, it consumes yet another address. Unless you are simply using the admin account as a shared mailbox.
- Runs as a separate mailbox in Outlook, unless automapping is disabled and email is forwarded.
- Your mobile access to these emails will be limited to Outlook for iOS/Android.
Alias Address
Not much to say here. Except that it’s not possible to assign an Alias to a regular user if the alias exists as a “UserPrincipalName” (UPN) on an existing account. Also if you have a Hybrid Exchange environment, you might be tempted to manipulate the user’s proxyAddress attribute directly. This will not work!
Microsoft 365 Groups
Not much to say here. Except that it’s not possible to assign an Alias to a regular user if the alias exists as a “UserPrincipalName” (UPN) on an existing account. Also if you have a Hybrid Exchange environment, you might be tempted to manipulate the user’s proxyAddress attribute directly. This will not work!
Final words
In a perfect world of P2 licensing, you could use Azure PIM to consolidate users. Unless security has required that you have separate accounts (tiering)
As always, I hope you find inspiration in this article. And I welcome any feedback in the comments or on X @michael_mardahl.


We tried using the plus addressing but it didn’t work. We configured [email protected] as the Email in the [email protected] Entra ID. However, sending a message to [email protected] didn’t deliver a message to [email protected]. Does it take a while to sync and take effect? Might there also be issues if the [email protected] was previously licensed for Exchange in the past?
Thanks for your thoughts.
That is the caveat of using plus-addressing. I mention this in the big red box in the start of the article.
Hello Michael. This is an excellent article, but I cannot seem to get the new “+admin” to work. The instructions don’t really add up.
Let’s say I have a normal user account of [email protected] (UPN and email address). This is a licensed account with a mailbox.
My admin account UPN is [email protected]. This is an unlicensed account and cannot receive emails.
If I add smtp:[email protected] to the proxyaddresses attribute of the account [email protected], it does not work due to the issues that you described elsewhere in the article. If I add [email protected] (or anything else) as a proxyaddress to the account [email protected], that works, but it only allows me to receive emails to bob+admin and not adm.bob. So I’m not seeing how this recommendation actually fixes the problem of not being able to receive emails to [email protected]
With that stated, what am I missing here?
Thanks!
That is the caveat of using plus-addressing. I mention this in the big red box in the start of the article.
In more recent times I have set the plus addressing but then afterwards I have assigned a license to the admin account. gone into exchange online and setup forwarding from the mailbox to my regular account, and set it to NOT keep a copy. then I have converted the mailbox to a shared mailbox and removed the license.
I then am able to receive e-mails sent to the admins own UPN. It can look a bit weird inside the exchange management after that, with the forwarding being rendered with a GUID instead of a username. but it works.
Hi Michael
Not sure if this thread still alive.
I have a Global Admin with no license, but running the New-DistributionGroup produces the below error.
Do I need to prepare something to the existing Global admin before creating the DG?
An Azure Active Directory call was made to keep object in sync between Azure Active Directory and Exchange Online. However, it failed. Detailed error
message:
The value specified for property EmailAddresses is incorrect. Reason: ObjectConflict with:User_xxxxxxxx-xxxx-xxxx-xxxx-xxxxxxxxxxxx DualWrite (Graph)
Thanks
Michael K.
Seems to me you have a conflict – I can’t comment on the specifics of it as I have not run into it.
Hi Michael!
I have same issue: The value specified for property EmailAddresses is incorrect. Reason: ObjectConflict
I think that it’s impossible add the UPN address of the admin account as PrimarySmtpAddress of Distribution Group.
Things have changed in Microsoft land. but a new fix is available, and I have updated the article to reflect this change.
Alternatively try to clear previous mailbox info form the admin. if there are any existing details from a previous license, then it will fail to create the DG.
See here: https://techcommunity.microsoft.com/t5/exchange-team-blog/permanently-clear-previous-mailbox-info/ba-p/607619
I understand that with that, I can send (from a internal monitoring system for instance) a mail to [email protected] (the smtp of the distribution list) and it will arrive in the mailbox of [email protected] (the smtp of the u-Account). So far so good, but if I have a mail enabled security-group in ActiveDirectory (ex. vCenterAdmins) and the admin account (with [email protected] but now without smtp address attributes) is member of this group, will it still work when I sent alerts to the security groups smtp address?
For instance an alert from vCenter is sent to the mail enabled securitygroups smtp address “[email protected]” – that is the only configured address for vCenter alerts. The mail enabled securitygroup vCenterAdmins acts as a distribution list. All members of this distribution list would – if mail enabled – get the mail to their smtp address. But the admin account does not seem to be “mail enabled” in your case and therefor as a member of a mail enabled security group will not get an eMail at all. It seems with the explained solution you cannot sent a eMail to the user object of the Admin account, but you sent instead a eMail to his corresponding UPN, which seems for me not the same – or am I wrong?
My suggestion is simply for this use case:
1 person has two user accounts, a regular account that has a mailbox, and a special admin account that has no e-mail account.
To save some money on the e-mai licenses, you simply redirect any e-mail destined for the admin account, to the regular user account.
In the case of your venter admins mail enabled security group, you could add the normal user account to the venter admins mail enabled security group.
But since you are most likely also assigning permissions with that, it it not going to be a great solution.
Now, I have to comment on your choice of using a mail-enabled security group.
1 – you can’t use solutions like I have proposed, so you will need to just pay for the mail license.
2 – RBAC best practise dictates that you should separate security assignments and mail distribution whenever possible.
So I suggest you stick with a regular security group for assigning permissions, and create a separate distribution list for e-mails to your venter admin accounts.
This is the way – the other way is a shortcut and it offers less flexibility as a trade.off for less management overhead.
Great solution!
Thank you!!
Hi,
Well, as pointed on other forums, if there is no one in TenantAdmins that has a mailbox, no alerts are being triggered at all – there is simply nothing in logs/tracking.
So at the moment, the only way is to manually add the address you want (the one with mailbox) on each alert you want to receive.
For PIM reports, alternate email address does work.
Hi Andrew,
Thanks for the info.
I have heard of someone assigning a license to the admin, then setting up an email forward, and then converting to a shared mailbox, might do the trick, it seems a bit hacky though.
I would suggest adding an exchange online kiosk license then to your break the glass account, to get the system to generate the alerts on the cheap.