


While I was configuring MDT for creating reference images at one of my customers, we noticed that in some cases when systems that were deployed through ConfigMgr using the reference image we’ve built, they would contact the WSUS server used for patching during the reference image creation. It appeared that the registry keys containing WSUS information were not removed during the sysprep. In general this is not a big deal, but in this case we didn’t want the clients to start patching at this stage nor download any patches from that particular server.
Since we were leveraging MDT for the reference image creation process, I decided to create a script that would interact with the MDT environment and leverage it’s capabilities.
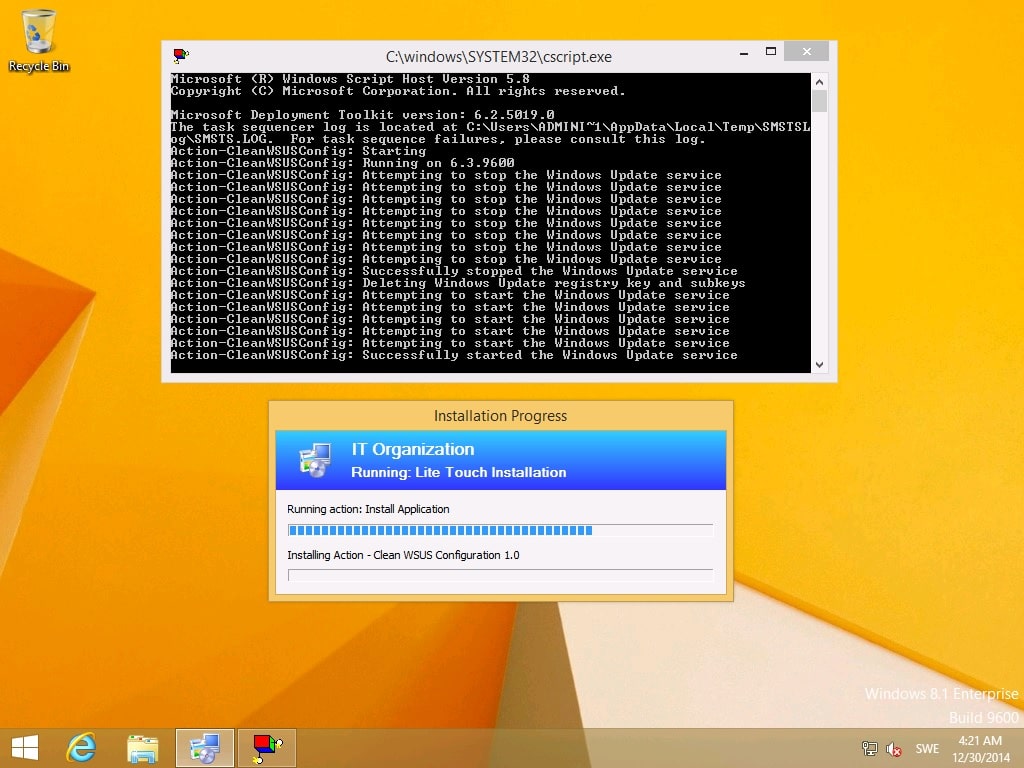
Update – 2015-03-27 – As pointed out to me by Jörgen Nilsson, once you start the Windows Update Agent service again after the script has removed the registry values, the service may attempt to connect to Windows Update and begin installing updates. To avoid this I’ve updated the script to not start the service again.
Download information
I’ve made the script available on the TechNet Gallery.
Implementation
I want to highlight that this script is only designed to work in a MDT stand-alone environment, or in a MDT-integrated task sequence with ConfigMgr. The purpose of the script is to clean the WSUS configuration from the registry, that means it’s only meant for usage when creating reference images.
1. Start with downloading the script from the TechNet Gallery.
2. Put the Action-CleanWSUSConfig.wsf in C:\Scripts\CleanWSUSConfig on your MDT server.
3. Open the Deployment Workbench and expand your Deployment Share.
4. Right-click on Applications and select New Application.
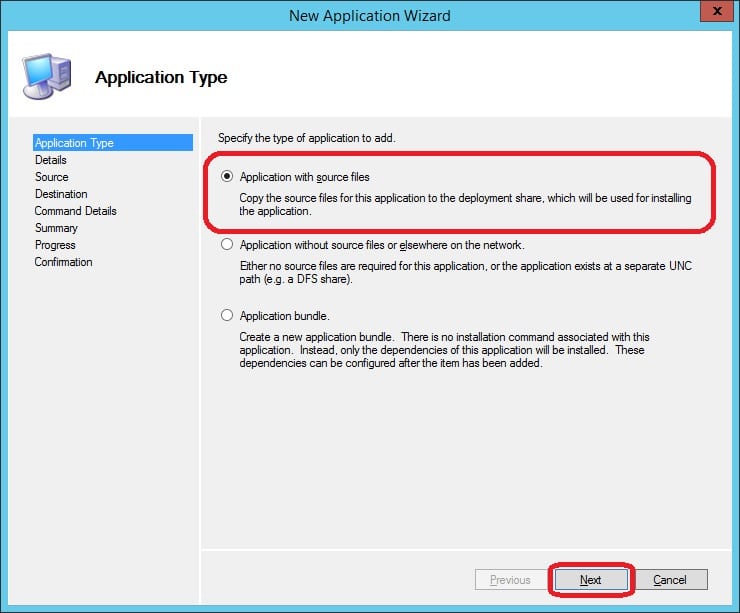
5. In the New Application wizard, select Application with source files and click Next.
6. On the Details page, enter the information you wish for the Application. I suggest that you give it a name like Action – Clean WSUS Configuration. Click Next.

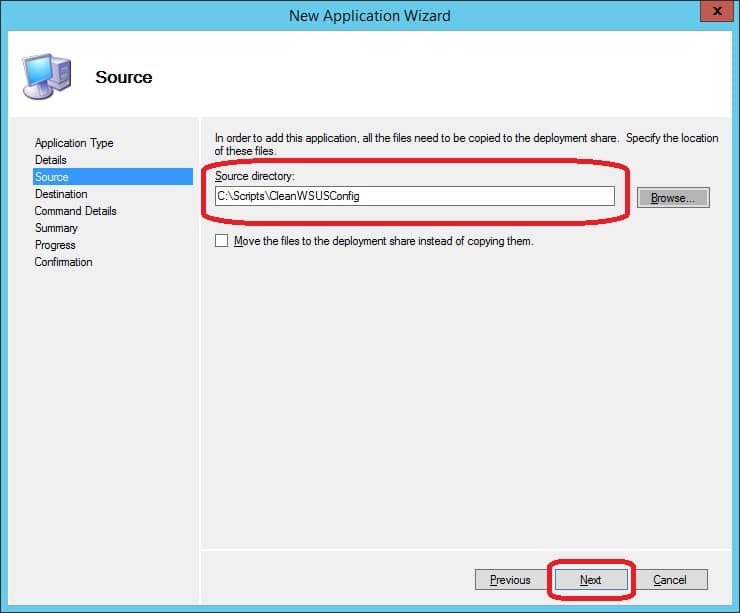
7. on the Source page, specify the path to where you saved the Action-CleanWSUSConfig.wsf file. In my case it was in C:\Scripts\CleanWSUSConfig. Click Next.
8. Specify the name of the directory where the new Application source files will be stored and click Next.

9. For the Command Details, specify the following as the command line:
cscript.exe Action-CleanWSUSConfig.wsf
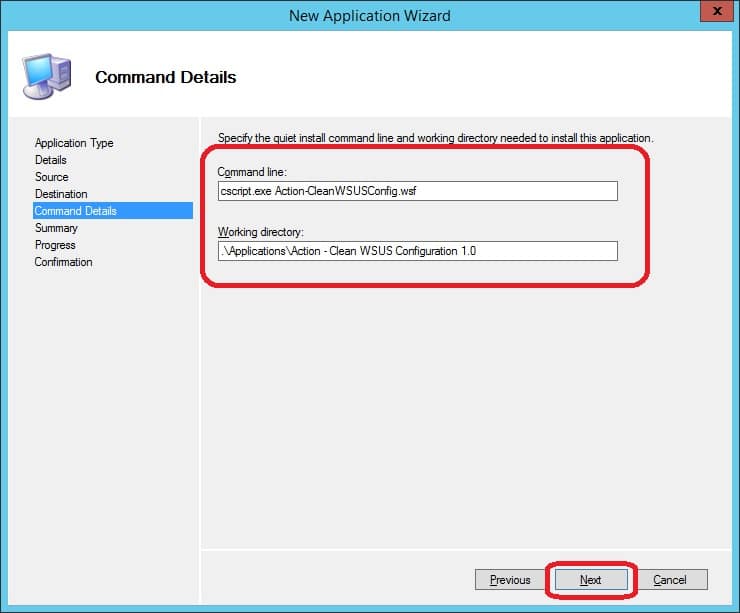
Click Next.
10. Click Next on the Summary page.

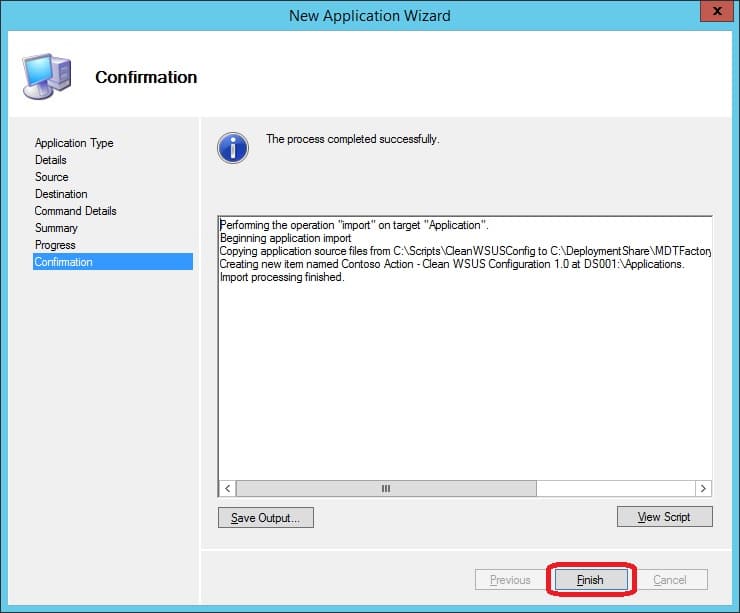
11. Finally click Finish on the Confirmation page.
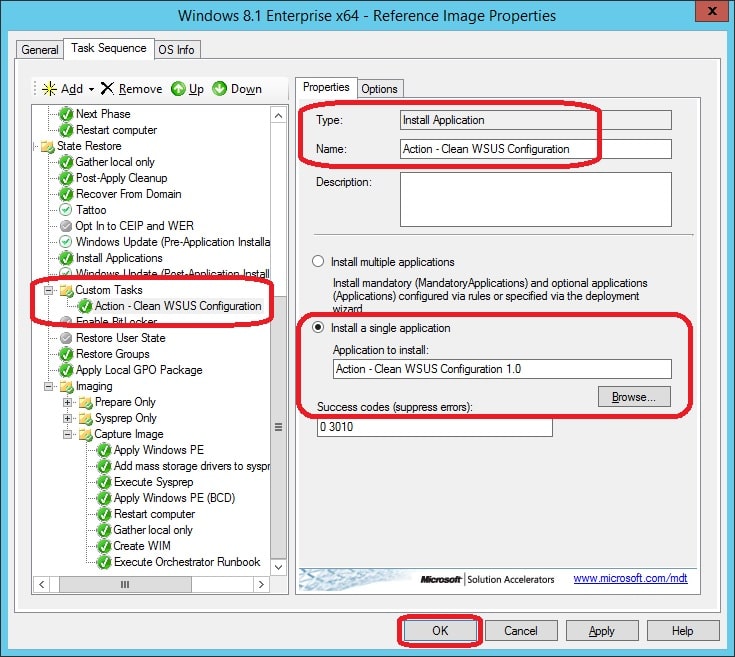
12. Open up your Task Sequence used for creating your reference images, and go to the Task Sequence tab. Scroll down to the State Restore group and select the Custom Tasks step. Click Add – General – Install Application. Choose Install a single application, click Browse and select the Action – Clean WSUS Configuration application. Click OK.

13. Change the name to Action – Clean WSUS Configuration and click OK.
Summary
From now on when you create your reference images, no traces of the WSUS server used for patching the image will be kept.


This looks good. Can you share what you have in your windows update group policy object for after OSD?
Hi Ryan,
I normally go with what Jason Sandy wrote about a while back here:
https://blog.configmgrftw.com/software-updates-management-and-group-policy-for-configmgr-cont/
Just configure Configure Automatic Updates to Disabled, and ConfigMgr will take care of the WUA without it trying to do something by itself.
Regards,
Nickolaj