Recently I shared a PowerBI template that could be used as a solid starting point for compliance reporting on servers, and with a couple tweaks, you could make it work for desktops too. Great, but now its time to go even further beyond with PowerBI!
So we’ve got a report and it does some cool stuff for us and yeah it could stand a few improvements but at its core, a report is only as good as the currentness fo the data that drives it. After all, if the data isn’t current it’s a struggle to take appropriate action. While we know SCCM isn’t always the fastest horse in the race when it comes to reporting information from clients upstream we can at least ensure that the information we are presenting to a manager is refreshed on a regular basis.
However, before we go too far down the path we need to take a moment and check a couple of simple requirements questions off the list.
- Appropriate PowerBI Licensing – Microsoft License Page
- I am not a master of Microsoft licensing nor do I play one on TV please research to find whats best for you and your organization but you will need one of the below:
- PowerBI Free
- PowerBI Pro
- PowerBI for Office 365 (E5 license)
- I am not a master of Microsoft licensing nor do I play one on TV please research to find whats best for you and your organization but you will need one of the below:
- A server to install the PowerBI Gateway on – You can use an existing server – it will need access to the internet.
Now for a note of caution before we go any further. When you are building your reporting gateway server, spend a little time and plan out your implementation. Think about where you should install it. Just because you CAN install it on your SCCM site server doesn’t mean you SHOULD install it there, what if you want to connect to other data sources. In fact, in the long run, your PowerBI gateway server could look something like this:
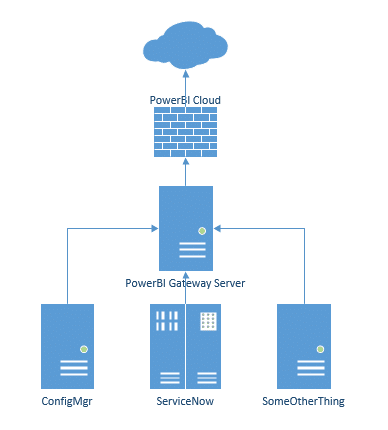
Neat right? That way you can pull a bunch of data from different sources together before sending it to the cloud. OK lecture on thinking things through over on to the fun part, how the heck do we install the gateway service in the first place.
First go ahead and login to the PowerBI service you should be able to do that from your O365 corporate portal OR from:
Once you’ve logged in and looked at the beautiful PowerBi dashboard you’ll notice in the upper right corner some fancy symbols.

If you click the one that looks like a ‘download’ button you’ll get a drop-down from the drop-down select ‘Data Gateway’
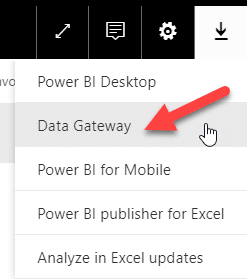
This will then take you to this wonderful little website where you can download the PowerBI Gateway, and sure I could just give you this link, but now if you lose it you know how to find your way back again. Either way, you need to click on the ‘Download Gateway’ button.

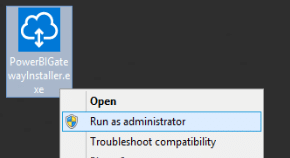
This will then download the PowerBIGatewayInstaller.EXE file once your download is complete copy the file to the server you would like to install the gateway on. In my example, I’ve chosen to install the gateway on my CAS in my lab you probably shouldn’t do this in production, unless you are sure you are the only person who’s going to be using PowerBI. Once you’ve got the file on the server give it the old right click run as administrator treatment.
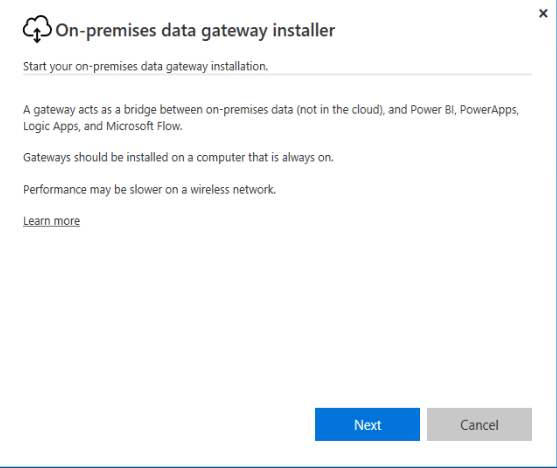
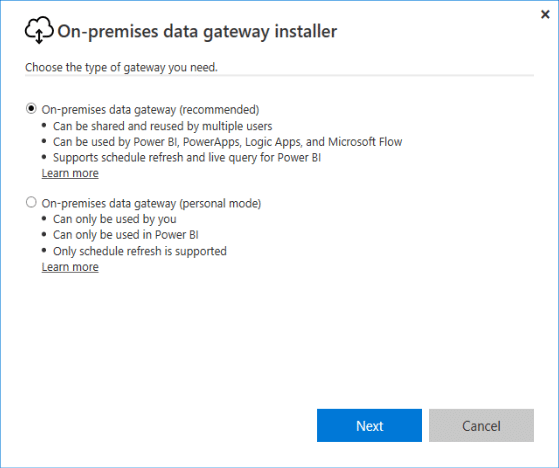
This will present you to our timeless friend the installation wizard. The first pane is pretty self-explanatory and you can just hit next.
Remember earlier in the article when I mentioned you can use PowerBI to connect MORE data than just ConfigMgr right? Well this is why I called that out. It’s decision time who and what all is going to be allowed to use this gateway? Are you installing it just for you, or other members of the organization with plans to expand your PowerBI implementation? I’m going to suggest you choose NOT personal unless you are absolutely sure that’s what you want. The features of the full gateway are just better.
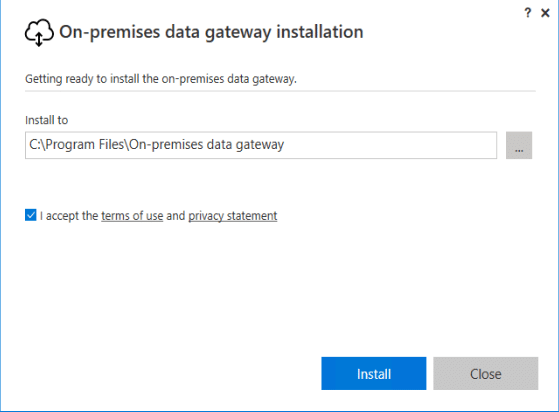
You can hit nex,t and you’ll get another prompt, no screenshot of that one, it just reminds you ‘Hey install this on a server and something that isn’t going to fall asleep’ and then you’ll be asked where you would like to install the gateway. I went with the default location.
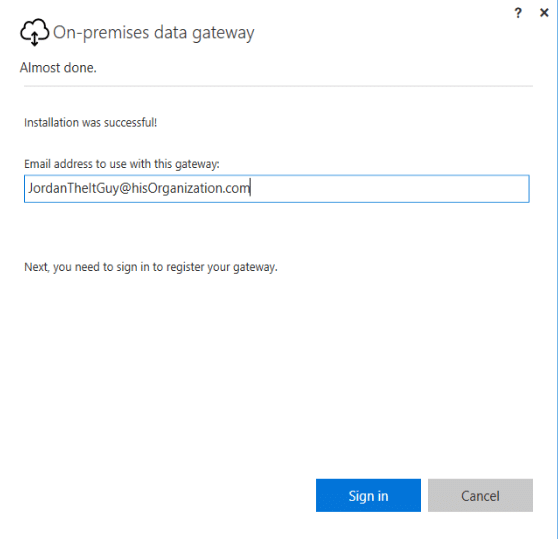
After you get that, you’ll see some progress bars and then the registration screen for the gateway. IMPORTANT: The E-mail address you use in this field should be the same address you used to login to PowerBI portal as this is where you will be trying to register your Gateway.
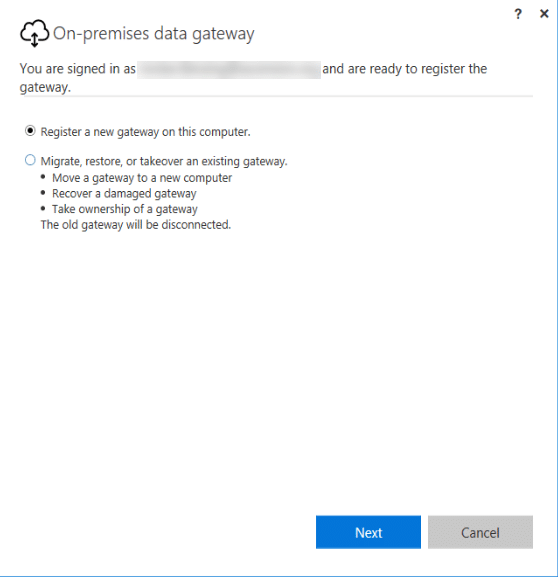
After you put in your e-mail address and login to your account you’ll be asked if you are installing a new gateway, restoring or some other options obviously we are registering a new gateway so the default option is fine.
Now we need to do a little more fun stuff. First, we need to name our gateway. I just named mine ‘SCCM-LAB’ because this gateway will only have access to resources that are within the ConfigMgr lab. Then you need to create a key I just generated one from my password solution. IMPORTANT: This key must be over 8 characters long. It will be used to connect to the Cloud Services. DO NOT LOSE THIS KEY.
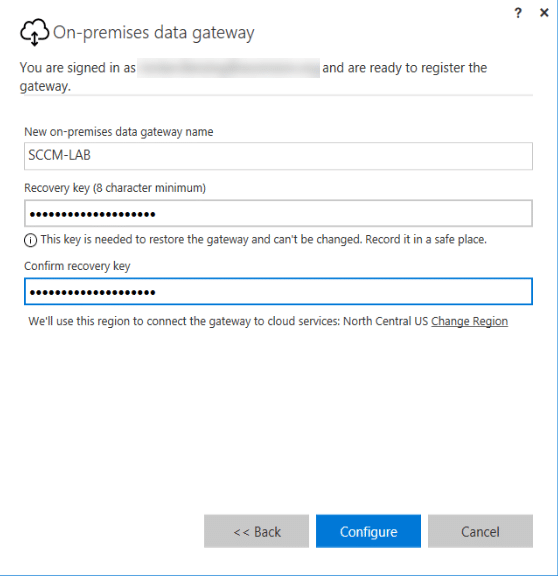
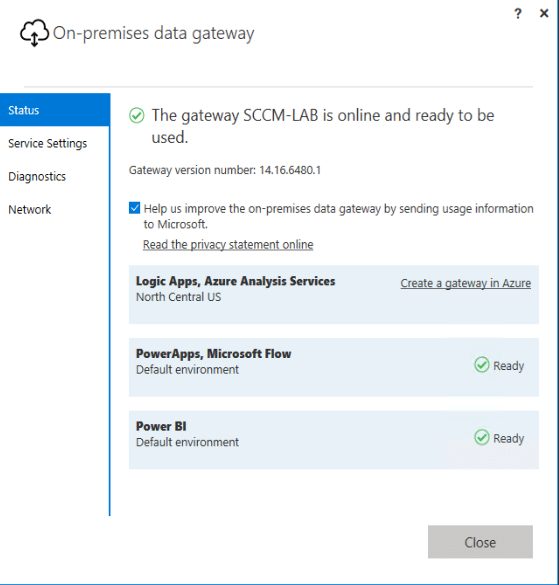
After you hit configure BAM Look it’s all set up and ready to rumble right? Well technically yes, however in its current state you’ll have a gateway it just won’t be doing anything useful so we should go through that real quick.
So first thing first let’s crack open PowerBI Desktop and take a look at that compliance report. Hopefully its all green! Now, you’ll notice in the Ribbon there is a little button called ‘Publish’ go ahead and hit that guy.

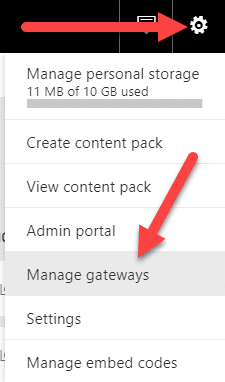
This is going to make you log in to PowerBI and then it will upload the report into the Cloud service. Assuming everything goes well you’ll get a happy little pop up that says success and that the report and data model have been uploaded to PowerBI. So, while it’s figuring out what to do with its life we’re gonna jump back over to the browser of your choice and take a look in PowerBI. We are gonna take a look at those cool symbols in the top right corner again only this time instead of picking the Download icon we are going to choose the gear icon and from the drop-down select ‘Manage Gateways’
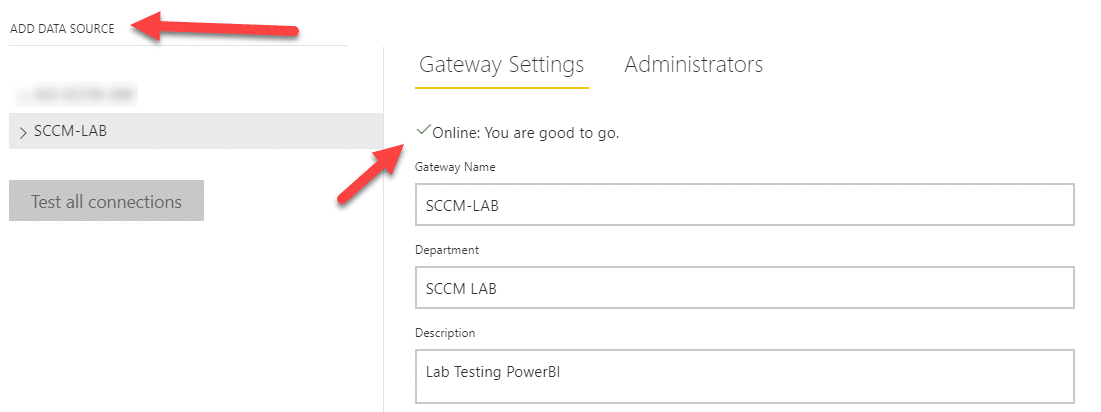
This will bring up the list of gateways you have available that you can manage. You can from here add some descriptive information to the gateway, and then do the important part add a data source as you can see our example gateway is online and happy and ready for us to hit that magic ‘Add Data Source’ button:
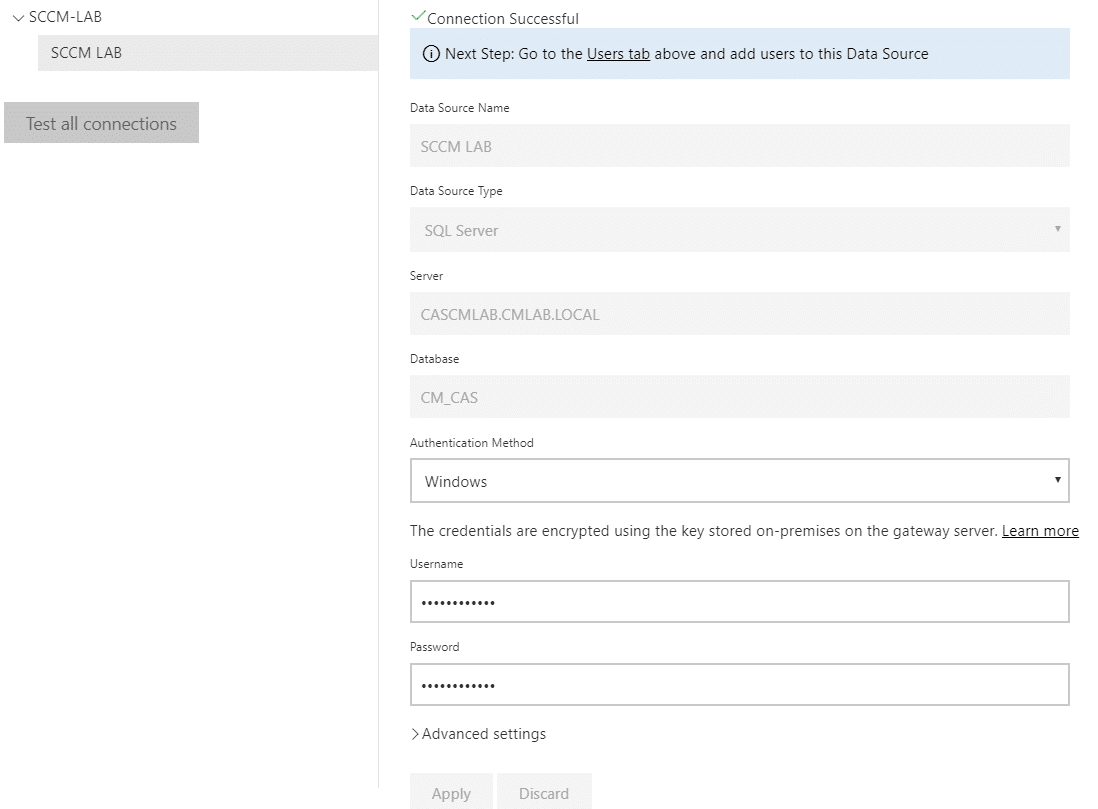
Once you click ‘Add Data’ Source you’ll get a couple fields to fill out which will then expand into numerous others. I’ve gone ahead and filled them in and selected ‘SQL Server’ as the data source type which then helped fill in some other information. If there is interest or people don’t know how can do a write up on creating a dedicated service account in SQL or Windows that has read-only access to the Database. In the end, you should end up with a form filled out that looks like this and you can click ‘Apply’
OK, we are almost there I promise, let’s make a quick hop back to our workspace by clicking ‘My Workspace’ on the left-hand side and then selecting ‘Datasets’ from the workspace.


Now, if you uploaded the report you should see based on the name you gave the report a ‘Dataset’ with the same name and if you click the weird little book with two arrows we can use our gateway to schedule a refresh period for how often the data that drives that report is refreshed!

Under the ‘Gateway Connection’ option you should see the gateway we installed and configured! Select the radio button and hit apply:

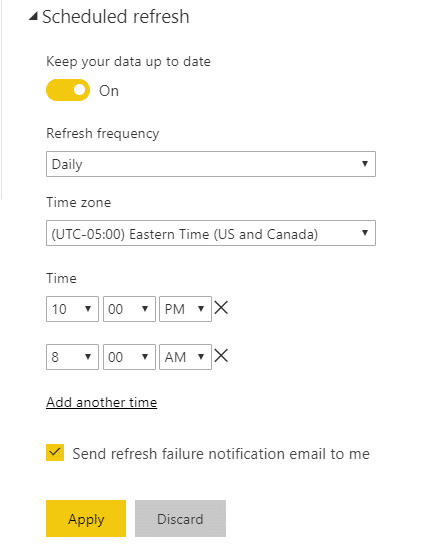
Then our final step is setting the scheduled if you move down a bit you’ll see the ‘Scheduled Refresh’ Section expand it see the appropriate options. I’ve gone ahead now and set my dataset to refresh once at 10 PM and once at 8 AM Eastern time so that first thing in the morning I can make sure my lab is in perfect health!
I hope this was helpful and not just a giant run on mess and I know there was a lot of information that was just kind of thrown out there but at the end of the day, the process is pretty simple. Please leave comments letting me know if there was something that wasn’t clear or if you have questions about how to set up a simple PowerBI gateway and I’ll do my best to respond. OK that’s it. no, seriously that’s all there is.






Add comment