


Back in January 2019 I wrote a series on setting up and customising MBAM (https://msendpointmgr.com/2019/01/12/step-by-step-microsoft-mbam/), a product that was part of the Microsoft Desktop Optimisation Pack, and a product that at the time was earmarked for retirement. At the time there were rumors’ that functionality would be imported into Configuration Manager, something that we learned was true with the introduction of MBAM functionality in TP 1908.
Series Links
Goodbye MBAM – BitLocker Management in Configuration Manager – Part 1 (Server Components)
Goodbye MBAM – BitLocker Management in Configuration Manager – Part 2 (Portal Customisation)
Goodbye MBAM – BitLocker Management in Configuration Manager – Part 3 (Client Encryption)
New in Configuration Manager Build 2002
Fast forwarding to today, with the release of Microsoft Endpoint Configuration Manager build 2002, MBAM functionality has been migrated in full. In this blog post series I will step through the setup process, how to integrate the new service into your task sequence, and how to customize the self service portal.
This is actually more, Goodbye MBAM standalone, as full integration has been completed.
Note: This feature currently doesn’t support Enhanced HTTP
The Setup Experience
To start of we need to have a couple of pre-requisites out of the way;
- Configuration Manager build 2002 installed
- Microsoft ASP.NET MVC 4.0
- Certificate Authority PKI*
- Three security groups;
- BitLocker Helpdesk Admins
- BitLocker Reporting Users
- BitLocker Admin Users
- MBAM Deployment Script
Upgrading Configuration Manager
This is something we are all familiar with, but just for those new to this process, here we go
- Launch the Configuration Manager console
- Click on the Administration blade
- Click on Updates and Servicing
- You should now see Configuration Manager 2002 listed as available for install. If you do not see this, click on the “Check for Updates” button and then try again later

- Perform a full backup of your existing environment (see https://docs.microsoft.com/en-us/configmgr/core/servers/manage/backup-and-recovery)
- Click on Install Update Pack
- After some time, the update will complete;

- You will at this point need to update the Configuration Manager console, and you will be prompted to do so in order to continue
- Logging back in and going to the About page, you can see the updated build information;

SQL Encryption
As you are going to store the recovery information for all BitLocker machines managed through Configuration Manager, data encryption might be a concern. If this is a requirement, then it is possible through SQL cell-level encryption, however, do note that this has the potential to cause up to a 25% performance degradation in SQL DB performance.
For more information on how to achieve this through certificates in SQL, along with the SQL versions supported, visit this page on the docs site – https://docs.microsoft.com/en-us/configmgr/protect/deploy-use/bitlocker/encrypt-recovery-data
The MBAM Web Portals
Installation of the MBAM portals (yes they are still MBAM branded, just migrated) in this example is on a single management point, which is not running SSL. In the previous 1910 release, which saw the initial availability of MBAM features, the use of HTTPS was a requirement which caused issues for those not running their infrastructure in full HTTPS mode. In the latest 2002 release however, only the associated MBAM sites need to be HTTPS enabled, meaning you no longer need to undertake a lot of pre-requisite work to push out this feature.
In this instance the MBAM portals are not actually installed as a feature, as you might imagine they would, but through a PowerShell script. So let us proceed and install the web components;
- First of all we will need to download and install the Microsoft ASP.NET MVC 4.0 prerequisite for the Self Service portal to work
- Download the setup file from https://www.microsoft.com/en-ca/download/details.aspx?id=30683
- Launch the installer and step through the setup process;

- In Active Directory, we will need to create three user groups that will be used to define access functions to the helpdesk and reporting portals;
BitLocker Helpdesk Admins
BitLocker Reporting Users
BitLocker Admin Users - Once installed open an administrative PowerShell window and go to the following location – %PATH TO YOUR CONFIGURATION MANAGER INSTALL%\CD.Latest\SMSSetup\Bin\x64
- Now run the following command;
.\MBAMWebSiteInstaller.ps1 -SQServerName %YOURSQLSERVER% -SQLDatabaseName %YourDBName% -ReportWebServiceURL “https://YOURREPORTINGSERVER/ReportServer” -HelpDeskUsersGroupName “DOMAIN\BitLocker Helpdesk Users” -HelpdeskAdminsGroupName “DOMAIN\BitLocker Helpdesk Admins” -MBamReportUsersGroupName “DOMAIN\BitLocker Report Users” -SiteInstall Both -DomainName “YOURFQDN” - Below is an example of this command being run in my lab;

- At the end of the script being run, you will have completion messages with the paths to the new IIS virtual directories;

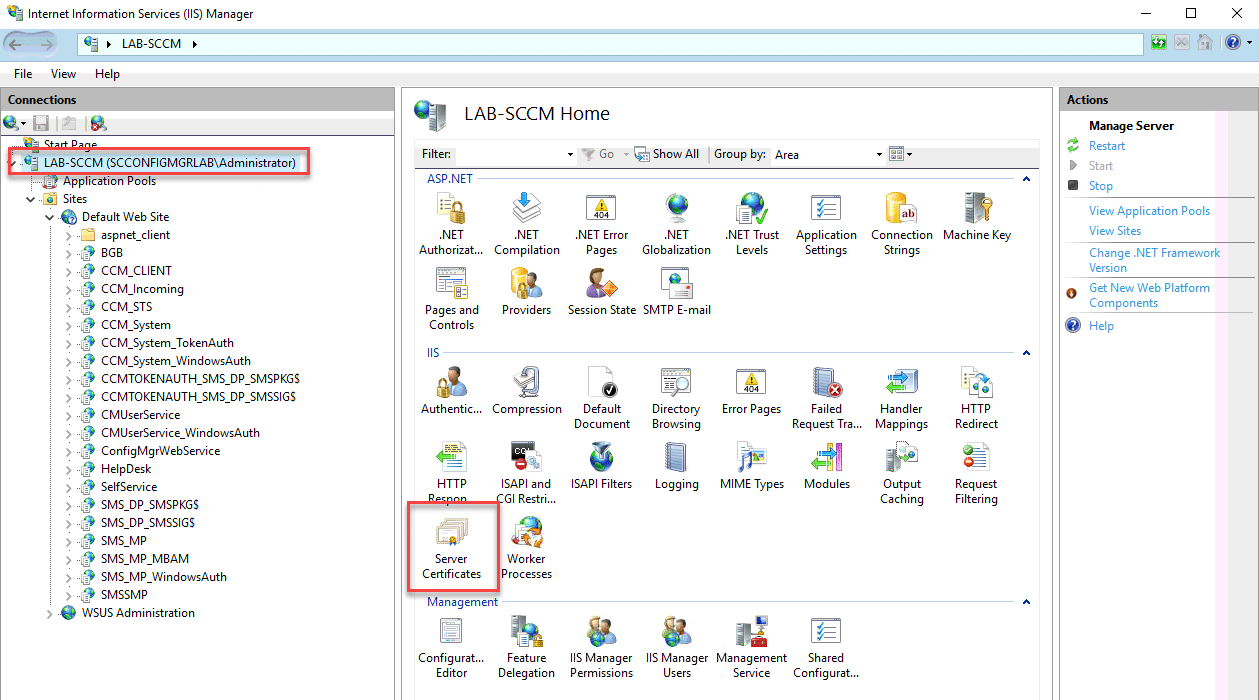
- At this point, going into IIS Manager, we can see the virtual directories are present;

Default Portal View
With the portals now installed, we can test functionality over HTTP and later add in HTTPS which will be required to escrow the recovery keys.
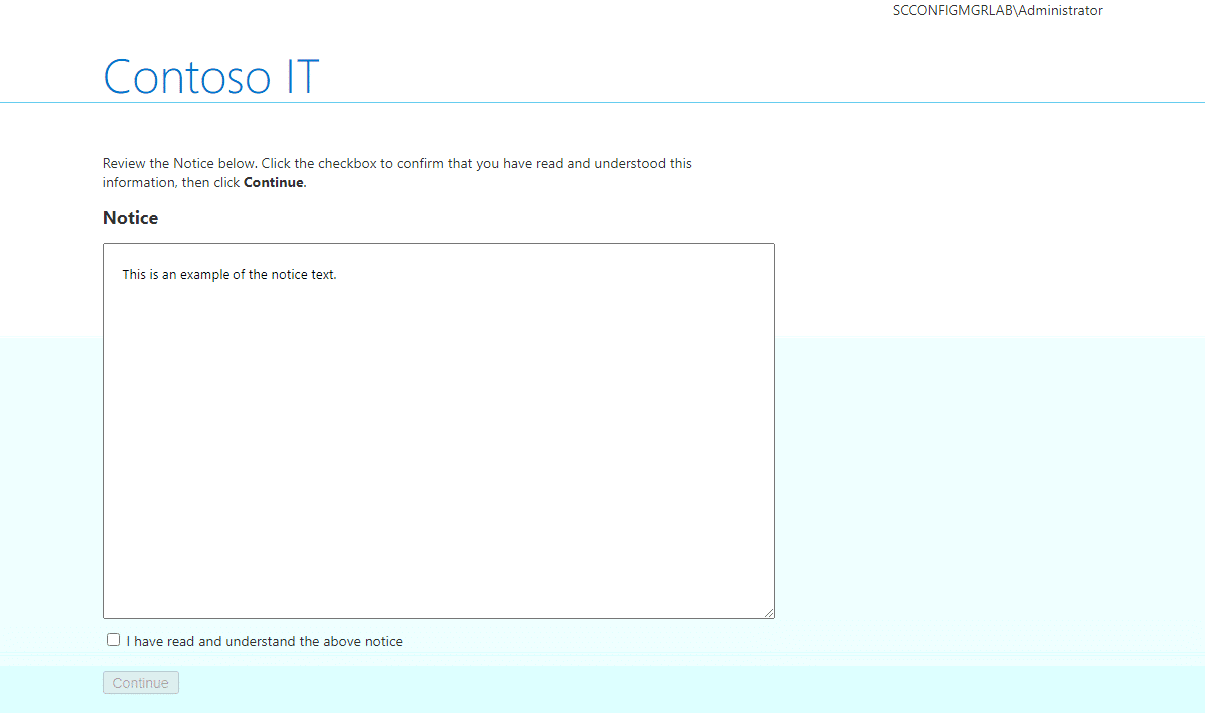
You can open the self-service portal which will be used by employees (fingers crossed) in order to recover their BitLocker keys as part of self service;
Now we can also test access to the Helpdesk portal, which obviously will be used by members of the IT Helpdesk;
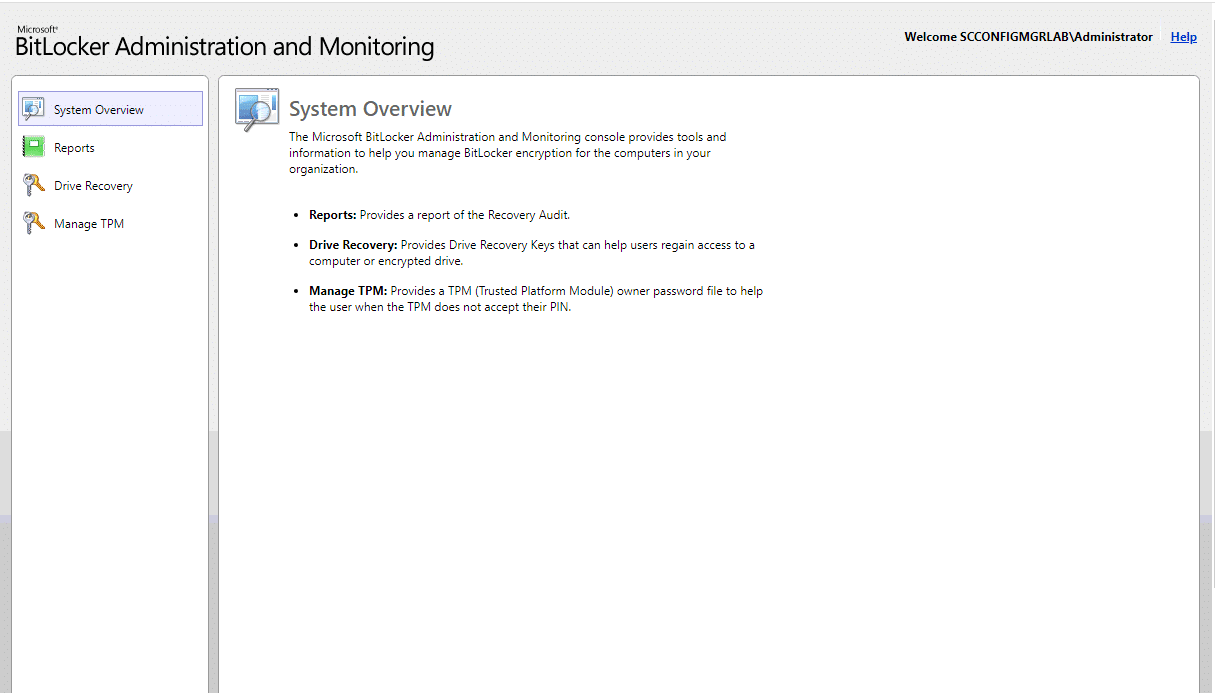
For those of you who are used to MBAM, these will obviously be very familiar as they are a direct port from the product. I will run through how to customise the self service portal in part 2 of this series.
Enabling HTTPS – Cert Creation and Installation
If you are running HTTP only in your environment, we now enable SSL for these individual sites. At this stage you will need a CA signed certificate which will be bound to port 443 on your IIS instance running on your Management Points.
Note: If you have a HTTPS enabled environment, you can skip over the cert creation and installation steps.
I will step through how to create and add your SSL certificate here;
- Create a new Active Directory security group and add your Management Point to the group, example;

- On your Certificate Authority, right-click on Certificate Templates and go to Manage
- Right-click the Web Server template and click “Duplicate Template“
- Name your Certificate, in this example I have used “ConfigMgr IIS Certificate”;

- On the Security tab, add the AD group you created earlier and assign the enroll permission;

- Click OK
- Close the Certificate Templates Console
- Right-click on Certificate Templates in the Certificate Authority Console, click New, Certificate to Issue
- Select the template name you created
- You should now see your template is available;

Now that we have a template to use, we need to assign a certificate to the management point.
- Open the IIS Management console on your management point
- Highlight the server name and double-click on Server Certificates;
- Click on the “Create Domain Certificate” action
- Enter the required details as per the below example;

- Select your internal CA and give your certificate a friendly name;

With the certificate created and listed, we can now bind it to port 443 for SSL communications.
- Click on “Default Web Site” in the IIS admin portal
- Click on “Bindings” in the actions pane
- Double-click on “https” and select the certificate you just provisioned from the SSL certificate list;

Enabling HTTPS – Individual Sites
It is a requirement to run HTTPS for escrow of the keys, as I already mentioned. Here in the latest 2002 implementation of the BitLocker management feature, we simply need to enable this on the individual sites in IIS Manager. This can be achieved by undertaking the following actions;
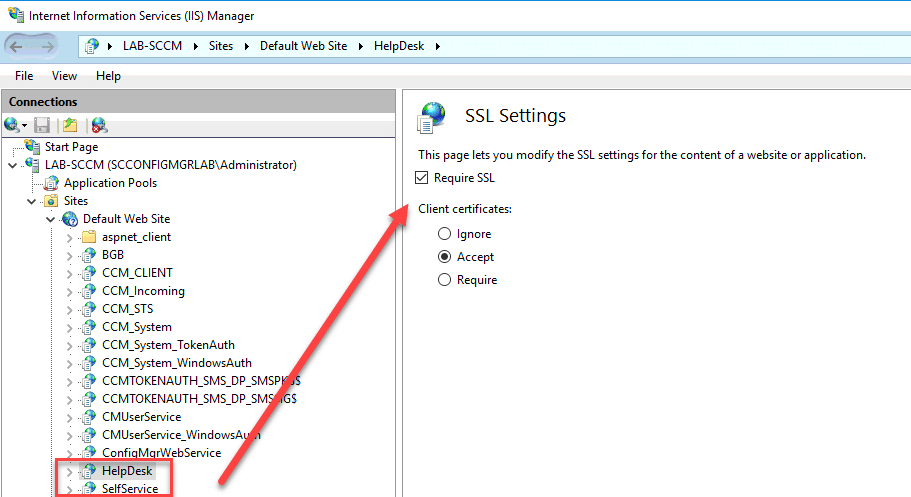
- Open IIS Manager
- Select the HelpDesk virtual directory underneath in the “Default Web Site” list
- Double-click on SSL Settings and click on the “Require SSL” checkbox, then underneath Client Certificates click “Accept“;
- Repeat this process for the SelfService and SMS_MP_MBAM sites
- Restart IIS using IISReset from an administrative command prompt or PowerShell window
You can now test accessing the sites over HTTPS;

Conclusion
At this state we have the background components enabled to support BitLocker management in Configuration Manager. In the next parts of this series we will look at customisation of the self service portal and how to deploy settings to the Windows clients, enforcing encryption in your organisation.


Add comment