


In part two of this three part series, I will run through how to customise the BitLocker Self Service portal in Configuration Manager build 2002.
Series Links
Goodbye MBAM – BitLocker Management in Configuration Manager – Part 1 (Server Components)
Goodbye MBAM – BitLocker Management in Configuration Manager – Part 2 (Portal Customisation)
Goodbye MBAM – BitLocker Management in Configuration Manager – Part 3 (Client Encryption)
IIS Customisation Options
With the self-service portal installed, the first thing we can do is use IIS manager to edit some of the basic text displayed in the portal.
Custom HTML Work
The issue with the self service portal however, is it feels a little bit, early 2000’s. So in order to make the portal feel a bit more up to date, we can simply go down the path of editing the HTML mark up of the portal itself, including adding corporate logos.
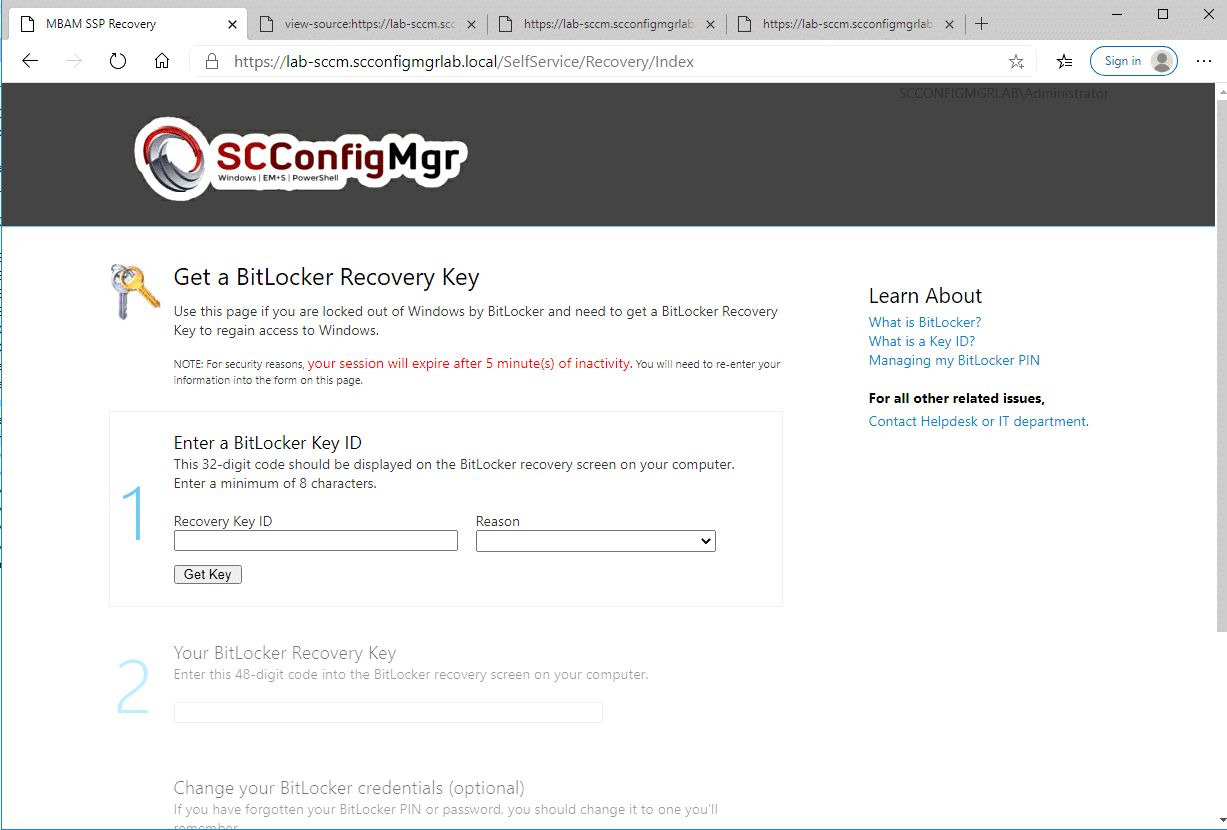
The Self Service Portal
The self-service portal provides end-users with a quick means of recovering their BitLocker recovery password in the event of a recovery event being triggered. Let us go ahead and validate that the component was successfully installed;
- Launch a web browser and browse to the following URL – https://YOURSERVER/SelfService

- At this point we have the generic experience where some elements can be controlled within IIS
- Open the IIS Manager console, select the SelfService virtual directory and go to Application Settings;

- Now we can edit basic settings in the UI;

- From here we can do things like setting the company name and deciding if we want to display a notice to users by editing the notice.txt file, or hiding the initial page by setting the DisplayNotice to False.
Fully Customising The Self Service Portal
If you wish to fully customise the portal however, you will need to edit the site master layout and the CSS file for the site. By doing this you can achieve a less generic look;
To do so, simply follow the below;
SITE Style Sheet
- Browse to the following location – C:\inetpub\Microsoft BitLocker Management Solution\Self Service Website\Content
- Create a backup of the Site.CSS style sheet
- Open the Site.CSS style sheet
- Now you can remove the gradient background by changing the following;body
{
font-family: “Segoe UI”, Verdana, sans-serif;
font-size: 14px;
color: #333;
background: #DFF2F9url(images/BrowsersBkgd_repeat-x.jpg) top left repeat-x;
margin: 0px;
} - Next update the background colour with your preferred colour in hexadecimal format
- In this example #DFF2F9 is replaced with #FFFFFF for a white background;body{
font-family: “Segoe UI”, Verdana, sans-serif;
font-size: 14px;
color: #333;
background: #FFFFFF ;
margin: 0px;
} - In order to give the header block a contrasting background, locate the following section of code;#header
{
display: block;
} - Add a background entry with your background colour again in hexadecimal format, you should then have a section like the below#header
{
display: block;
background: #454442;
}
Adding A Custom Logo
In order to add an image with your organisations logo you will need obviously first of all to create and size your logo. In the example shown below I have used a pixel height of 120 and colour matched the background;

Now to insert the logo;
- Save the image file to the following location;
C:\inetpub\Microsoft BitLocker Management Solution\Self Service Website\Content\Images - Browse to the following location and create a backup of the Site.Master filer;
C:\inetpub\Microsoft BitLocker Management Solution\Self Service Website\Views\Shared - Open the Site.Master in a text editor
- Scroll down to the following section;<div id=”header”>
<div class=”content”>
<% Html.RenderPartial(“UserIdentityControl”); %>
<br/>
<% Html.RenderPartial(“UserLogoutControl”); %>
<h1>
<asp:Literal runat=”server” Mode=”Encode” Text=”<%$appSettings:CompanyName %>” />
</h1>
</div>
</div> - Add the HTML image tags and comment out the text company name as per the below;<div id=”header”>
<div class=”content”>
<% Html.RenderPartial(“UserIdentityControl”); %>
<br/>
<% Html.RenderPartial(“UserLogoutControl”); %>
<img src=”<%= Url.Content(“https://lab-mbam.scconfigmgrlab.local/SelfService/Content/Images/SCConfigMgrBackgroundLarge.png”) %>” alt=”SCConfigrMgr Lab Environment”>
<!–
<h1>
<asp:Literal runat=”server” Mode=”Encode” Text=”<%$appSettings:CompanyName %>” />
</h1>
–>
</div>
</div>
Conclusion
At this point you should now have a more custom look to your self service portal. Now its time to look at how we put everything together for the Windows 10 client in part three.


Add comment