


Every organization to some extent configures the desktop wallpaper for their users, it’s something that’s been common in the industry for ages and it’s also a way to brand it’s managed devices. In a modern world, this hasn’t really changed, however the methods to use are slightly different than what was commonly used in the past.
Methods to configure a desktop wallpaper
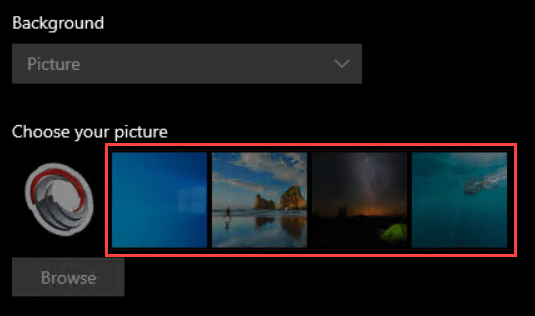
With Microsoft Intune, the option to set a desktop wallpaper can easily be performed by using a ‘Device Restriction‘ policy, pointing to an image file stored in e.g. a Storage Account in Azure or similar, as shown in the picture below:

A downside of using this method, could of course be that the end user cannot change this desktop wallpaper set by their IT department. Some organizations would not have an issue with that, others might see that differently. For myself, I don’t see an issue with the company that I work for would want to ‘brand’ their equipment, however they should at least provide me with the means to be able to change it.
There are also a bunch of resources out there, that uses various script-based methods to replace the famous img0.jpg file, which is an approach that I’ve taken myself several times over the years, even so that I wrote a script about and posted it here on the blog:
Set custom wallpaper in Windows 10 during OSD with ConfigMgr – MSEndpointMgr
Looking at the options we have available today, the scripted approach still makes the most sense, as it can be customized to the max and essentially only your imagination sets the limit, and not intrusively lock the desktop wallpaper for the user.
Modernizing the scripted approach
The script mentioned in the other blog post referenced above, was originally created to work in an on-premise world where devices was deployed using ConfigMgr. In order to utilize the script when provisioning a device using Windows Autopilot to be managed by Intune, the script needed some changes. One of the core changes is that the desktop wallpaper cannot be stored in any sort of package and be delivered to the device along side with the script that is responsible for configuring the desktop wallpaper. A shift towards the cloud, more specifically a Storage Account in Azure for instance, makes much more sense.
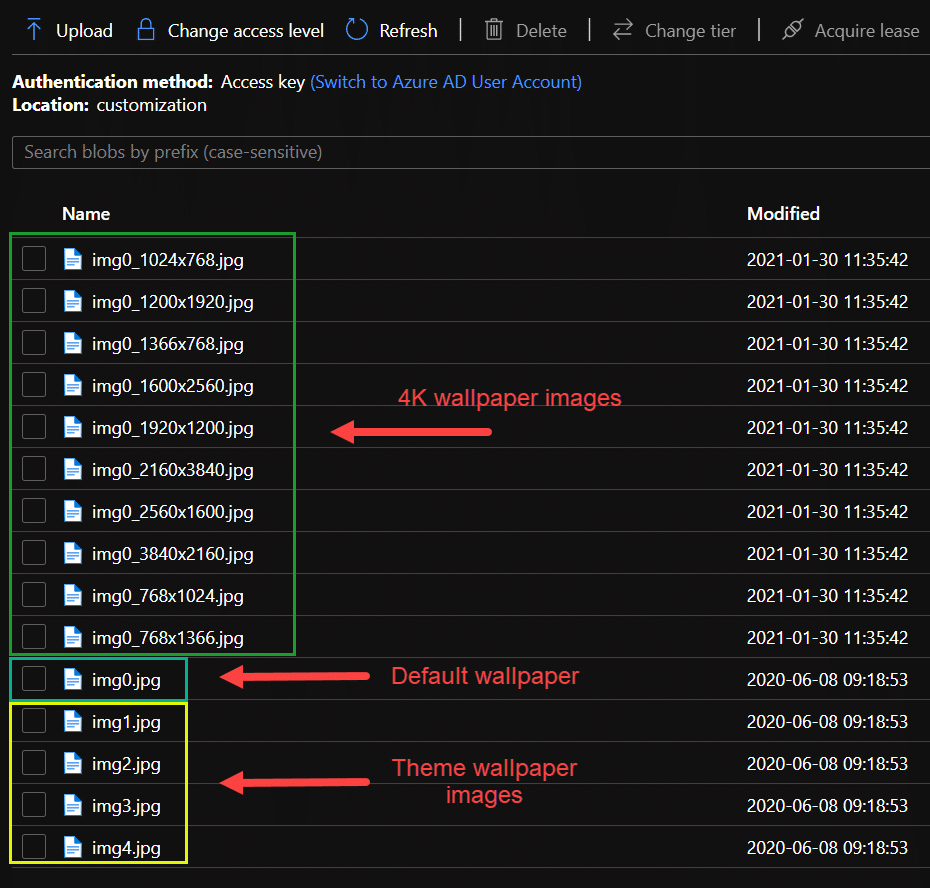
Additionally, new functionality have also been added to the script, where as support for replacing theme related desktop wallpapers (the files located in C:\Windows\Web\Wallpaper\Theme1), as highlighted below:
Also, the new script can now replace any of the default 4K wallpapers, more specifically the image files that reside inside the C:\Windows\Web\4K\Wallpaper\Windows folder:

Something worth mentioning that also has been improved with this new script, is that it now restores the required changes made to NTFS permissions on the desktop wallpaper image files that’s replaced using this approach. That was something that was not performed by the previous version, and should be considered a very much important task.
You can find the updated script that works in a modern world in our GitHub repo, at the following URL:
Intune/Set-WindowsDesktopWallpaper.ps1 at master · MSEndpointMgr/Intune (github.com)
Let’s go through all of the necessary steps required to set this new script up with an Azure Storage Account, configuring the script (some slight changes to the static parameter input is required) and finally create a PowerShell Script object in Intune that will be used as the execution mechanism.
Create a Storage Account in Azure
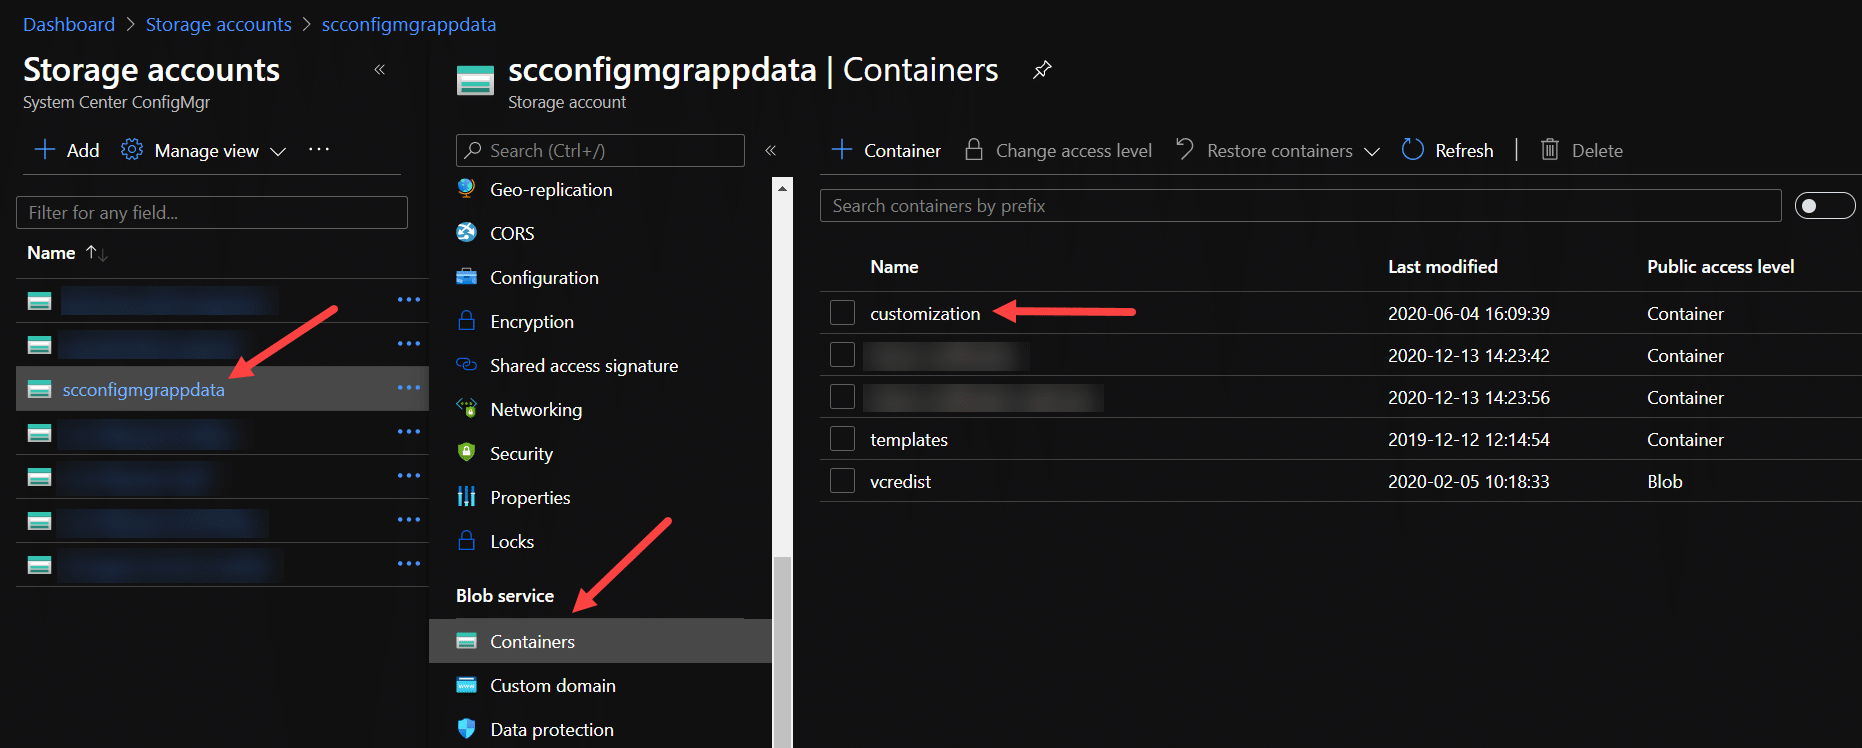
Setting up a new Storage Account in Azure is not very hard, so I’ll leave that up to you to figure out. Let’s instead look at the required configuration. In my lab environment, I have a Storage Account named ‘scconfigmgrappdata‘. Under the Blob service section, you can add a Container. In the image below, you can see that my Container is called ‘customization‘:
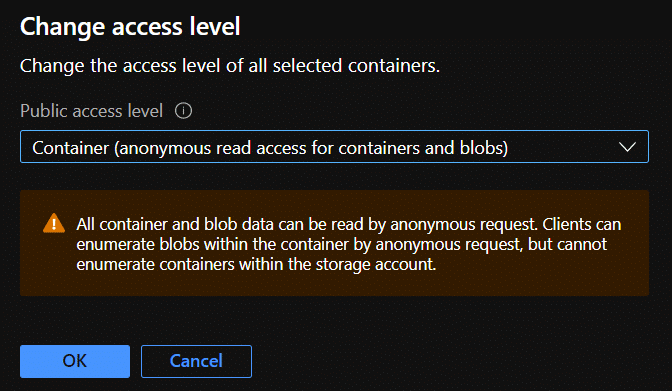
An important configuration aspect of the Container is to ensure whatever resides inside of it, can be accessed anonymously (otherwise the scripted approach would have to deal with authentication, which may not be ideal). This can be accomplished by changing the access level, as shown below to e.g. ‘Container (anonymous read access for container and blobs)‘:
Next, let’s talk about what content should be put inside the container.
How the improved script works
With the new improved script to manage the desktop wallpaper, there are three different actions that the scripts supports, which are the following:
- Replace default wallpaper image: img0.jpg
- File located in this directory:
- C:\Windows\Web\Wallpaper\Windows
- File located in this directory:
- Replace 4K default wallpaper images, e.g. img0_3840x2160.jpg
- Files located in this directory:
- C:\Windows\Web\4K\Wallpaper\Windows
- Files located in this directory:
- Replace default theme wallpapers, e.g. img1.jpg and so on
- Files located in this directory:
- C:\Windows\Web\Wallpaper\Theme1
- Files located in this directory:
Depending on what you put in the container of the Storage Account, the script will automatically detect the appropriate content and replace the local wallpaper images.
Let’s for instance say that you’re only looking to replace the default wallpaper, not the theme wallpapers and the 4K wallpaper images. In such a case, simply just upload your wallpaper image to the Storage Account container and ensure it’s named as the file you wish to replace, more specifically img0.jpg.
The same rule applies for any of the other actions that the script supports. If you also wish to replace the 4K wallpapers, either all of them or a few of them, ensure the new wallpaper images you want to replace the local ones with, are uploaded to the same Storage Account container and named accordingly with the file they’re meant to replace.
Upload wallpaper images to Storage Account container
Uploading content to a Storage Account container is very straight forward. Below is an example where wallpaper content have been uploaded, to support all three actions of the script, with some visual explanations of what the different files are meant to be used for:
Create a PowerShell Script object in Intune
With all the wallpaper image content uploaded to a Storage Account container, before we create the PowerShell Script object in Microsoft Intune, it’s important that the script file is updated slightly to reflect the Storage Account name and the container name from your environment.
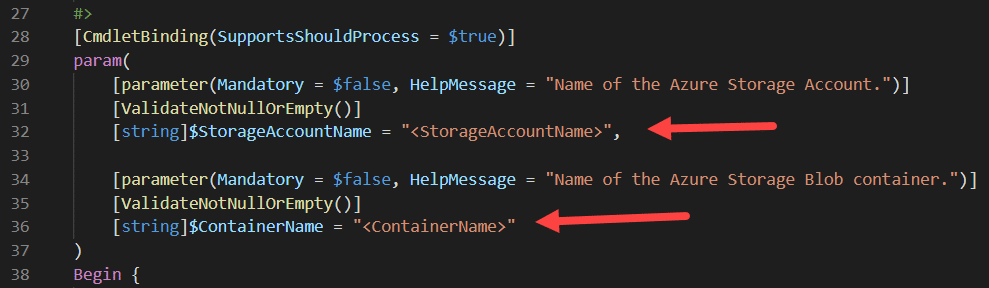
Download the Set-WindowsDesktopWallpaper.ps1 from the GitHub link above in this post. Open the script file and scroll down to the parameter input section as shown in picture below. Edit the following parameters:
- StorageAccountName
- Enter the name of the Storage Account here (this is the unique name)
- ContainerName
- Enter the name of the container created inside of the Storage Account
Save the script so that it’s ready for upload.
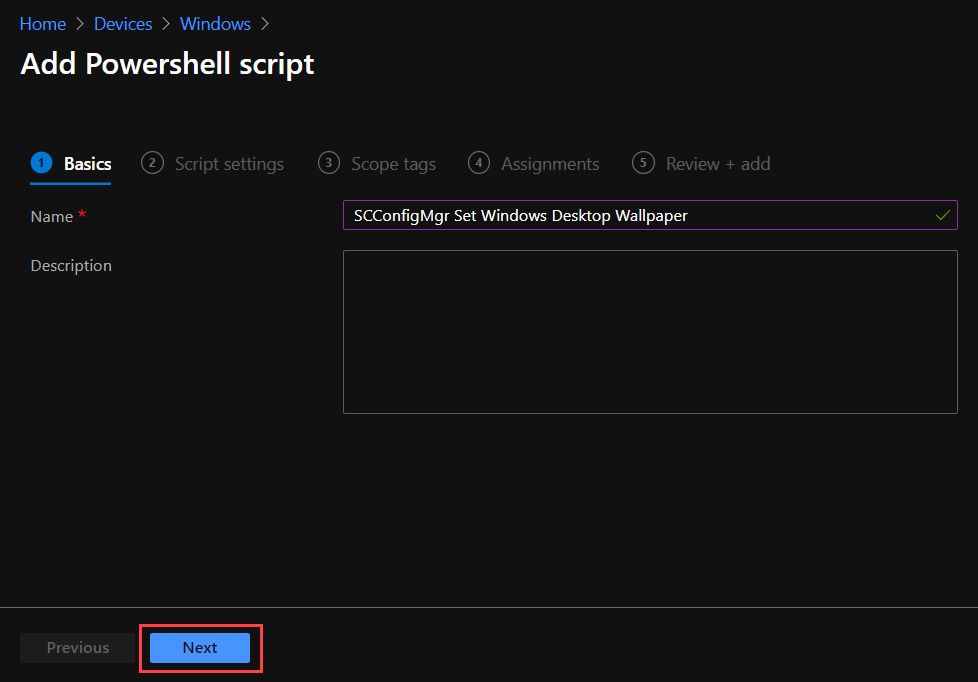
Within the Microsoft Endpoint Manager console (endpoint.microsoft.com), browse to Devices – Windows – PowerShell Scripts and click Add.

Provide a name for the script, e.g. <company> Set Windows Desktop Wallpaper and click Next.
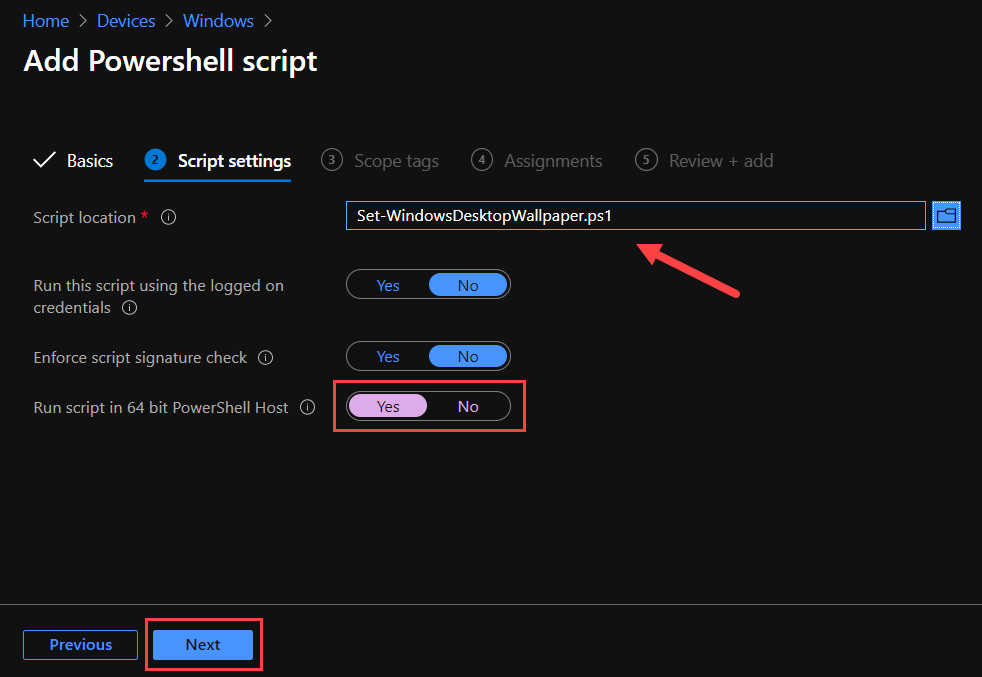
Browse to the located where you stored the amended Set-WindowsDesktopWallpaper.ps1 file and select it. Ensure the script will be invoked as a 64-bit process and click Next.
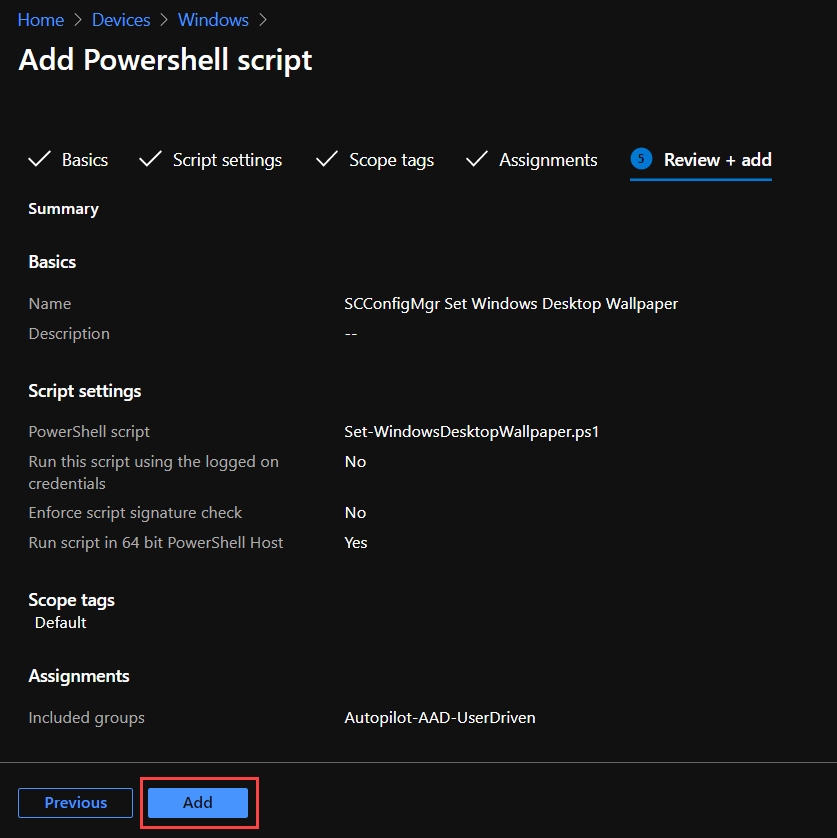
Assign any eligible scope tags if they’re used in your environment and click Next. As for assignments, point to a group of devices or users, depending on your targeting requirements. Generally, as this script is designed to be executed once during device provisioning, I usually target these types of scripts to the group that contains all of my Autopilot enabled devices.
Last but not least, click Add when the desired configuration has been made.
That’s it, the script will now be executed once any of the targeted devices checks in.
End user experience and script execution results
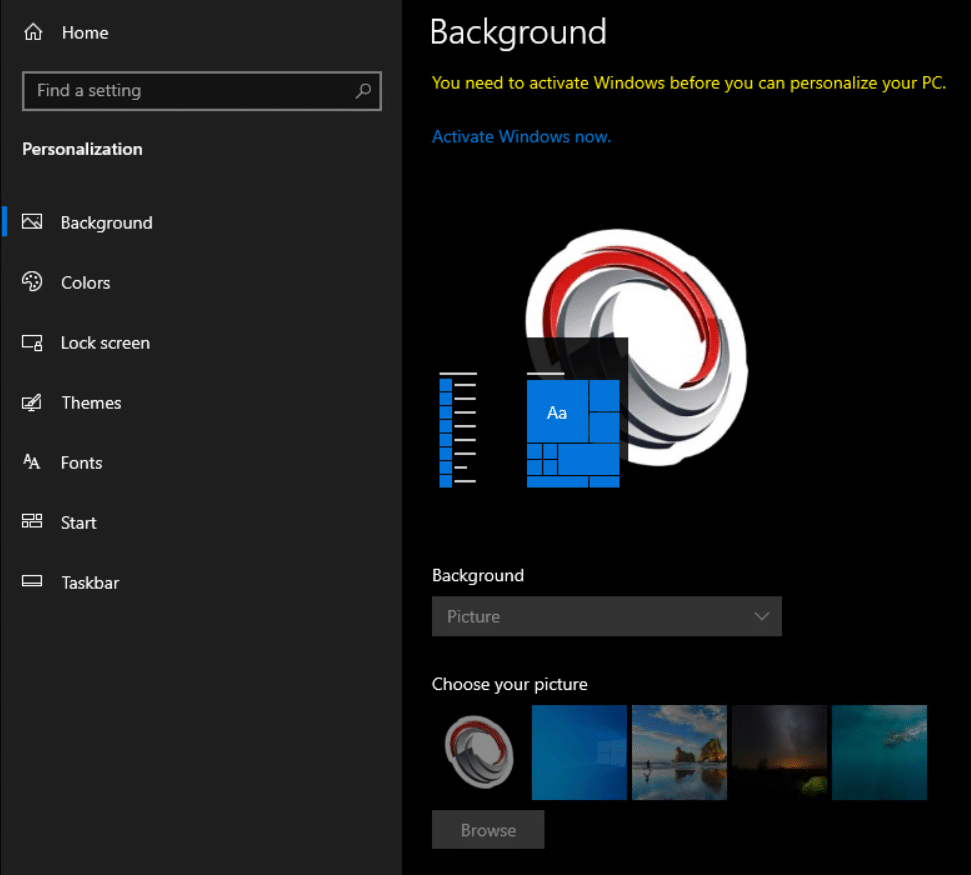
From an end user perspective, the idea is to provide a corporate look and feel right after the provisioning has completed. Depending on what wallpaper images was uploaded to the Storage Account container, the experience could look similar to the following, if only the img0.jpg file was replaced by the script.
As for the scenario when the script also replaces the files within the Theme1 folder, the experience may look similar to this:

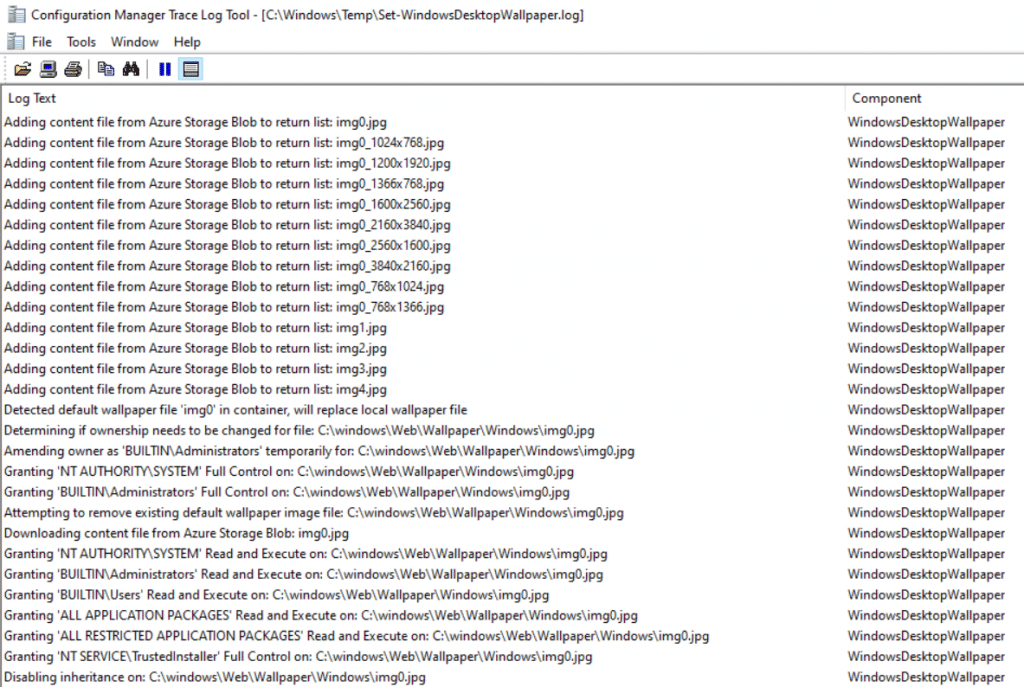
Behind the scenes, within the C:\Windows\Temp folder a file called Set-WindowsDesktopWallpaper.log is created tracking almost all movements of the script and want action it has performed. If something didn’t go as expected, for instance a certain wallpaper was not replaced, resort to this log for a bit of help with your troubleshooting.


Add comment