Some time ago, Microsoft announced that the Microsoft Intune PowerShell enterprise application, that many of us had made use of throughout the years, would be removed. This was stated in a message that read similar to:
Title: We’ve detected a Microsoft Intune PowerShell script issue in your environment User impact: If action isn’t taken, PowerShell scripts may break. Current Status: If you are using the Intune PowerShell application ID (d1ddf0e4-d672-4dae-b554-9d5bdfd93547), you will need to update your scripts before May 1 with a different Microsoft Entra ID registered application ID to prevent your PowerShell scripts from breaking. Microsoft has replaced the GitHub repository using the old application ID d1ddf0e4-d672-4dae-b554-9d5bdfd93547 with a new repository as announced here: https://techcommunity.microsoft.com/t5/intune-customer-success/update-to-microsoft-intune-powershell-example-script-repository/ba-p/3842452 Additionally, this has been communicated under Message Center posts MC736429 and MC721851.
What does this mean for the IntuneWin32App PowerShell module? Basically, an update is scheduled for release to revise how the Connect-MSIntuneGraph function should be used when retrieving an access token used by many of the built-in functions of the module. It’s current behavior was to always fall back to the Microsoft Intune PowerShell enterprise application (with a known identifier of d1ddf0e4-d672-4dae-b554-9d5bdfd93547, if the ClientID parameter wasn’t passed on the command line. This will change in the upcoming release, where it will be required to make use of a custom (an app registration you register yourself in your tenant) app registration.
How to setup an app registration
Login to portal.azure.com as a Application Administrator, Cloud Application Administrator or Global Administrator and go to the Microsoft Entra ID blade.
Browse to App registrations.
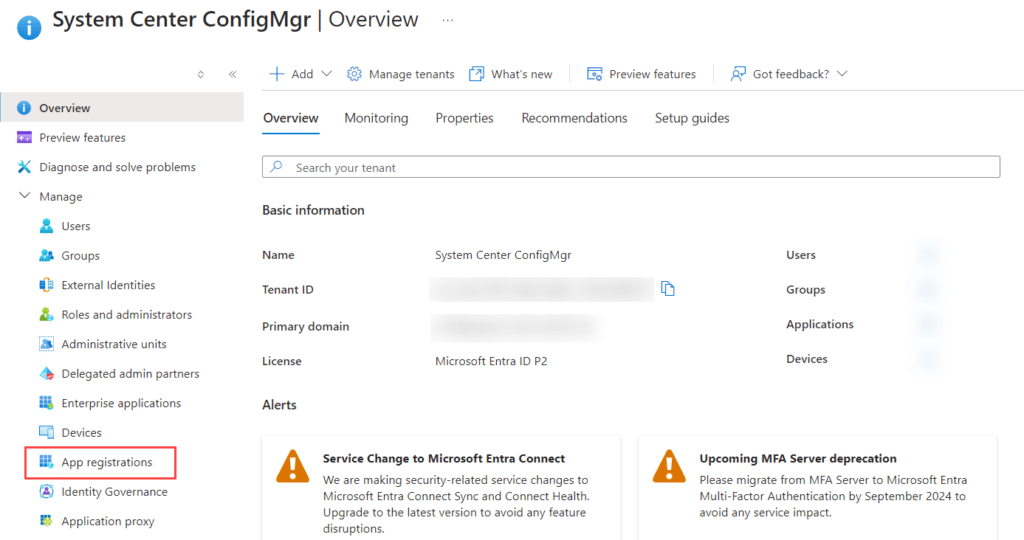
Click on New registration.
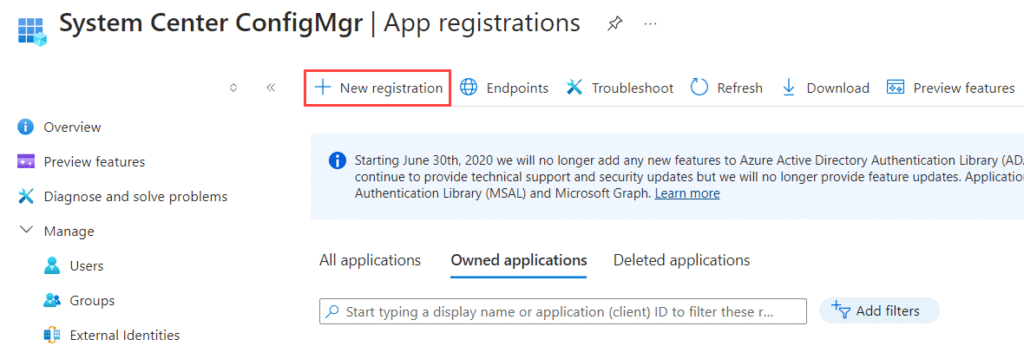
Provide a name for the app registration. Ensure to select that Accounts in this organization directory only is checked under Who can use this application or access this API. Unless you know what you’re doing, and require multi-tenant support, do not change this default selection.
Select Public client/native (mobile desktop & desktop) as Redirect URI and enter http://localhost in the text field (that’s HTTP, and not HTTPS).
Click Register when ready.
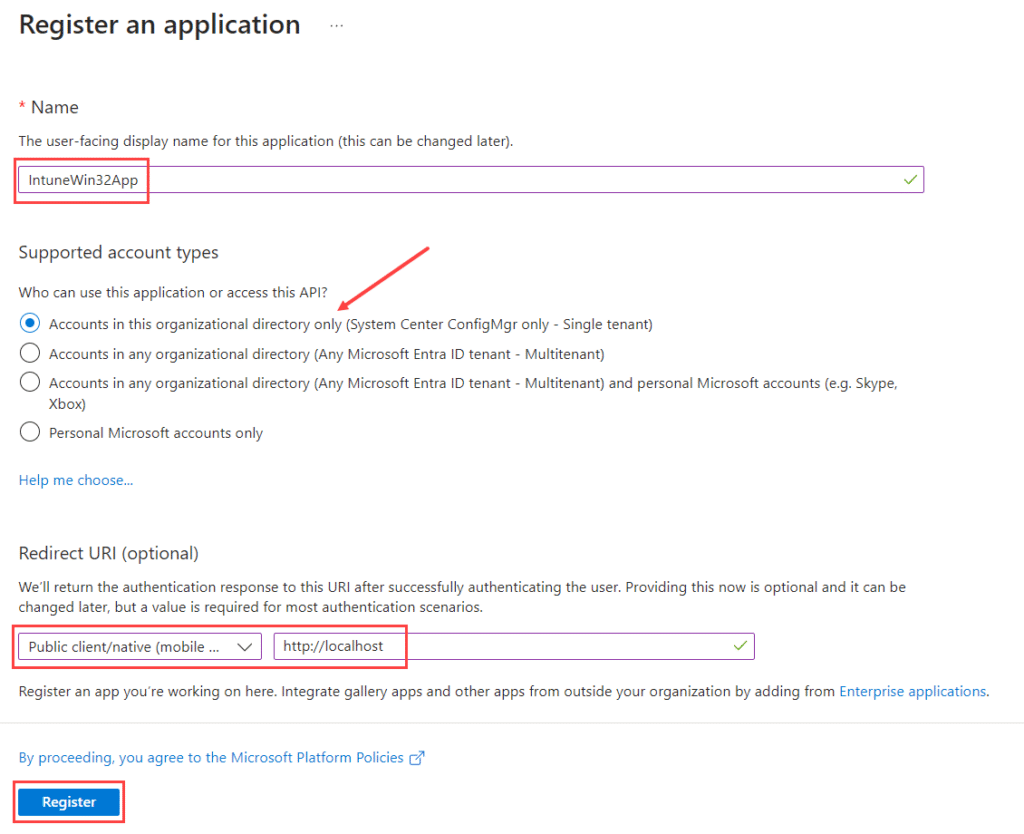
In the Authentication section of the newly registered application, ensure it resembles what’s shown below.
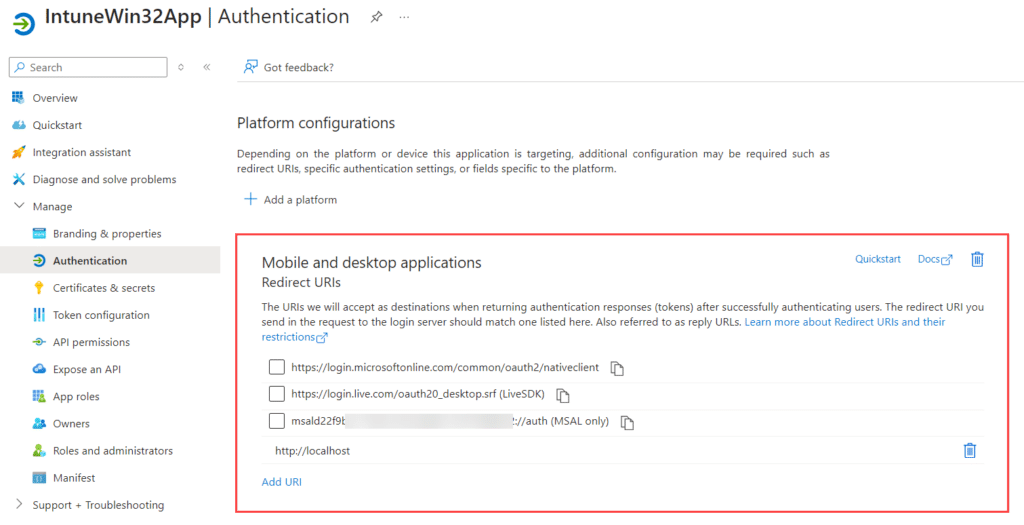
If you wish to enable Device Code flow, one additional configuration is required to be enabled under the Authentication section.
Flip the Enable the following mobile and desktop flows from No to Yes.

Click Save.

Configure permissions for the app registration
Now that the app registration has been created, the next step is to grant permissions to the application. In this step, the minimum required permissions will be added, to ensure full functionality of the IntuneWin32App module.
Note: If you wish to add additional permissions, such as permissions to be able to read groups, you could add Group.Read.All as well to this app registration.
The minimum required permissions to be added to the app registration are:
- DeviceManagementApps.ReadWrite.All
- DeviceManagementRBAC.Read.All
Open the API permissions blade and click Add a permission.
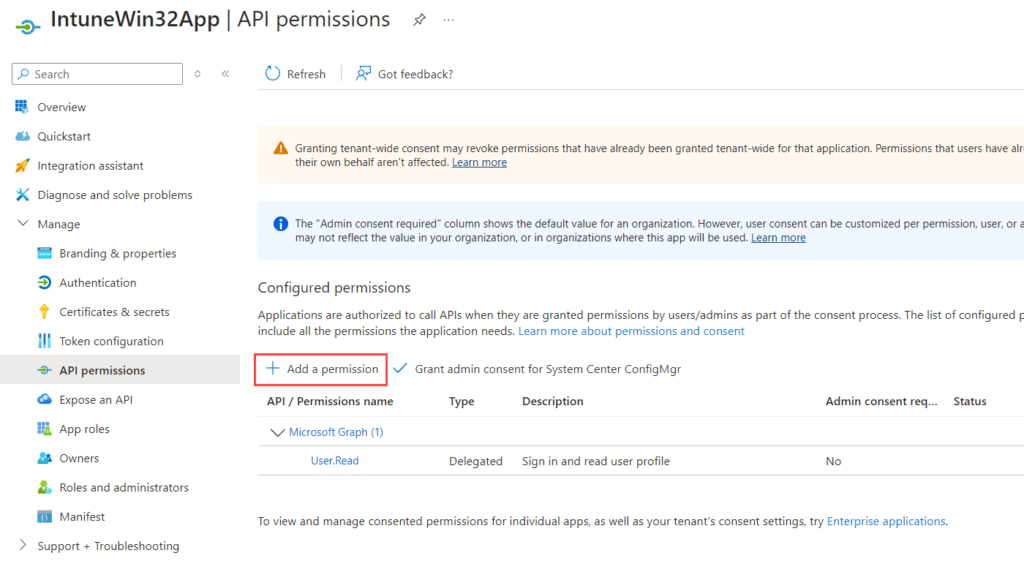
Click on Microsoft Graph.

At this stage, it’s important to select the proper type of permissions, either Delegated permissions or Application permissions. It’s of course also possible to setup the same permissions for both permission types, however it’s recommended to split them in different app registrations, as a best practice.

Delegated permissions
Delegated permissions should be selected if you’re interactively going to authenticate using the Connect-MSIntuneGraph function of the IntuneWin32App module. An example could be that you manually execute a script that’s prompting for your authentication credentials.
For example, usage with Connect-MSIntuneGraph could look like:
Connect-MSIntuneGraph -TenantId "tenant.onmicrosoft.com" -ClientID "<your_client_id>"
If this is how you’re using the module, select Delegated permissions.
Application permissions
Application permissions should be selected if you’re planning on authentication in an automated scenario, for instance where a script is scheduled to run on a certain date or time, or if you wish to not be prompted for interactive authentication using a Client Secret.
For example, usage with Connect-MSIntuneGraph could look like:
Connect-MSIntuneGraph -TenantId "tenant.onmicrosoft.com" -ClientID "<your_client_id>" -ClientSecret "<your_secret>"
If this is how you’re going to use the module, select Application permissions.
Configure the desired permission type
Once the correct permision type have been identified for the purpose of how you’re going to authenticate, in the Select permissions section, search for DeviceManagementApps.
Select DeviceManagementApps.ReadWrite.All and click Add permissions.
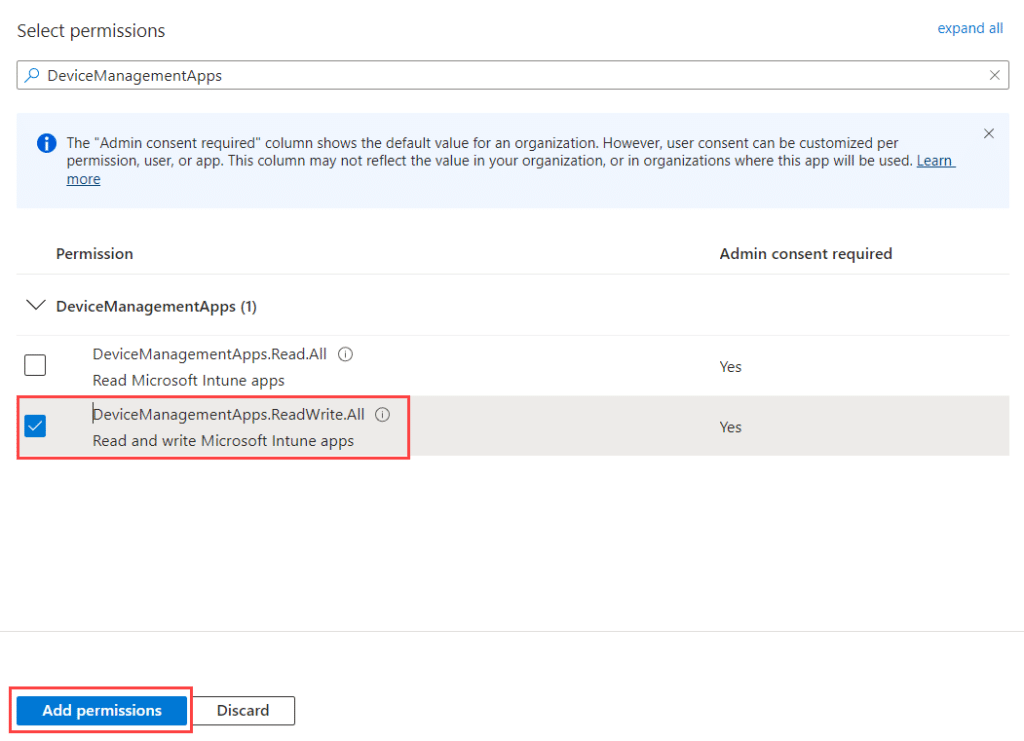
Once the permissions have been added, the last step is to ensure admin consent have been granted for those that require it.
Click Grant admin consent for <tenant name>.

Click Yes in the prompt that appears for confirmation of the admin consent.

The Status field should now have changed to a green checkmark.

Now, follow the same steps above to add the following permissions, as the same permission type that you added earlier:
- DeviceManagementRBAC.Read.All
Don’ forget to grant admin consent.
Authenticate using Connect-MSIntuneGraph function
With the new app registration setup with the minimum required permissions for the intended permission type, using Connect-MSIntuneGraph will now always require the ClientID parameter to be passed on the command line (this will be the breaking change that will be introduced in the next release).
Here’s how the function will have to be used depending on the various scenarios.
Delegated authentication (interactive)
This is how you’d invoke the authorization code authentication flow:
Connect-MSIntuneGraph -TenantId "tenant.onmicrosoft.com" -ClientID "<your_client_id>"
Client Credentials authentication (non-interactive)
This is how you’d invoke a client credentials authentication flow using a client secret:
Connect-MSIntuneGraph -TenantId "tenant.onmicrosoft.com" -ClientID "<your_client_id>" -ClientSecret "<your_secret>"
This is how you’d invoke a client credentials authentication flow using a certificate:
Connect-MSIntuneGraph -TenantId "tenant.onmicrosoft.com" -ClientID "<your_client_id>" -ClientCert "<your_X509Certificate>"
Device Code authentication (interactive)
This is how you’d invoke a device code authentication flow:
Connect-MSIntuneGraph -TenantId "tenant.onmicrosoft.com" -ClientID "<your_client_id>" -DeviceCode




Add comment