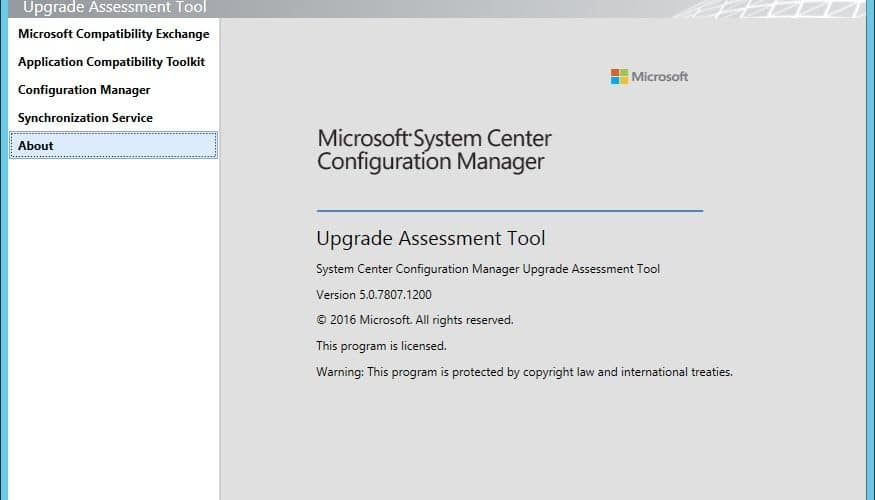
Up until now, there has not really been any simple way for organizations to assess their environment for a successful Windows 10 roll out. Today, Microsoft has released a tool they call Upgrade Assessment Tool that is aimed at determining if computers managed by ConfigMgr can run Windows 10 (including Windows 7 and 8.1, but that’s not interesting to be honest). In this blog post, I’ll go through the installation and configured process and show you how the Upgrade Assessment Tool can provide some serious value to your Windows 10 migration project.
Requirements
In this post, I’ll be installing the Upgrade Assessment Tool together with the prerequisites on a dedicated virtual machine. You could if you want to, perform the steps outlined in this post on your Primary Site server as well. In regards to ConfigMgr version, you need to be using any of the following:
- System Center Configuration Manager (Current Branch) version 1602 and later
- System Center 2012 Configuration Manager SP2 with Cumulative Update 3
- System Center 2012 R2 Configuration Manager SP1 with Cumulative Update 3
Your ConfigMgr clients must be running any of the following versions:
- System Center 2012 Configuration Manager SP1 or later
- System Center 2012 R2 Configuration Manager or later
- System Center Configuration Manager (current branch) version 1511 or later
In addition, you’ll need to have a Reporting Service point in your environment and you must be collecting hardware inventory on your ConfigMgr clients. Since Upgrade Assessment Tool is integrated with Application Compatibility Toolkit (ACT) from Windows Assessment and Deployment Toolkit (Windows ADK), you’ll need to install the following on the target server:
- Latest version of Windows ADK 10 (1511) and select the ACT component
Download the Upgrade Assessment Tool from the following link:
https://www.microsoft.com/en-us/download/details.aspx?id=37145
Install and Configure the Upgrade Assessment Tool
I’m not going to cover the steps required to successfully install the Application Compatibility Toolkit, since they’re pretty straight forward and a matter of a check box during the Windows ADK setup process. However, you’ll need to install Windows ADK 10 to get ACT, so make sure you’ve completed those steps before you continue. On a side note, ACT requires access to a database running on at least SQL Server 2005 or Express edition. The database will be created during the wizard when you’ll configure ACT, so you don’t need to create it before hand.
Configure Application Compatibility Toolkit 6.1
Before we get started, I just want to mention the Application Compatibility Toolkit Technical Reference on TechNet. If you should at any point during this post, need to read up more on the technical details, you’ll know where to find it:
https://technet.microsoft.com/en-us/library/hh825181.aspx
Let’s begin.
1. Open the Application Compatibility Manager from the start menu to get started (make sure that you start it elevated).
2. In the ACT Configuration Wizard, select Next.

3. Select Yes to use this computer to run the ACT Log Processing Service and click Next.

4. In the SQL Server field, specify the name of your SQL Server (in my case my Primary Site server called CM01). Click Connect and name the database e.g. ACTDB. Click Next. If you’d want to improve performance and reduce disk space, after you’ve completed the wizard you should change recovery model of the ACTDB to Simple instead of Full.

5. Make sure that your account that you’re running the wizard as have proper permissions on the SQL Server instance to perform a database creation, or the wizard will fail. Click Next.
6. Specify a folder where collected ACT data from your computers will be stored and processed from, e.g. C:\ACTLogs. Give the share name something that suits in your environment, perhaps you should make the share hidden. Click Next.

7. Next you’ll need to specify an account that will process the data collection logs into the database. I suggest that you create a special service account for this purpose, and give it read and write permissions on your ACTDB. For demonstration purposes, I’ll be using my domain admin account. Click Next.

8. On the Congratulations page of the wizard, click Finish and ACT will be launched.
We’ve now completed the first step of installing and configuring Upgrade Assessment Tool. Next up is to create a data-collection package in ConfigMgr and send it out to the systems.
Create and deploy a data-collection package
1. In the Application Compatibility Manager console, go to the Collect work space, select Data Collection Packages and select File -> New.
2. Select Inventory collection package.

3. Give the Package a name, e.g. Upgrade Assessment Package. Make sure to select the logs folder created earlier. If you’ve for some reason not installed ACT 6.1 Update 2 (Windows ADK 10 version 1511 should contain the correct version), add a label of TotalDuration at this point. If you do not add this label, the data collection package will not work properly. Click Create.

4. Browse for a suitable location where the data collection package (MSI file) will be created and click Save.
5. On the Next steps page, click Finish. Remember to give Domain Computers write access to the ACT logs folder (both NTFS permissions and sharing permissions, depending on your normal procedure).
6. Copy the data collection package to your Content Library in ConfigMgr. In my lab environment I’ve copied it to \\CM01\Source$\Pkgs\ACT\6.1\UpgradeAssessment.
7. Create a new Package in ConfigMgr and name it Upgrade Assessment Package, point the content source to the location where you copied the data collection package and select to create a standard program with the following settings:

8. Deploy the package to a collection of systems that you want to assess for upgrade. I’ll leave this part up to you to create a collection that contains the proper systems.
Install and configure the Upgrade Assessment Tool
With ACT configured and a data collection package deployed to a set of systems, it’s time to install and configure the Upgrade Assessment Tool.
1. Run the UpgradeAssessmentTool.msi downloaded earlier and click Next on the welcome page.
2. Accept the license agreement and click Next.

3. Select a location for where the tool will be installed and click Next.

4. Click Install.

5. On the completed page, click Finish.
6. From the Start menu, launch the Upgrade Assessment Tool Configuration application.
7. On the Microsoft Compatibility Exchange page, specify a proxy server if required.
8. On the Application Compatibility Toolkit page, enable Connect to Application Compatibility Toolkit server and specify the ACT database server and database name. In addition, specify a user/service account that will be used to access the ACT database. Click Verify to make sure your configuration was successful.

9. On the Configuration Manager page, specify the Site database server and database name. Specify a user/service account to be used when connecting to your ConfigMgr site database and click Verify. Upgrade Assessment Tool will automatically load a set of recommended system requirements. Adjust these to fit your upgrade needs, for instance if you want to check upgrade compliance and only want 64-bit system, change the operating system version accordingly.

10. Click Apply.
11. If you wish to schedule the Upgrade Assessment Tool synchronize service to regularly connect to Microsoft Compatibility Exchange, your ACT database and ConfigMgr, create a sync schedule on the Synchronization Service page and click Synchronize. If you at some point need to check the synchronization for issues, browse the Upgrade Assessment Tool installation location and refer to the UATSyncs.log.

12. Click Apply again and then OK.
Using ConfigMgr with Upgrade Assessment Tool
With everything installed and configured, we can now turn to ConfigMgr and start exploring what the Upgrade Assessment Tool brings to the table.
Reporting
Under the Monitoring work space, we usually have our Reports. We now have a new folder called Upgrade Assessment. In this folder there’s a bunch of reports that we can run to check for upgrade readiness, like for instance the Operating system requirement status for computers in a specific collection report:

Device Collections
Unfortunately, we do not get any device collection out of the box, but we now have tools to create our own to assess the upgrade state of our devices. The process of creating such collection is very well documented in the link below, and I suggest that you look into this, since it can be a good idea to only have systems that have been assessed for upgrade in a collection that eventually will be used to deploy for instance Windows 10.
https://technet.microsoft.com/en-us/library/jj677190.aspx
Summary
This tool could not have been released in a better time. For a while, organizations have started to evaluate, even deployed or started upgraded some of their systems (some may even have completed their migration journey to Windows 10). With this add on, if you may call it so, assessing upgrade readiness for Windows 10 is now easier than ever, and you no longer have to create custom solutions like running setup.exe from a network share, parsing the setupact.log file etc on your systems. You now have all the data you need directly in ConfigMgr.


I’ve installed the Win10 ADK 1607. From step 1 above I don’t even see the Application Compatibility Manager on the start menu. There is something called Compatibility Administrator the does not launch a wizard. Has the 1607 ADK changed so drastically that these instructions can’t be used? Or should I just use 1511 version?
Never mind…found this: https://technet.microsoft.com/en-us/itpro/windows/plan/act-technical-reference
hi
I have the same version of UAT, in the configMgr page after provding credentials i am unable to see “Windows 10” in the operating system drop down. ConfigMgr and UAT are installed on the same server. ConfigMgr is 1602 version.
I am having the same issue did you ever get this resolved?
Did you guys find a resolve for that? I don’t see Windows 10 either.
SQL Server 2015? Did you mean 2014?
Hey, no that should read 2005, not 2015. Writing in the middle of the night sometimes have a bad effect 😉
Same problem here.
“Failed to query device drivers with error: Exception of type ‘System.OutOfMemoryException’ was thrown.”
Hi Jakob,
I’ve not seen this error in my lab environment unfortunately. How did you configure the setup, like in my example? I mean running ACT and the Upgrade Assessment Tool on a remote server.
Regards,
Nickolaj
I’m having the same issue with ACT and UAT installed locally on the SCCM server.
Any solution?
Great guide. Thanks!
When I start the Sync service I get an error in the log:
(From SyncS.log)
Start to query Drivers
Failed to query device drivers with error: Exception of type ‘System.OutOfMemoryException’ was thrown.
Any ideas? No connection to MS is made so the setup is kinda crippled right now.
I’m facing the same issue. Did you solve it?