


Companies and organizations that are investing in Microsoft Intune for Mobile Device Management most often have the need to enroll certificates to their mobile devices when deploying for instance Wi-Fi or VPN profiles. For those of you that are not familiar with SCEP, it stands for Simple Certificate Enrollment Protocol and is a industry wide technology that was developed to simplify the distribution of certificates. Mobile Device Management products, such as Microsoft Intune, supports distribution of SCEP Certificate Profiles to enroll certificates through the SCEP protocol on mobile devices. However, it’s not as easy as that sounds. There are a few requirements that you’ll need to have in place for a successful enrollment of a certificate on a mobile device.
Since the whole process is quite overwhelming for the regular administrator, I’ve decided to prepare my Intune cloud-only lab environment for SCEP certificate enrollment. In this post I will cover all the steps necessary to successfully enroll a certificate on a mobile device using a SCEP Certificate Profile for iOS in Microsoft Intune, in addition what’s required in terms of on-premise infrastructure. Some of this infrastructure could easily be hosted in Azure, but in order to reflect most environments that administrators are currently working with today, I’ve decided to go with on-premise infrastructure in this post.
What you’ll need in terms of on-premise infrastructure
In order to enroll certificates to mobile devices using Microsoft Intune and a SCEP Certificate Profile, you’ll need the following on-premise infrastructure and an Active Directory domain (pretty obvious, but still):
- Certificate Authority (Issuing or Root CA)
- Network Device Enrollment Service (NDES) server
- Microsoft Intune Certificate Connector (installed on the NDES server)
- Member server for Azure AD Application Proxy
Since the NDES server would need to be made available publicly, you have several options to accomplish that. You could for instance install a Web Application Proxy (WAP) server and make that internet facing, use any kind of 3rd party load-balancing equipment like for instance Citrix NetScaler. However, I’ve opted to go with the easiest and also the coolest solution, using Azure AD Application Proxy. This technology uses an agent that you install at a member server in your on-premise environment and it then operates much like a reverse proxy, allowing you to publish internal services externally. I will not cover how to setup Azure AD Application Proxy with the installation of the agent and configuration in your Azure AD directory, since that has already been covered exceptionally well in the documentation from Microsoft:
https://azure.microsoft.com/sv-se/documentation/articles/active-directory-application-proxy-enable/
For those of you that are not familiar with Azure AD Application Proxy, don’t worry. I will cover how to publish the NDES server and show you how the configuration will look like.
Overview
Before we begin install and configure any of the required infrastructure, I just want to give you a short overview of the high-level steps that we’ll go through in this post.
- Create Service Accounts
- Configure Certificate Templates
- Install NDES server
- Publish NDES server externally with Azure AD Application Proxy
- Configure NDES server
- Install and configure Microsoft Intune Certificate Connector
- Create and deploy a SCEP Certificate Profile
For those of you that have read my posts earlier, I try to be as thorough as possible and outline every necessary steps from the beginning to the end. And I’ll do the same in this post (except for how to install the agent for Azure AD Application Proxy as described earlier).
Let’s get started.
Create Service Accounts
A service account for NDES is required in order to enroll certificates from your Certificate Authority. Create a normal user account in your environment. I’ve created an user account called IntuneNDES_SVC in my lab environment. Whenever this account is references in this blog, refer to the account that you’ve created.
Configure Certificate Templates
You’ll need to have access to a Certificate Authority (CA) in your on-premise infrastructure that is running on at least Windows Server 2008 R2. If your CA is running on Windows Server 2008 R2 specifically, you’ll also need to have installed KB2483564. In my lab environment I’m running my CA on Windows Server 2012 R2, so the process when duplicating a certificate template might look slightly different right in the beginning. Make sure that you select your compatibility settings for the certificate template to be at least Windows Server 2008.
In this post, you’ll create two certificate templates:
- Intune NDES
- This template will be used by the NDES service account when enrolling certificates
- Intune NDES SSL
- This template will be used to request a SSL certificate for the NDES server
Intune NDES certificate template
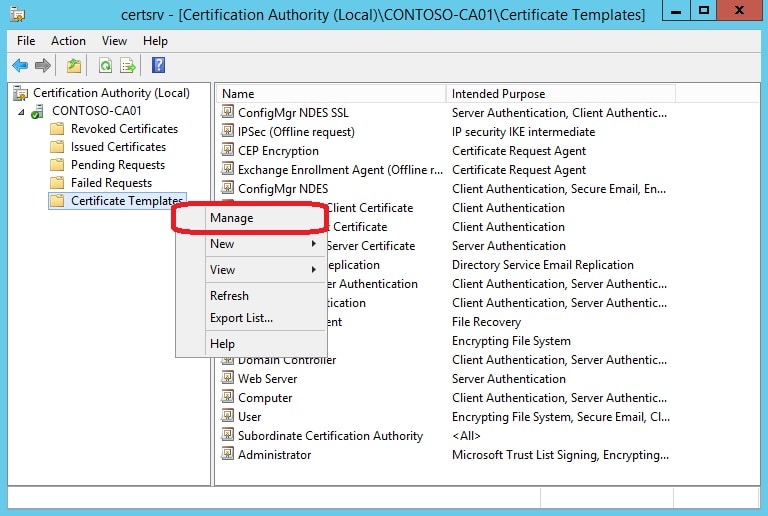
1. Logon to your CA server and open the Certificate Authority management console.
2. Right click on Certificate Templates and select Manage.
3. Scroll down and locate the User template, right click and select Duplicate Template.

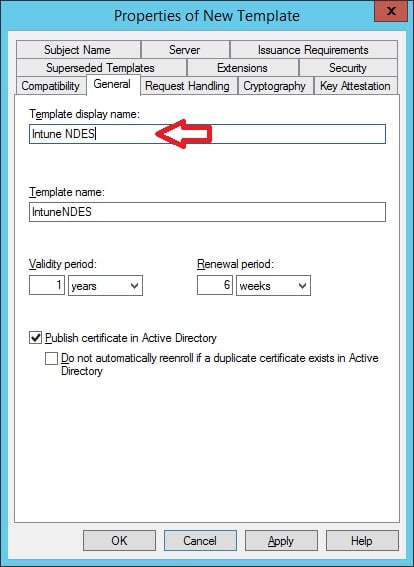
4. On the General tab, give the template a name, for instance Intune NDES. Make a note of the Template name that will be the same as the Display name, just without any spaces (IntuneNDES).
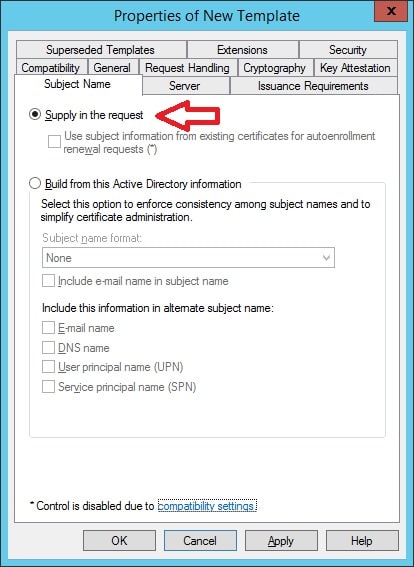
5. On the Subject Name tab, select Supply in the request. If you’re worried about security, the Intune Policy Module for NDES will enforce it.
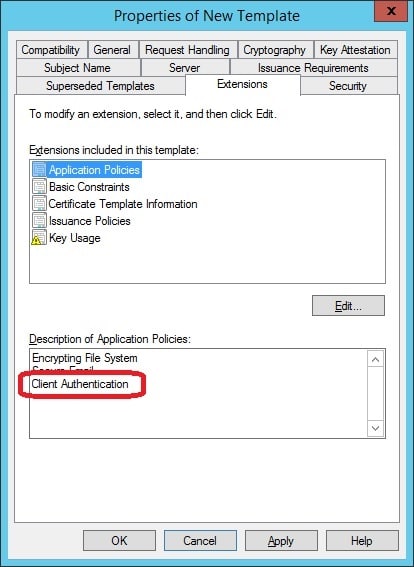
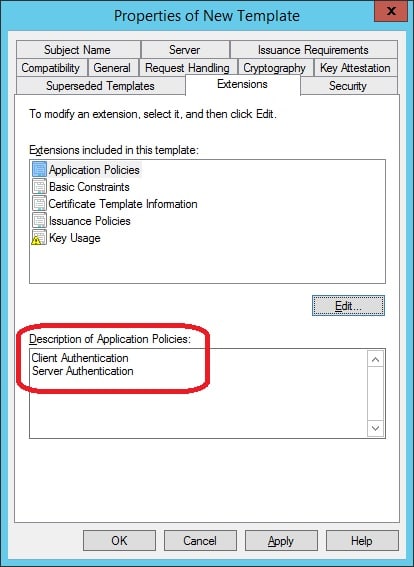
6. On the Extensions tab, make sure that Client Authentication is available under Description of Application Policies.
7. Still on the Extensions tab, select Key Usage and click Edit. When deploying SCEP Certificate Profiles (which we’ll be doing later on), we want to make sure that the Signature is proof of origin (nonrepudiation) is not selected, if you’d want to be able to use this template when the certificate is enrolled on iOS or OS X devices.

8. On the Request Handling tab, uncheck the Allow private key to be exported.

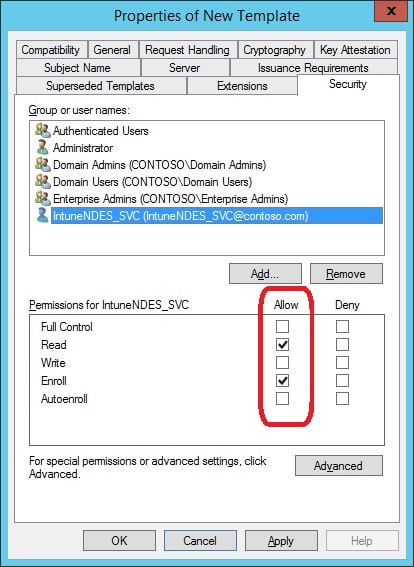
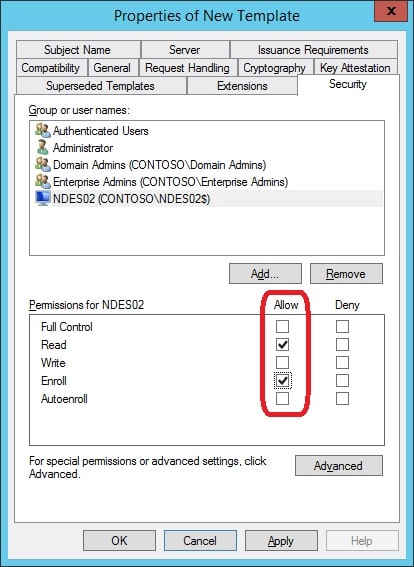
9. On the Security tab, add the IntuneNDES_SVC service account and allow for Read and Enroll permissions.
10. Before we save the template, make a note of the Minimum key size on the Cryptography tab. It should have the value of 2048. This will be important later on in this post. Click OK.
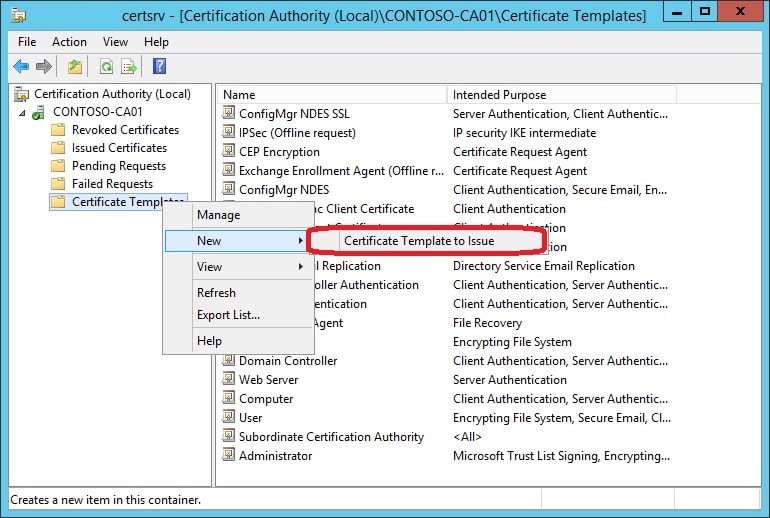
11. On your Issuing CA server (in case you have an Root CA with a subordinate CA, also referred to as Issuing CA), go back to the Certificate Authority management console and select Certificate Templates. Right click and select New -> Certificate Template to Issue.
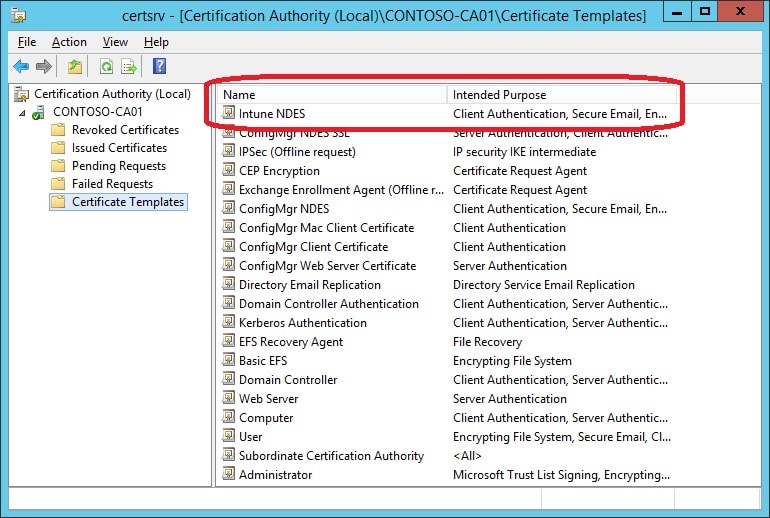
12. Select the Intune NDES certificate template and click OK.

13. You should now see the Intune NDES certificate template in the list of issues certificate templates.
Intune NDES SSL
As we’ve now seen how the process of creating a certificate template looks like, from now on I will only add screenshots of the required configuration for the Intune NDES SSL certificate template. This template will include both Client Authentication and Server Authentication EKU’s (Enhanced Key Usage). This is not a best practice, but it works well. If you’re concerned about best practices when it comes to certificates (and you should be), separate the two EKU’s into two certificate templates. However, I’ve chosen to bundle them up in an attempt to make things easier.
1. In the Certificate Authority console, right click on Certificate Template and click Manage.
2. Right click on the Web Server template and select Duplicate Template.
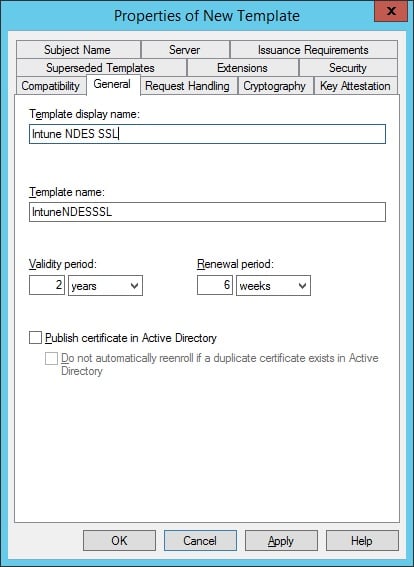
3. On the General tab, name the template Intune NDES SSL.
4. On the Extensions tab, add Client Authentication as an Application Policy by clicking on Edit and select the EKU.
5. On the Security tab, add the NDES server computer account and allow for Read and Enroll permissions.
6. On the Subject Name tab, make sure that Supply in the request is selected. Click OK to save the template.
7. Issue the Intune NDES SSL certificate template.
We’ve now created both certificate templates. Next up we’re gonna take a look at how we install and configure the NDES server itself.
Install NDES server
As for the NDES server, you’ll need to install the role on a Windows Server 2012 R2 machine or later that is joined to the same domain as your CA. Intune does not support using NDES when it is running on your CA server, that’s something to keep in mind. So do not attempt to install the NDES role on your CA, it may seem to work, however it’s doomed to fail.
In my lab, I’ve installed a server called NDES02.contoso.com (internal FQDN) running on Windows Server 2012 R2.
1. Open an elevated PowerShell prompt and run the following command:
Add-WindowsFeature -Name @("ADCS-Device-Enrollment","Web-Server","Web-WebServer","Web-Common-Http","Web-Default-Doc","Web-Dir-Browsing","Web-Http-Errors","Web-Static-Content","Web-Http-Redirect","Web-Health","Web-Http-Logging","Web-Log-Libraries","Web-Request-Monitor","Web-Http-Tracing","Web-Performance","Web-Stat-Compression","Web-Security","Web-Filtering","Web-Windows-Auth","Web-App-Dev","Web-Net-Ext","Web-Net-Ext45","Web-Asp-Net","Web-Asp-Net45","Web-ISAPI-Ext","Web-ISAPI-Filter","Web-Mgmt-Tools","Web-Mgmt-Console","Web-Mgmt-Compat","Web-Metabase","Web-WMI","NET-Framework-Features","NET-Framework-Core","NET-HTTP-Activation","NET-Framework-45-Features","NET-Framework-45-Core","NET-Framework-45-ASPNET","NET-WCF-Services45","NET-WCF-HTTP-Activation45","NET-WCF-TCP-PortSharing45","RSAT-ADCS-Mgmt","WAS","WAS-Process-Model","WAS-NET-Environment","WAS-Config-APIs")
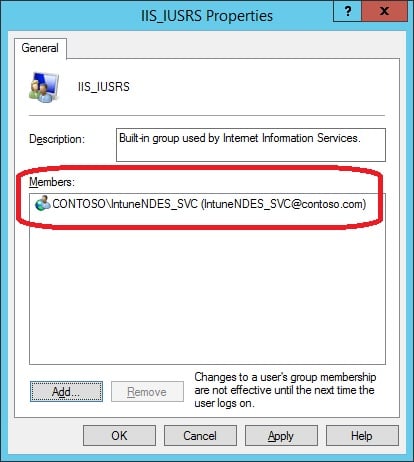
2. Open the Computer Management console and add the IntuneNDES_SVC service account to the local ISS_IUSR group.
3. We also need to configure a SPN for the NDES service account. Open an elevated command prompt, and run the command below:
setspn -s http/[DNS name of NDES server] [Domain name]\[NDES service account name]
In my lab environment, that would translate to the following:
setspn -s http/NDES02.contoso.com CONTOSO\IntuneNDES_SVC
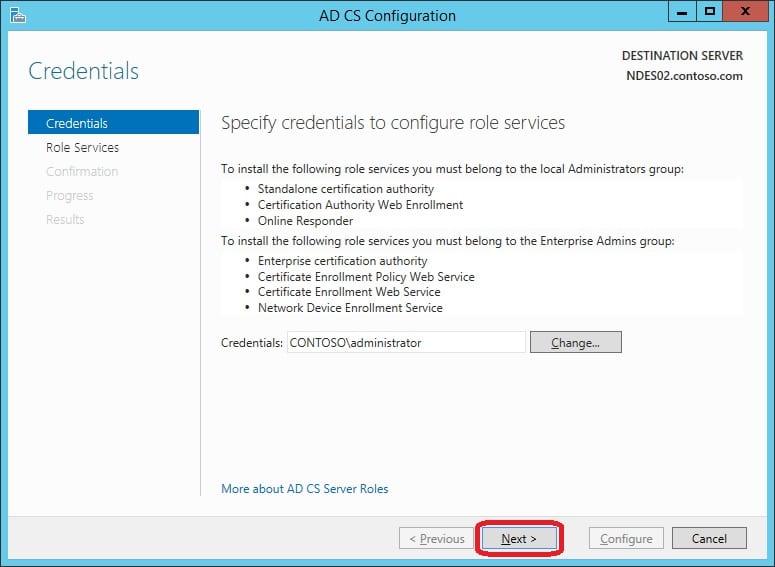
4. Open Server Manager on the NDES server, click on the yellow flag and click on Configure Active Directory Certificate Services link.

5. On the Credentials page, specify the credentials that will be used to configure NDES. Make sure that the account that you specify is a member of the Enterprise Admins group, and a local administrator on the NDES server. Click Next.
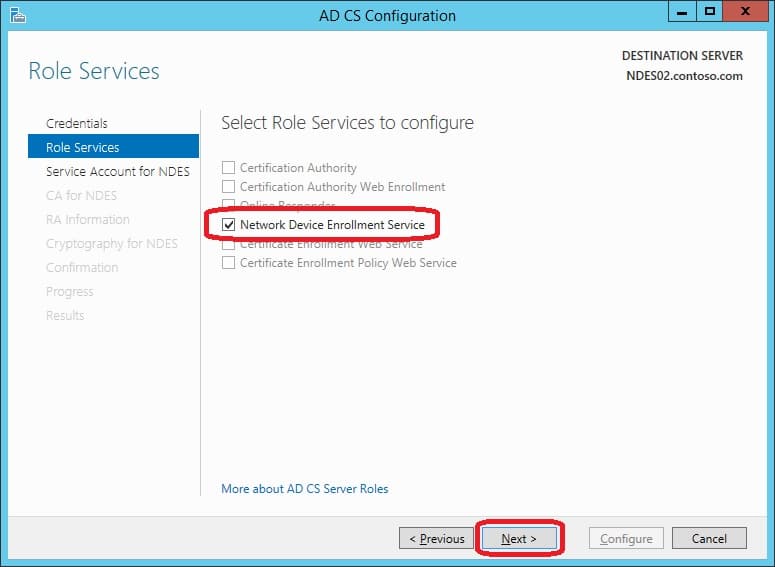
6. On the Role Services page, select Network Device Enrollment Service and click Next.
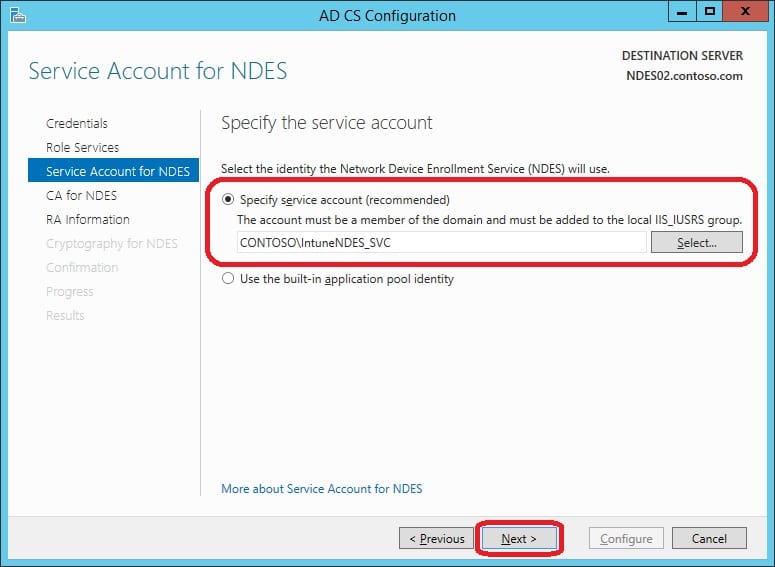
7. On the Service Account for NDES page, specify the IntuneNDES_SVC service account and password and click Next.
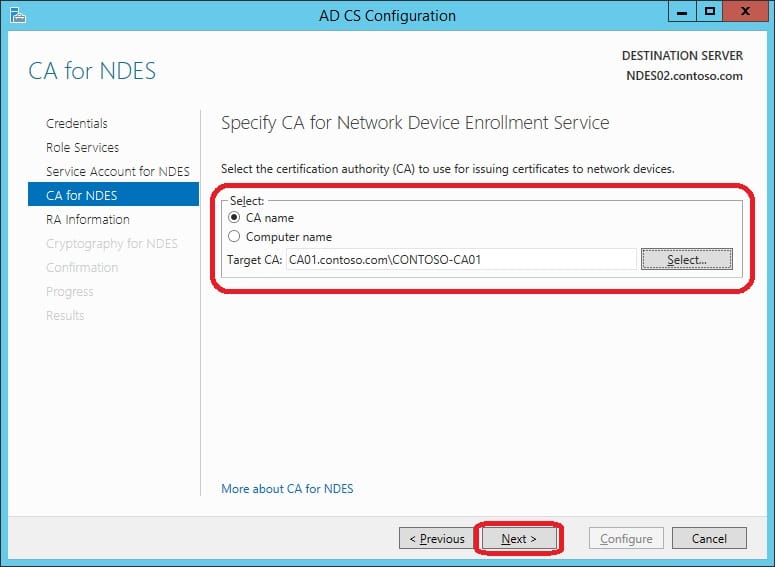
8. On the CA for NDES page, select your Issuing CA (or Root CA if you only have that) and click Next.
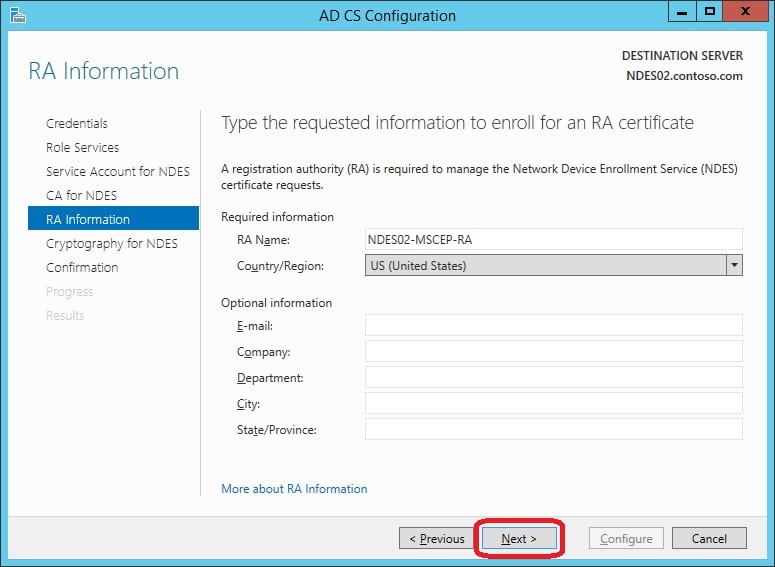
9. On the RA Information page, leave the defaults and click Next.
10. On the Configure CSPs for RA page, make sure that the Minimum key size on the Cryptography tab of the certificate template that we created earlier match both the values here. This is very important, so make sure that you get it right (hint, use 2048). Click Next.

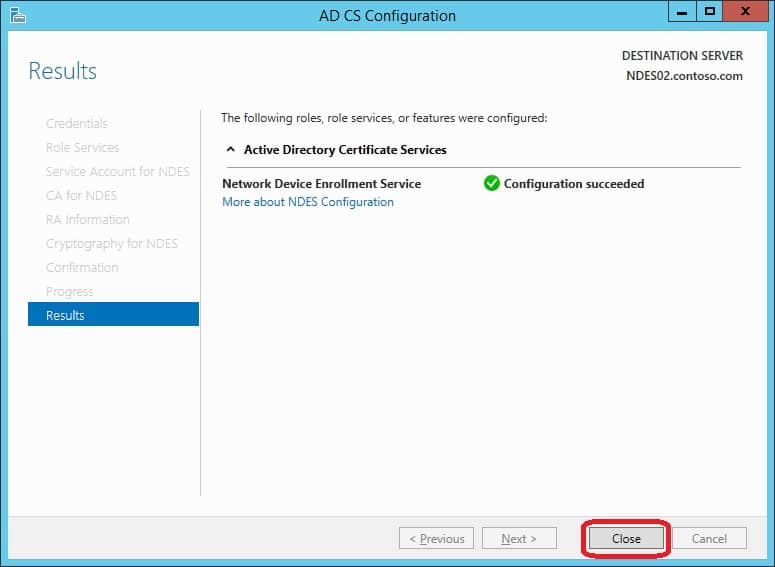
11. On the Confirmation page, click Configure.

12. On the Results page, click Close.
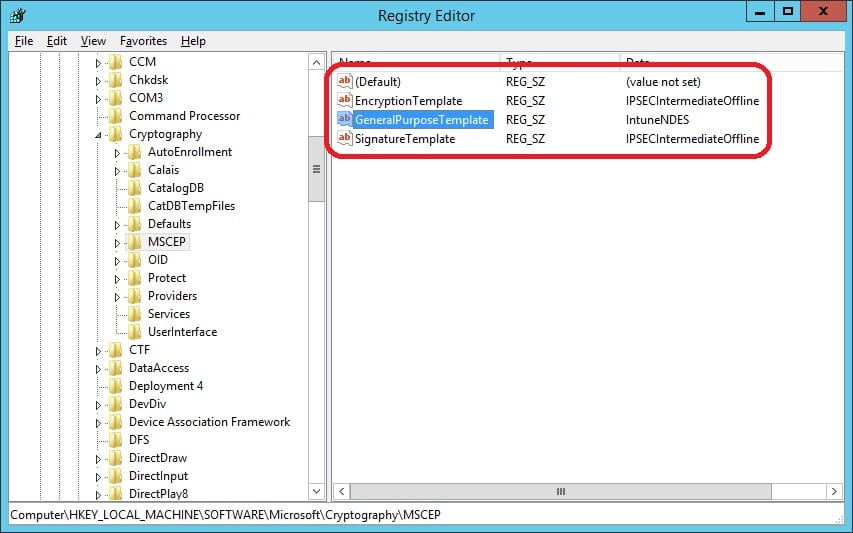
13. Open the Registry Editor on the NDES server and browse to the following key:
HKEY_LOCAL_MACHINE\SOFTWARE\Microsoft\Cryptography\MSCEP
14. Now, this part is mentioned in various blog posts that all of the three values data should be consistent with the Template Name of the certificate template (IntuneNDES in our case). However, there’s more to it. In our certificate template, the Purpose (found on the Request Handling tab of the certificate template) is configured for Signature and Encryption. That translates to the GeneralPurposeTemplate value in this key. Therefor, change the current data value to IntuneNDES (or the Template Name of your certificate template, in case you named it something else).
Below is a table that maps the certificate template purpose to the values in the above registry key:
| Certificate Template Purpose | Registry value to edit | Value seen in the Intune admin console for the SCEP profile |
| Signature | SignatureTemplate | Digital Signature |
| Encryption | EncryptionTemplate | Key Encipherment |
| Signature and encryption | GeneralPurposeTemplate | Key Encipherment Digital Signature |
15. Open an elevated command prompt and run iisreset. Restart the NDES server.
We’ve now completed the installation part (including some configuration) of the NDES server. As a validation step, you can browse the following URL (replace the DNS name with the one in your environment):
https://ndes02.contoso.com/certsrv/mscep/mscep.dll
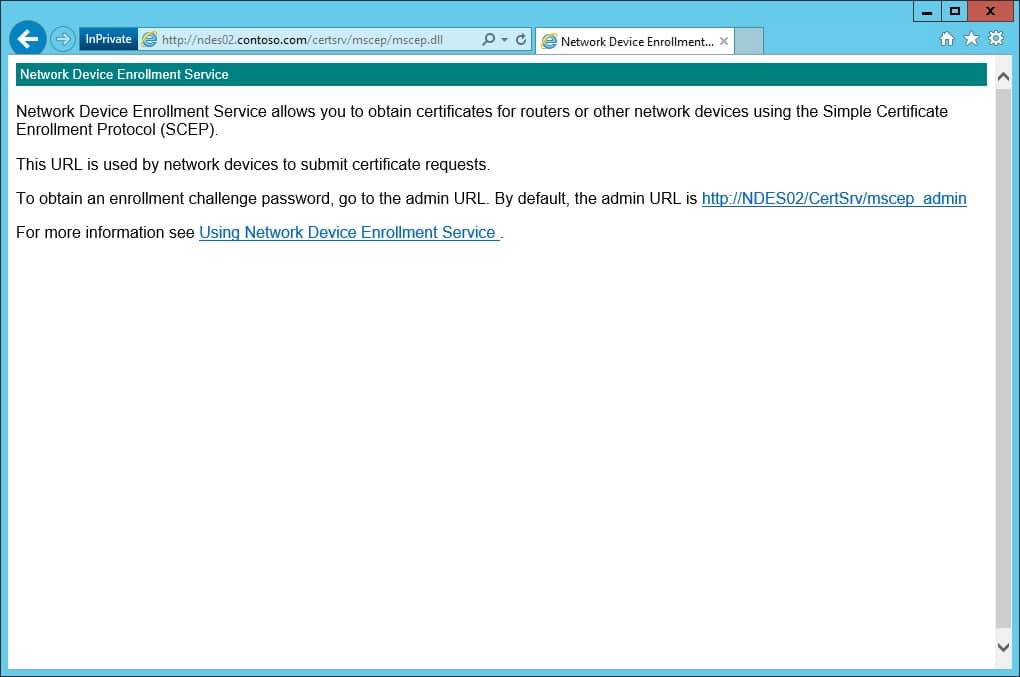
Don’t worry that if you were to publish the NDES service externally that people can access it, it will be hardened later on.
Publish NDES server externally using Azure AD Application Proxy
Are you still with me? Great, it’s a long post and I’m aware of that. But there’s a lot to it when preparing for SCEP certificate enrollment. Now, we’re going to publish the NDES server externally with the help of Azure AD Application Proxy. In this part of the post, I’ll go ahead and use the external domain that Azure AD Application Proxy uses by default, which is msappproxy.net (yes, that’s three P’s in a row). You could use one of your verified domains in your Azure AD directory, but remember that would require you to create a CNAME in your public DNS zone.
1. Login to manage.windowsazure.com with a Global Admin account.
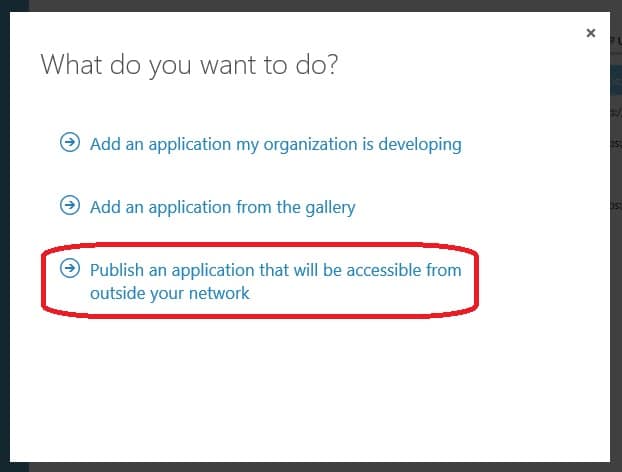
2. Go to your Active Directory, select Applications and click Add.
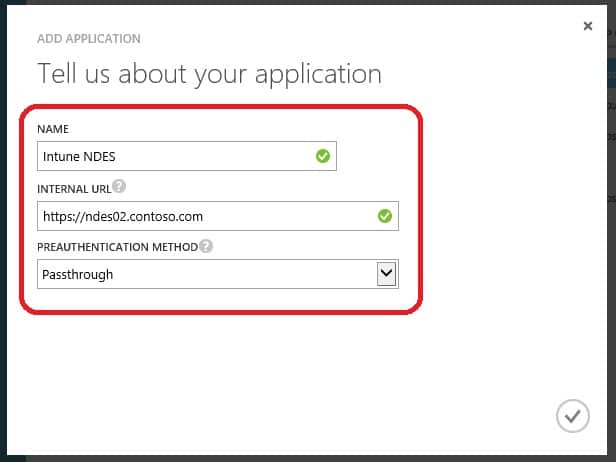
3. Select the option that reads Publish an application that will be accessible from outside your network.
4. Name the application e.g. Intune NDES. As for the internal URL, give it the value if your internal NDES server DNS name, e.g. https://ndes02.contoso,com. Yes, that’s correct, specify HTTPS as the protocol, because we’ll later on bind a SSL certificate (by using the Intune NDES SSL certificate template) to the server. Make sure that you select Passthrough as the Preauthentication Method. Click on the check mark.
That’s all there is to it, easy right? As a side note, there’s no reason to assign any users to this application, as it’s only for visibility. All users can by default access this application. You can now check out the settings of this application, to get the public URL for it, by click on Configure of the application:
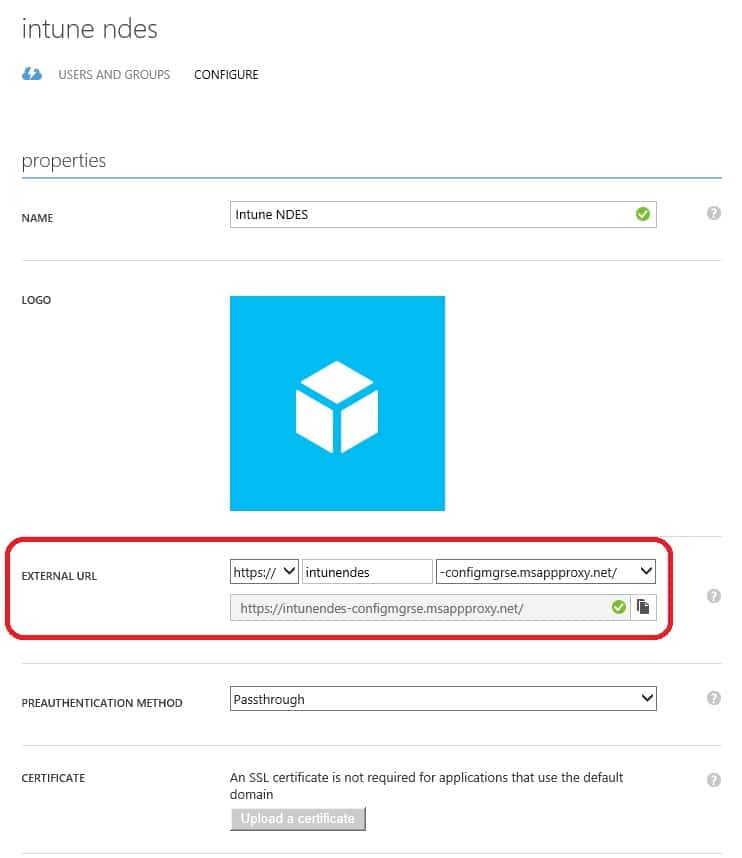
As you can see, the external URL for my NDES server is now:
https://intunendes-configmgrse.msappproxy.net
Configure NDES server
With our NDES server published externally, we now need to request a SSL certificate and bind it in IIS, so that we can access it on the HTTPS address that we specified when we published it.
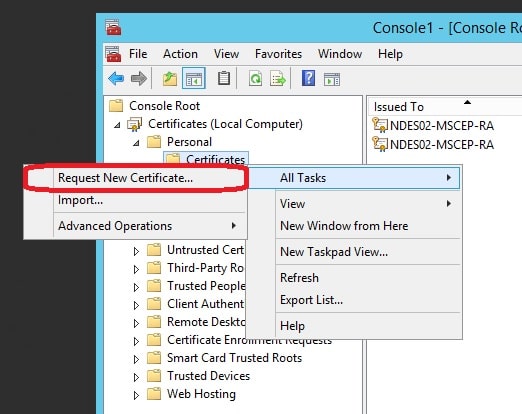
1. Open an MMC console and add the Certificates snap-in for the local computer on your NDES server.
2. Expand Certificates, Personal and select Certificates.
3. Right click on Certificates and select All Tasks -> Request New Certificate.
4. Click Next on the Before You Begin page.
5. On the Select Certificate Enrollment Policy page, click Next.
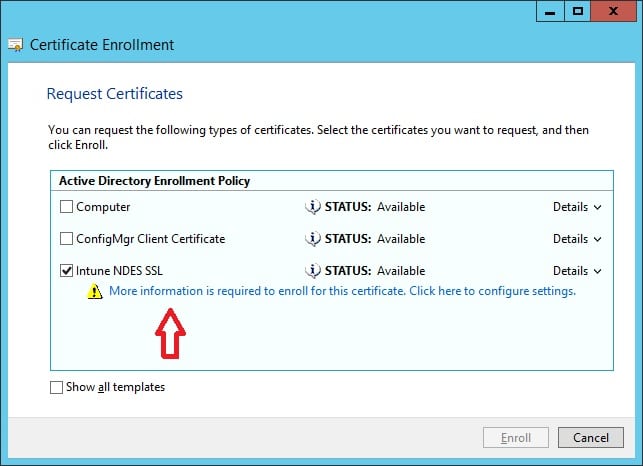
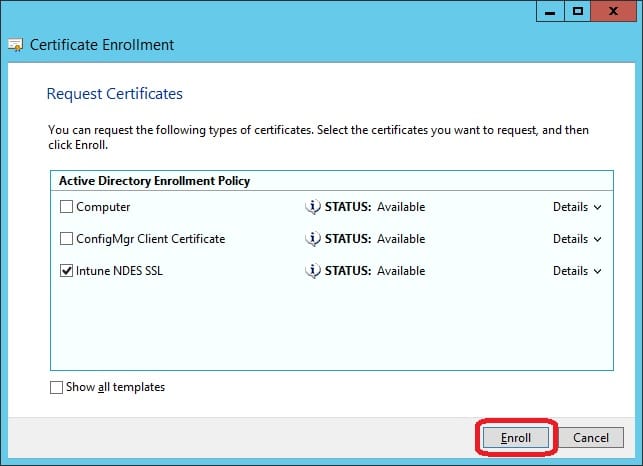
6. Select the Intune NDES SSL certificate template and click on the link below to configure the information required to enroll a certificate.
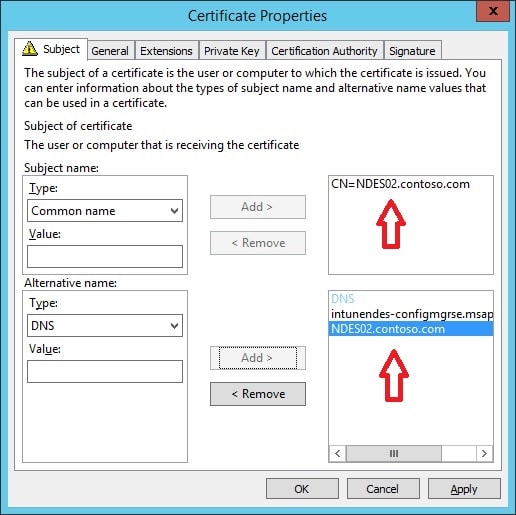
7. As for Subject name, select Common name as the Type and enter the internal DNS name of the NDES server. In the Alternative name section, select DNS as the type and add your external DNS name to the NDES server. Add the internal DNS name of your NDES server as well and click OK. In my environment, I’ve added the following:
Subject name:
– NDES02.contoso.com (internet DNS name of the NDES server)
Alternative name:
– intunendes-configmgrse.msappproxy.net (external DNS name for NDES server, published with Azure AD Application Proxy)
– NDES02.contoso.com (internal DNS name for NDES server)
If you’ve chosen to split up this certificate in two, it’s required that you add the Common name as Subject name for the Client Authentication certificate. As for the Server Authentication certificate, add the internal and external DNS name to the Alternative name (SAN). I’ve not verified the split configuration and how exactly it should be setup, but it’s basically the same we do here with one certificate instead.
8. Click Enroll.
9. Click Finish.

10. Open Internet Information Services (IIS) management console, select the Default Web Site and click on Bindings in the actions menu.

11. Click Add and select https as Type, leave IP address with All Unassigned and make sure the port is set to 443. Select the SSL certificate that we recently enrolled and click OK.

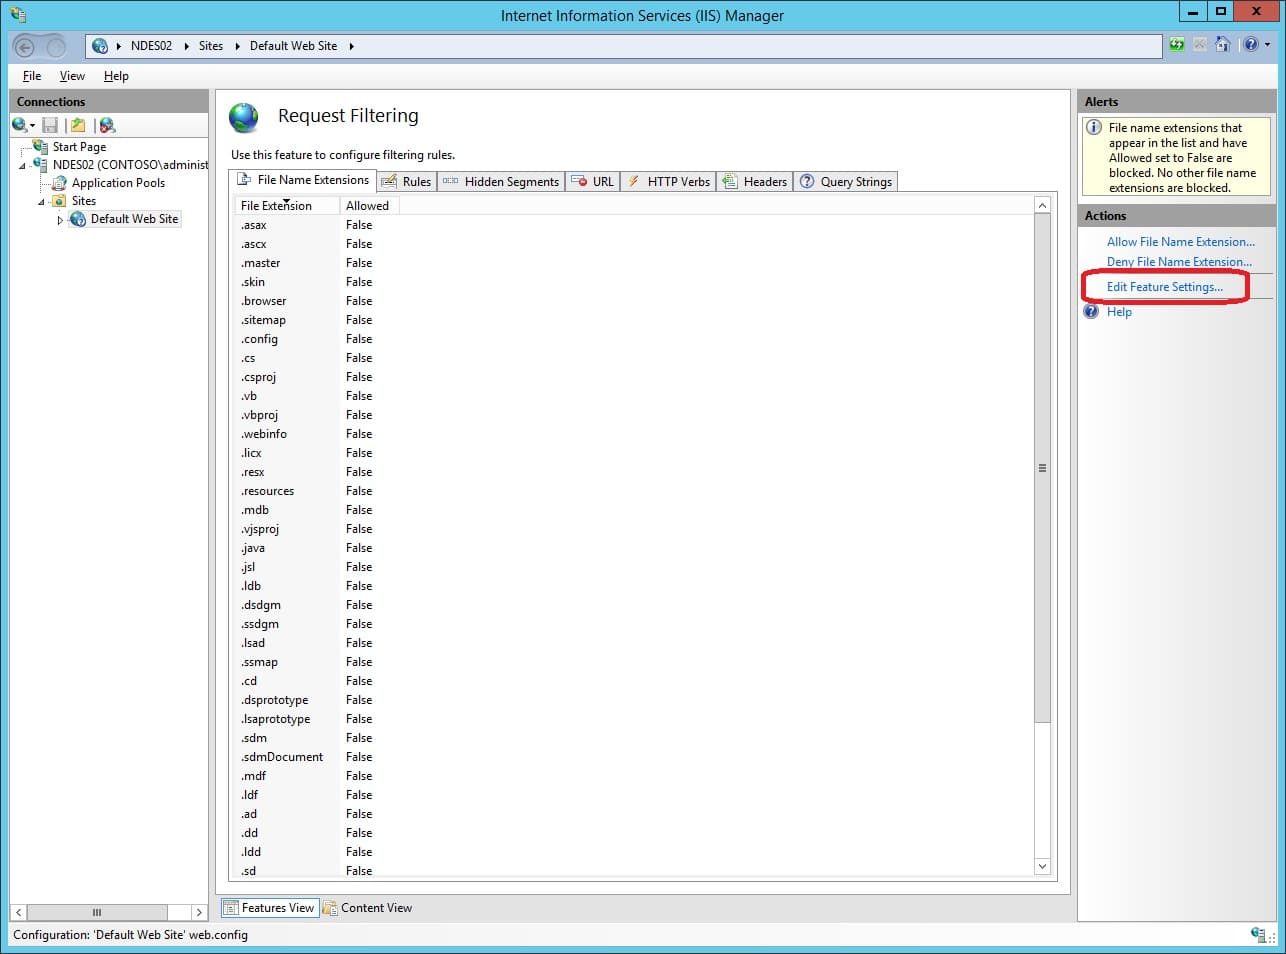
12. Go to Request Filtering in the IIS management console and click on Edit Feature Settings.
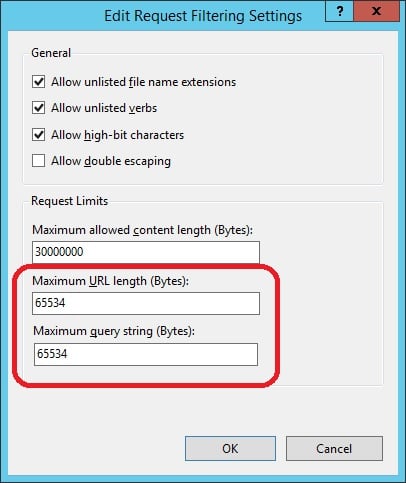
13. Set both the Maximum URL length (bytes) and Maximum query string (bytes) values to 65534 and click OK.
14. Go back to the Default Web Site and select restart.

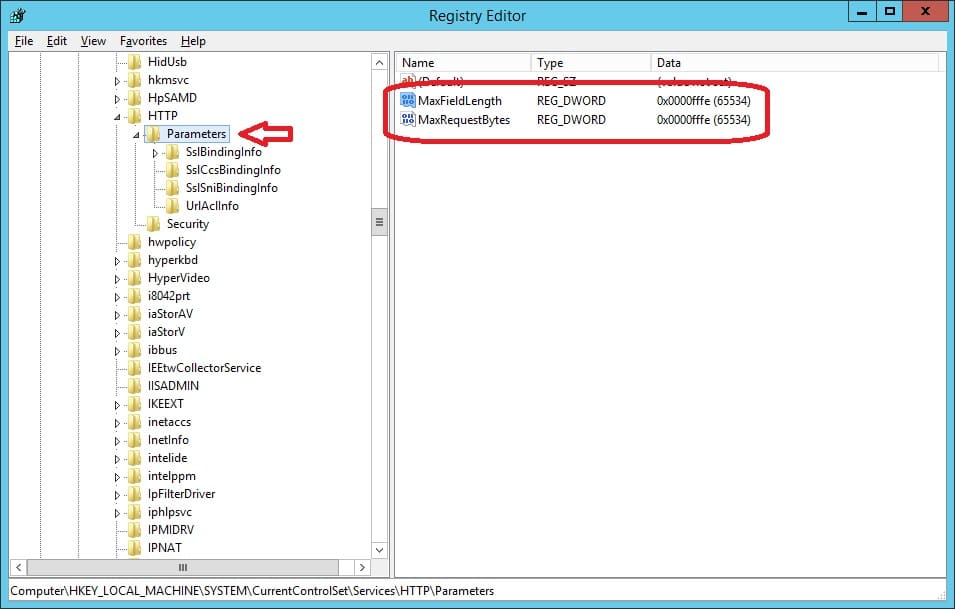
15. Open Registry Editor and browse to the following key:
HKEY_LOCAL_MACHINE\SYSTEM\CurrentControlSet\Services\HTTP\Parameters
16. Create the following registry values if they don’t exist as DWORD (32-bit) values:
Value: MaxFieldLength
Data value: 65534 (decimal)
Value: MaxRequestBytes
Data value: 65534 (decimal)
17. As a final step in configuring the NDES server, restart it (don’t forget this step).
Once the NDES server has come back online, it’s then ready to support the Microsoft Intune Certificate Connector.
Install and configure Microsoft Intune Certificate Connector
Up until now, we’ve laid the ground work to essentially support the Microsoft Intune Certificate Connector. This Certificate Connector can be downloaded from within the Microsoft Intune admin console. Before we download the software, we also need to enable the subscription to the Certificate Connector.
1. Login to manage.microsoft.com with your Global Admin account.
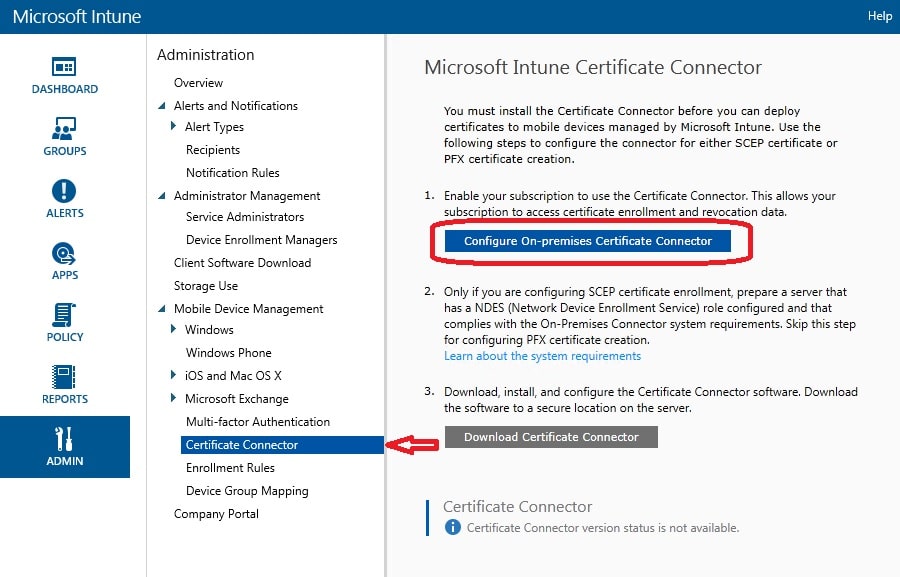
2. In the Admin workspace under Mobile Device Management, select Certificate Connector.
3. Click on Configure On-premises Certificate Connector.
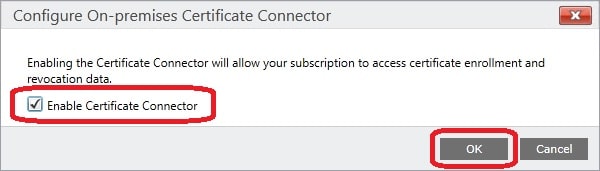
4. Put a check mark in the Enable the Certificate Connector check box and click OK.
5. Click on Download Certificate Connector and save the ndesconnectorsetup.exe file. Copy the setup file to the NDES server in e.g. C:\Installation.

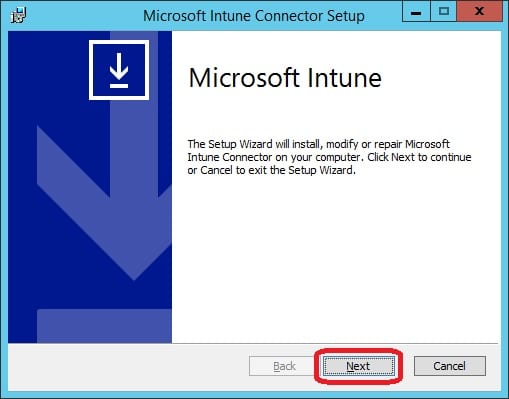
6. On the NDES server, run ndesconnectorsetup.exe elevated to begin the installation of the Certificate Connector.
7. Click Next once the Microsoft Intune Connector Setup wizard has launched.
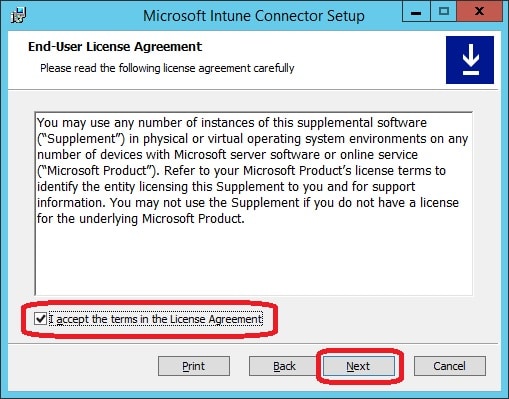
8. Accept the licens terms and click Next.
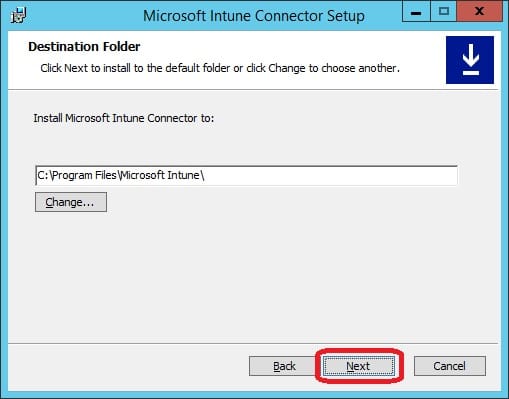
9. Specify the installation destination and click Next.
10. Select SCEP and PFX Profile Distribution and click Next.

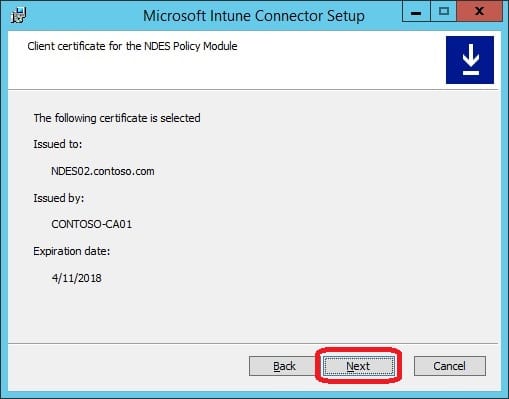
11. Click Select and choose the certificate that we enrolled on the NDES earlier that contains the Client Authentication Enhanced Key Usage. Click Next. Note, even though you select the certificate, it’s not shown directly in the wizard, until you click next.

12. Review the certificate information and click Next.
13. Click Install.

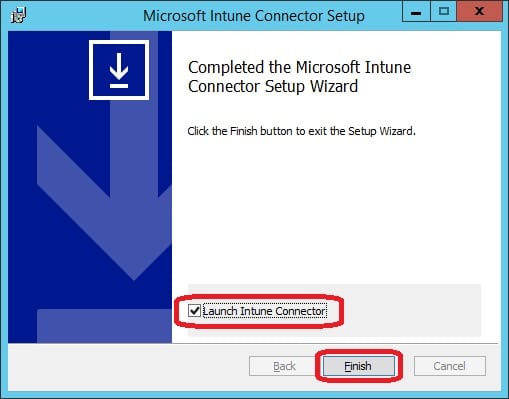
14. One the installation has completed, remember to put a check mark in the Launch Intune Connector check box and click Finish.
If you forgot to launch the Intune Connector, you can always launch it manually by running the following exectuable:
C:\Program Files\Microsoft Intune\NDESConnectorUI\NDESConnectorUI.exe
15. Click on Sign In and enter your Intune service administrator credentials, or credentials for a tenant administrator with the Global Admin permissions. It might be a good idea to create a service account in your Azure AD for this, however I’m not gonna do this at this point this is only a lab environment.
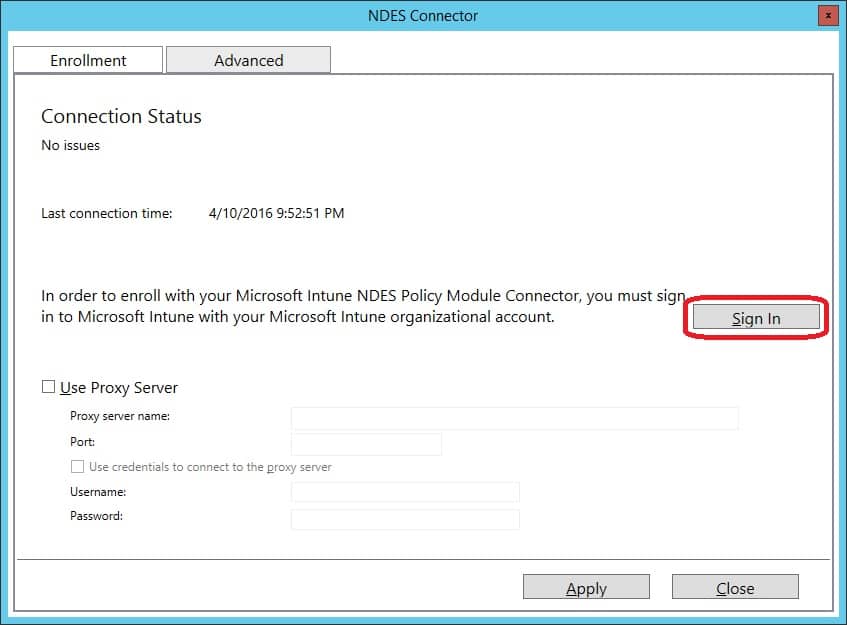
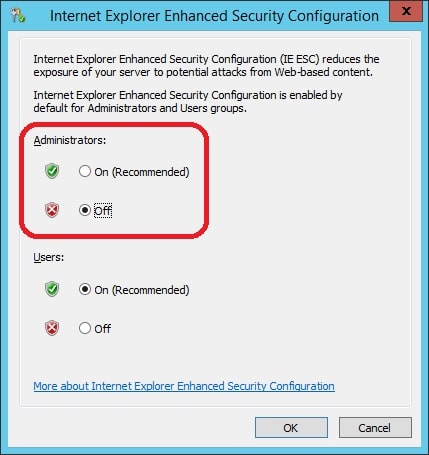
I’d also suggest that you turn off Internet Explorer Enhanced Security Configuration for the time being on the NDES server, before you click on Sign In. If you’ve turned this off, I suggest that you re-launch the Intune Connector manually, like explained a bit earlier.
16. Enter your credentials and click Sign In again.

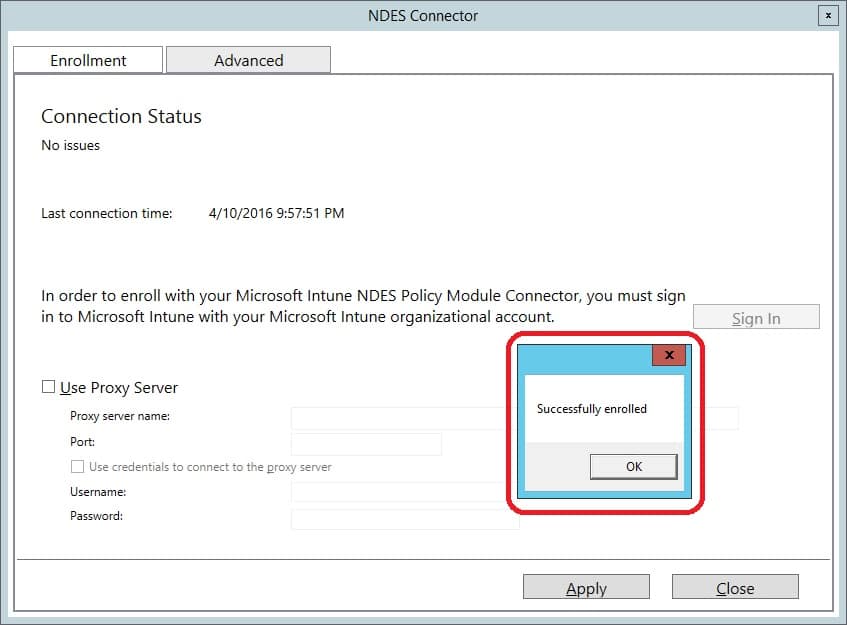
17. If everything was successful, you should see a popup window saying Successfully enrolled. Click OK.
Now we have installed the Microsoft Intune Certificate Connector and connected it with your Intune tenant. If you want to be able to handle certificate revocation, you might have a look at the Advanced tab and configure what account that should be used to revoke certificates. By default, it’s the computer account of where you’ve installed the Certificate Connector, in this case it’s the NDES server.

For this to work properly, you’d have to give the proper permissions on the Certificate Authority, like shown below:
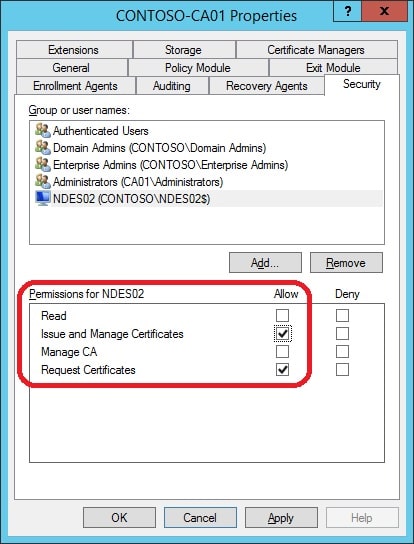
Next, we’ll create a SCEP Certificate Profile in Microsoft Intune, and deploy it to a device. But before we continue, restart the NDES server once again. At this point, the NDES server is also hardened and returns an 403 error when accessed through a browser for instance.
Create and deploy a SCEP Certificate Profile
With our on-premise infrastructure prepare for SCEP Certificate Enrollment, we’ve come to final stages of this post. What’s left at this stage is to create two different Configuration Policies in Microsoft Intune, and deploy them to a user or device.
First, we need to create a Trusted Configuration Policy to deploy the Root CA certificate. I assume that you’re familiar with the process of export the Root CA certificate, if not have a look at this guide:
https://support.microsoft.com/en-us/kb/555252
Create a Trusted Certificate Profile
1. Login to manage.microsoft.com with a Global Admin account.
2. Go to the Policy workspace, select Configuration Policies and click Add.
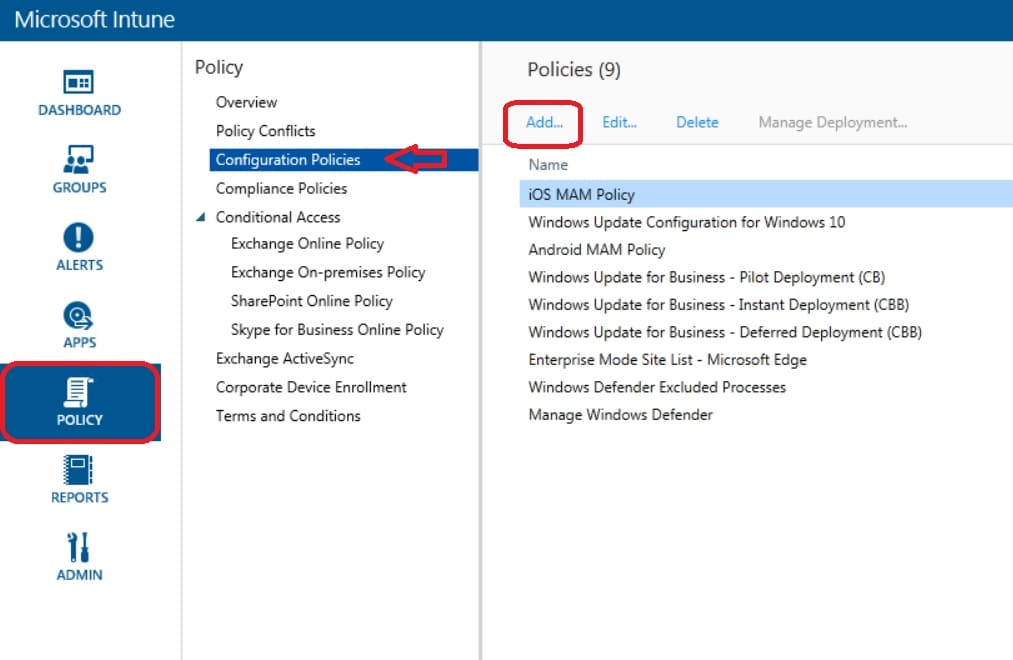
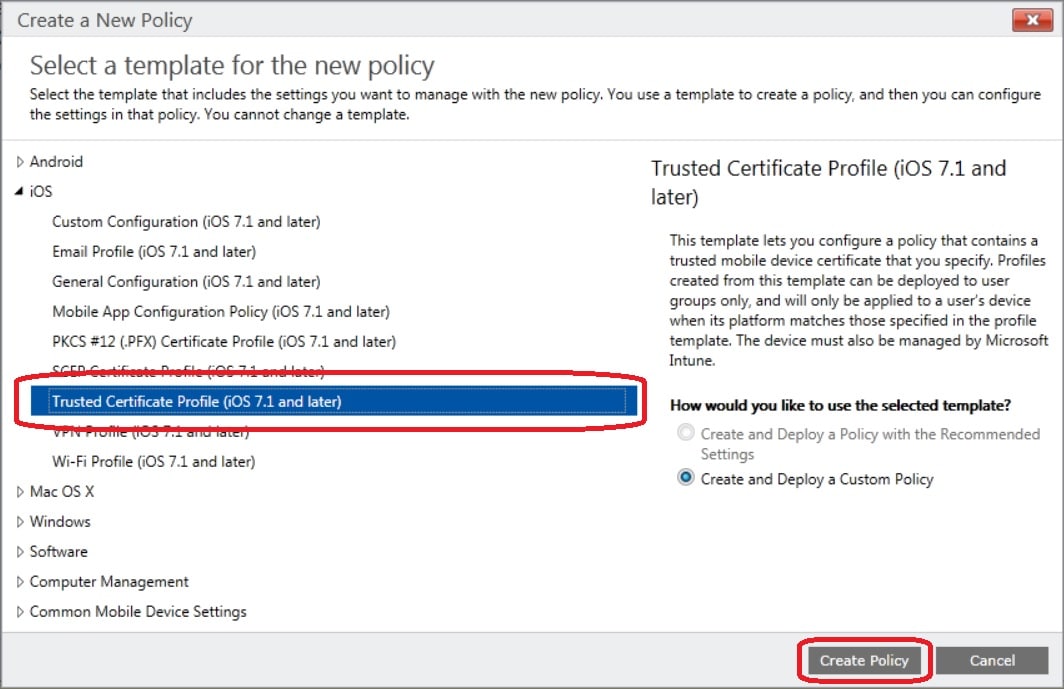
3. Expand iOS, select Trusted Certificate Profile (iOS 7.1 and later) and click Create Policy.
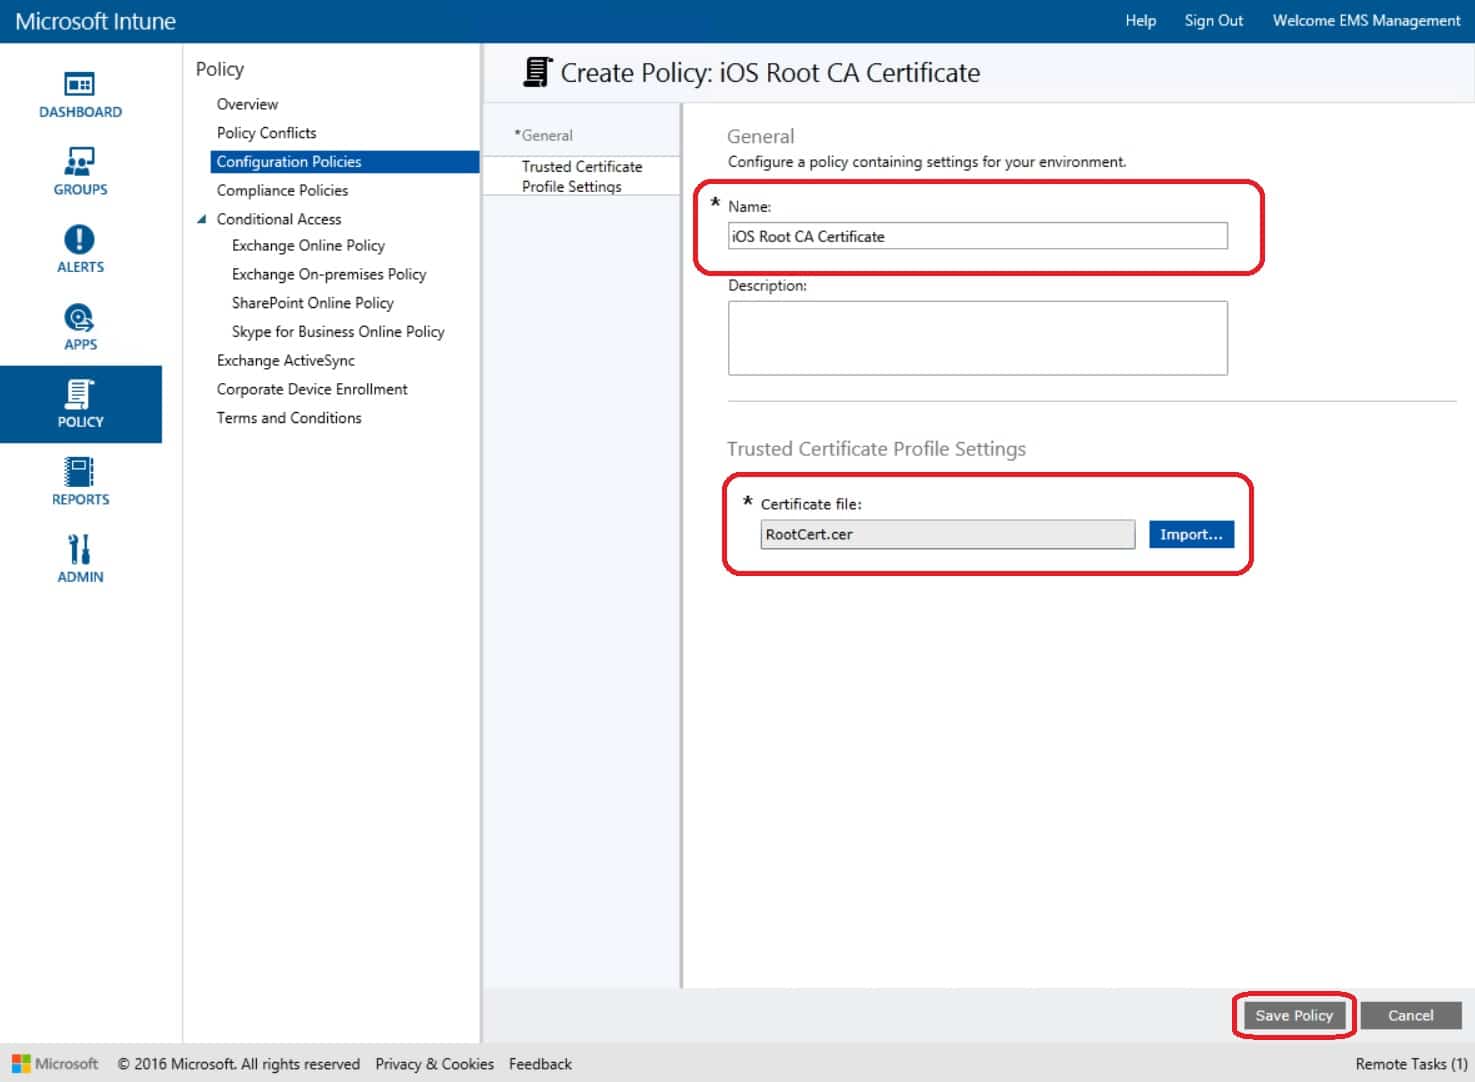
4. Give the policy a name, e.g. iOS Root CA Certificate and select the export Root CA certificate that you’ve exported. Click Save Policy.
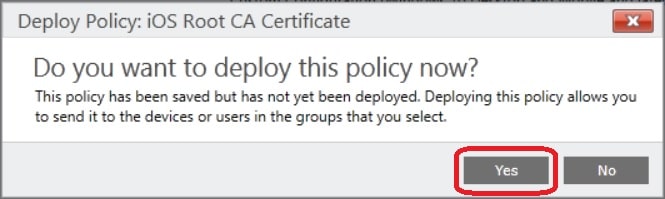
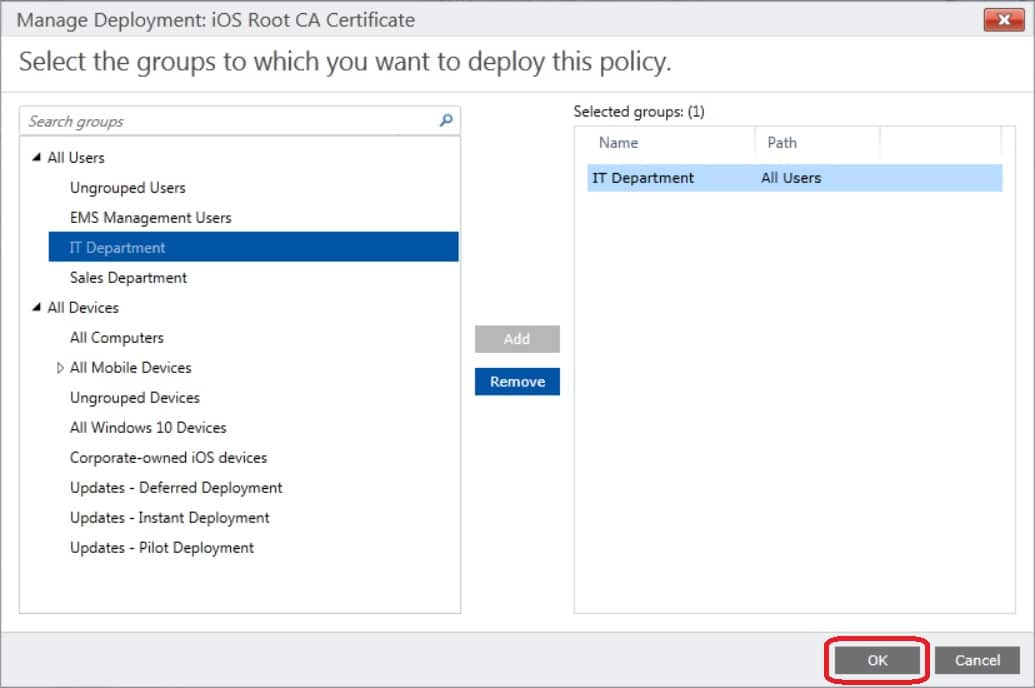
5. Select Yes to deploy the policy now.
6. Select a user or device group as your target. I’d suggest that you target this policy against a user group, since that deployment will be alot faster than against devices. Click OK.
With the Trusted Certificate Profile created and deployed containing the Root CA that’s needed in order to enroll a SCEP certificate, we can now proceed to the last step in this post, which is to create a SCEP Certificate Profile and enroll a certificate.
Create a SCEP Certificate Profile
A SCEP Certificate Profile is necessary to actually perform the enrollment of certificates. It tells the mobile device where to access the NDES service, how to request the certificate with different parameters etc. So let’s create one now, to get going.
1. Click Add in the Configuration Policies node under the Policy workspace.
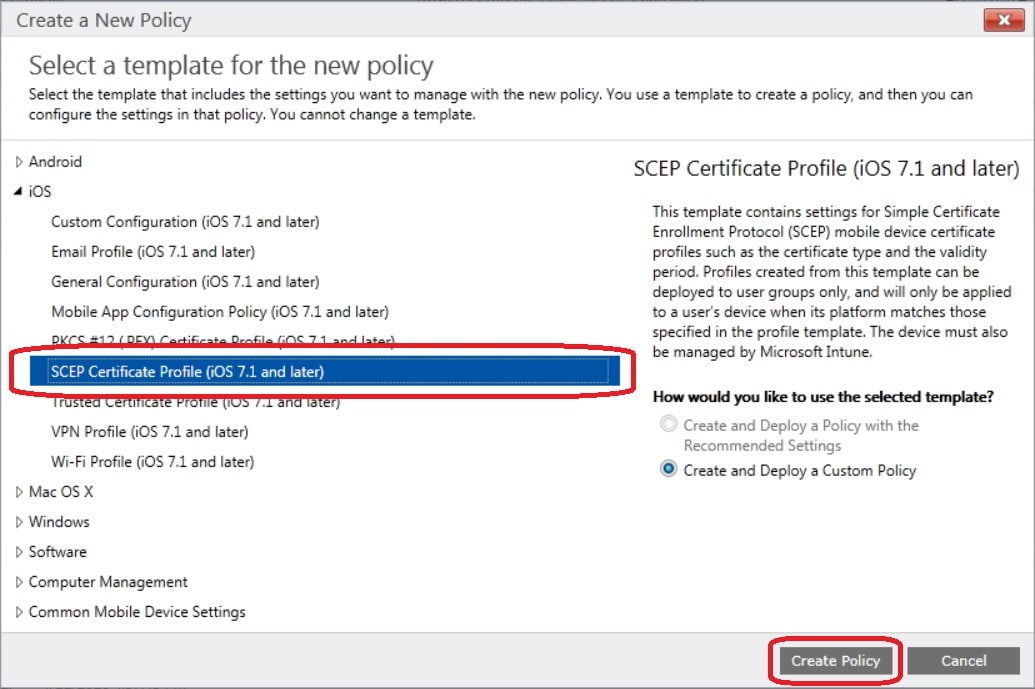
2. Expand iOS, select SCEP Certificate Profile (iOS 7.1 and later) and click Create Policy.
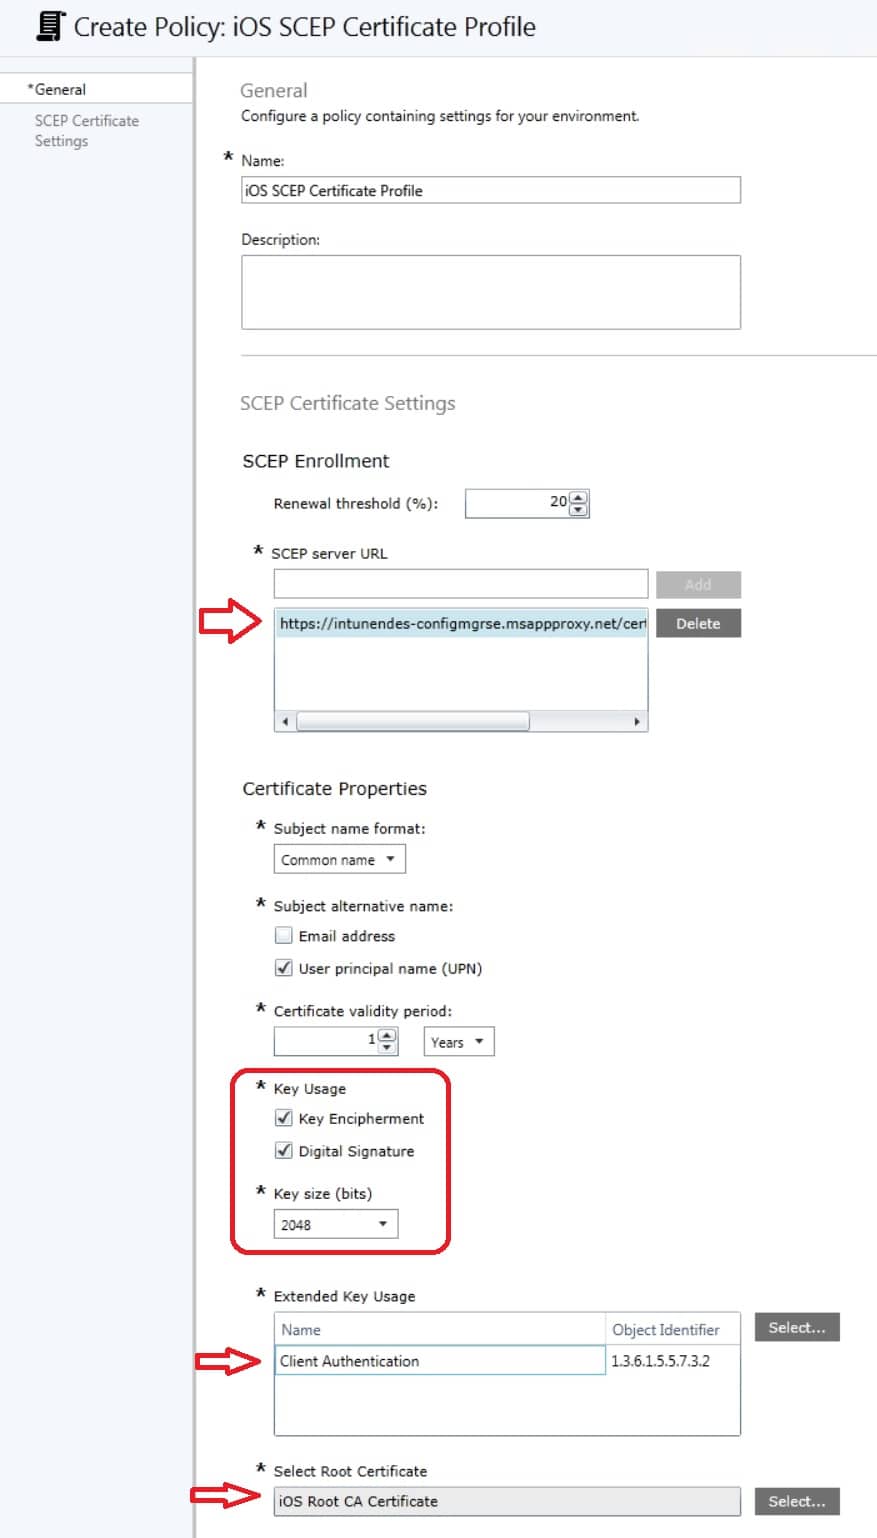
3. Give the policy a name, e.g. iOS SCEP Certificate Profile. Specify the SCEP server URL, where this should be the external URL for your published NDES server, in my case:
https://intunendes-configmgrse.msappproxy.net/certsrv/mscep/mscep.dll
Now, since there’s no generic configuration when it comes to certificates that fits every scenario, I’ve just configured the policy as I see fit to successfully enroll a certificate. However, in your case, you should configure the policy in terms of what requirements you have for the Subject name format, Subject alternative name, Renewal threshold etc. When you’ve configured the policy accordingly, click Save Policy.
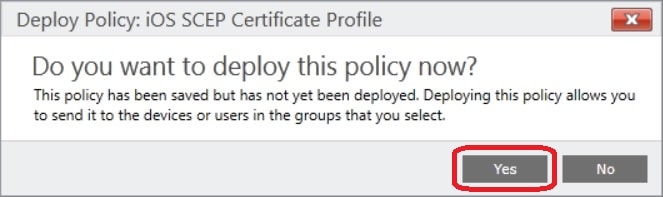
4. Click Yes to deploy the policy.
5. Select a user or device group and click OK. The same goes for this policy as I stated for the Trusted Certificate Profile, targeting users will cause the policy to be enforced quicker than targeting devices.

That’s it! You should now get a certificate enrolled.
Summary
Now with everything setup as we want, it’s time to recap. It’s been a long post, with many moving parts and if any of them have not been configured correctly, you’ll most likely run into issues. Pieter Wigleven wrote an excellent article on the TechNet blogs about this whole scenario can be setup when used with ConfigMgr. In his post there’s a part that describes common errors that you might have run into, or for some reason may experience. So I suggest that you bookmark the following page, for troubleshooting purposes in the future:
https://blogs.technet.com/b/tune_in_to_windows_intune/archive/2014/04/25/part-2-scep-certificate-enrolling-using-configmgr-2012-crp-ndes-and-windows-intune.aspx
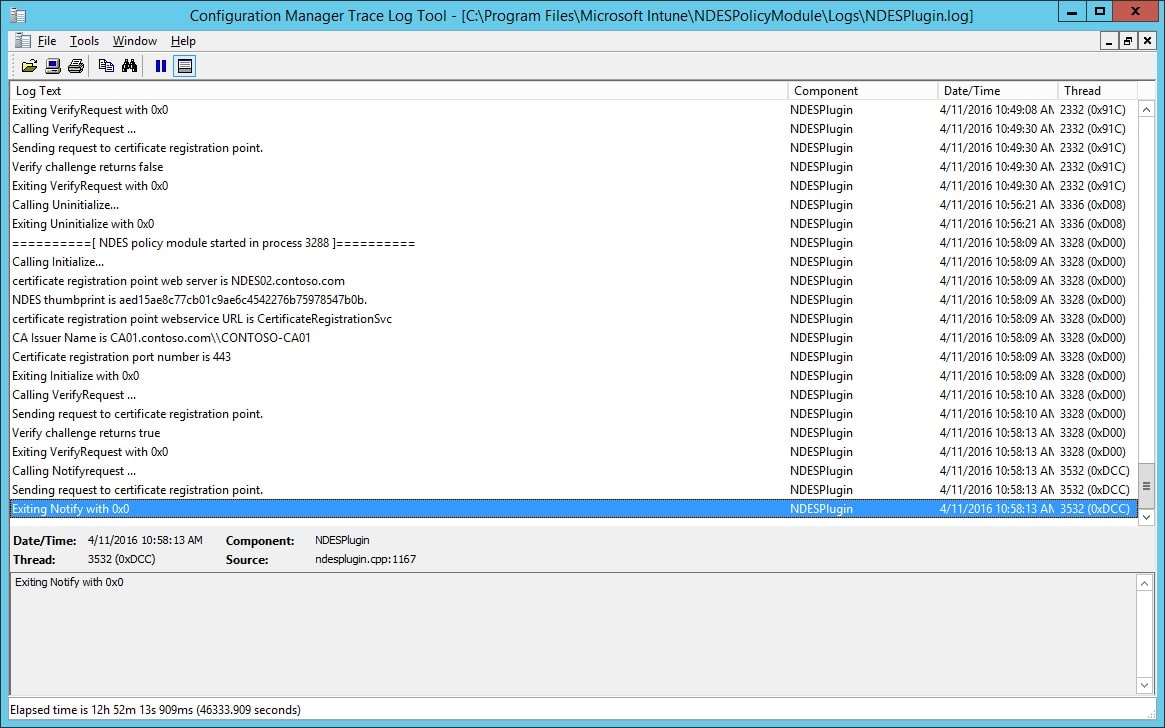
If everything is working as it’s intended, in your NDES server you should have a log file in the following location:
C:\Program Files\Microsoft Intune\NDESPolicyModule\Logs
This log contains messages from the Policy Module installed with the Microsoft Intune Certificate Connector. This should be your first stop when attempting to troubleshoot. In this log you’ll also see if there’s any indication of certificate errors, that you’ve requested on your NDES server.
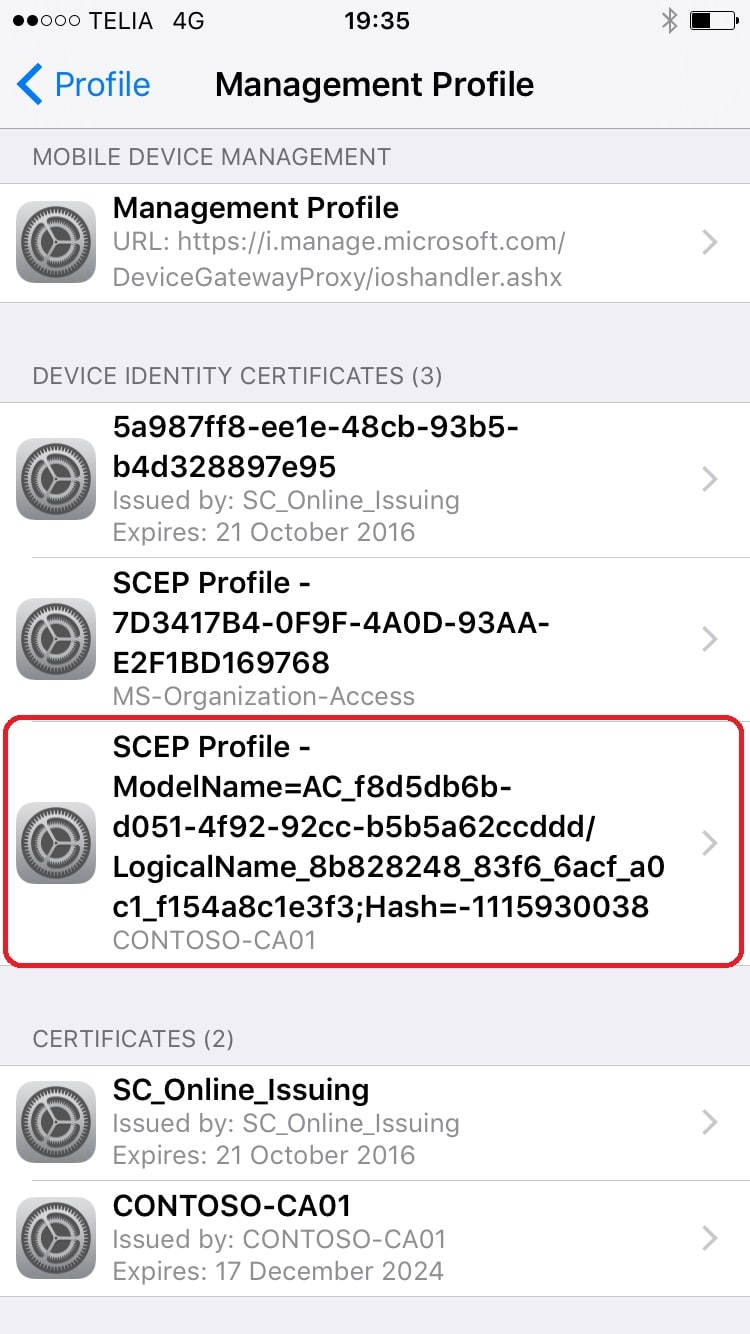
Finally, how can we validate that we indeed did enroll a certificate with the SCEP protocol? Once you’ve refreshed the policy on for instance an iOS device, if you go into the Settings app, select General and then Device Management, you’ll see the Management Profile for Microsoft Intune. Select that and then More Details. In here you’ll see all the certificates associated with this Management Profile. Under Device Identity Certificates, once you’ve successfully enrolled a certificate with a SCEP Certificate Profile from Microsoft Intune, it will be shown here, like in the picture below:
Additionally, you can verify that a certificate has been enrolled to your device by checking the Certificate Authority management console under Issued Certificates, and on your NDES server in the following location:
C:\Program Files\Microsoft Intune\CertificateRequestStatus\Succeed
In the folder above, there should be a CRS file for each certificate issued to your mobile devices (or users). With that said, that’s a wrap of this post. I hope it will help you with preparing your environment for supporting certificate enrollment with the SCEP protocol and deliver a more rich and seamless experience for your users with Microsoft Intune.


Great, great article. Thanks! One correction though, you have the NDES website listed as https://ndes02.contoso.com/certsrv/mscep/mscep.dll when it should be http://ndes02.contoso.com/certsrv/mscep/mscep.dll (http, not https).
Hi,
Is there any requirement to install the web service role on your CA? Can the NDES server request certificates from Active Directory without using the web server component?
Thanks
when installing on server 2016 after installing the intune connector it breaks the SCEP installation. have you tried this on Server 2016
Hello everyone
I have a issue about I don’t have scep profile in management profile in mobile ios system but I have ca certificate in management profile.I don’t sure about configure ndes server i step 7. value in CN=NDES02.contoso.com and DNS = NDES02.contoso.com.It should be internal dns of NDES server? It is same valus?
Configured SCEP for the first time by following your awesome and detailed write up. Thanks for the detailed write up and keep sharing your knowledge bud!
[…] and running in a safe matter. My colleage has written a very long and good post about this here: https://msendpointmgr.com/2016/04/12/prepare-your-environment-for-scep-certificate-enrollment-with-… and I really recommend you to read this post aswell so that you know both methods before you […]
This is great! Wished I saw it sooner like last year would have saved me lots of headaches. 🙂 definitely bookmarked!!
works in a hybrid environment ?
Hi Paulo,
It very much works the same in the hybrid scenario as for the NDES server part. However you’d need to install a CRP on your top-level site and also request certificates for that.
Follow this great article, as it covers the hybrid scenario:
https://blogs.technet.com/b/tune_in_to_windows_intune/archive/2014/04/25/part-2-scep-certificate-enrolling-using-configmgr-2012-crp-ndes-and-windows-intune.aspx
Regards,
Nickolaj
And if I try to do some test in an Azure tenant, it works also ?
Thanks !!!
Not really sure what you’re referring to with “some test in an Azure tenant”.
Regards,
Nickolaj
What I really need is:
We have a client who don’t want retype the e-mail account password on your IOS device every time that it change after 40 days.
It’s possible send this new password using certificate method ?
I heard an Engineer saying that is possible do it.
Thanks!