


In a recent audit with a customer I had a bit of a challenge, determining which devices had which antivirus / antimalware provider installed. In this situation there were at least two security products which had been applied to devices running both internally, managed through Configuration Manager, and externally managed through Intune.
If this was just a Configuration Manager managed environment, a Configuration Baseline with a PowerShell detection method would have done the trick, however due to the mix with Intune managed devices this would not have covered all bases, So I found myself heading back to Endpoint Analytics as a solution for this.
The reason of course is I could query on both sides of the management fence, and then pull back the data through MS Graph in obtain the values I required.
Endpoint Analytics Proactive Remediations
The first thing we need to do of course is enable Endpoint Analytics in our tenant, in this instance I had already done that, however, if you would like a walkthrough of this, check out @jankeskanke’s earlier post here – https://msendpointmgr.com/2020/06/25/endpoint-analytics-proactive-remediations/
With the tenant set up with Endpoint Analytics, and devices checking in, we can go ahead and add a new Proactive Remediation.
It is important to note that whereas the name Proactive Remediations suggests it requires a remediation step, this is not a hard requirement, if you want to use the detection script only, then that is perfectly acceptable.
Let us go through this process:
- Open the Microsoft Endpoint portal by logging onto – https://endpoint.microsoft.com
- Click on Reports
- Click on Endpoint analytics (Preview)
- Click on Proactive remediations
- Click on “+ Create script package”
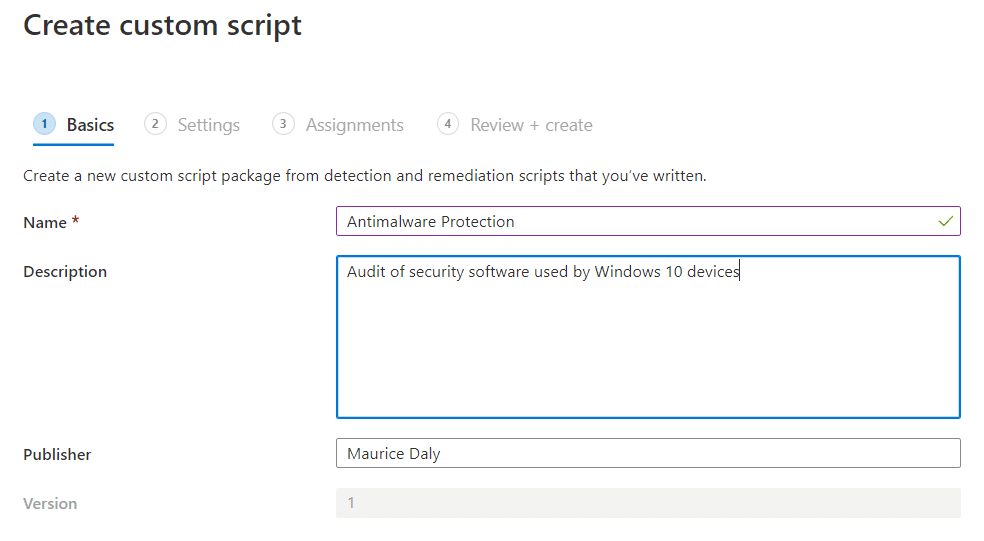
- Provide a name for your script, in this example I am using “Antimalware Protection”
- Click Next
- Now we need to enter the detection script, here its a very simple block of 17 lines which uses the “Root\SecurityCenter2” WMI namespace to obtain the currently assigned antivirus product:
# Obtain Antivirus information from WMI
$AntivirusProduct = Get-WmiObject -Namespace "root\SecurityCenter2" -Query "SELECT * FROM AntiVirusProduct" -ErrorAction 'SilentlyContinue'
# Check for returned values, if null, write output and exit 1
if ($AntiVirusProduct -gt $null) {
	# Check for antivirus display name value, if null, write output and exit 1
	if (-not ([string]::IsNullOrEmpty($($AntivirusProduct.Displayname)))) {
		# Write antivirus product name out for proactive remediations display purposes and set exit success
		Write-Output $AntivirusProduct.displayName
		Exit 0
	} else {
		Write-Output "Antivirus product not found"
		Exit 1
	}
} else {
	Write-Output "Could not query root\SecurityCenter2 WMI namespace"
	Exit 1
}- You should have a screen similar to the one below now:

- All we are left to do now is to assign the script (taking note that the default is to run once a day, but this can be changed to hourly if you want to expedite your data collection)
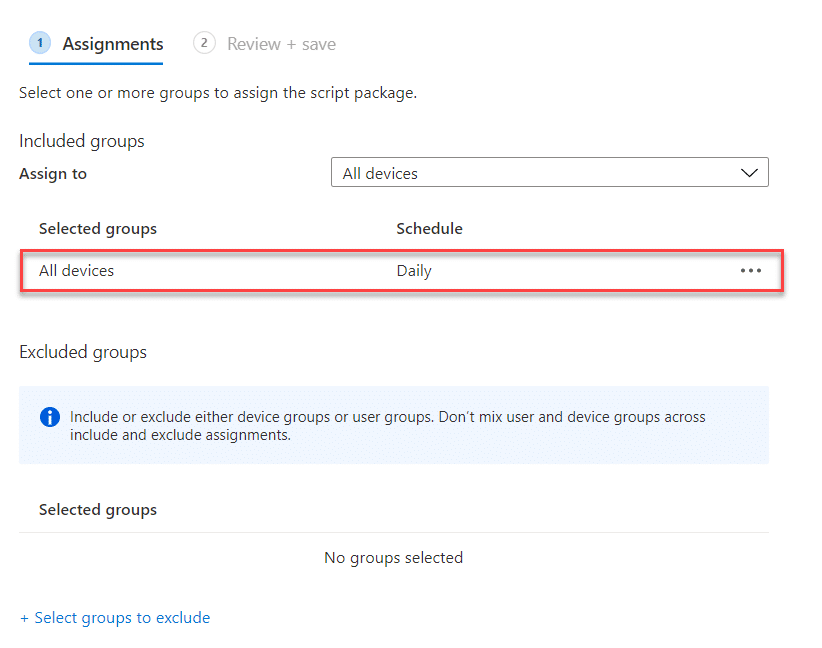
With that process complete, we need to wait for devices to check in, receive the targeted policy and perform the actions within the PowerShell script we included.
Reporting
With the PowerShell script doing its thing on devices, the next step is to harvest the returned product information. We can of course use the web interface for this, but it is a bit cumbersome when dealing with a significant number of devices, and as you have no method of exporting the data, it makes grouping a very manual process.

Using the Graph API though, we can return the same data, but through PowerShell we can manipulate the data and make it more meaningful, or export it so we can use with Excel or PowerBI for those fancier reports.
Let us step through the process below:
- Connect to Microsoft Graph, in this instance I am using the Microsoft Graph PowerShell module, however you can of course go and configure an application and use the Invoke-Restmethod cmdlet
Connect-MSGraph - Read and accept the security prompts for Graph permissions
- Once connected to Graph, you will receive confirmation of your username and tenant ID

- Now we need to set the schema to BETA, by running the following command:
Update-MSGraphEnvironment -SchemaVersion beta - Now we need to obtain the ID for the Proactive Remediation item we configured earlier, this can be done via the following command:
Invoke-MSGraphRequest -HttpMethod GET -Url ‘deviceManagement/deviceHealthScripts’ | Select-Object -ExpandProperty value | Select-Object DisplayName, ID | FT

- With that obtained, we can now put together the query which will return the values we need:
$Details = Invoke-MSGraphRequest -HttpMethod GET -Url ‘deviceManagement/deviceHealthScripts/5da1bba4-72a0-42f1-a956-f6662102c9d6/deviceRunStates?’ - Looking at the first set of values returned, we can pick the headers we want to group by:
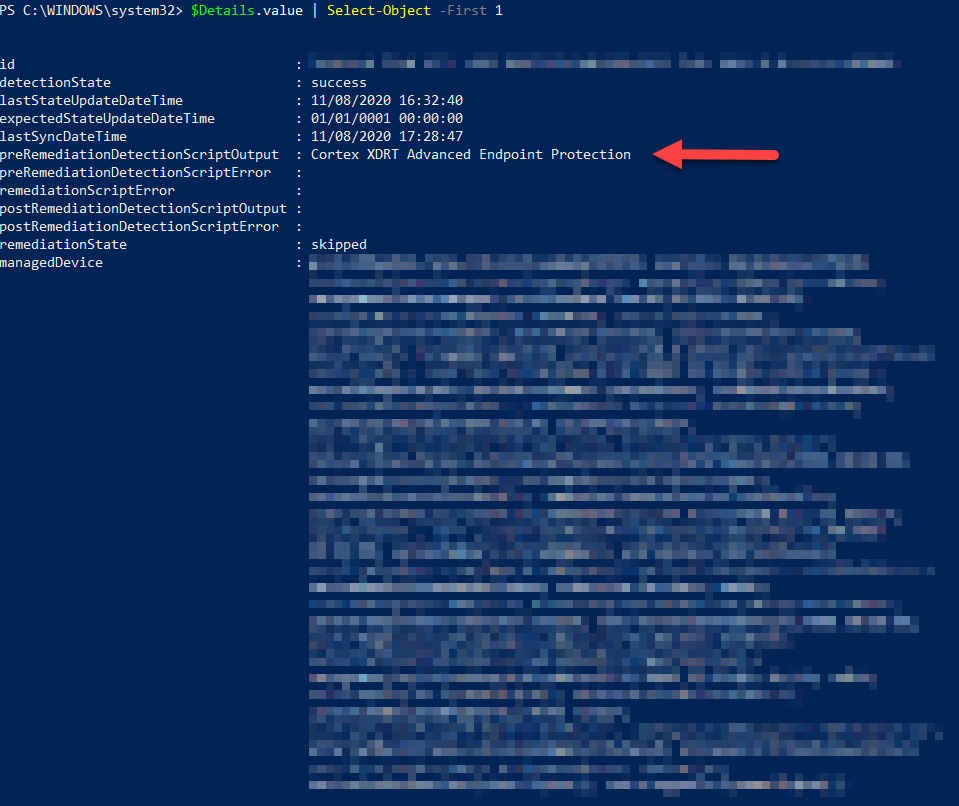
- In this instance I am only concerned about the “preRemediationDetectionScriptOutput” header, which contains the product name identified when the PowerShell detection script as run on the device
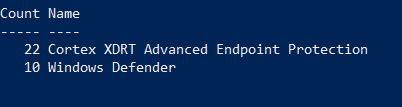
- Running the following command we then have a list of security products discovered and the number of devices they were installed on:
$Details.value | Group-Object preRemediationDetectionScriptOutput | Select-Object Count, Name
Which should give you an output similar to the one below:
- Exporting the values to a CSV of course allows you to then take the detail and make it more presentable for your audit report:
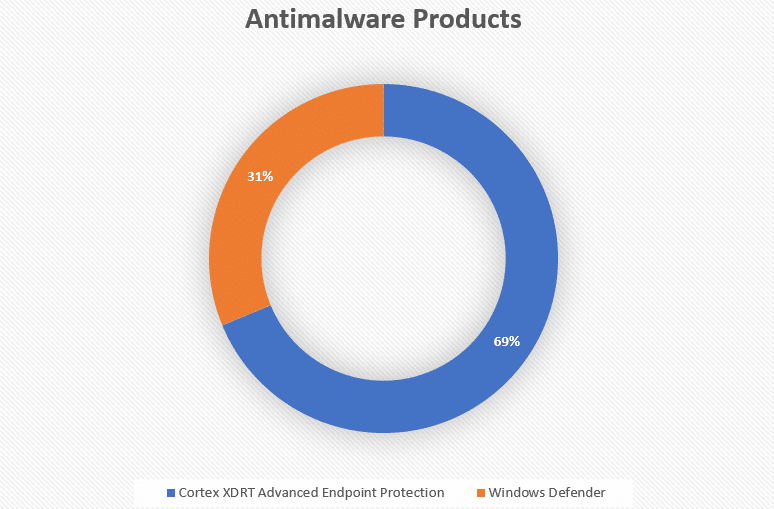
Conclusion
This is just another simple example of how you can leverage the power of Endpoint Analytics, in this case in an audit. Note: the figures shown in the post are not the final figures, as it will take time for machines to check in,
I’m sure there is much more to come from the developers in Microsoft and those in the community who think of interesting uses of this awesome feature.
Thanks for reading.


Add comment