


In this blog post on “Securing SCEP/NDES for Intune with gMSA,” you can learn how to tighten security If you have NDES and SCEP configured for your Intune clients using a regular AD User Account as your NDES Service account.
The NDES service account has the permissions to act as a registration authority.
The NDES service can enroll client identity certificates for any user in the organization. And you should regard this account as a high-value target for any attackers that might gain a foothold inside your perimeter.
This is why I highly recommend that you make it very tough to compromise and abuse this account due to any human error like storing the password in an unsecure location.
This post is a good extension to work done by @nickolaja in the blog series Certificate deployment for mobile devices using Microsoft Intune – Part 1 – Overview
gMSA basics
If you are unfamiliar with the term gMSA; It stands for Group Managed Service Accounts and is a feature that allows you to avoid having to manage the password and lifecycle of your service accounts.
A gMSA’s act much like a computer account. And are tied to specified servers and are not useable by just any server on your network.
Read more about gMSA here: Group Managed Service Accounts Overview | Microsoft Docs
You can get set up for gMSA using the guide Create the Key Distribution Services KDS Root Key | Microsoft Docs.
The rest of this blog post will be expecting you to have already set up a gMSA account on the NDES server and tested that it works using Powershell.
Please notice; that this guide has been tested to work on Windows Server 2019 with a GUI installed.
Replacing the regular NDES service account with a gMSA
Log into the remote desktop of your NDES server to begin securing SCEP/NDES for Intune with gMSA.
To replace the original NDES service account, we first need to take care that the new gMSA account can read the certificates Private keys and has the correct account permissions.
NB: Do NOT remove the existing service account from the ACLs. When everything works as expected, you can go ahead and delete the old service account instead of removing it from all the ACLs.
NDES Private keys permissions
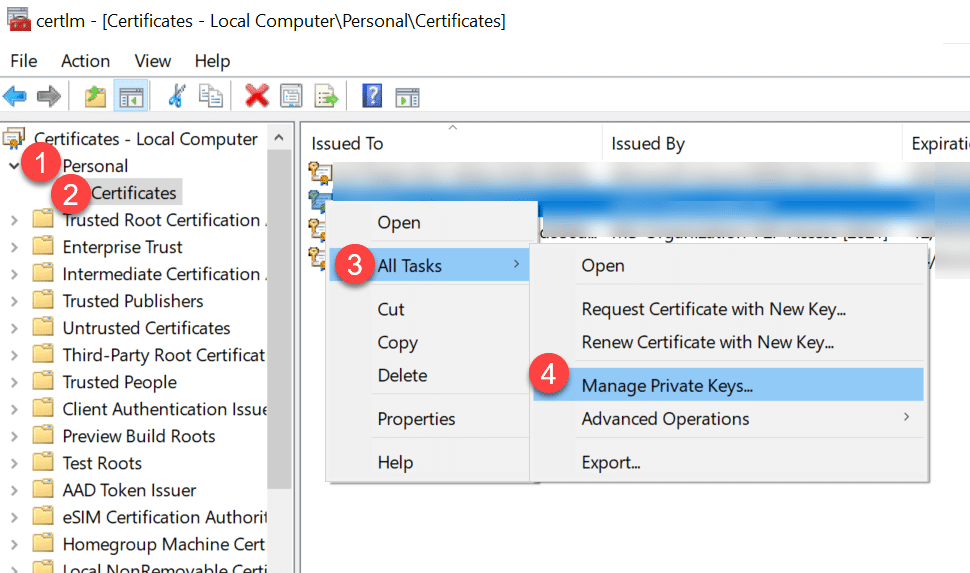
- Start the program “certlm.msc” from “run.”
- Navigate to “Personal” -> “Certificates” and find the NDES Client certificate.
- Right-click on the certificate and chose “All tasks” -> “Manage Private Keys…”
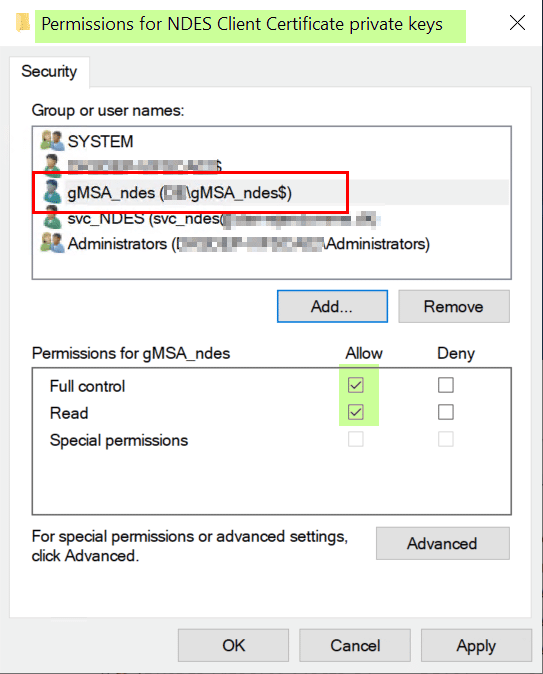
- Add the gMSA account to the Access Control List (ACL).
- Pay attention to the fact that you should add a $ sign at the end of the account name.
- Make sure to adjust the search scope to include Managed Service Accounts.
Click the “Add…” button to find and add the gMSA account.
Add the permissions shown in the below screenshot, mirroring what the existing Service account had.
Now, continue adding the gMSA account and permissions to the rest of the certificates private keys that relate to NDES:
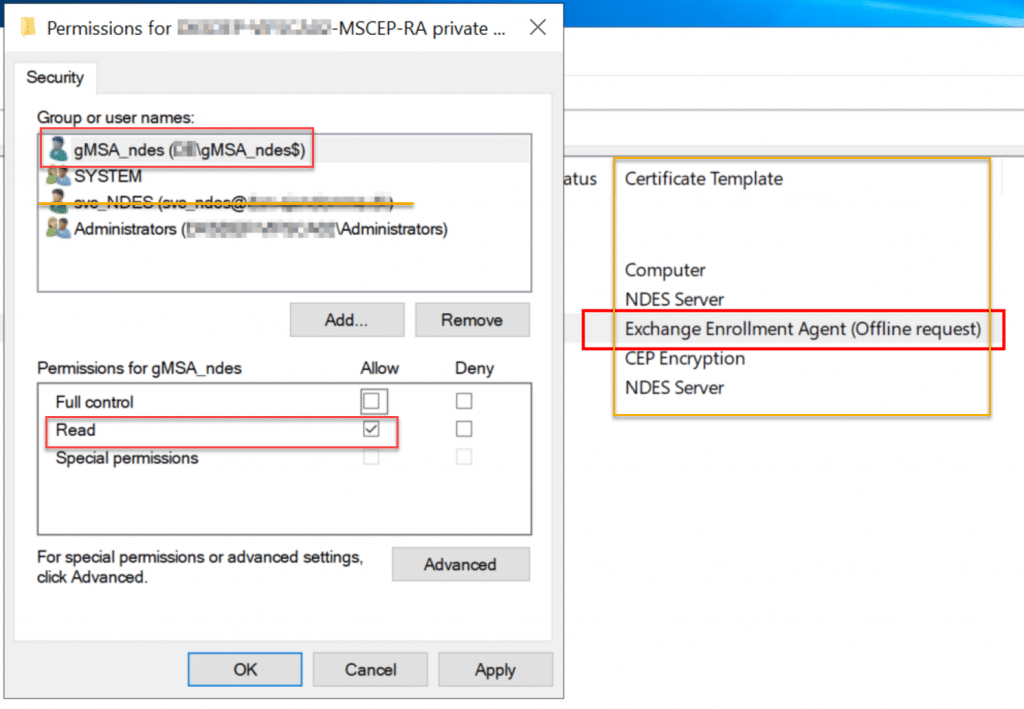
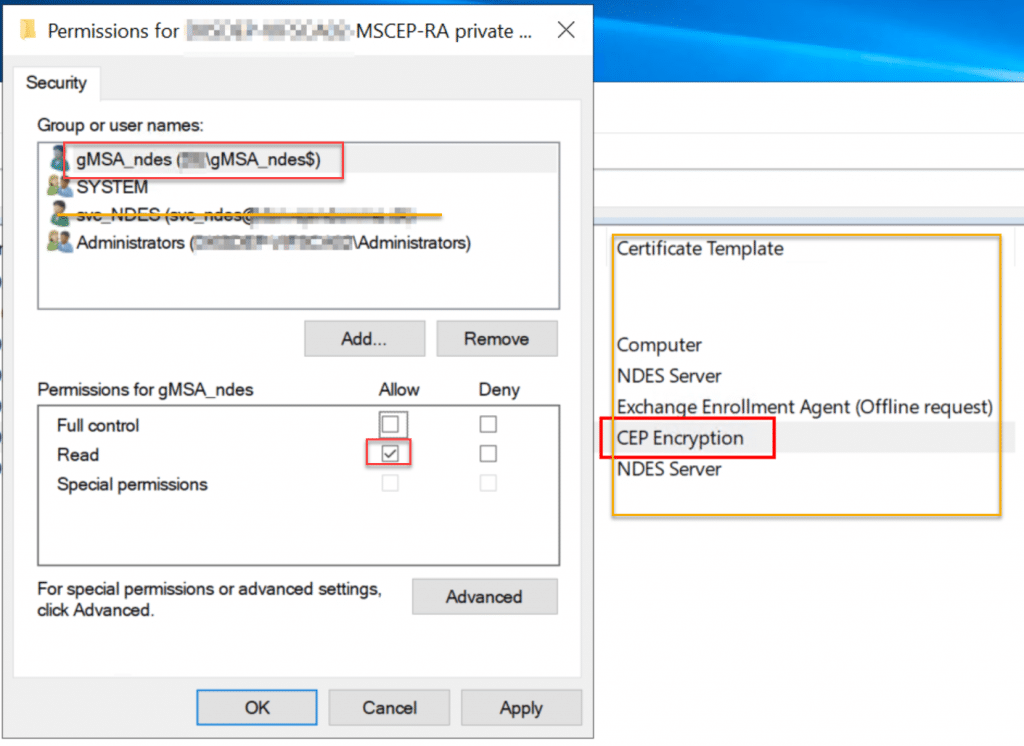
That’s it for the Private Key permissions, now on to the Account permissions…
gMSA account permission on the NDES server
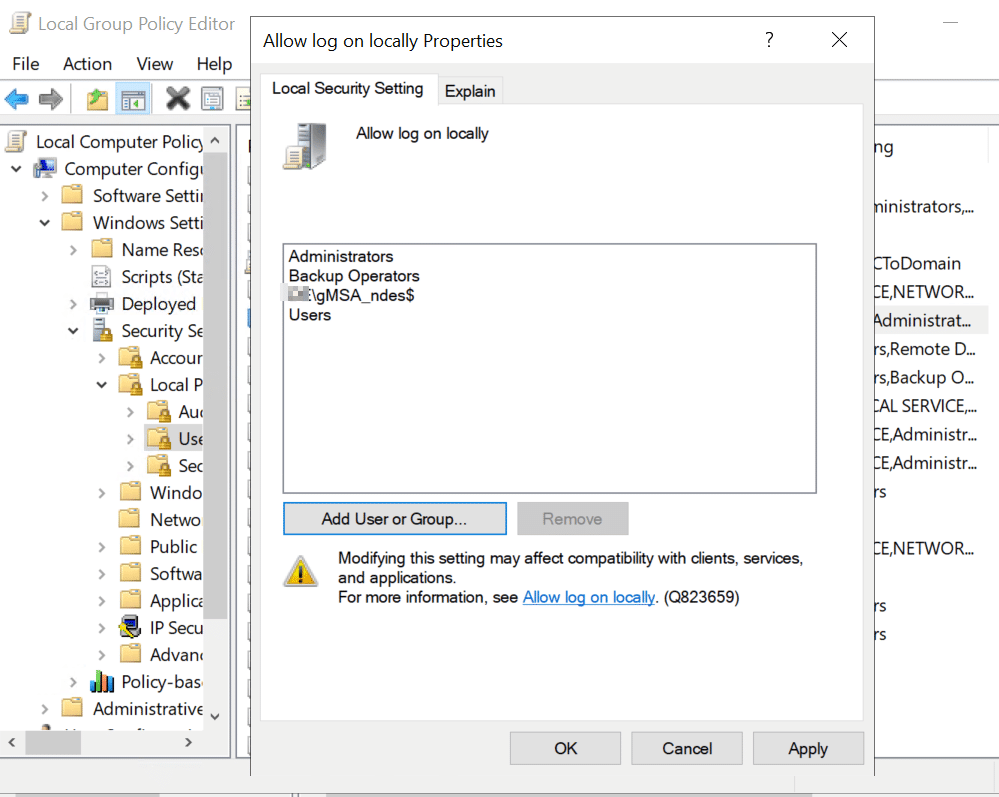
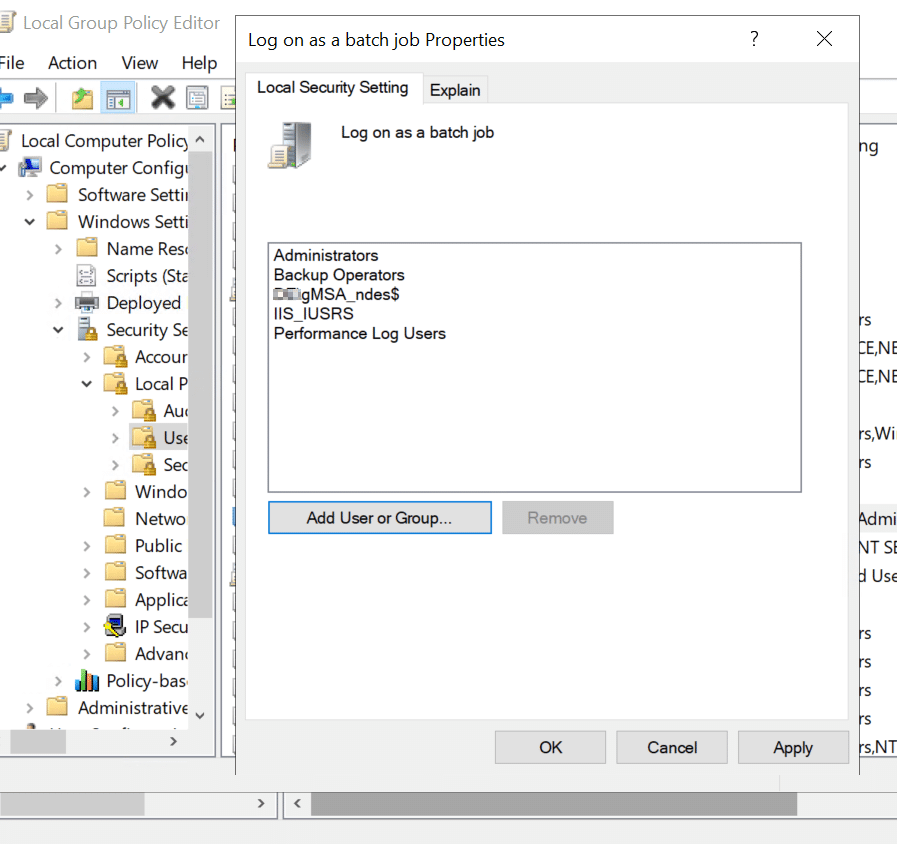
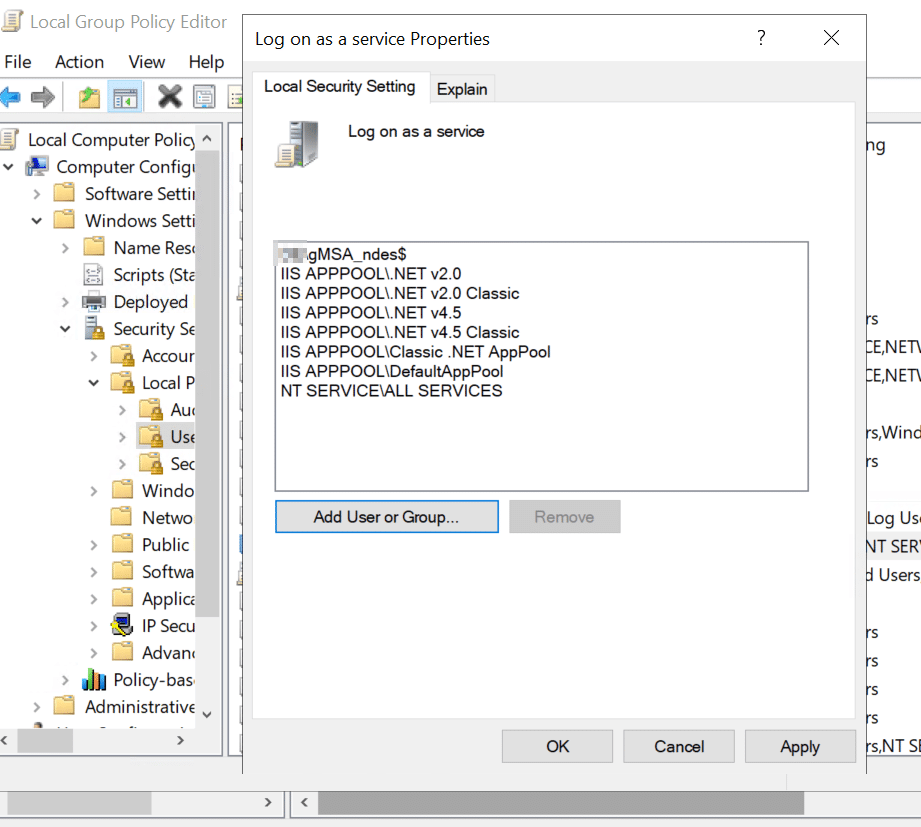
The new gMSA account will need permissions to logon locally, as a batch job, and as a service.
- Start the program “gpedit.msc” from “run” on the NDES server.
- Navigate to “Computer Configuraton” -> “Windows Settings” -> “Security Settings” -> “Local Policies” -> User Rights Assignment.”
- Locate “Allow log on locally”, “Log on as a batch job” and “Log on as a service”
- Modify each of them to include the gMSA account, as shown in the below screenshots.
That’s it for account permissions, now on to the Internet Information server…
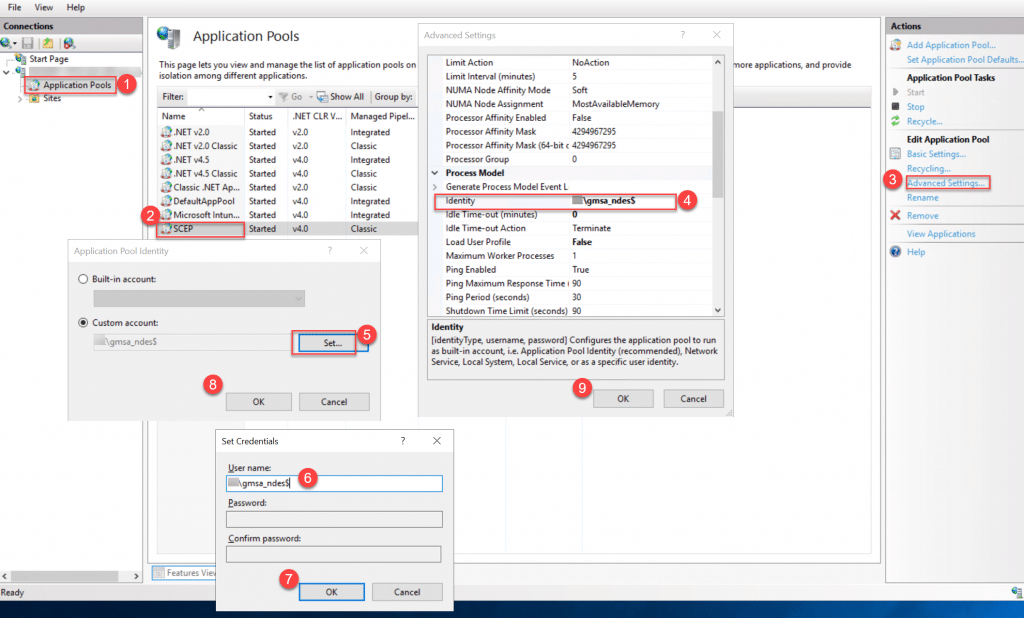
SCEP Application pool identity
As you might remember from having configured NDES, the SCEP service runs on IIS, so we need to replace the service account for the application pool identity in order for this to work.
Notice: Do not attempt to recycle the pool or restart it before you have done the last steps. And please don’t take to long doing them, or the application pool might recycle on it’s own.
Now, this part is where many can and will make mistakes!
So I have made a screenshot outlining the steps of adding the gMSA as the Application Pool identity. But there is a bug here, where no error is displayed if you add the account incorrectly!
You MUST enter the gMSA account with the domains NetBIOS name prefixed.
Example: DOMAIN\gmsa_ndes$
Please pay attention to the fact that the password box gets greyed out as soon as you enter the $ after the account name, this is how gMSA works, and you know that it is supported.
All done!
Now it’s on to the last part, which happens on the Certificate Authority server…
Configuring certificate template permissions for gMSA
The last step is to ensure that your gMSA account can actually request certificates from the Certificate Authority.
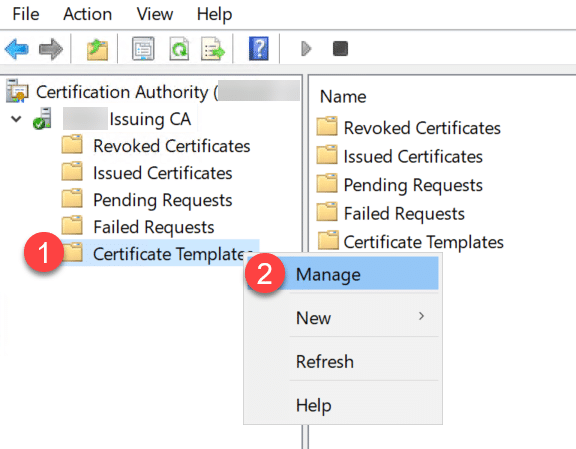
If you don’t have the Certificate Authority snap-in installed on yor NDES server, jump on over to your Issuing CA via Remote desktop, and start the “Certificate Authority” console.
- Right-click on “Certificate Templates”
- Click on “Manage”
Now you need to identify the certificate template you create to distribute to the clients.
If you are in doubt – it is probably the one that the existing service account has permissions to.
Add the gMSA to the ACL and make sure that it get’s the “Enroll” permission.
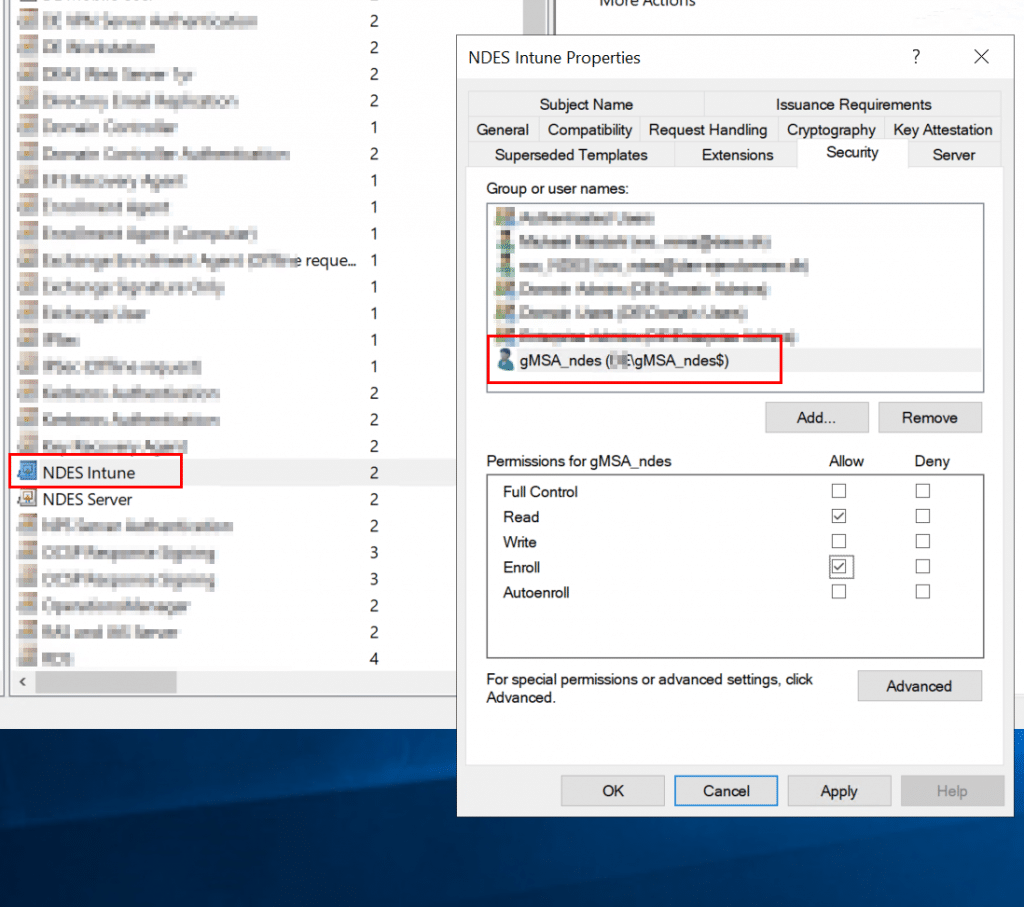
Yay! You are now done with all the certificate template configuration and can continue onward!
Now, go back to the NDES server, and reboot it, to make sure everything gets started properly.
Troubleshooting and notes
During the times I have done this, certain things have come up, and you might benefit from knowing these extra tidbits.
Intune Connector account
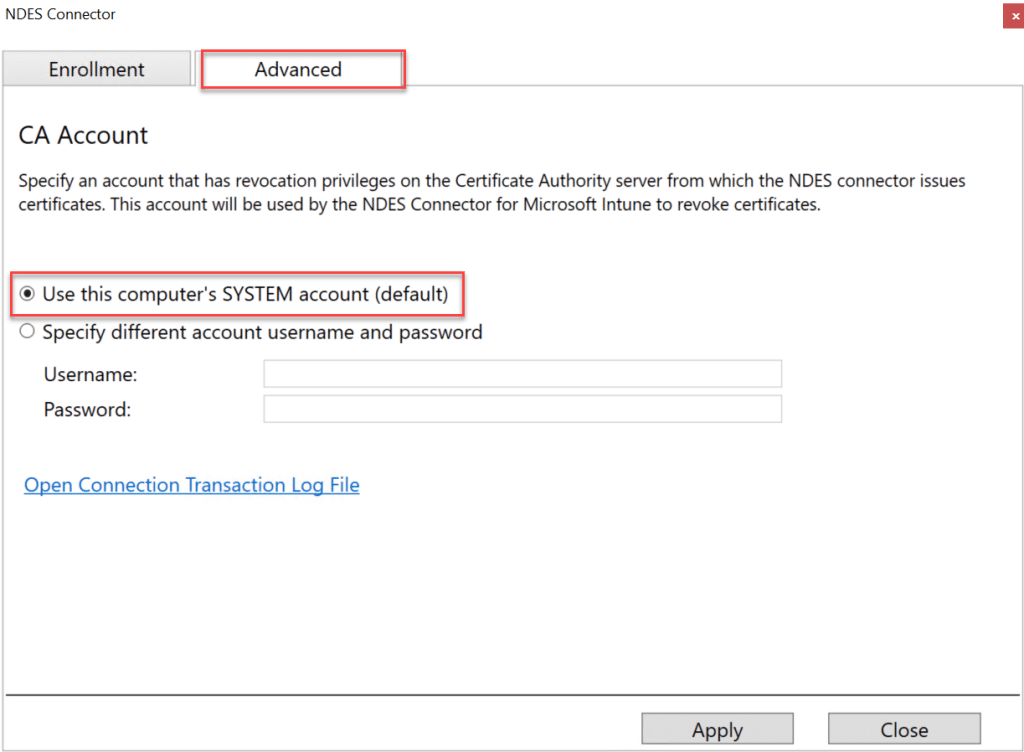
There is an advanced option to add a specific service account during the installation of the Intune connector.
If you did not know this, the account entered in the Intune Connector is used to revoke certificates enrolled by the Registration Authority (NDES), but it is optional.
You should have granted the same account the correct permissions to revoke certificates on the CA during your setup of the Intune SCEP Connector. But the UI for configuring this account, unfortunately, does not support gMSA, so you would have to opt. for a dedicated account just for this or use the system account and add the computer account to the ACL of the accounts allowed to revoke certificates (on the Issuing CA).
You can find the UI for changing this setting in the folder “C:\Program Files\Microsoft Intune\NDESConnectorUI\NDESConnectorUI.exe” on the NDES server.
Windows Server 2012 specific
There is a know issue with doing this on Windows Server 2012. Please refer to this article on a fix for Error 500.0 Internal server error.
On another note: do not use Windows Server 2012 for anything that is public-facing! or anything else for that matter, as it is out of mainstream support.
Troubleshooting guides for Error 503
This is one of the most common errors and usually has to do with permissions. And you need to make sure all permissions are correctly set up and that the gMSA account is typed correctly into the Application Pool, as stated in the above sections.
If you are out of luck, then you can find a good resource for troubleshooting this error in the official Microsoft documentation, which is found at: https://docs.microsoft.com/en-us/troubleshoot/mem/intune/troubleshoot-scep-certificate-device-to-ndes#:~:text=HTTP%20Error%20503,-When%20you%20browse&text=This%20issue%20is%20usually%20because,in%20IIS%20isn%27t%20started.&text=If%20the%20SCEP%20application%20pool,On%20the%20device%2C%20run%20eventvwr.
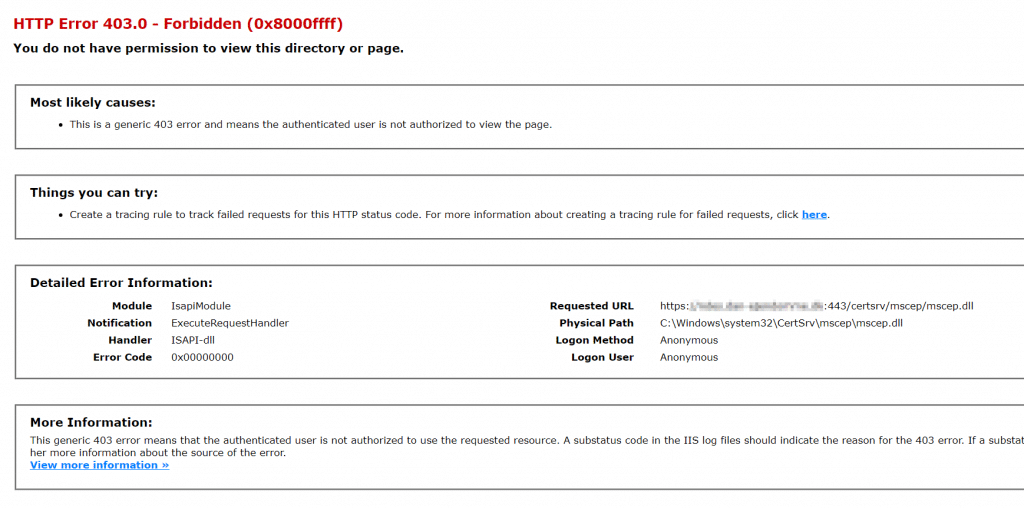
HTTP Error 403.0 – Forbidden (0x8000ffff)
Hey! This error is OK. And indicates that things are actually working with the Intune Connector, and you might just have forgotten that this is how it is supposed to be.
Source materials
Setting up NDES using a Group Managed Service Account (gMSA) – Microsoft Tech Community
Conclusion
You have now completed securing SCEP/NDES for Intune with gMSA and can be proud you did something good for the security of your systems!
As always I hope you will add your comments below and follow on twitter to show your support.


Add comment