


With this post we are releasing our first version of a community solution that gives you similar control over BIOS updates on your Intune managed devices as you today have using our Modern BIOS Management solution for Configuration Manager using the Driver Automation tool.
Intune does provide firmware updates through Windows Update for Business today, and can update your devices with the latest security and functional features within your BIOS firmware. Microsoft Surface devices were of course the first to gain this ability, but now we see additional OEM’s using this capability, although this does depend on support for your model.
The Control Requirement
This is yet another reason for moving out to WUfB for many organizations, however, what if you need granular control over the rollout of these firmware updates? Many organizations have been “bitten” in the past with firmware updates causing issues, such as Windows BitLocker recovery screens, TPM chips vanishing, and a host of other stability issues.
These are of course the exception to the rule, and updating the firmware is something that you simply should be doing from a security point of view. So how can we integrate a control mechanism so that IT admins have greater control over the release of these updates?
Intune BIOS Control
In much the same way that Modern BIOS Management has been a control mechanism used by organizations to provide control and automation of BIOS firmware updates with Configuration Manager, we set out to to deliver the same functionality, but in Microsoft Intune.
With many of you starting to make a shift in how devices are managed, and adoption of Microsoft Intune making huge grounds, we are pleased to announce the BETA release of Intune BIOS Control. This new solution re-uses the Driver Automation Tool, with some additional code to cater for the following;
- Automatic provisioning of Azure Storage
- Storage of BIOS release files in XML stored in Azure
- Integration with OEM PS modules to obtain the latest version information
- Updating of the XML control file based on your selections
How Does It Work?
In conjunction with the automation additions within the DAT, we go back to our “go-to feature” that is Proactive Remediations (this does mean that you will need to be licensed for this feature). Through a detection and remediation script, the solution will then check your machine’s firmware version against the latest BIOS version contained within the Azure hosted control file. Where a newer release is available for your device, the system will then be flagged for remediation, resulting in the following;
- Downloading of the firmware update
- Automatic flashing of the firmware update
- Toast notification issued to the end user (including the ability to snooze)
- Registry based information on the firmware update process
NB: At present, we should now point out that this initial release supports HP only. We are adding additional OEM's and they will come on stream in the coming weeks.
Requirements
In order for use the solution you will need the following;
- Windows Enterprise and Intune is required to use Proactive Remediations
- Windows Client Machines
- HP CMSL module 1.6.3 or higher installed (please refer to our earlier blog post for automation scripts to make this happen – Manage HP Bios Updates with Proactive Remediations – Part 1 (msendpointmgr.com))
- Proactive Remediation PowerShell scripts located here – Intune/Firmware/Intune BIOS Update Control/BIOSUpdate_PR at master · MSEndpointMgr/Intune (github.com)
- Windows Server / Client Admin
- Driver Automation Tool version 7.0.0 or higher – maurice-daly/DriverAutomationTool: Home of the Driver Automation Tool (github.com)
- Azure PS modules (Az.Accounts, Az.Storage, Az.Resources) – Please refer to the Microsoft documentation for these – Install the Azure Az PowerShell module | Microsoft Docs
- HP CMSL module 1.6.3 or higher installed as above
Azure Provisioning Mode
On the “admin” machine, which can either be a regular Windows 1x client or a Windows server, you can start the Driver Automation Tool with a new Azure provisioning switch. This can be used by running the following;
DriverAutomationTool.exe -AzureProvisioning
With the switch called in the command line, you will be prompted to sign in to your Azure subscription;
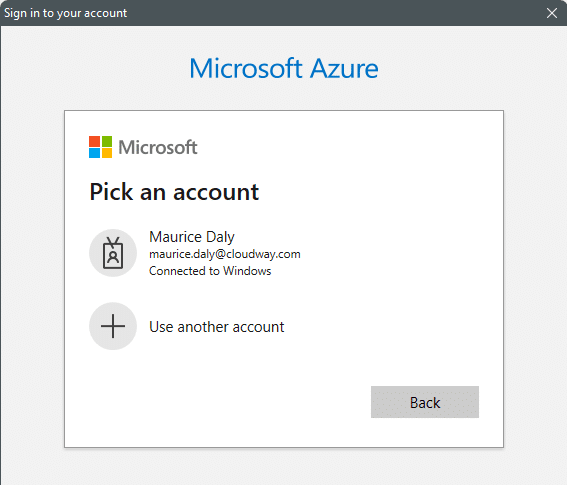
For this operation you will need to have sufficient permissions to create a storage account within the list of resource groups available to your account. The DAT will then launch fully and bring you to a series of drop down list boxes where you can select the following;

- The Azure Subscription to be used
- The Resource Group to be used
- The Azure region location to to be used for the storage account
- Specify an account name to be used
- Validate the account name is available
- Create the storage once verified as available
When the storage account has been created, DAT will stamp registry entries which contain the details of your Azure storage location, along with the security key to be used for uploads;
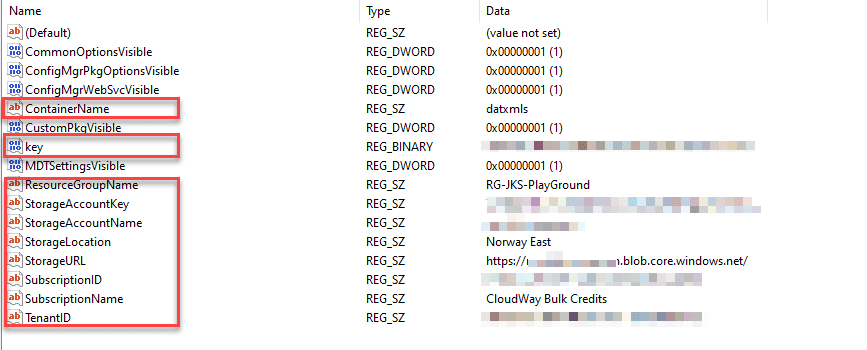
You should see visual confirmation of your storage account in the right hand side of the tool. You can start the process of populating the XML control file, by going back to the “Make & Model Selection” tab and selecting “Intune” as the deployment platform.
Make & Model Selection
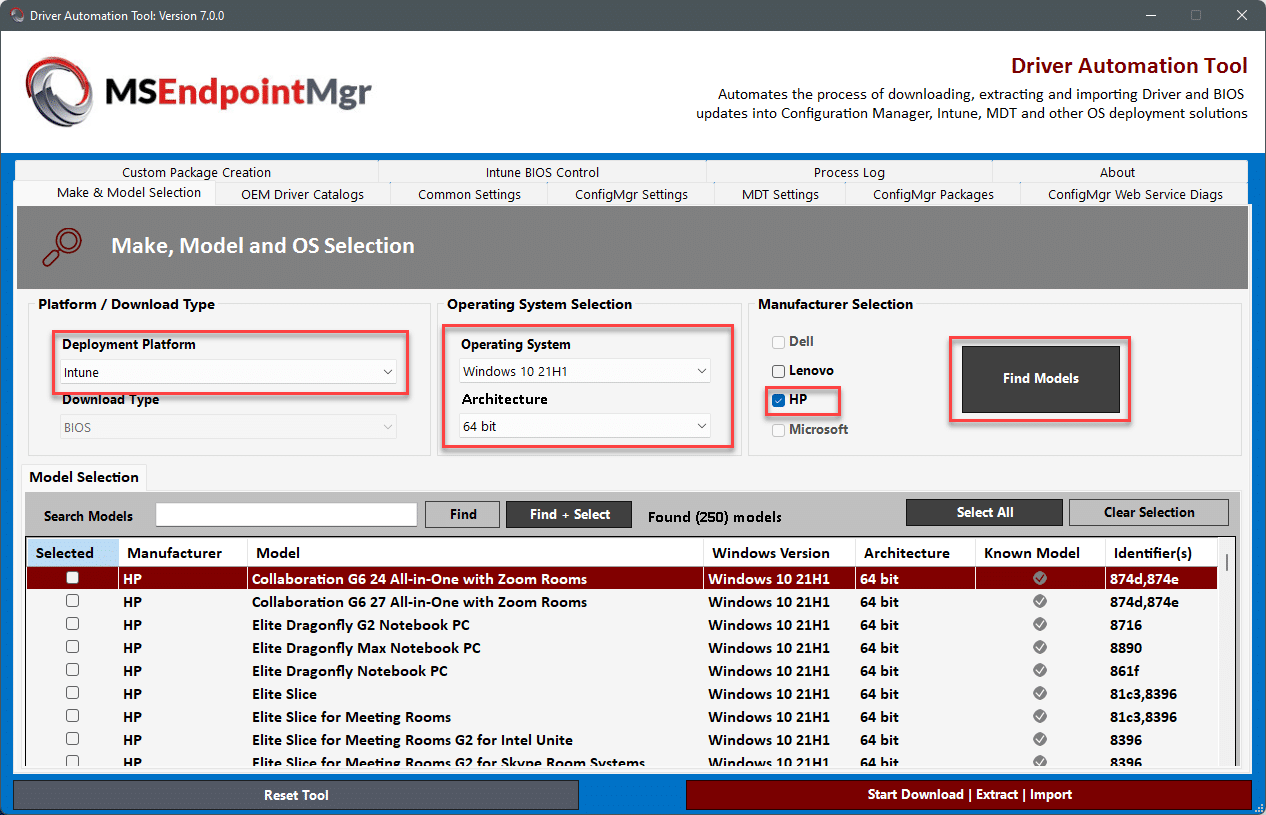
Your provisioning is now done, and all tabs and settings which are not required for this mode will be disabled, and the only download type at present will be set to “BIOS”. Due to the way in which the DAT obtains make and model information from OEM feeds, you will still be required to select the OS, before clicking on “Find Models”
For those of you familiar with the tool, you might see something unexpected happen when you click on the “Start Download | Extract | Import” button. A process will now call the OEM specific detection method, in this case the HP method will not download the actual firmware updates, as these will be downloaded at the client end.
Once your models have been processed, you will be brought to the “Intune BIOS Control” page, where your list, along with any other models already stored in the Azure XML control file will be displayed;

Push Production / Latest
On the Intune BIOS Control settings, you will now see the latest BIOS version from the OEM, along with the version currently in production. At this point if you wish to push the latest OEM version, you simply select the models you want to update and then hit the “Push Latest To Production” button.
If you are adding models, the latest version information will be obtained from the OEM feed automatically when you hit the “Push Production Update(s)” button, with the new model selected. In the case of both, the entire XML is always re-written to your Azure storage location.
This should look like the below;

Proactive Remediations
With the XML control file in place, you can now configure the proactive remediation scripts for detection and remediation. Within the code of both of the scripts, you will need to edit the “< TO BE SET >” values, substituting your storage, file locations, and BIOS password (if required);
$Script:ToastSettings = @{
    LogoImageUri = "<TO BE SET>"
    HeroImageUri = "<TO BE SET>"
    LogoImage = "$ToastMediafolder\ToastLogoImage.png"
    HeroImage = "$ToastMediafolder\ToastHeroImage.png"
    AttributionText = "Bios Update Notification"
    HeaderText = "It is time to update your BIOS!"
    TitleText = "Firmware update needed!"
    BodyText1 = "For security reasons it is important that the firmware on your machine is up to date. This update requires a reboot of your device"
    BodyText2 = "Please save your work and restart your device today. Thank you in advance."
    ActionButtonContent = "Restart Now"
}
$Script:Scenario = 'reminder' # <!-- Possible values are: reminder | short | long | alarm
# Define BIOS Password
$Script:BIOSPswd = $null
# Define path to DAT provisioned XML - must be set
$Script:DATUri = "<TO BE SET>"- Logo Image Uri : Full uri path to the “Logo” image in the Toast Notification
- Hero Image Uri: Full uri path to the “Hero” image in the Toast Notification
- DatUri: The full uri path to the XML created in the provisioning step
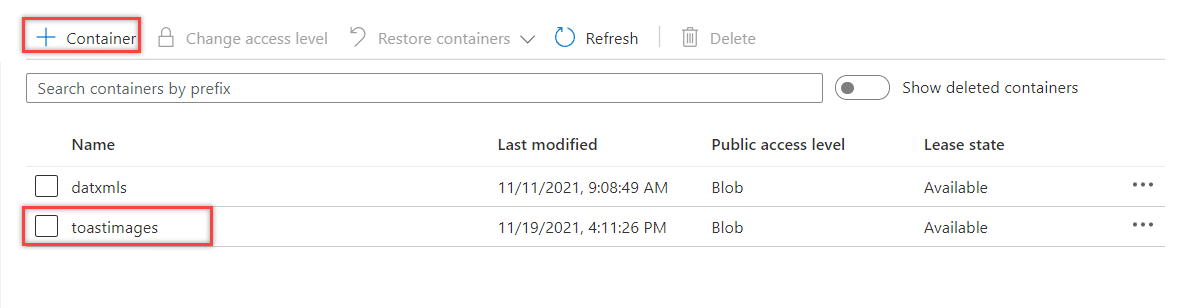
For the images you can simply create a new folder in the same azure storage account and upload your files there.
Configure the proactive remediation as per the below screenshot and then target your devices and set a schedule to run.
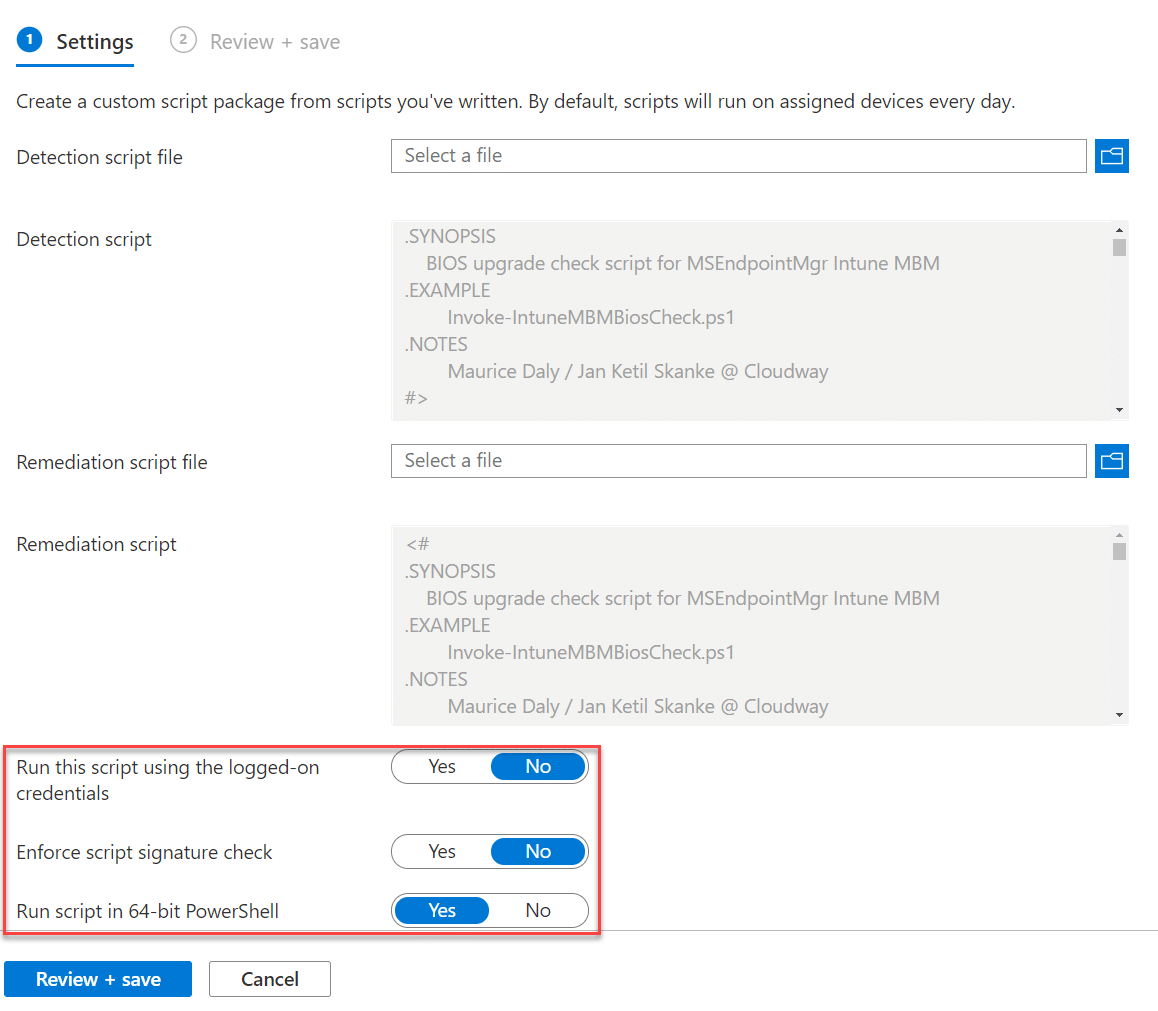
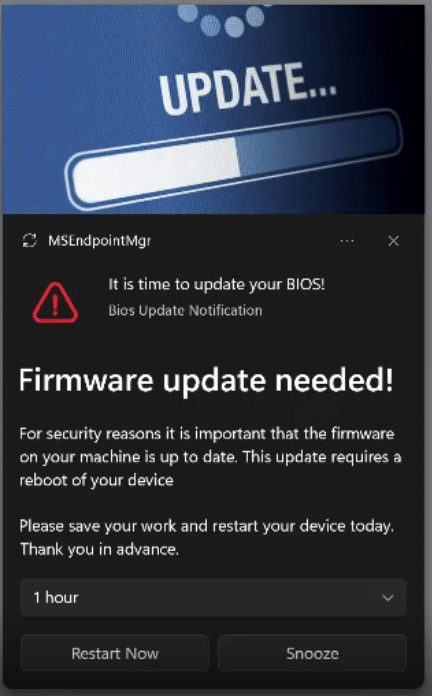
End User Experience
Now how does this look for the end user? When the PR is initiated the code will check the current version against the controlled version, where the latter is newer, the remediation script will kick in and present the user with a toast notification similar to the one below;
Below is a video of the entire process;
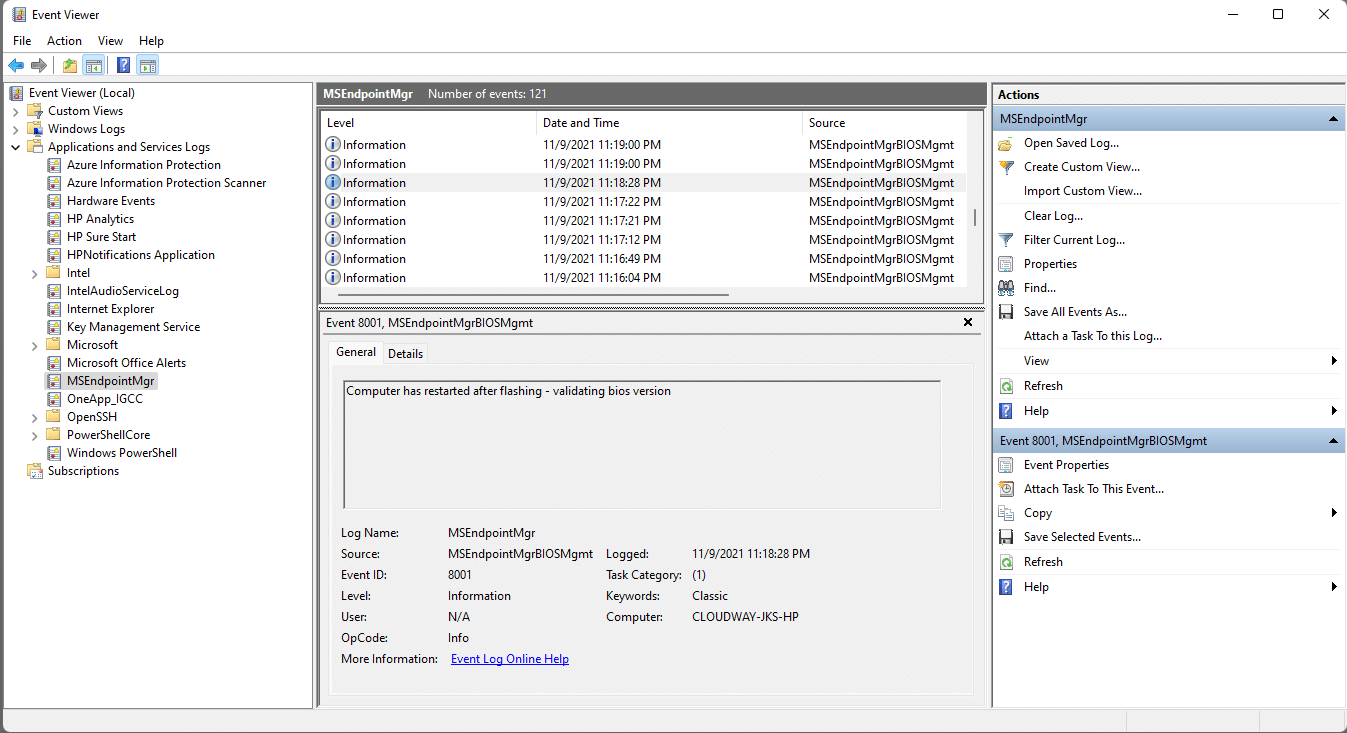
Within the event viewer on the client machine, you will also get a verbose output of the entire process;
Reporting
A full Azure log analytics based reporting workbook will be released in the coming days, for now here is a sample screenshot of how this will look (obviously you can change your logo);
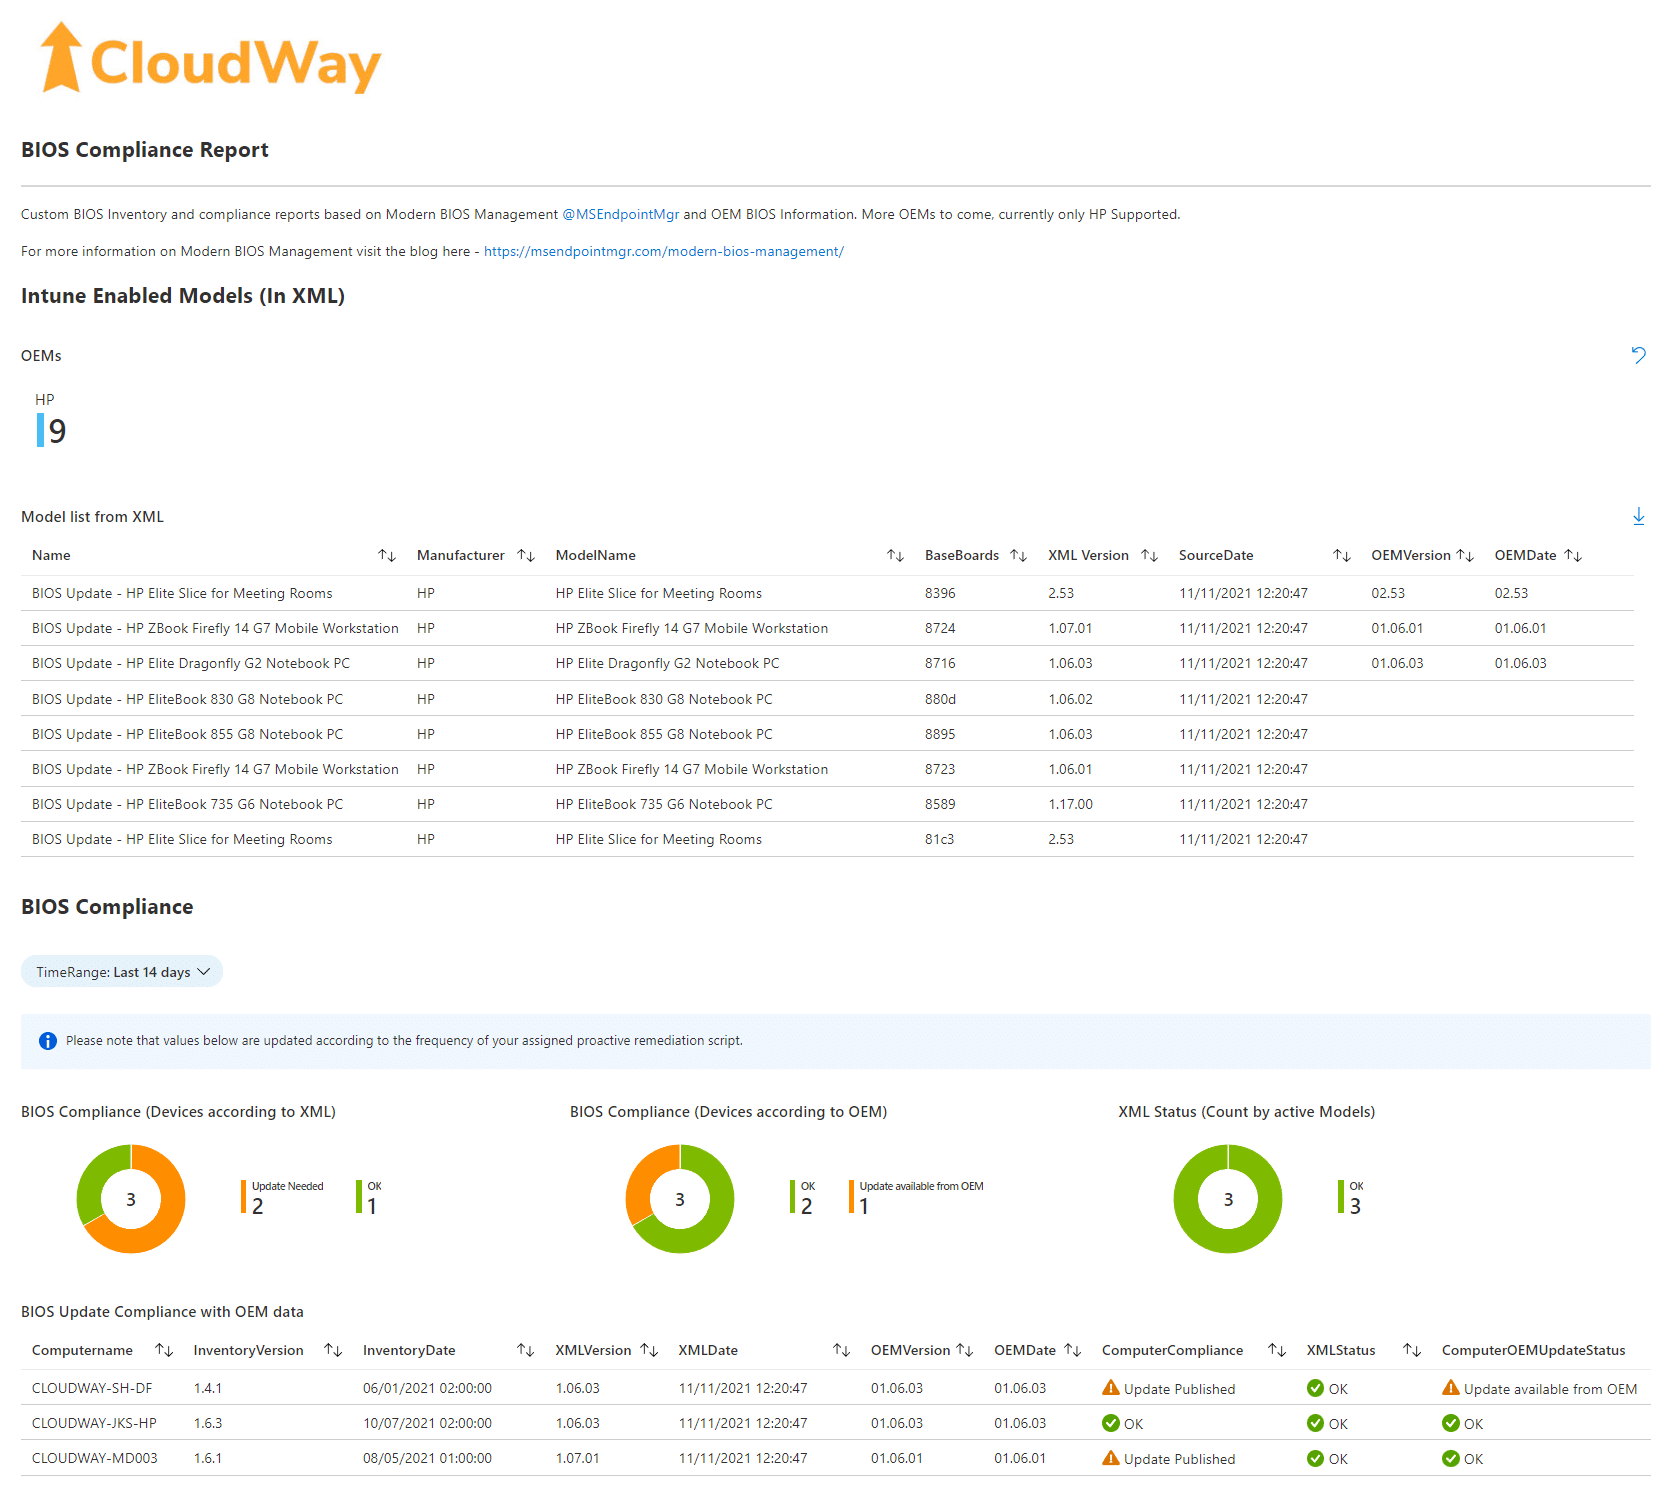
Note that there will be additional requirements for the reporting feature due to custom hardware inventory collection.
Feedback
As this is an initial “beta” release of the solution, we are looking for your feedback on the solution and any optimizations you might like to see. Feel free to leave comments here on the blog, or on Github if you find any bugs or have other feedback.
NB: In the first BETA release we only support HP. Support for Lenovo and Dell is coming soon.


Add comment