


Self-Service Account Recovery (SSAR) is finally here for Microsoft Entra ID! Are you planning or running a passwordless tenant and wondering what to do when your users lose access to all their authentication methods? Well, wonder no more – Microsoft has delivered what many of us have been waiting for! (Especially those of us that have had to knick the ol’ SSPR service to go 100% Passkey)
Quick Facts: Self-Service Account Recovery (Click to expand)
- Feature Name
- Self-Service Account Recovery (SSAR)
- Status
- Public Preview (as of December 2025)
- License Required
- Microsoft Entra ID P1 or higher
- Supported IDV Providers
- AU10TIX, IDEMIA, TrueCredential (LexisNexis)
- Dependencies
- Verified ID, Face Check, TAP policy
- Recovery URL for users
- https://aka.ms/mfasetup
So what exactly is SSAR?
Definition: Self-Service Account Recovery (SSAR) is a Microsoft Entra ID feature that enables users to regain access to their accounts through government ID verification and biometric liveness checks when they’ve lost all authentication methods.
Self-Service Account Recovery (SSAR) is Microsoft’s answer to a long-standing problem in identity management: what to do when someone loses everything. Phone stolen? Authenticator wiped? Hardware token gone missing? Your pet ostrich swallowed the FIDO key… In the passwordless world, this used to mean a trip to the welpdesk, where someone would have to somehow verify you are who you say you are – often using nothing more than “security questions” or a gut feeling (and they really had better things to do that day).
SSAR changes the game entirely. Instead of relying on human judgment alone (which attackers love to exploit through social engineering), users can now verify their identity using government-issued ID and biometric liveness checks that is AI assisted. It’s like SSPR, but for the modern passwordless era – and it actually seems pretty secure (Always remember: Hackers are two steps ahead!).
Why should you care?
- Self-Service Account Recovery brings SSPR-like functionality to the passwordless world.
- Your helpdesk will thank you (fewer “My ostrich ate my laptop, phone and fido key” tickets).
- Social engineering attacks on account recovery are eliminated-ish.
- Users can recover access on their own if they have proper government ID available.
- It’s the missing piece for true passwordless adoption IMHO.
If you’re already running Verified ID and Face Check in your tenant (perhaps for some cool on-boarding solution), you’re halfway there. If not… well, keep reading! and I’ll walk you through the entire setup.
Prerequisites
Before we dive into configuring Self-Service Account Recovery, make sure you have the following in place:
- Microsoft Entra ID P1 license (or higher).
- An Azure subscription (for the IDV provider billing).
- Verified ID enabled and configured in your tenant.
- Face Check add-on enabled with a validated Azure subscription.
- Authentication Administrator role in Microsoft Entra.
- Contributor or Billing Administrator role for your Azure subscription.
- And I think you should also have migrated to the new authentication methods policy controls. 😀
The Solution
I’ll walk you through setting up SSAR with AU10TIX as the identity verification provider. We’ll scope it to a specific group of users first (always a good idea with preview features), and then test the recovery flow.
Step 1: Verify that Verified ID and Face Check are Enabled
Before configuring SSAR, we need to make sure the underlying services are ready.
- Sign in to the Microsoft Entra admin center as a Global Administrator.
- Navigate to Verified ID in the menu.
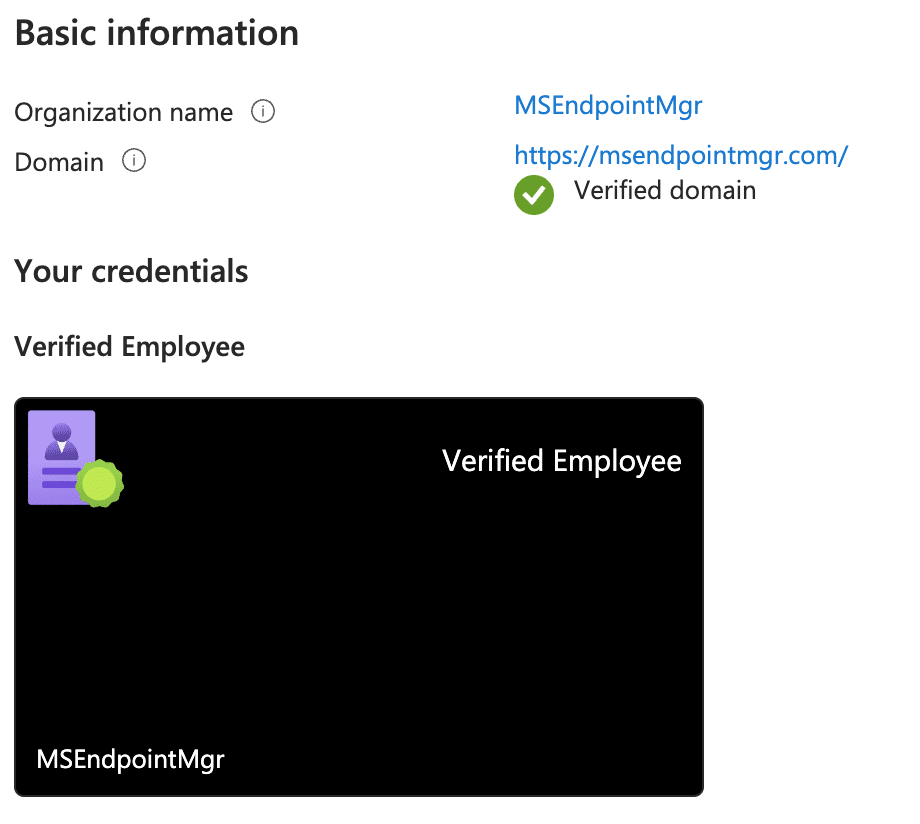
- Under Overview, verify that you have configured something like the image below. Else you will see the option for Quick Setup, where you click the get started button and follow the wizard till done. And you will see something like this:
- Now just scroll down a bit and activate the Face Check add-on if not already done.
- Verify that Face Check shows a validated Azure subscription.
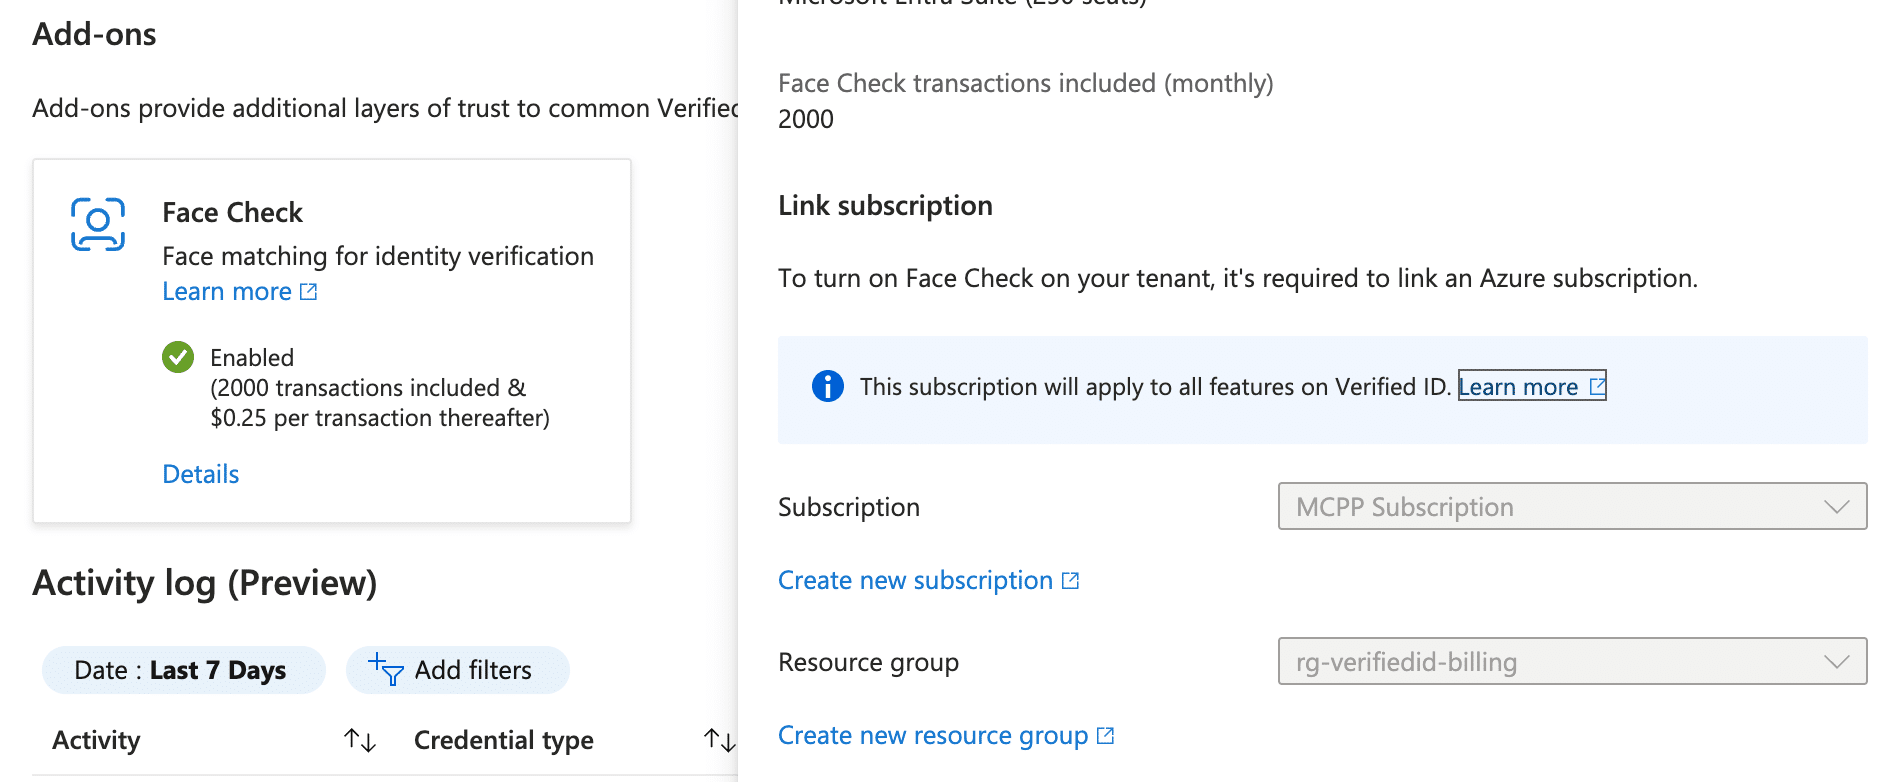
If either of these are not configured, you’ll need to set them up first. Face Check requires linking an Azure subscription for billing purposes (You get like a bunch of free credits, so worry not about your finances at this point).
I am purposefully not going into minute details on how to setup these things, as it is very straightforward to just follow the wizards that are built-in. And go with all the defaults.
Step 2: Create a Security Group for SSAR
I prefer to scope new preview features to a controlled group of users before rolling out to the masses. And for SSAR you are forced to assign to a group anyways… Let’s create an ACL group for this purpose.
- In the Microsoft Entra admin center, navigate to Identity > Groups > All groups.
- Click New group.
- Configure the group as follows:
- Group type: Security
- Group name:
acl_ssar_enabled(I like the acl abbreviation from my days as an AD admin, but group naming is entirely up to you!) - Group description: Users enabled for Self-Service Account Recovery
- Membership type: Assigned (or Dynamic if you prefer)
- Add your test users to the group
- These should be real users who have completed actual sign-ins, else you will have to do some fake sign-ins before testing. also important to note, you should have a government ID for these users, so don’t be faking it soo much in your tests. Since the service will match on First name and Last name. Meaning that you now have to fire all people that have the same first and last name. I would personally go with the Last-In First-Out rule.
(For those without sarcasm, I must explain that I am kidding. But the duplicate name thing is a real issue. You can’t have people with the same first and last name in your assignment group. period)
- These should be real users who have completed actual sign-ins, else you will have to do some fake sign-ins before testing. also important to note, you should have a government ID for these users, so don’t be faking it soo much in your tests. Since the service will match on First name and Last name. Meaning that you now have to fire all people that have the same first and last name. I would personally go with the Last-In First-Out rule.
- Click Create.
Step 3: Configure Account Recovery
Now for the main event – let’s set up SSAR.
- In the Microsoft Entra admin center, navigate to Entra ID > Account recovery (Preview).
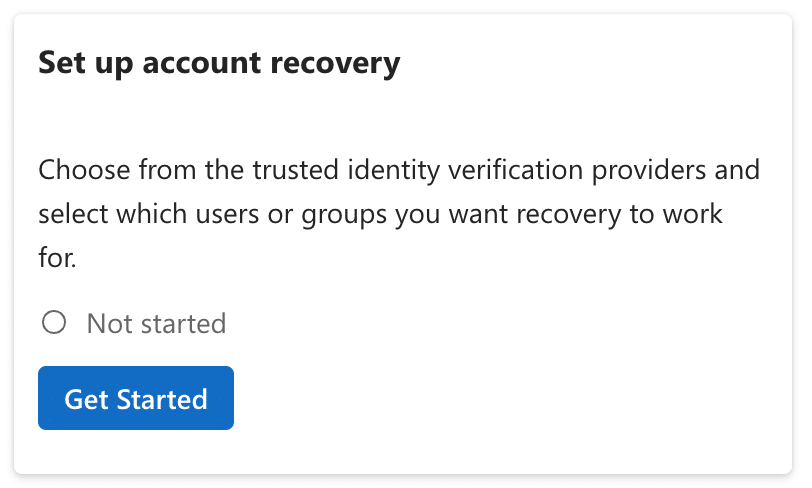
- Under Set up account recovery, click Get started.
- Under Choose a recovery mode, select Production then click Next.
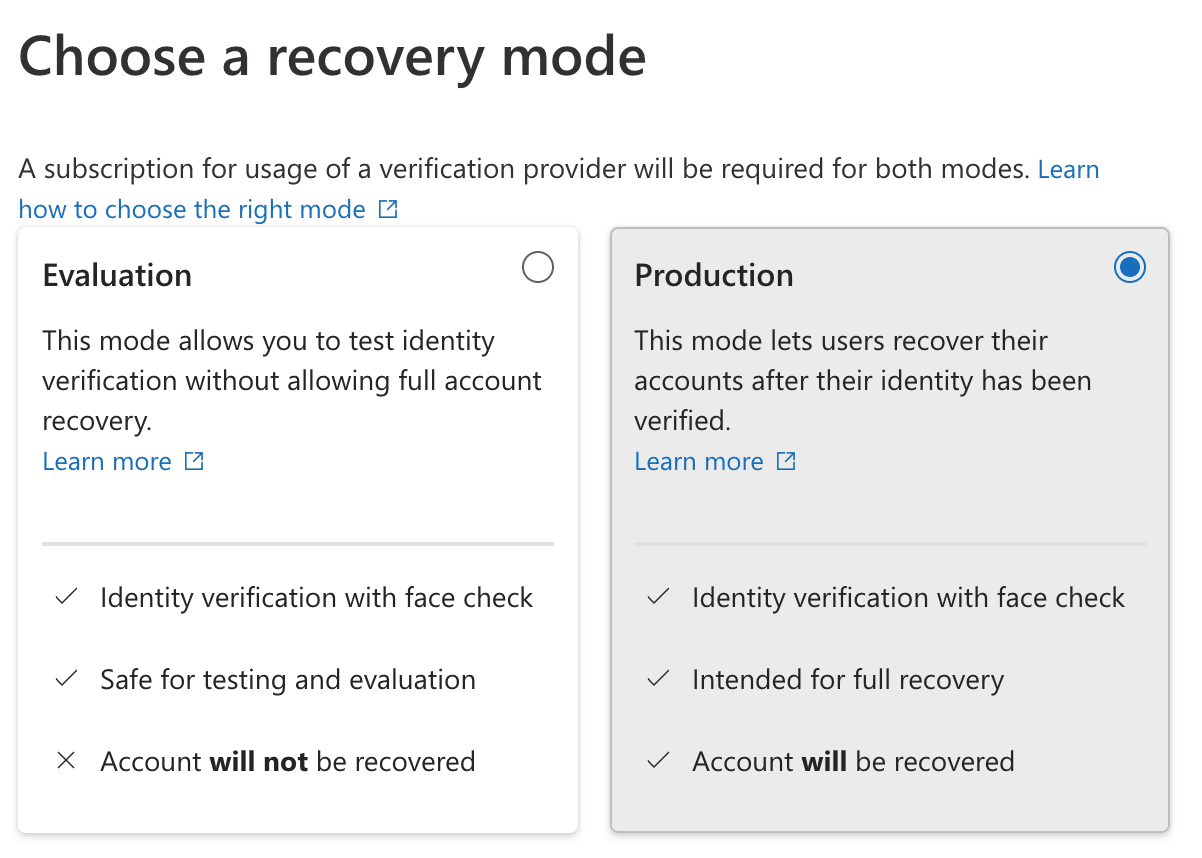
- Note: Evaluation mode lets users test the identity verification flow but won’t actually recover accounts. Since we want the full experience, we’re going straight to Production – but with a scoped group, so don’t worry bruh!
- Under User group selection, click Select groups.
- Search for and select your
acl_ssar_enabledgroup. 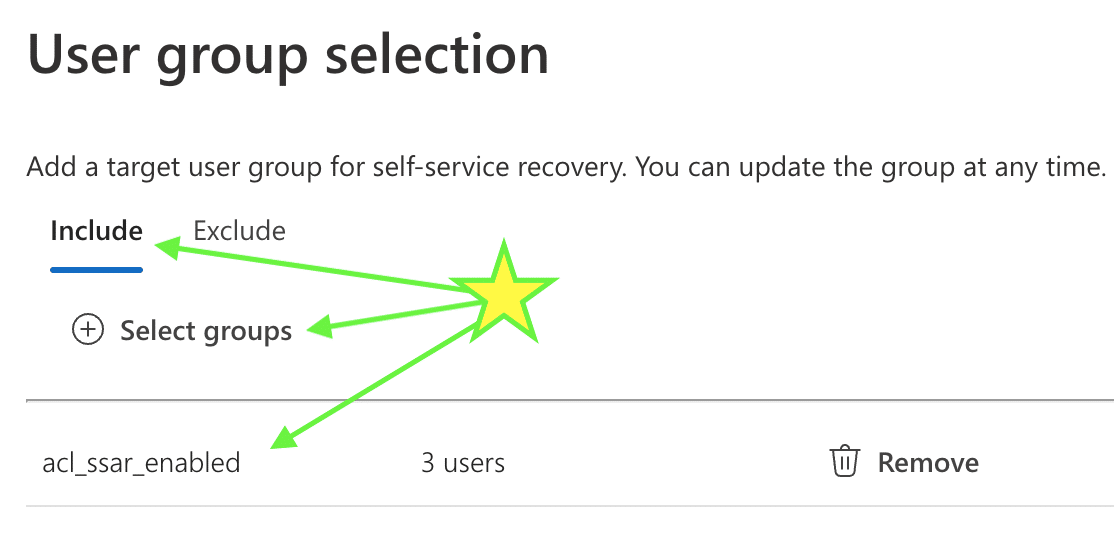
- Search for and select your
- Click Next when you see the group added to the include list.
Step 4: Subscribe to an Identity Verification Provider
This is where we set our IDV provider through the Microsoft Security Store.
- Under Identity verification providers, you’ll see the available options: AU10TIX, IDEMIA, and TrueCredential (LexisNexis).
- Select AU10TIX by clicking Get solution in the AU10TIX box.
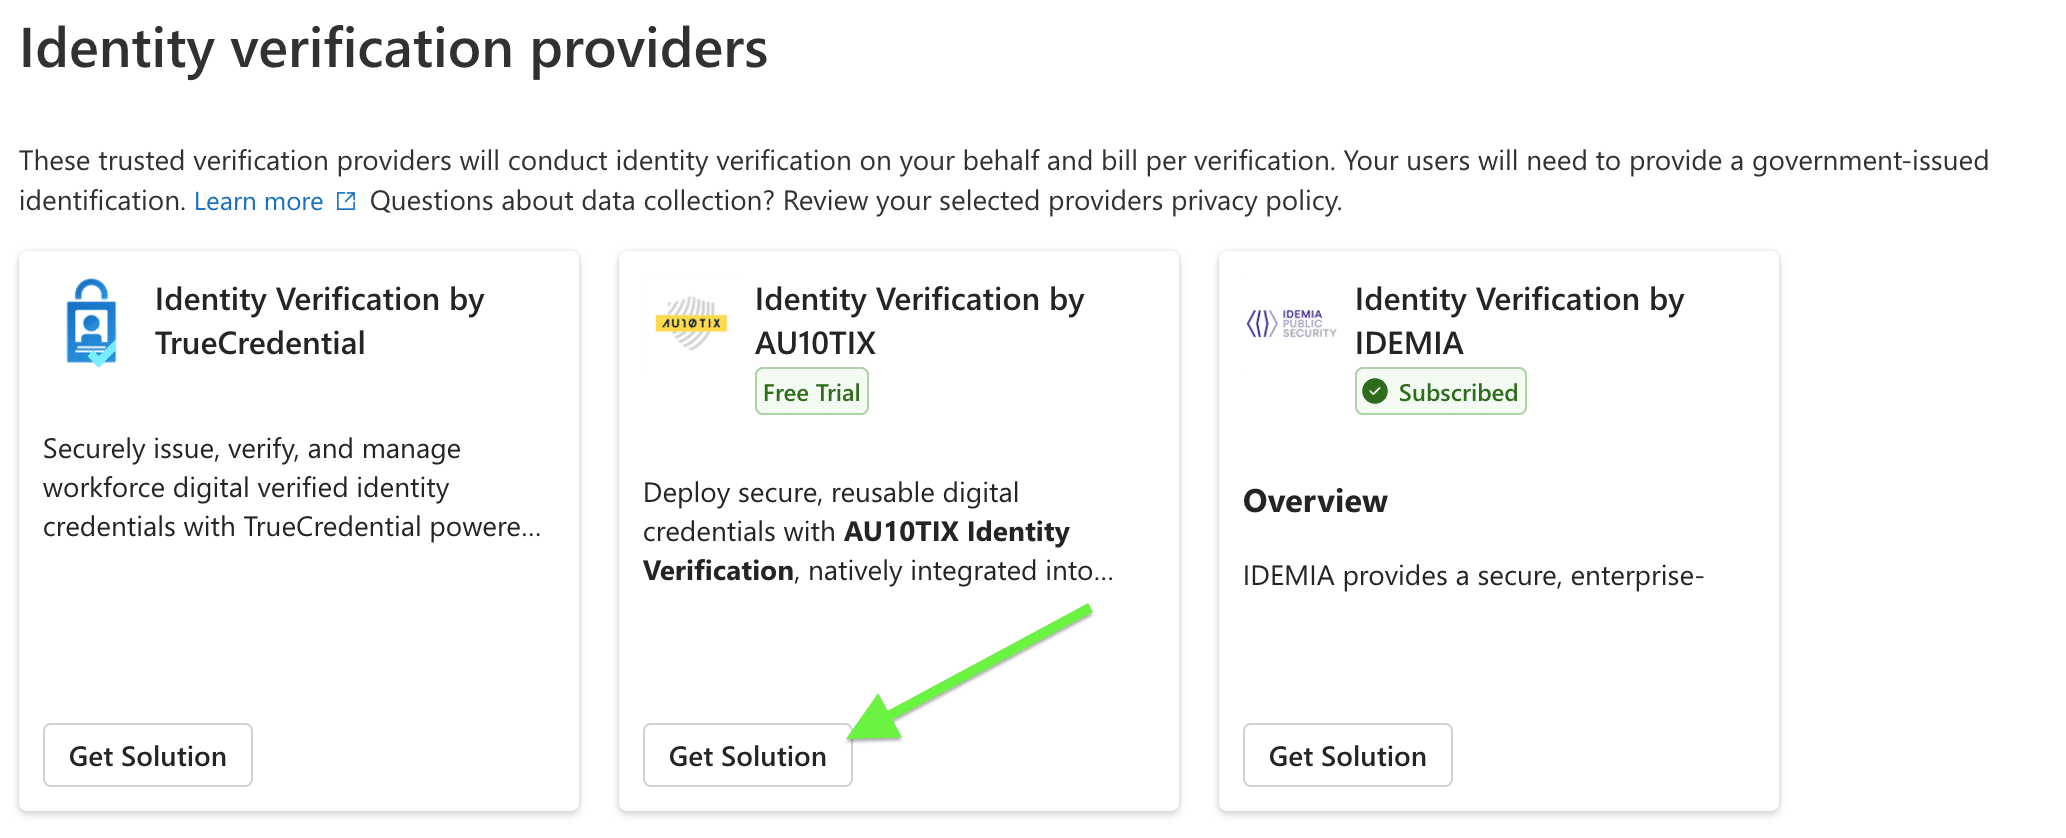
- I am simply using AU10TIX as an example here, I am not directly recommending them. It was just the easiest for me to use them in the demo, as I already use IDEMIA due to them being EU based, like me.
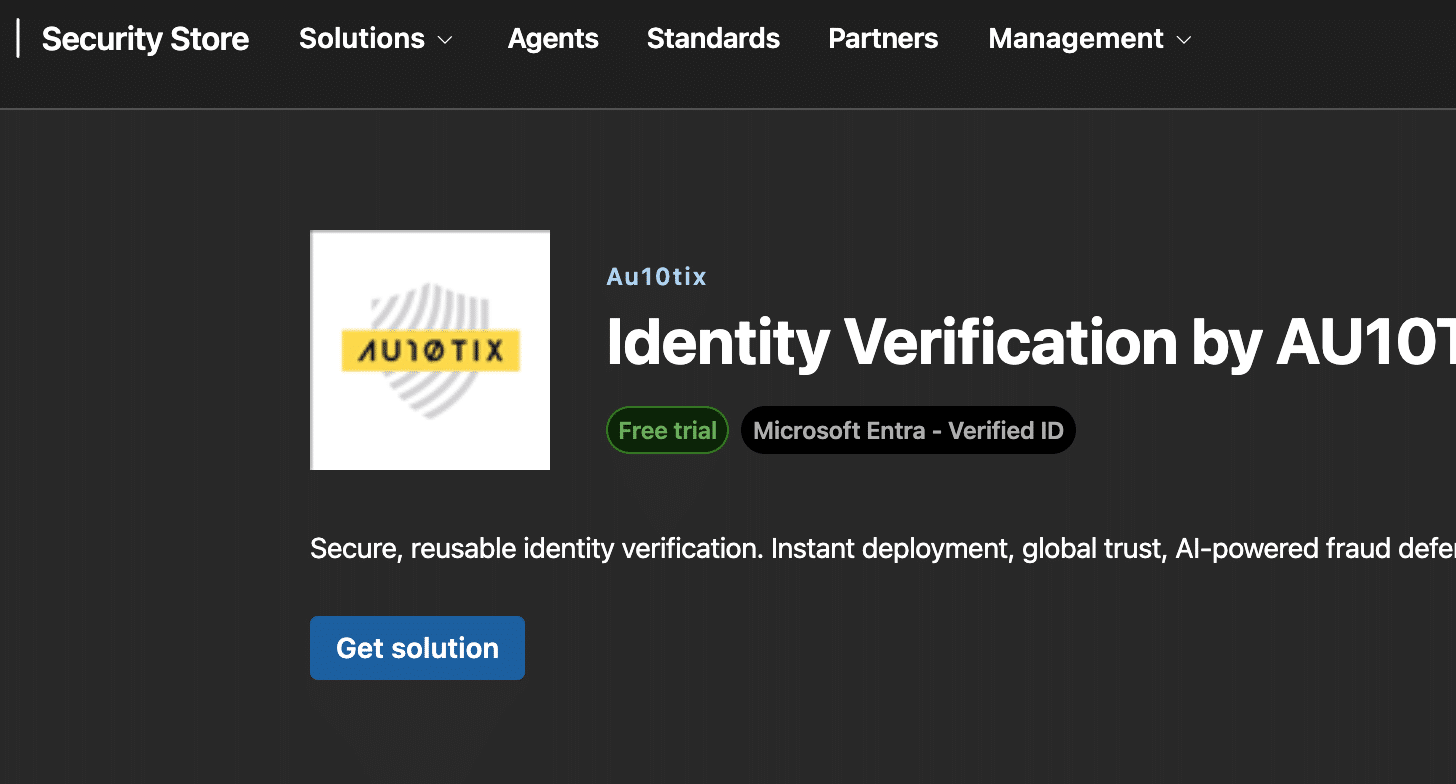
- Click Marketplace to open the Microsoft Security Store.
- Make sure you are signed-in with an account that has Owner or Contributor rights on your Azure subscription (required for billing).
- On the AU10TIX overview page, click Get solution.
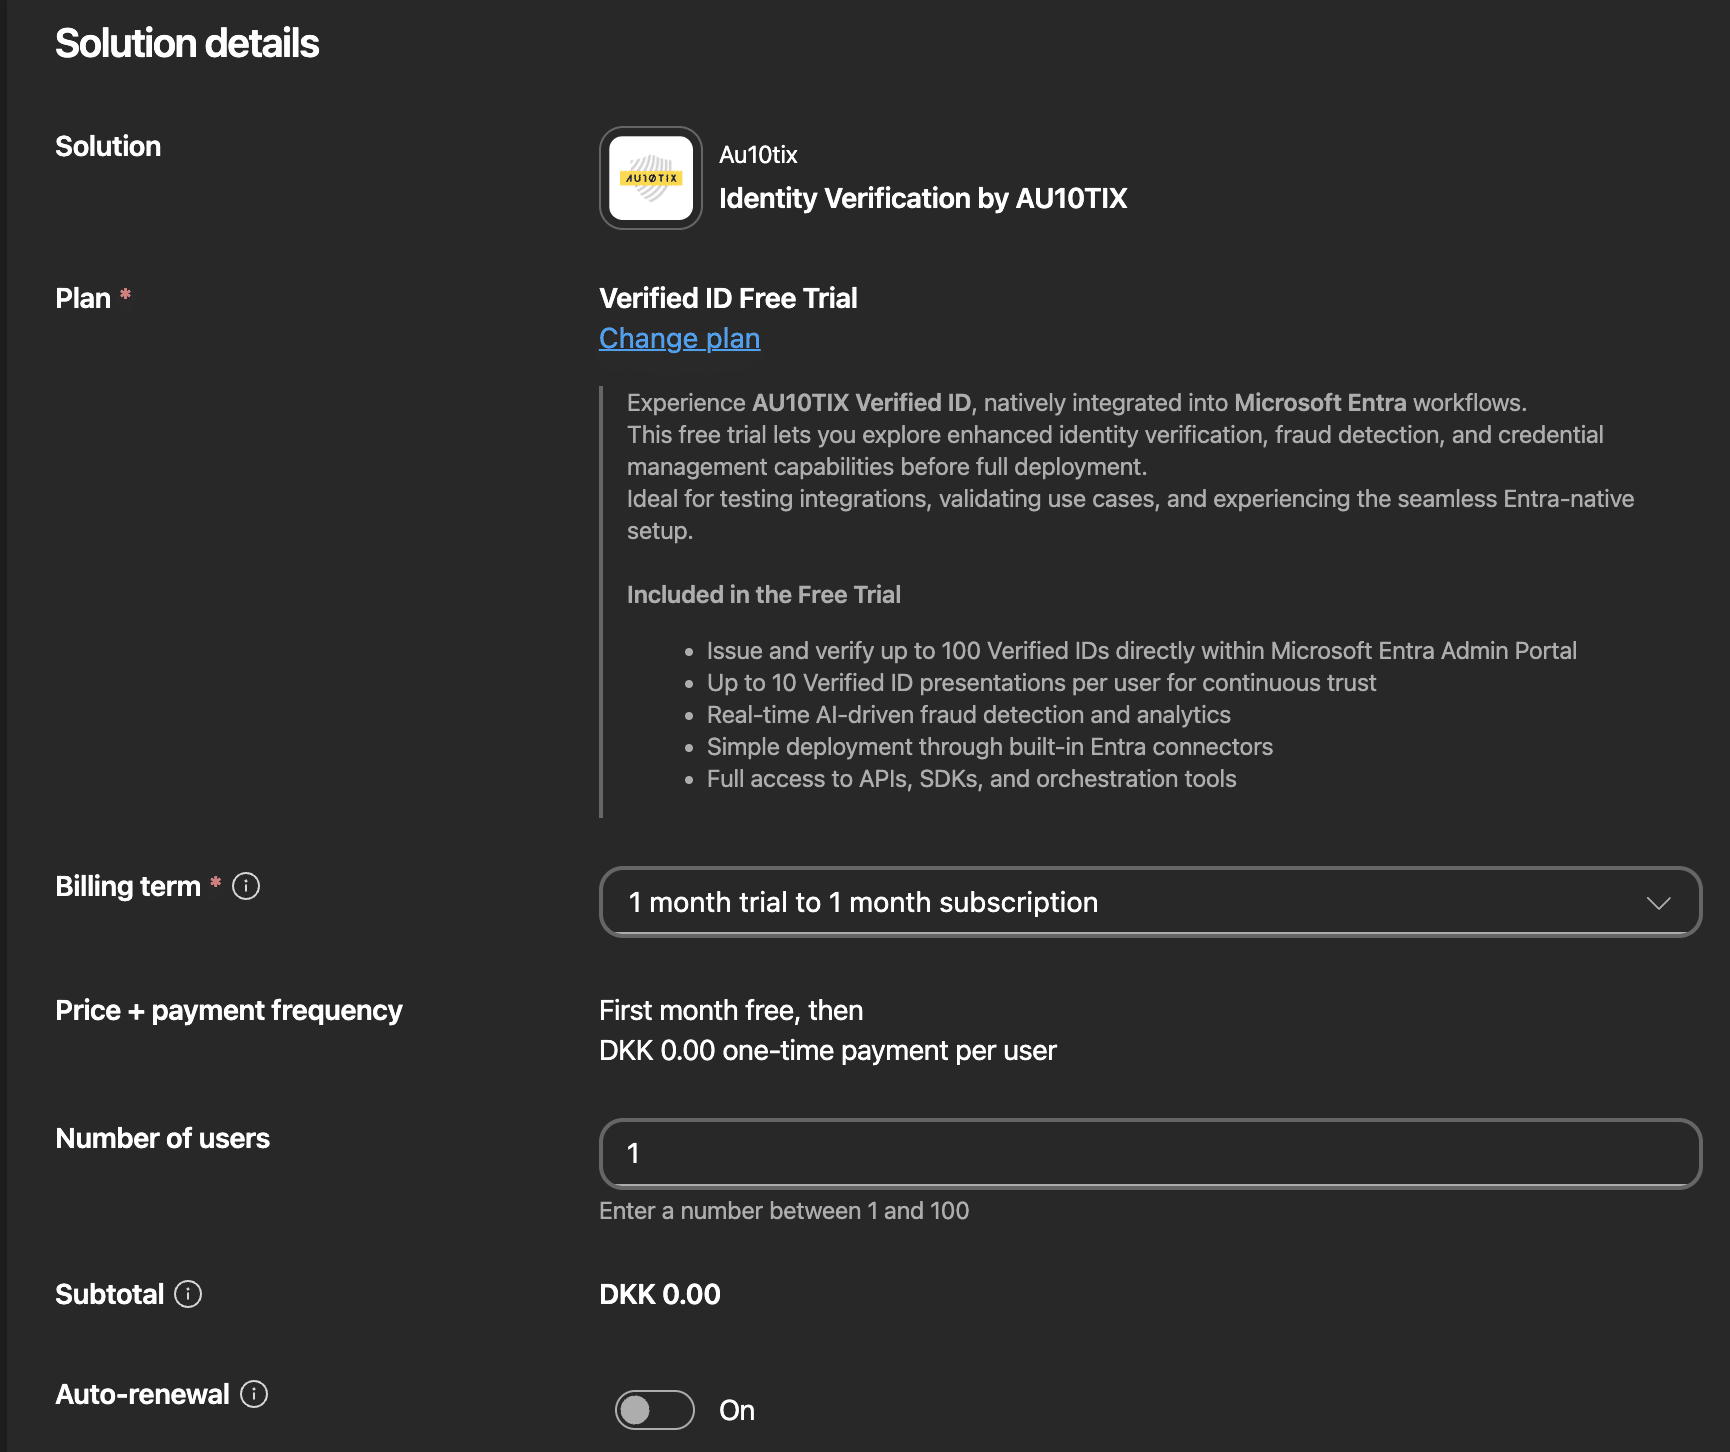
- Configure the SaaS subscription:
- Billing subscription: Select your Azure subscription
- Resource group: I simply use the same one as I did for the Face Check billing)
- Resource name: Give it a descriptive name like “au10tix-ssar”
- Plan: Select your preferred pricing plan (I choose the Free Trial, and disabled auto-renewal)
- Click Next, review your order, and click Place order.
- When the subscription is ready, click Configure account now.
- Complete the activation in the AU10TIX portal by providing the required details.
- After seeing Success, return to the Microsoft Entra admin center (It takes some time to provision, and you get a bunch of e-mails you can archive).
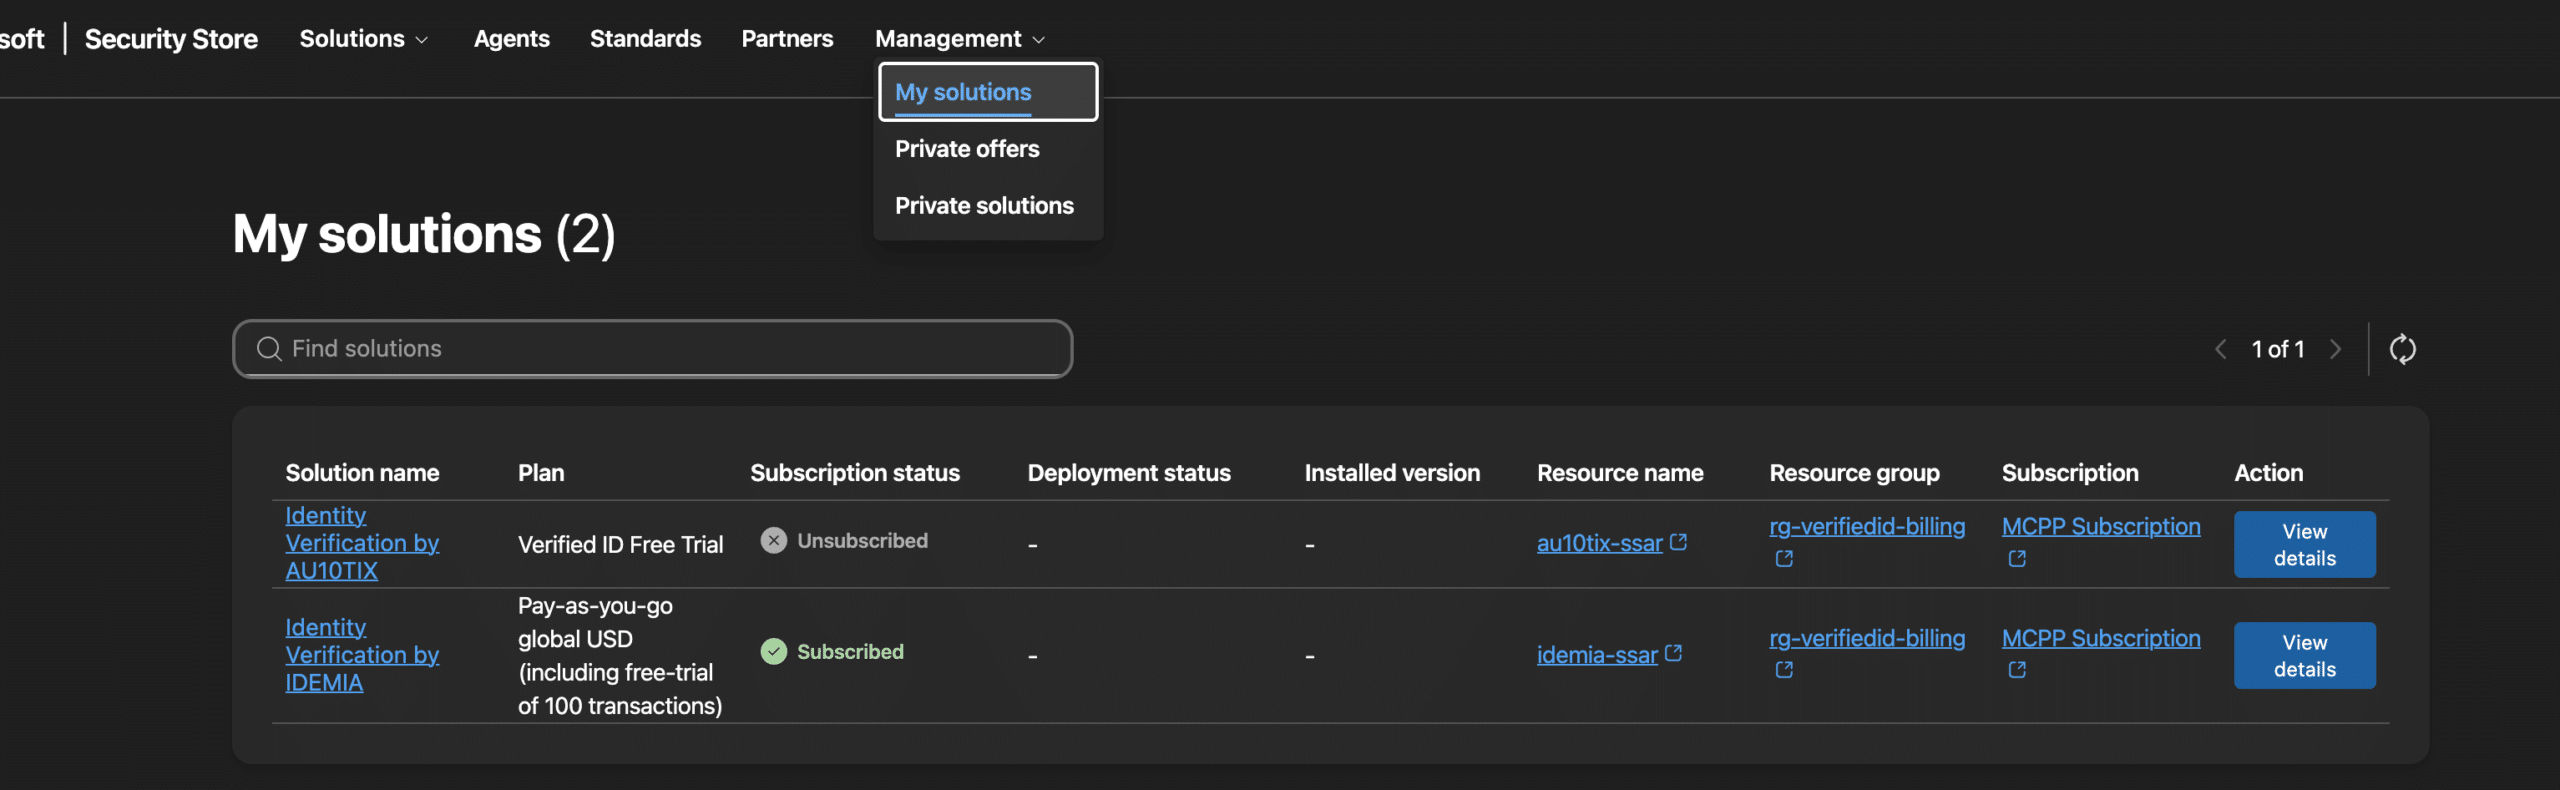
- PRO TIP: Afterwards you can always return to the security store to view the solutions (and cancel them) via the Management -> My solutions view.
Step 5: Finalize Account Recovery Setup
- Back in the Account Recovery setup wizard, the Identity verification provider should now show AU10TIX as Subscribed.
- Click Select next to AU10TIX.
- Click Next to proceed to the review page.
- Review your configuration:
- Recovery mode: Production
- User groups: acl_ssar_enabled
- Identity verification provider: AU10TIX
- Click Done to complete the setup.
You should now see the Account Recovery home page showing your configuration in Production mode with AU10TIX (or your choice) as the subscribed provider. Here is a screenshot from my production tenant where I use IDEMIA: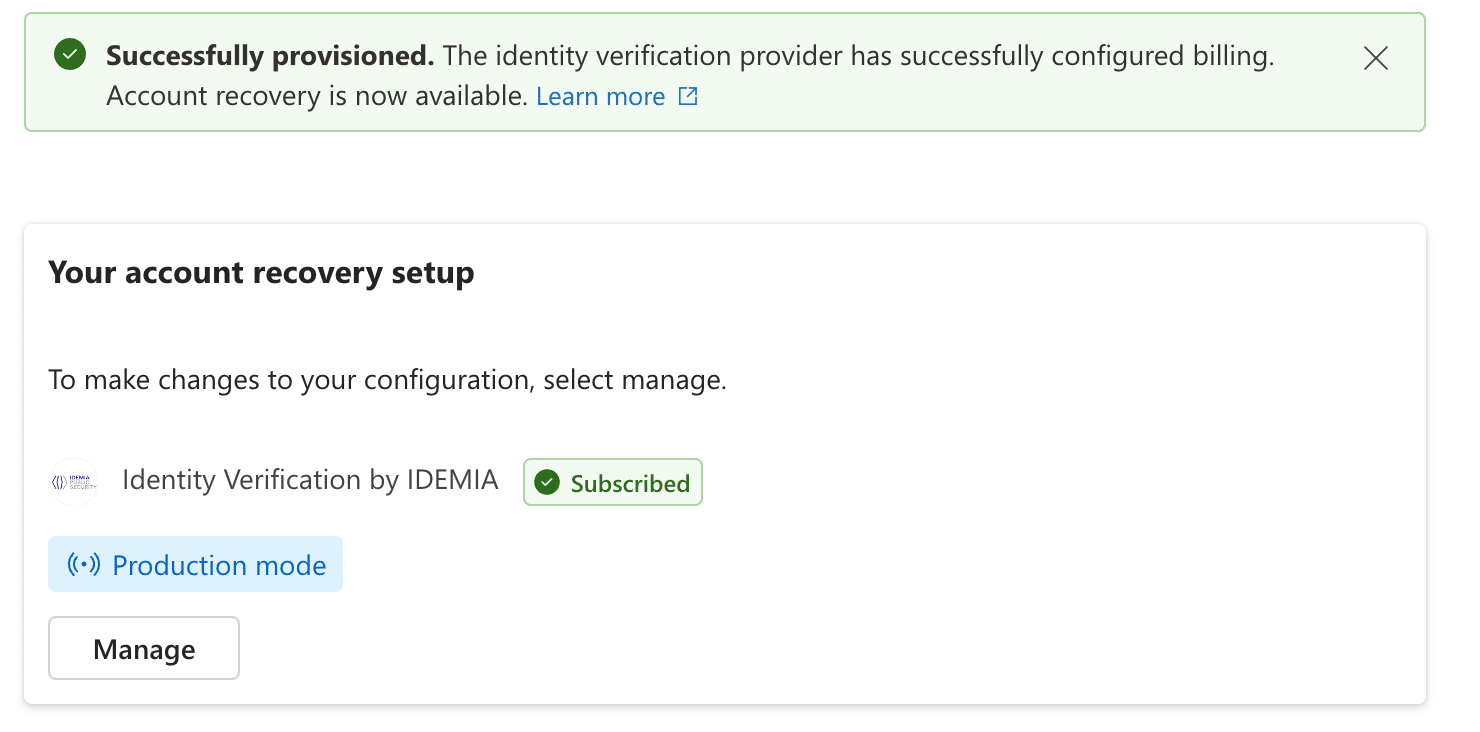
Testing Account Recovery
Now for the moment of truth – let’s test the recovery flow!
IMPORTANT: The Undocumented Gotcha
Here’s something I discovered the hard way, and it’s not documented anywhere by Microsoft:
You MUST initiate the account recovery process via https://aka.ms/mfasetup – NOT through normal portal logins!
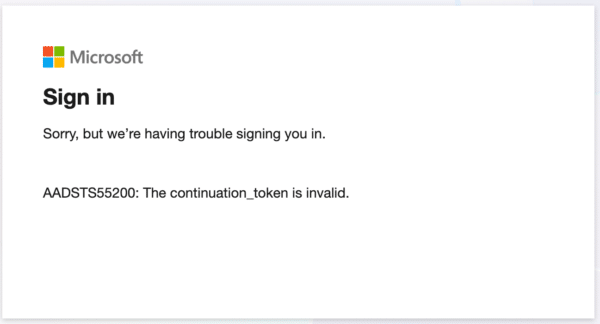
If you try to test recovery through the standard login portals (like portal.azure.com or portal.office.com), you’ll get an unhelpful AADSTS55200: The continuation_token is invalid error immediately after clicking “Recover your account.”
I spent hours troubleshooting this, checking Verified ID credentials, Face Check configuration, and IDEMIA/AU10TIX setup – only to discover the issue was simply where I was starting the recovery flow.
It also seems to work when doing it form inside a Microsoft App like Teams on the smartphone, but I was just testing, so did not bother with signing-out of my apps or setting up a separate user and smartphone just for this. I only tested from within the Microsoft Authenticator app by trying to add a new user account via the sign-in feature. But that was also completely broken! which is a shame, because it would be the best place to start IMHO.
The Correct Way to Test
- Open an InPrivate/Incognito browser session.
- Navigate to https://aka.ms/mfasetup.
- Enter the UPN of your test user (must be a member of
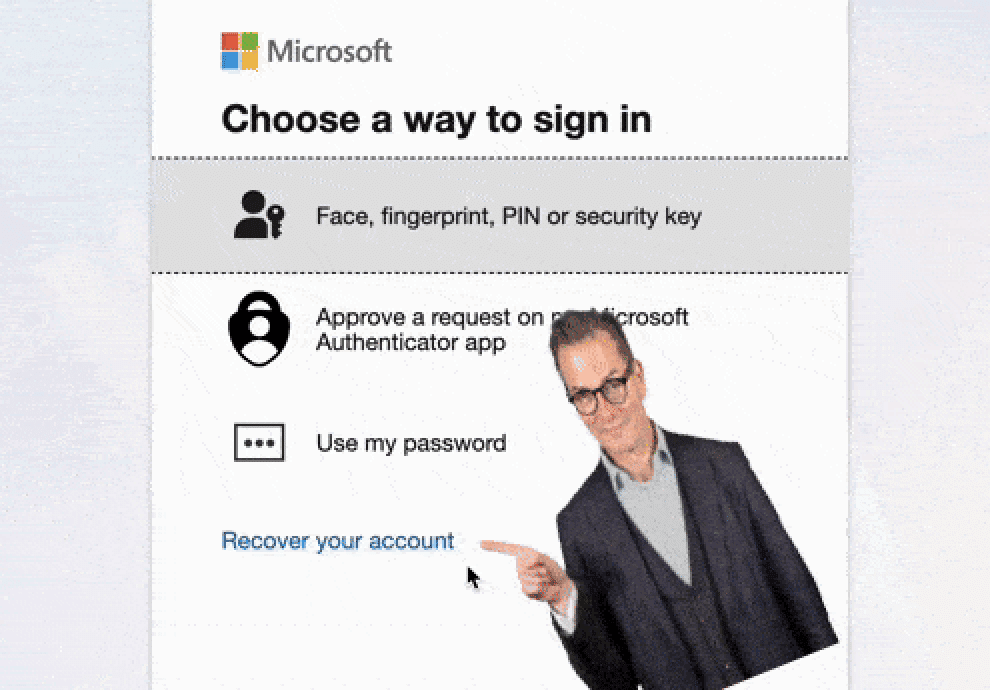
acl_ssar_enabled). - When prompted for authentication, click Other ways to sign in.
- Click Recover your account.
- You’ll be presented with information about the recovery process. Click Next to proceed.
- You’ll be redirected to the IDV provider for identity verification:
- Choose your country and identification method
- Upload/scan your government-issued ID
- Complete the liveness check (selfie time!)
- After successful verification, a Verified ID credential is issued to your Microsoft Authenticator app.
- Complete the Face Check in Microsoft Authenticator.
- Upon successful verification, you’ll receive a Temporary Access Pass (TAP).
- Use the TAP to sign in and register new authentication methods. Preferably directly in the authenticator app – You can go straight to Passkey setup if you have completely disabled the old SSPR for the user account and enabled Passkeys as the only method allowed!

“He who remembers a thousand passwords carries a thousand burdens. He who uses a passkey carries only his finger.”
– Confucius, probably
User Profile Requirements
For the identity verification to succeed, the user’s First name and Last name in Entra ID must match the details on their government-issued ID. The Display Name is not used in this process.
Make sure your test users have these properties correctly filled in:
- Navigate to Users > select the user > Properties > Edit properties
- Verify that First name and Last name match their government ID exactly
Mismatches like “John” vs. “Jonathan” or complex surnames will cause the verification to fail! (At least during preview).
Troubleshooting (Click to expand)
- AADSTS55200: The continuation_token is invalid
- Are you using https://aka.ms/mfasetup to initiate recovery? If not, that’s your problem! (Microsoft knows this and will be rolling out a fix in Feb. 2026)
- User doesn’t see “Recover your account” option
- Verify the user is a member of your SSAR-enabled group
- The user needs at least one prior successful authentication before recovery becomes available
- Identity verification fails at name matching
- Check that First name and Last name in Entra ID match the government ID exactly
- Display name is not used – only First name and Last name properties
- Face Check fails
- Ensure good lighting conditions
- Try a different background
- Make sure the user’s face is clearly visible
- No TAP issued after verification
- Verify that TAP is enabled in your Authentication methods policy
- Ensure the user is in scope for TAP (this is separate from the SSAR group!)
- Unable to use the TAP after issuance (User blocked by CA)
- Make sure your Conditional Access, does not contain a policy that blocks the user action “Register security information”. In general I recomend allowing this user action in combination with a custom Authentication Strenght, that specifically requires the use of a Temporary Access Pass (TAP).
- I don’t see the “Recover account” link when choosing other ways to sign-in.
- The system will only show this link in certain scenarios, and only when I knows the user you are trying to access, is a member of a group assigned to the SSAR service. So, either:
- you are too fast (It can take a few minutes to register)
- you are trying with a user that is not correctly assigned to the service.
- you did not heed my warning about simply going to aka.ms/mfasetup
- The system will only show this link in certain scenarios, and only when I knows the user you are trying to access, is a member of a group assigned to the SSAR service. So, either:
Frequently Asked Questions (Click to expand)
What is the difference between SSPR and SSAR?
Self-Service Password Reset (SSPR) allows users to reset passwords when they still have access to at least one authentication method. Self-Service Account Recovery (SSAR) is designed for total lockout scenarios where users have lost access to ALL authentication methods and must verify their identity through government ID and biometrics – this is especially important when using only Passkeys.
Which identity verification providers does SSAR support?
Microsoft Entra SSAR supports three IDV providers through the Microsoft Security Store: AU10TIX, IDEMIA, and TrueCredential (powered by LexisNexis). All three offer government ID verification and biometric liveness checks.
Why do I get AADSTS55200 error when testing SSAR?
The AADSTS55200 “continuation_token is invalid” error occurs when initiating account recovery from standard login portals. You must use https://aka.ms/mfasetup to start the recovery process – this is an undocumented requirement as of December 2025.
UPDATE: Microsoft is now aware of this, and will be rolling out the fix in Feb. 2026.
Does the user need the Microsoft Authenticator app for SSAR?
Yes, the Verified ID credential issued after identity verification is stored in Microsoft Authenticator. The Face Check verification also occurs within the Authenticator app.
What user attributes must match for SSAR to work?
The user’s First name and Last name properties in Microsoft Entra ID must exactly match the name on their government-issued ID. The Display Name field is not used in the matching process.
Final Words
Just remember: This is a preview feature (as of writing), and I see a bright future for it – So, lets hope Microsoft keeps investing in this service. I ran into some snags which made me write this blog post, and I hope sharing it here saves you some time and frustration! (Or at the very least makes Microsoft fix the issues that I uncovered)
As always, I hope you find inspiration in this article. And I welcome any feedback in the comments or preferably a follow on Linkedin @michael-mardahl.
Follow on LinkedInUseful Links to go deeper:
- Overview of Microsoft Entra ID Account Recovery
- How to Enable and Test Account Recovery (Preview)
- How End Users Can Set Up Account Recovery
- Microsoft Entra Verified ID
*This post was enhanced with he help of AI, for readability and cool images! #DontHateThePlayerHateTheGame


Thanks for the detailed set up guide and demo. Once the the Verified ID credential is issued in Microsoft Authenticator how does it work with future SSARs?
Is the Verified ID used without redirecting to the IDV again?