


If you’re looking to install a Software Update Point on a remote system fast and easy, this is the post for you. In my lab environment I’ve installed a Windows Server 2012 R2 virtual machine that we’ll be using through out this post to install and configure WSUS on in preparation for the Software Update Point (SUP) installation. The virtual machine will be referenced in this post as WSUS01. Instead of configuring WSUS to use a local Windows Internal Database, we’ll use the SQL Server that my stand alone Primary Site database is running on. My Primary Site server is called CM01, which also is where the SQL Server is running.
Once we have WSUS01 up and running and joined to the domain, we can get going with installing WSUS and configure it for the SUP site system role. Before we start, save the below PowerShell script as Install-WSUS.ps1 to the WSUS01 server. I’ve copied it to C:\Scripts. This script will take care of installing WSUS on Windows Server 2012 and above, and also configure it properly. It also supports for entering a named instance on the SQL server if your site database is not running on the default MSSQLSERVER instance. In addition to this, we also need to add the stand alone Primary Site server’s computer account to the local Administrators group on WSUS01.
param(
[parameter(Mandatory=$true)]
[string]$WSUSContentFolder,
[parameter(Mandatory=$true)]
[string]$SQLServer, [string]$InstanceName ) Begin { $WarningPreference = “SilentlyContinue” if (!(Test-Path -Path $WSUSContentFolder)) { Write-Output “INFO: Specified WSUS content folder was not found, creating it`n” New-Item $WSUSContentFolder -ItemType Directory | Out-Null } Install-WindowsFeature -Name UpdateServices-Services,UpdateServices-DB -IncludeManagementTools | Out-Null } Process { $WSUSUtil = “$($Env:ProgramFiles)\Update Services\Tools\WsusUtil.exe” if ($InstanceName) { $WSUSUtilArgs = “POSTINSTALL SQL_INSTANCE_NAME=$($SQLServer)\$($InstanceName) CONTENT_DIR=$($WSUSContentFolder)” Write-Output “INFO: Starting the WSUS PostInstall configuration`n” Start-Process -FilePath $WSUSUtil -ArgumentList $WSUSUtilArgs -NoNewWindow -Wait Write-Output “INFO: Successfully installed and configured WSUS” } else { $WSUSUtilArgs = “POSTINSTALL SQL_INSTANCE_NAME=$($SQLServer) CONTENT_DIR=$($WSUSContentFolder)” Write-Output “INFO: Starting the WSUS PostInstall configuration`n” Start-Process -FilePath $WSUSUtil -ArgumentList $WSUSUtilArgs -NoNewWindow -Wait Write-Output “INFO: Successfully installed and configured WSUS” } }
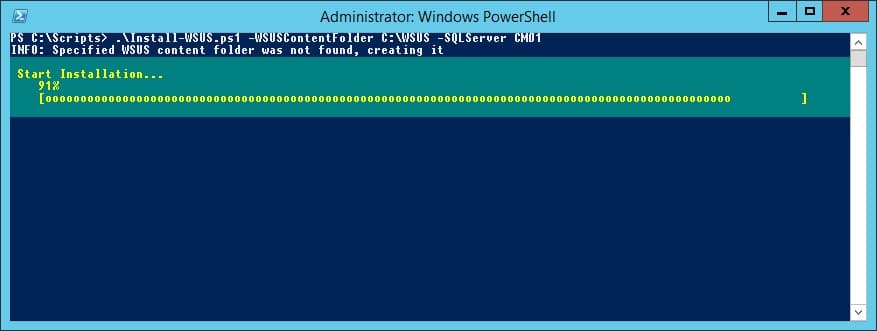
1. Logged on to WSUS01 with an administrator account, open an elevated PowerShell prompt and run the following command:
.\Install-WSUS.ps1 -WSUSContentFolder C:\WSUS -SQLServer CM01
You should of course edit the command so that it would work in your environment. Here we’re choosing to store the WSUS data in C:\WSUS and specifying to create the SUSDB (WSUS database) on a remote SQL Server called CM01. Remember that the account running this command should have the proper permissions to create a new database on the SQL Server. Wait for the command to finish, it will take a while since it’s installing the WSUS features.
![]()
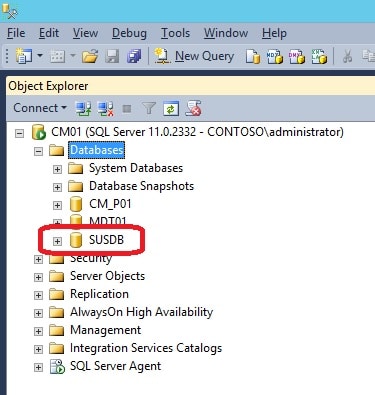
2. Once the script has completed, launch SQL Server Management Studio on the SQL Server to check whether the SUSDB is present (it should be if everything went fine with the script). This is how it now looks on my SQL Server:
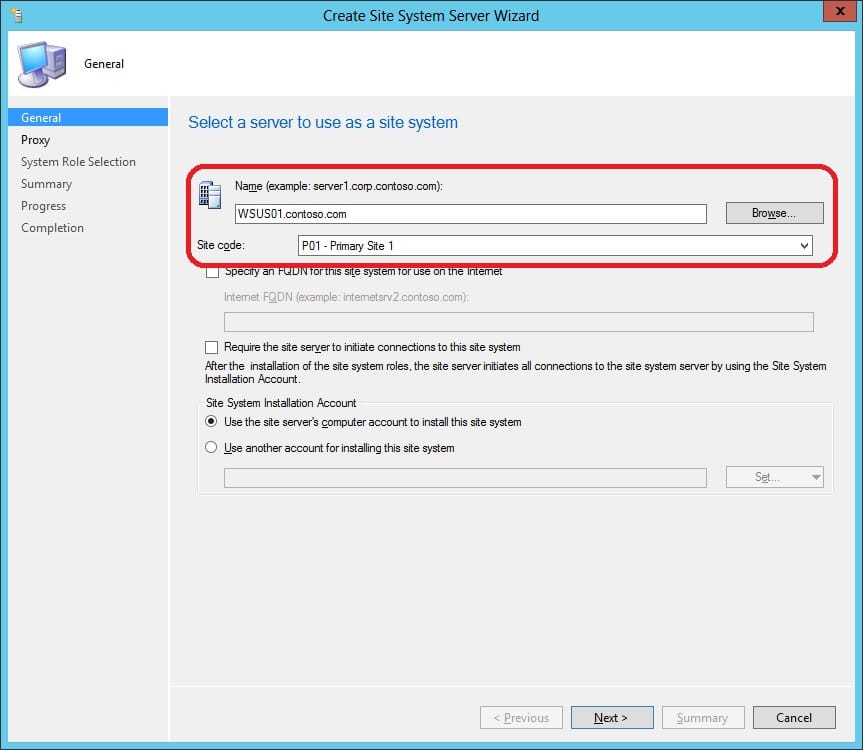
3. Launch the ConfigMgr console and go to Administration -> Site Configuration, right click on Servers and Site System Roles and select Create Site System Server.
4. In the Name field, enter the FQDN for WSUS01, which in my lab environment is WSUS01.contoso.com. Also select the site code that you’d like to associate this new site system server with. Click Next when ready.
5. Determine if you need to use a proxy for this site server when it connects to the internet. In my lab environment that is not necessary, so click Next if that applies to your environment aswell.
6. Select the Software update point role and click Next.

7. Under WSUS Configuration, select the option for Windows Server 2012 which would be to configure to use ports 8530 and 8531. Determine what types of client connection types this SUP should allow and click Next.

8. Click Next on the Proxy and Account Settings page, unless you’d want to configure an account which ConfigMgr uses to connect to WSUS on the site system server running the SUP. This is only available for ConfigMgr 2012 SP1 and forward.
9. Since this is the first SUP in the hierarchy, it would be wise to configure it to synchronize from Microsoft Update. If that’s not an option in your environment, go ahead and specify an upstream server instead. In this post, we’ll configure the SUP on WSUS01 to synchronize from Microsoft Update. Click Next.
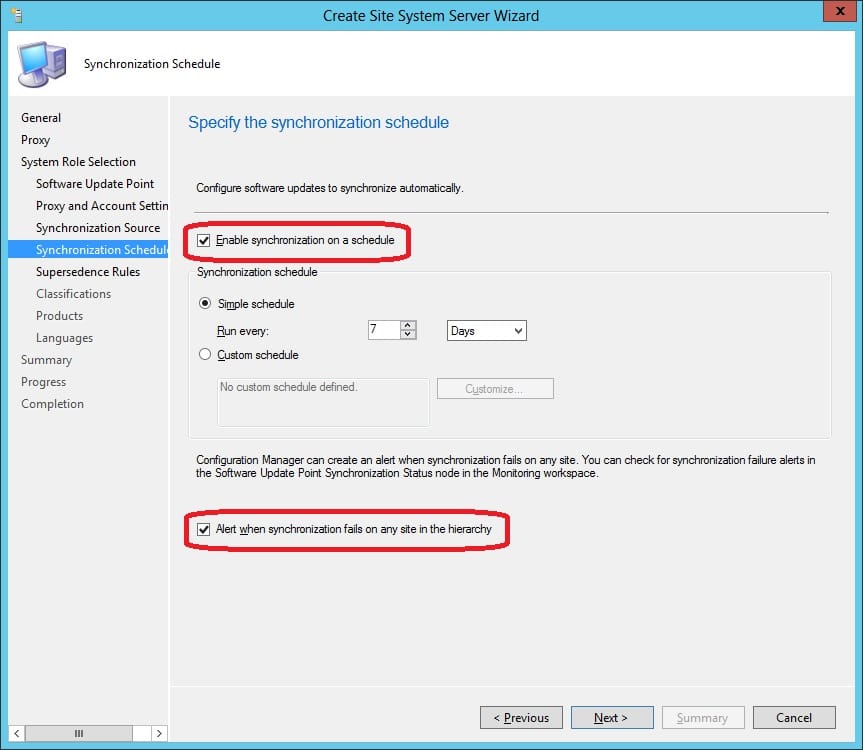
10. I’d recommend to enable synchronization on a schedule. Normally the 7 days schedule which is default is sufficient. But determine how you’ll be dealing with Out-of-Band updates from Microsoft and what suites your environment the best. Click Next when ready.
11. Depending on what your company policy regarding deploying software updates is, choose if you’d like to expire superseded updates immediately or wait a specified number of months. Since this is my lab environment, I’ll expire them immediately.
12. On the Classifications page, I’d recommend to select atleast these classifications:
- Critical Updates
- Definition Updates (e.g. if your using Endpoint Protection)
- Security Updates
- Service Packs
- Update Rollups
But here aswell, it all comes down to how much you can afford regarding network traffic and storage wise. The updates themselves, except for Service Packs, are normally not huge in size, but when synchronizing them all it will put load on the network and take up a decent amount of storage. Keep that in mind. Click Next when ready.

13. On the Products page it’s even more important to only select those products that you have in your environment. The more products you select, the more network load and storage space is required. Click Next when you’ve selected those products that are currently available in your environment. What’s important to note here though, is that right away, you’ll not be able to select e.g. Windows 8.1 or Windows Server 2012 R2. You’ll have to come back once the SUP installation has finished, and select those products then. You’ll find the option to configure this later if you go to Administration -> Site Configuration -> Sites, select the Primary Site you associated the SUP with, click on Configure Site Components and choose Software Update Point. In the Products tab, once the SUP installation has finished, you should now see all the newly added products.
14. On the Languages page, select the languages for different products you have in your environment. Click Next.
15. Click Next on the Summary page and finish the wizard.
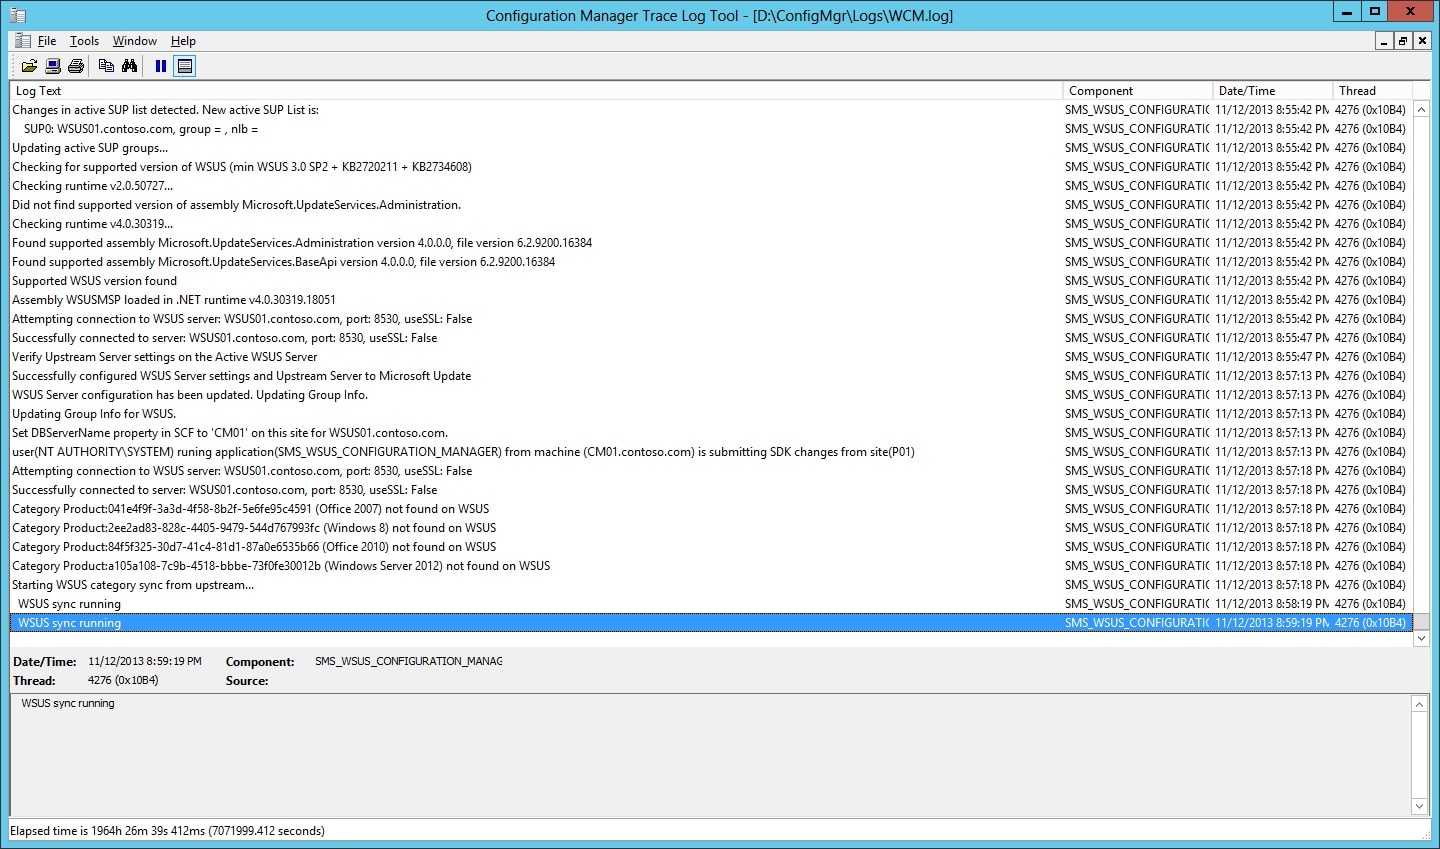
16. We can now follow the installation progress if you look in the <ConfigMgr_installation_folder>\Logs\WCM.log.
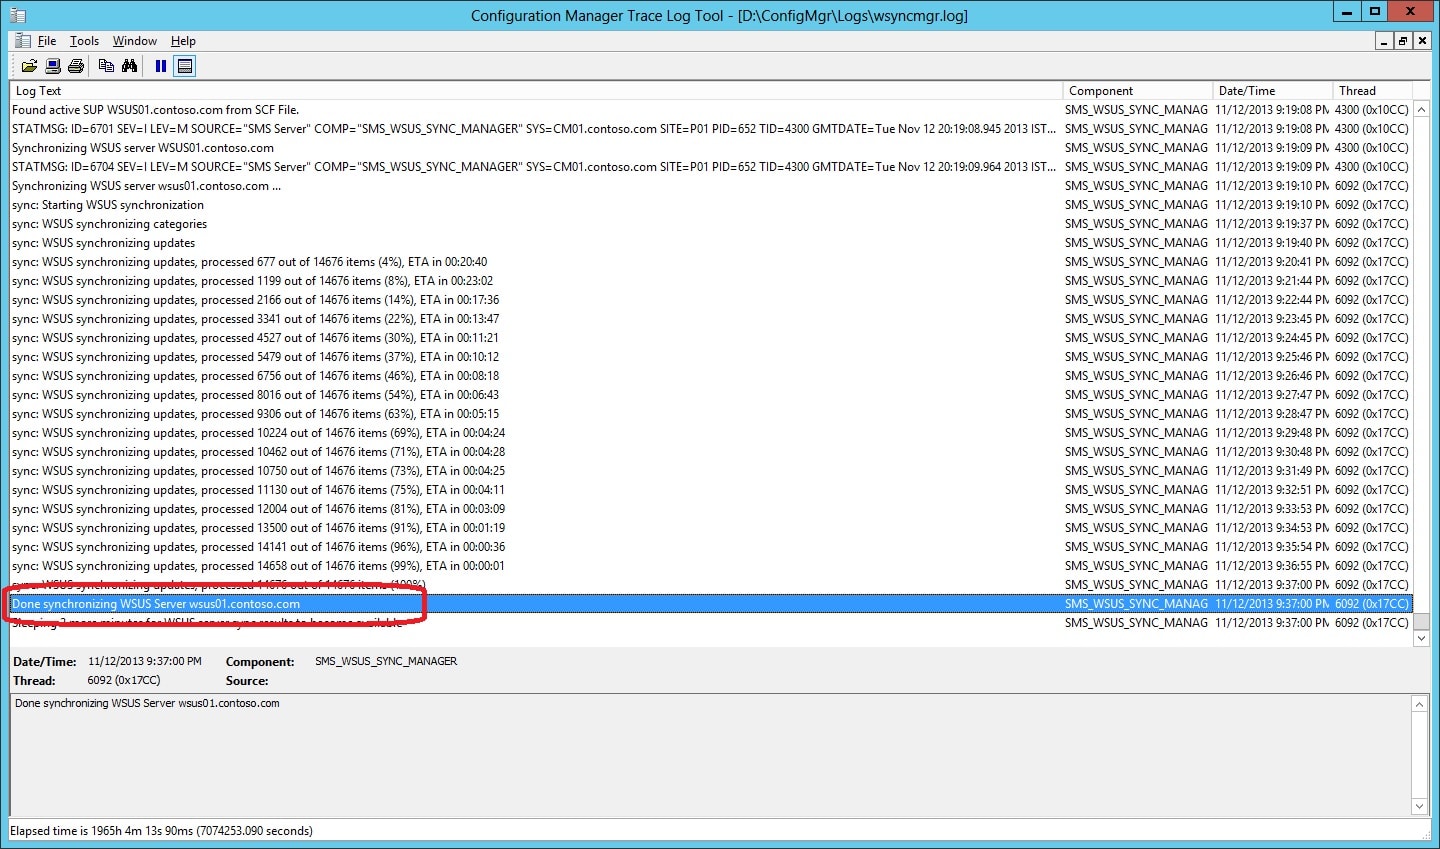
17. Once the installation of the SUP is completed, it will start the initial synchronization. You can follow that in <ConfigMgr_installation_folder>\Logs\wsyncmgr.log.
That’s all, your environment now has a remote SUP!


Thanks for this post!
Can i ask if there is any specific reasons to put the SUSDB on CM01 (and not use local SQL express) besides that we already have SQL installed? I ask because i plan to set up a new primary site which will include software updates and have heard that “Separate WSUS is good because it has a tendency to behave bad”
//Pelle
Hi Pelle,
Where have you heard that it has tendency to behave bad? There’s not really a best practice here, but I’d myself prefer putting it in a full SQL Server instead of installing a separate SQL Server Express and managing that too.
Regards,
Nickolaj
It’s all looking good except that In SCCM console we can not see any updates under all software updates and therefore cannot create software update groups, but WSUS console on remote SUP showing updates and syncing is working on SUP and getting updates from upstream server. Do we have to add SUP role on upsteam WSUS server in SCCM for me to see the updates in the SCCM console?
Great post, could have used this yesterday when I just had to rebuild the SUP on our CM 2012 R2 server (on Win Server 2012 R2). I figured it out and it seems to be synchronising now.
Please. Any chance you could cover how to go about setting up MS update deployments, ADRs etc., I’m so used to just using WSUS and allowing clients to simply query a WSUS server and for it to fill in the blanks for Windows, Office etc., On SCCM it seems to much more complicated and I can’t find any easy to understand guides relevant to CM2012R2…
Keep up the great work!
Hi Dave,
Thanks for the nice comments! I actually finished a PowerShell script yesterday that polishes the ADR functionality a bit. So in the near future I’ll post about that. Great input to include more basic instructions on how to use the ADR’s. Will keep that in mind when I’m about to write that post.
Regards,
Nickolaj