


Status Message Queries are perhaps not the most explored and used feature of ConfigMgr 2012, but it’s a great way to get information about what’s happening in your environment. By using Status Message Queries, you could collect all messages generated by a specific deployment of a task sequence and present them in a single window. This way we’ll get a ConfigMgr real-time experience overview about how our deployments are progressing. I know that there are other methods out there on how to monitor Operating System deployment, but this method is something I’ve become really found with over the years.
In this post I’ll create a Status Message Query that I can use to see all the information about my Windows 8.1 deployments, sorted by the most current message. In my lab environment I have a task sequence I use to deploy Windows 8.1 that is called Windows 8.1 Enterprise x64 – Install. The deployment of this task sequence to a specific collection is what we’ll use to get the status messages.
Overview
- Locate the DeploymentID
- Create a Status Message Query
- Show messages from a deployment
Locate the DeploymentID
When we’re going to create the Status Message Query, we need to know the DeploymentID of the actual deployment that we’ll show all the status messages from. In order to get that, we’ll simply go to Software Library – Task Sequences, select the desired task sequence and then click on the Deployments tab on the bottom. Here we’ll see that the DeploymentID is shown to us. If it’s not, you can right-click somewhere in the column field and enable the DeploymentID column.
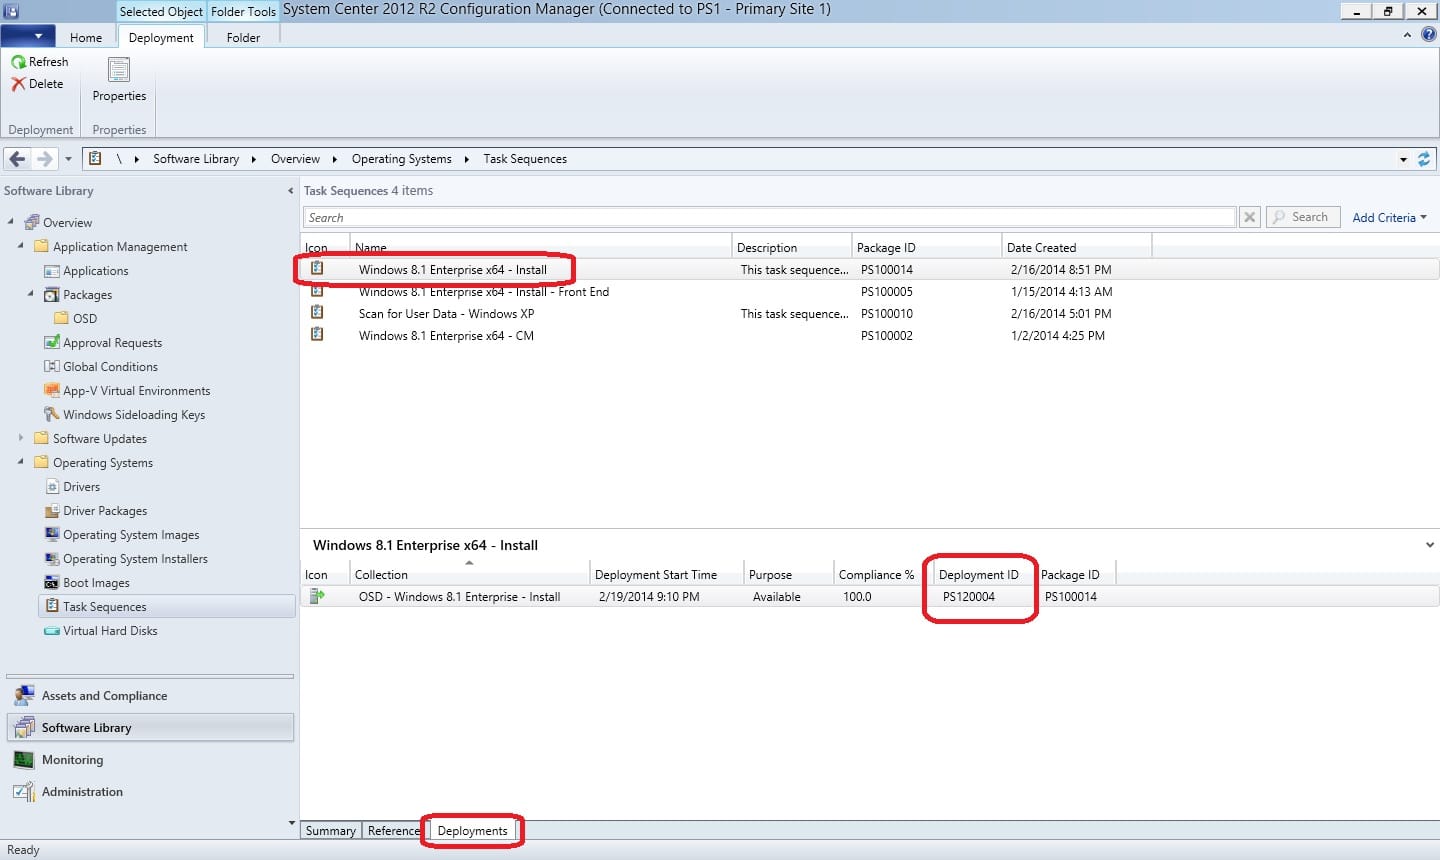
Take a note of the DeploymentID, in this case it’s PS120004. We’ll be using this later when we create the actual Status Message Query.
Create a Status Message Query
Creating a Status Message Query is done basically the same way as you would create an in-console Query. If you feel comfortable with creating Status Message Queries and don’t want to follow the instructions below, here’s the query statement that I’ll be using:
select
SMS_StatusMessage.*,
SMS_StatMsgInsStrings.*,
SMS_StatMsgAttributes.*,
SMS_StatMsgAttributes.AttributeTime
from SMS_StatusMessage
left join SMS_StatMsgInsStrings
on SMS_StatMsgInsStrings.RecordID = SMS_StatusMessage.RecordID
left join SMS_StatMsgAttributes
on SMS_StatMsgAttributes.RecordID = SMS_StatusMessage.RecordID
where SMS_StatMsgAttributes.AttributeID = 401 and SMS_StatMsgAttributes.AttributeValue = "PS120004" and SMS_StatMsgAttributes.AttributeTime >= ##PRM:SMS_StatMsgAttributes.AttributeTime## order by SMS_StatMsgAttributes.AttributeTime DESC
Note! Remember to replace the PS120004 with the DeploymentID of your deployment.
1. Go to the Monitoring node in the ConfigMgr console and expand System Status.
2. Right-click on Status Message Queries and select Create Status Message Query.
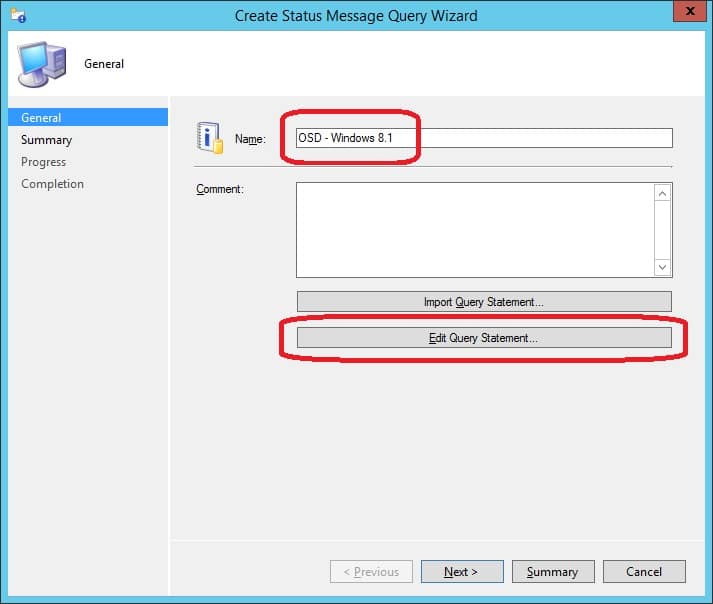
3. In the Name field, enter a name. I’ve choosen to go with OSD – Windows 8.1.
4. Now click on Edit Query Statement.
5. Click on the Criteria tab and then click on the yellow star.
6. In the Criterion Properties window, click on Select.
7. Select the following in the Select Attribute window:
Attribute class: Status Message Properties
Alias as: <No Alias>
Attribute: Attribute ID
Click on OK.
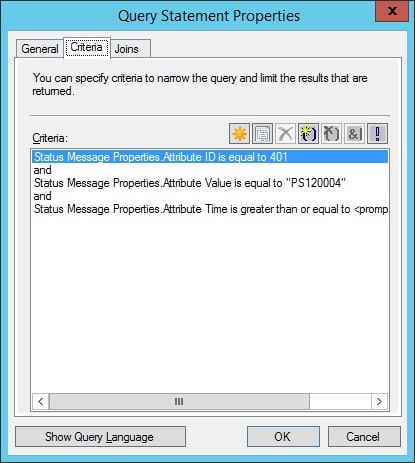
8. Back in the Criterion Properties window, enter 401 in the Value field and click OK.

9. Click on the yellow star again and in the Criterion Properties window, click Select.
10. In the Select Attribute window, select the following:
Attribute class: Status Message Properties
Alias as: <No Alias>
Attribute: Attribute Value
Click OK.
11. In the Criterion Properties window, enter the DeploymentID in the Value field and click OK. In my case the DeploymentID is PS120004 as we discovered earlier.

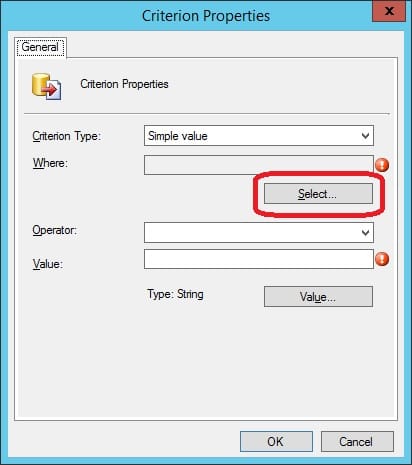
12. Make sure that the last row in the Criteria field is selected, click on the yellow star again and click on Select.
13. In the Select Attribute window, select the following:
Attribute class: Status Message Properties
Alias as: <No Alias>
Attribute: Attribute Time
Click on OK.
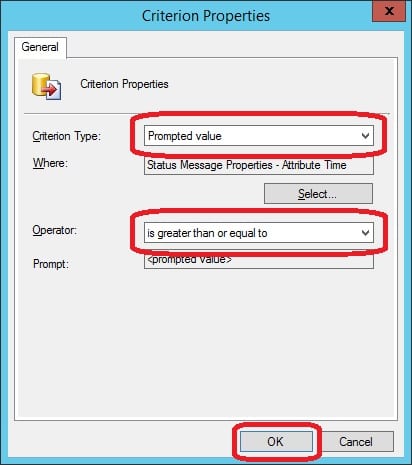
14. In the Criterion Properties window, change Criterion Type from Simple value to Prompted value and then select is greater than or equal to in the Operator field. Click OK.
15. The Criteria tab in the Query Statement Properties windows should now look like this:
16. Click on the General tab and click on the yellow star.
17. In the Results Properties window, click Select.
18. In the Select Attribute window, enter the following:
Attribute class: Status Message Properties
Alias as: <No Alias>
Attribute: Attribute Time
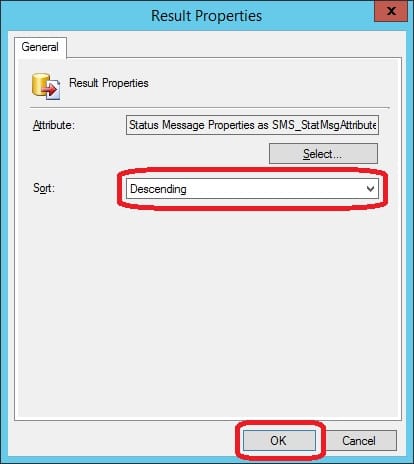
Click OK.
19. In the Sort drop down menu, select Descending and click on OK.
20. Click on OK in the Query Statement Properties window.
21. Back in the Create Status Message Query Wizard, click Next.
22. On the Summary page, click Next.
23. On the Completion page, click Close.
Show messages from a deployment
Now we have created the Status Message Query, let’s see what kind of information we can get from it.
1. From the Monitoring node, expand System Status and select Status Message Queries.
2. Right-click on the Status Message Query that we just created and select Show Messages.
3. In the window that appears, select an option from the Select date and time drop down menu.
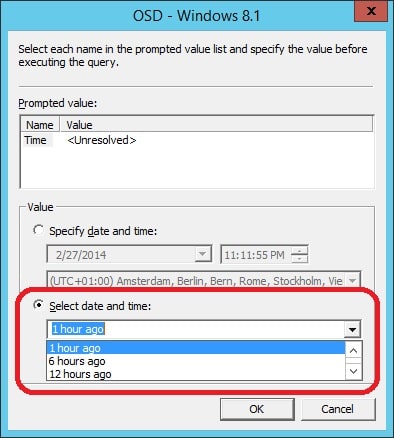
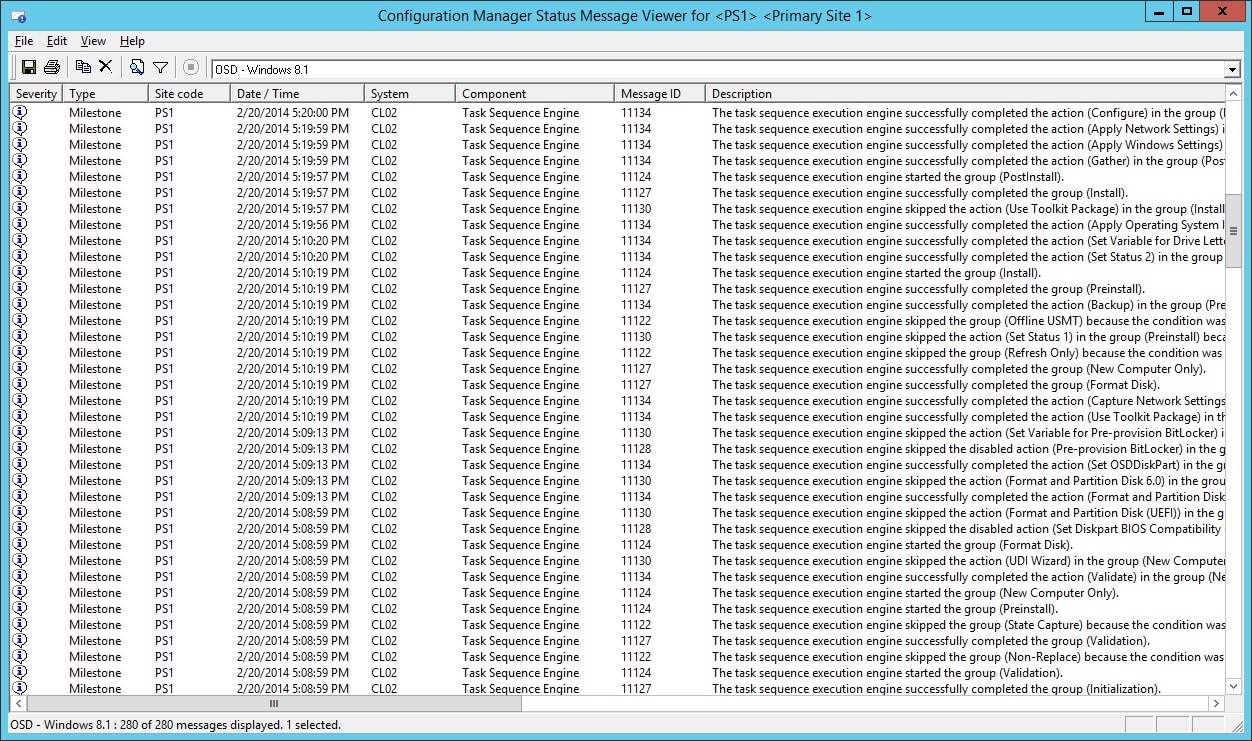
If there were any messages found after the time and date you selected, they will be shown in the Status Message Viewer window. As you can see below, status messages from an earlier deployment of my Windows 8.1 Enterprise x64 – Install task sequence are shown. Here we can get a lot of details about what’s currently going on for specific systems that are being installed, or has been installed already. This is also a great way to troubleshoot a deployment if anything failed. You can at this stage double click a message to show the details about it, or hover the mouse over as well.


Can you put multiple deployment IDs? If the TS is deployed to a few different collections? but a singular window for viewing status messages?
Instead of using the DeploymentID, you can use the PackageID. This way you see all deployments of that TS in a single SMQ. This is better for mass deployments where there may be several collections with their own Deployment for the same TS.
Query here;
Replace PACKAGEIDHERE and SITECODEHEREwith the relevant info.
select stat.*, ins.*, att1.*, att1.AttributeTime from SMS_StatusMessage as stat left join SMS_StatMsgInsStrings as ins on stat.RecordID = ins.RecordID left join SMS_StatMsgAttributes as att1 on stat.RecordID = att1.RecordID inner join SMS_StatMsgAttributes as att2 on stat.RecordID = att2.RecordID where att2.AttributeID = 400 and att2.AttributeValue = “PACKAGEIDHERE” and stat.SiteCode = “SITECODEHERE” and att2.AttributeTime >= ##PRM:SMS_StatMsgAttributes.AttributeTime## order by att1.AttributeTime desc
Worked great. Help on trouble shooting for sure. Thanks
Worked perfectly, many thanks 🙂
This works for my primary site, but when I select my secondary site I do not get any status messages. Is there something I need to configure in order for this to work?
worked great, thanks
I tried this step by step and was never able to pull back any information. I have verified that my attribute ID is correct. I’m using SCCM2012R2 base. Is there anything I could be missing?