


Deploying kiosks in Windows 10 through Microsoft Intune offers a straight forward means of locking down a system to a single or even a multi-app kiosk. Sandy has already covered how to set up a multi-app kiosk using the AssignedAccess CSP method in an earlier blog post – https://docs.microsoft.com/en-us/windows/configuration/lock-down-windows-10-to-specific-apps, but what happens when the default kiosk restrictions are an issue?
I had this dilemma recently when setting up a kiosk that required access to browse local media, as the default kiosk policy prevents the user from browsing locally attached media (see this Microsoft document for more restriction info – https://docs.microsoft.com/en-us/windows/configuration/lock-down-windows-10-to-specific-apps).
In Windows 10 1809 a new specified location can be used to provide access to a single location, however at the time of writing the only option is the users download folder which again would not suit the requirement (https://docs.microsoft.com/en-us/windows/configuration/kiosk-xml). So I set about looking at an alternative method for deploying a kiosk style machine where I could have more granular control over the restrictions applied to the user session.
Shared PC – An Alternative Kiosk Method
In this instance I looked towards the Shared PC feature of Windows 10 to provide guest access. Shared PC mode documentation – https://docs.microsoft.com/en-us/windows/configuration/set-up-shared-or-guest-pc
Shared PC mode in Windows 10 1607 and greater provides a build in control method for account maintenance and also supports guest user accounts, ideal for a kiosk I thought. There are some mandatory policy restrictions again, however none of which locked down the machine to the same extent as kiosk mode, so that provided an excellent starting point.
There is also a Shared PC CSP available for configuring settings in Intune, making it straight forward to enable and configure settings – https://docs.microsoft.com/en-us/windows/configuration/set-up-shared-or-guest-pc. Taking this modern Shared PC approach as a starting point I’ll now step through how to use a mixture of both traditional and modern methods to achieve a more flexible kiosk.
Step 1 – Microsoft Intune Policies
The first thing we need to do is create a policy to enable SharedPC mode with guest access
- Log onto the Azure Portal
- Click on the Intune Blade and go to Device Configuration
- Click Profiles and then “+ Create Profile” in order to build a new profile
- Select Windows 10 as the platform and Custom as the profile type
- Click on Settings and enter the following OMA-URI entries;
./Vendor/MSFT/SharedPC/EnableSharedPCMode – Boolean – True
./Vendor/MSFT/SharedPC/SignInOnResume – Boolean – True
./Vendor/MSFT/SharedPC/EnableAccountManager – Boolean – True
./Vendor/MSFT/SharedPC/AccountModel – Integer – 0
./Vendor/MSFT/SharedPC/DeletionPolicy – Integer – 0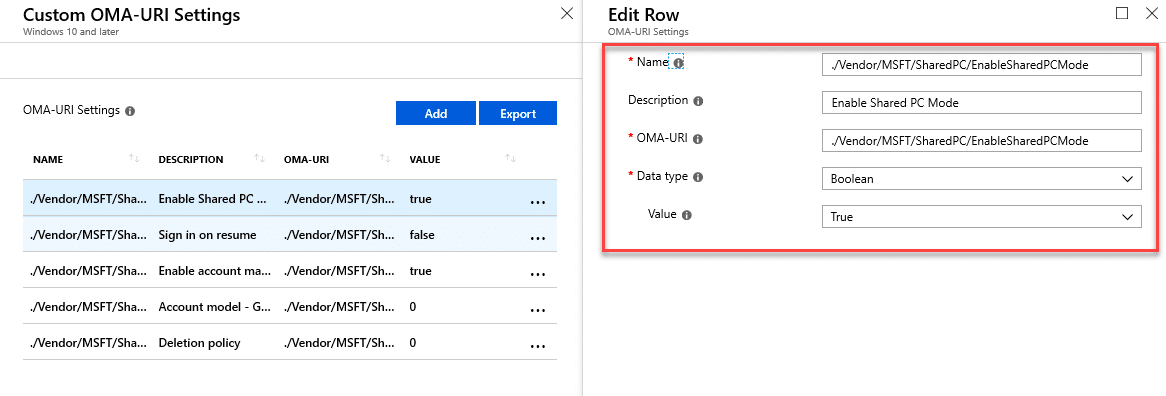
- Save the policy
- Assign the policy to a group of your choice
Now the process of locking down and deploying applications can begin.
- Go back to the Device Configuration\Profiles section of the console
- Click on the “+ Create Profile” button again
- Select Windows 10 as the platform and this time “Device Restrictions” as the profile type
- Start the process of turning off all unwanted features

- Import a start menu layout export (table mode is recommended)

- Save the policy
- Assign the policy to the same group as before
Now lets create another profile to take care of Windows Defender and other security related settings;
- Go back to the Device Configuration\Profiles section of the console
- Click on the “+ Create Profile” button again
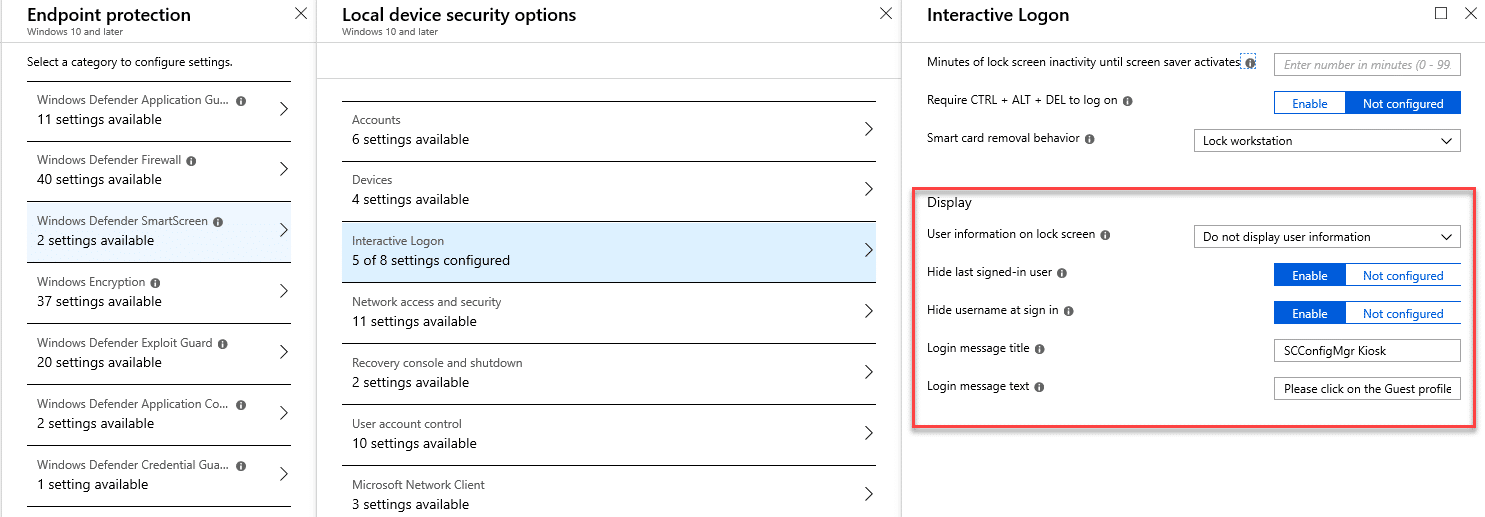
- Select Windows 10 as the platform and this time “Endpoint Protection” as the profile type
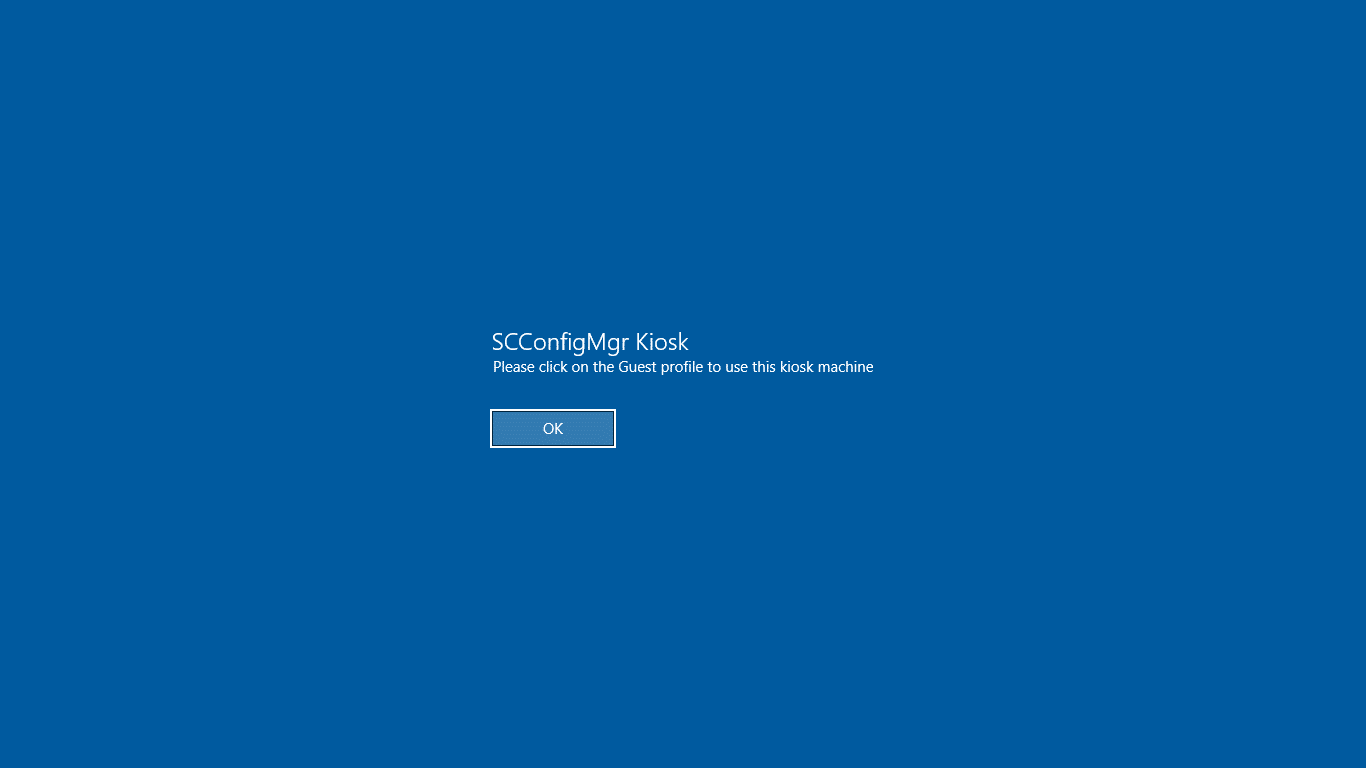
- In the below example I have configured the interactive logon screen to advise the user what to do to log on;
One last policy in this example is to schedule a restart of the machine as part of daily maintenance, leaving the machine ready to log in the next morning. Here we will use another CSP, the Reboot CSP – https://docs.microsoft.com/en-us/windows/client-management/mdm/reboot-csp.
- Go back to the Device Configuration\Profiles section of the console
- Click on the “+ Create Profile” button again
- Select Windows 10 as the platform and Custom as the profile type
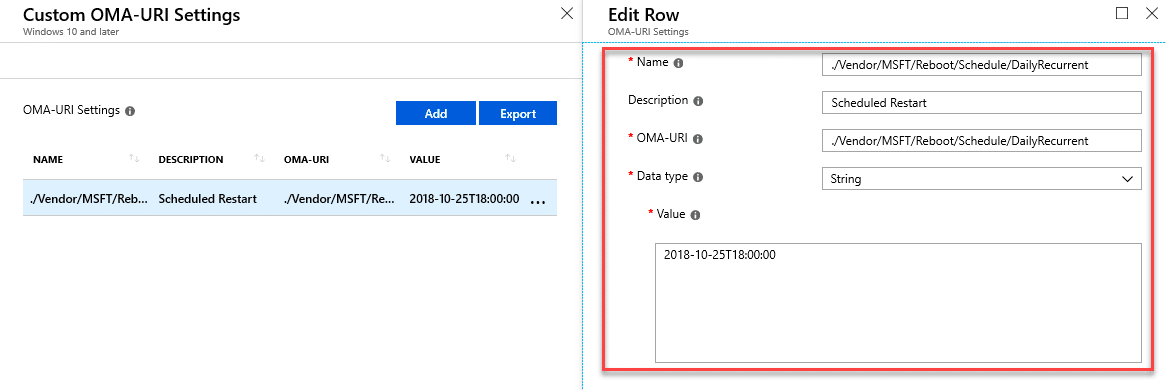
- Click on Settings and enter the following OMA-URI entry;
./Vendor/MSFT/Reboot/Schedule/DailyRecurrent – String – 2018-10-25T18:00:00
When putting this post together the documentation contained examples which had issues, thankfully Oliver updated the documentation with the examples I recommended.
At this point we now have a fully functional kiosk style machine ready, however on testing the locked down policies I found that there was plenty of room for further locking down the machine.
Step 2 – Non-Administrator Workstation GPO
In order to fully lock down the workstation I am using a local non-administrator GPO as ADMX is still currently unavailable.
In this example I am going to apply restrictions to the Start Menu, the task bar, set URL’s in Edge and Google Chrome along with a few other security related restrictions to prevent the end user launching applications they shouldn’t.
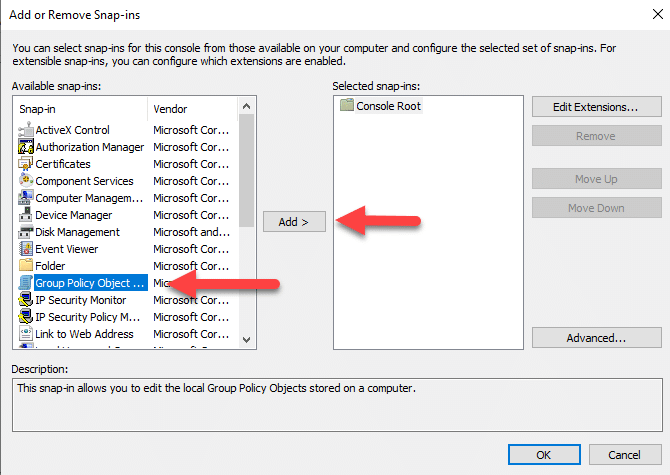
- Launch MMC on a machine running the same build of Windows as your target device
- Add the Group Policy Object Editor
- Select the Non-Administrator group

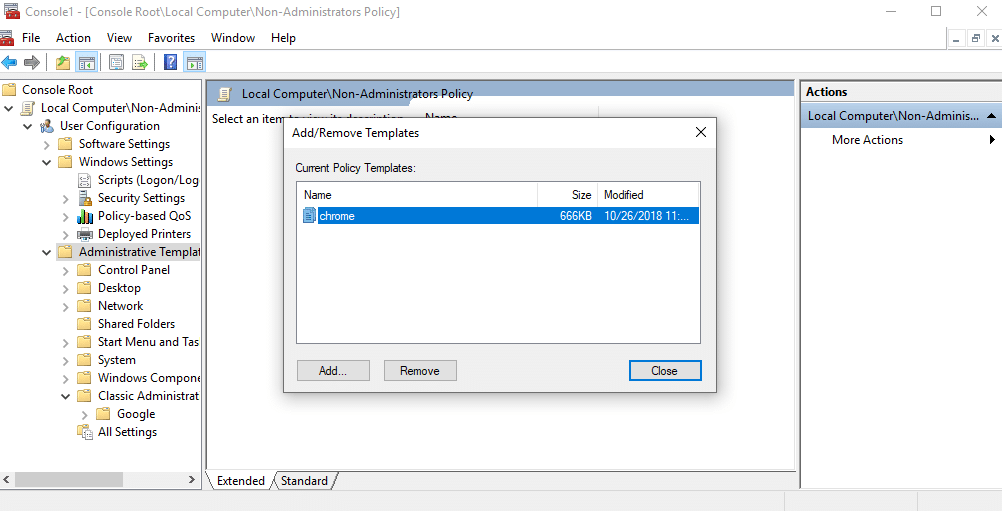
- Add in any third party ADM templates you wish to use
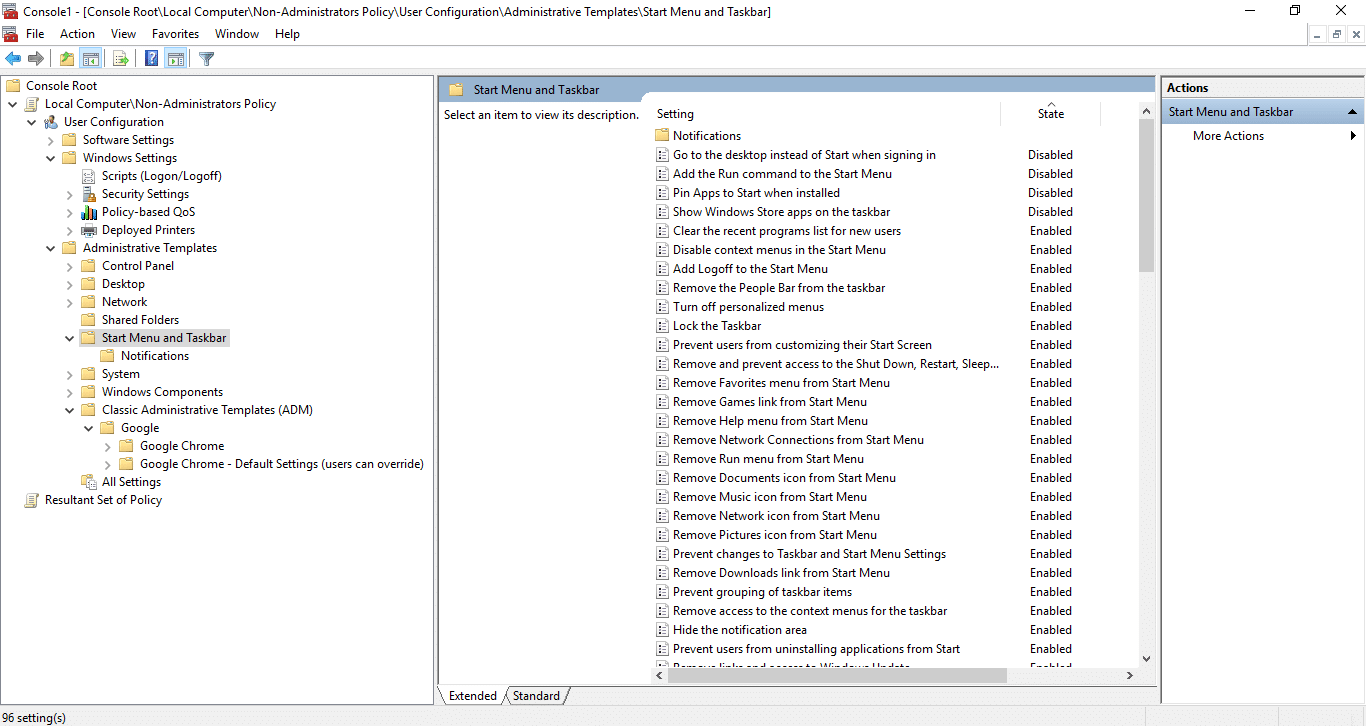
- Configure security and other task bar lock downs;
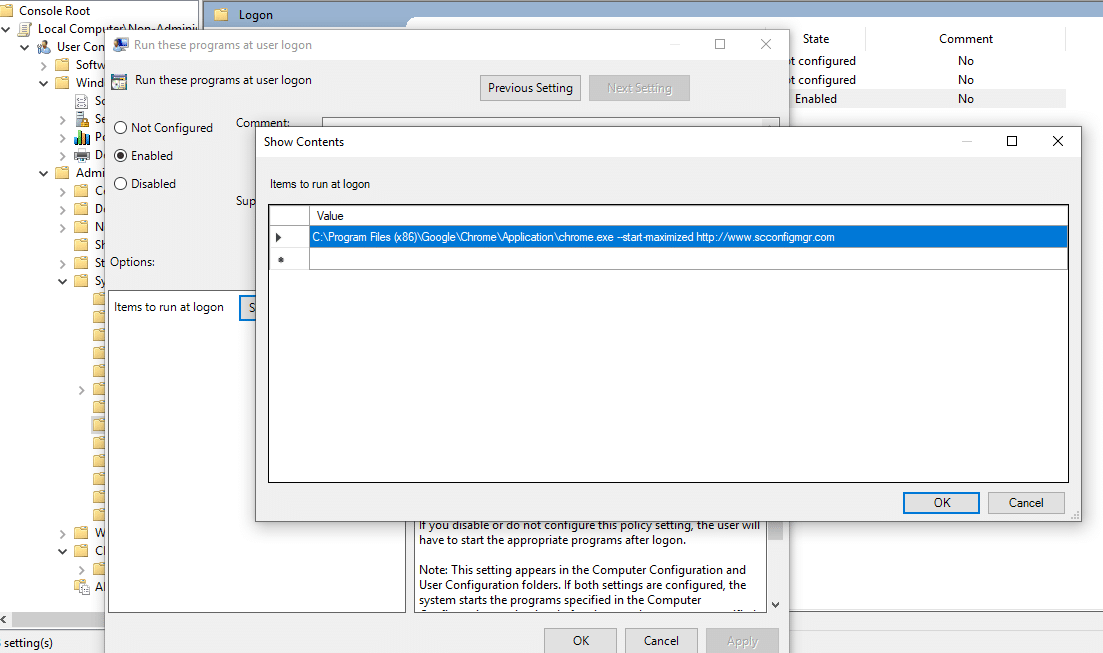
- Configure application settings such as Edge and Chrome homepages and also launching an application on login if you wish. In the example here I am calling Chrome to via the following;
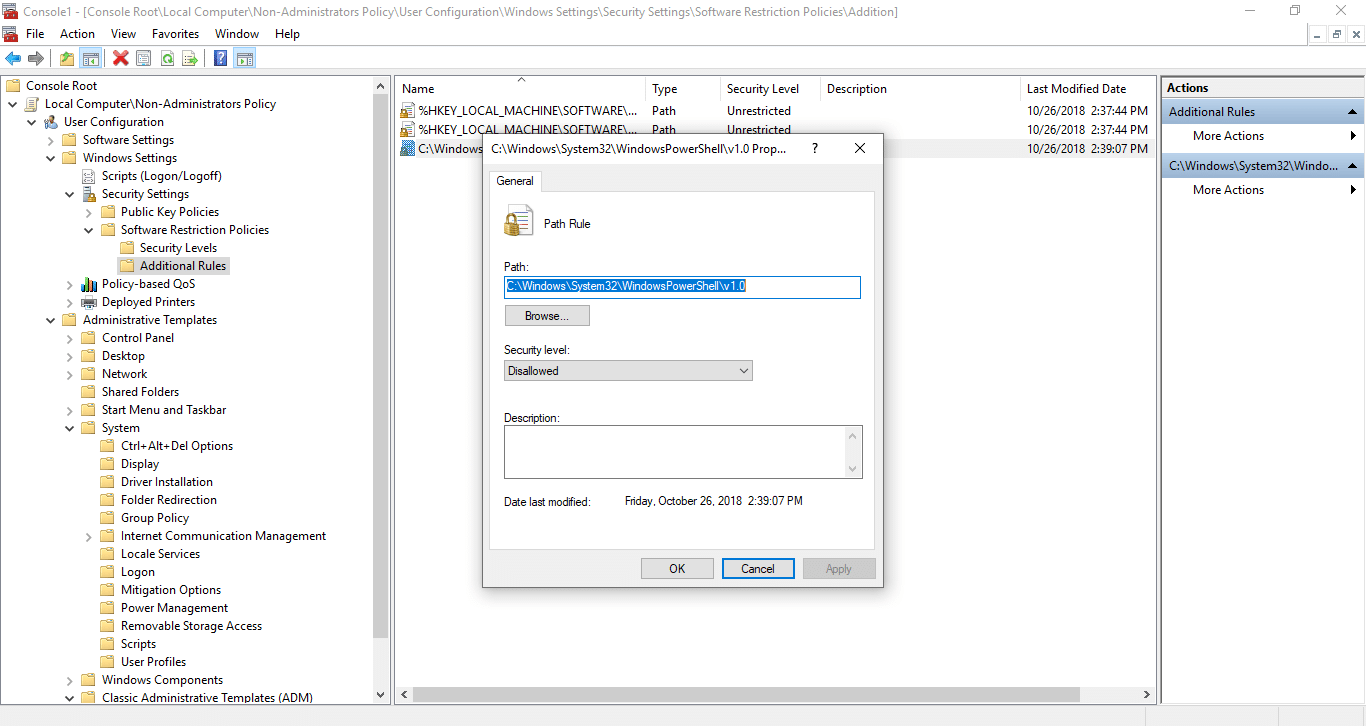
- I am also restricting access to PowerShell using a Software Restriction Policy as I don’t want guest users to have access;
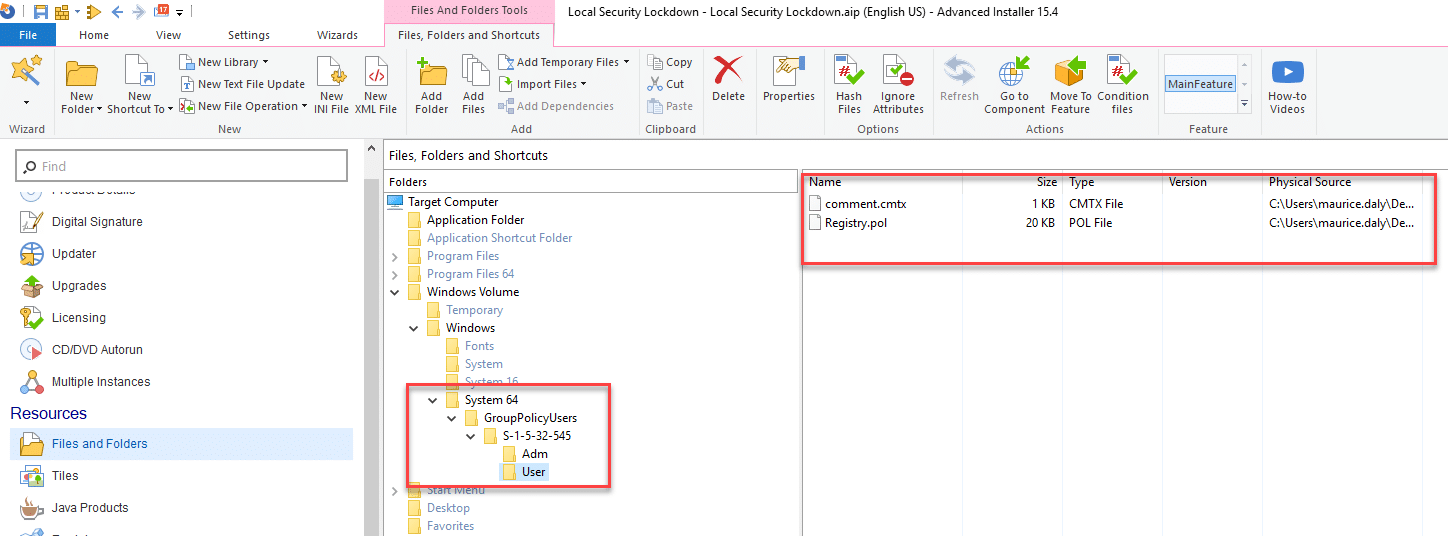
- The resulting policy is created in the following location – C:\Windows\System32\GroupPolicyUsers\S-1-5-32-545 directory;

- Copy the contents of this directory to another location for the next step
Step 3 – Create a GPO MSI
Now that we have a copy of the GPO, the next stage of course is to have a method of injecting the files and folders into our “kiosk” machine.
To do this I am creating a single MSI insaller in Advanced Installer that simply contains the files and drops them into the same location on the target machine. The beauty here of course is that the file can be readily deployed via Intune and additions to the GPO can be easily re-deployed via incremental updates to the MSI. Obviously this might change when ADMX is fully available but for now this method works fine.
- Add the GPO files and folders into your MSI build package builder, ensuring that the package is set for the Windows architecture version you are deploying
- Build the package and test deployment on a test machine. The folders and files should appear and restarting the machine then logging in as a non administrator will test if policies have been successfully applied
Step 4- Deploy the MSI
Once all of the security and application lock downs have been applied and tested, switch back to Intune blade in your Azure portal and move onto the next step
- Click on Client Apps and then Apps to display a list of your deployed applications
- Click on “+ Add” selecting “Line-of-business app” as the App Type (of course Win32 is also a valid method)
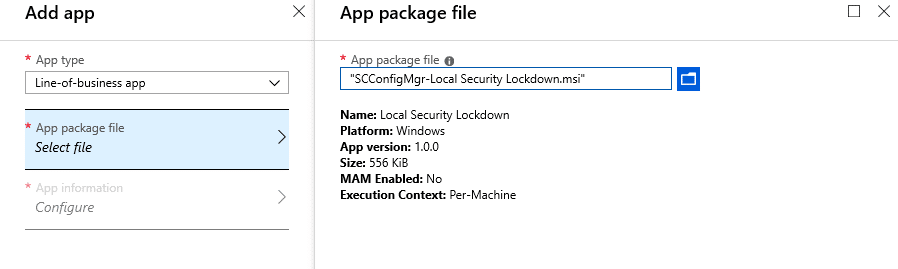
- Fill in the app information and set a logo as/if required
- Save the app
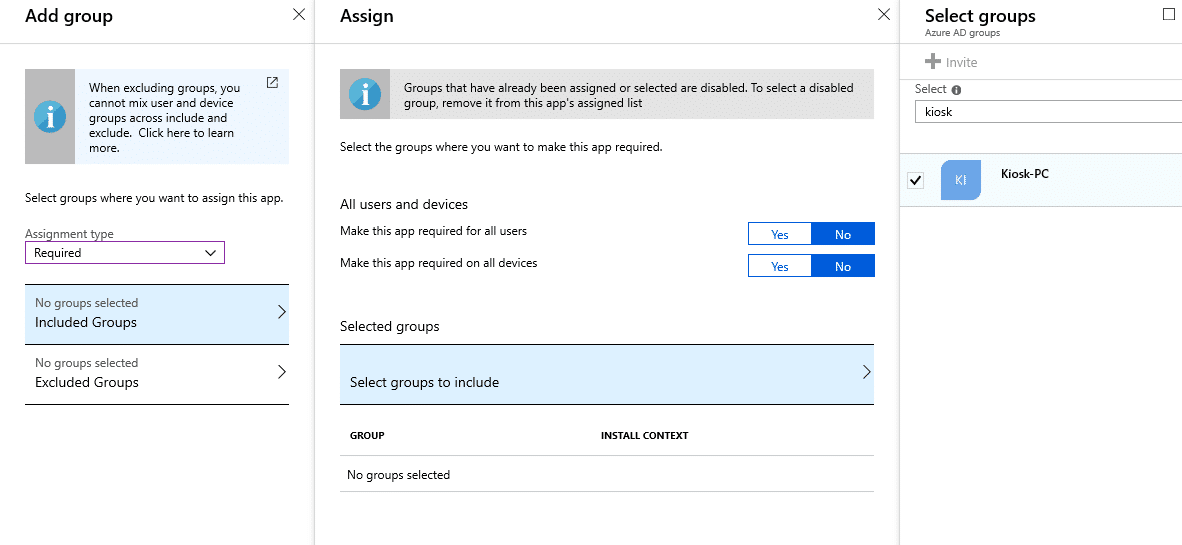
- Assign the application as a Required assignment to the same group as before
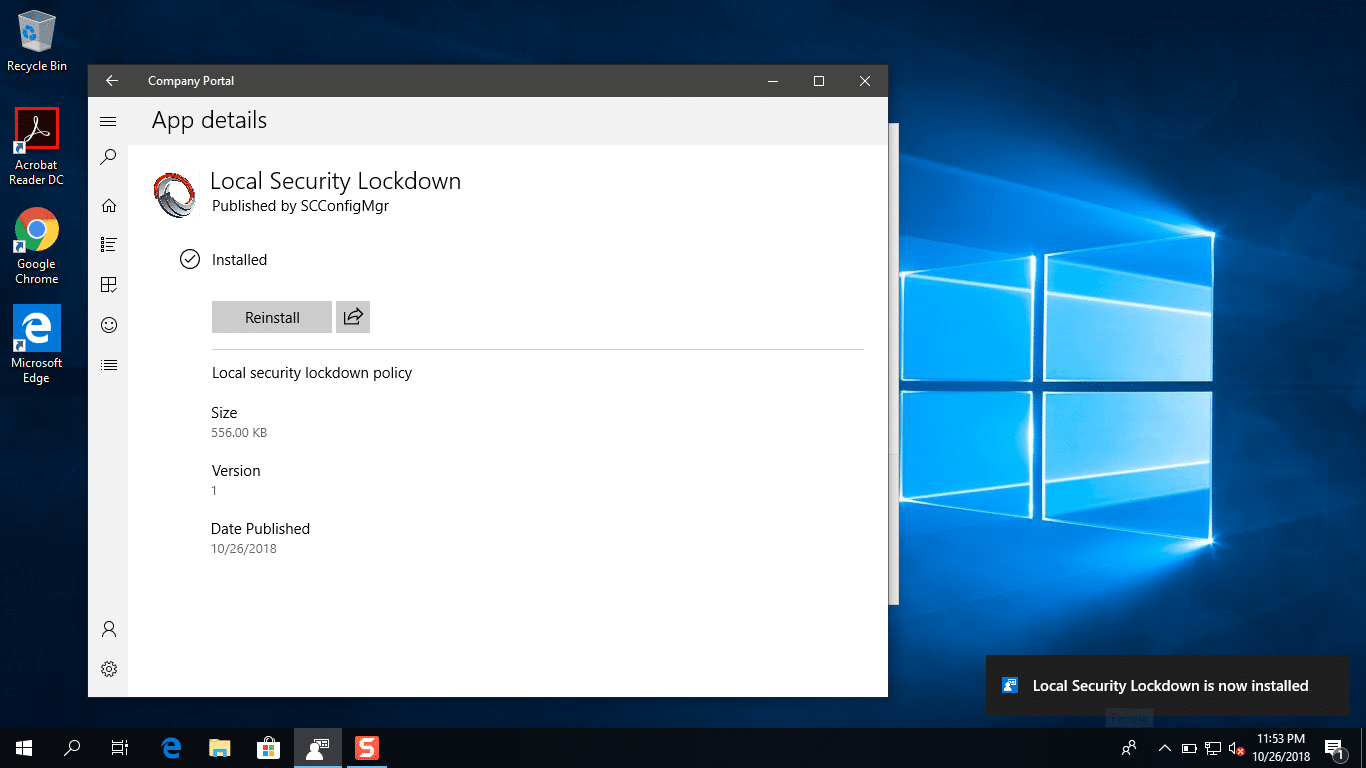
Making the application available in the company portal, we can also manually test the installation;
End Result – A Shared PC Kiosk
Below is the end result, what I believe to be an improved kiosk experience for both the administrator and the end user;
- Login message
- Guest Sign-In

- Locked Start Menu layout
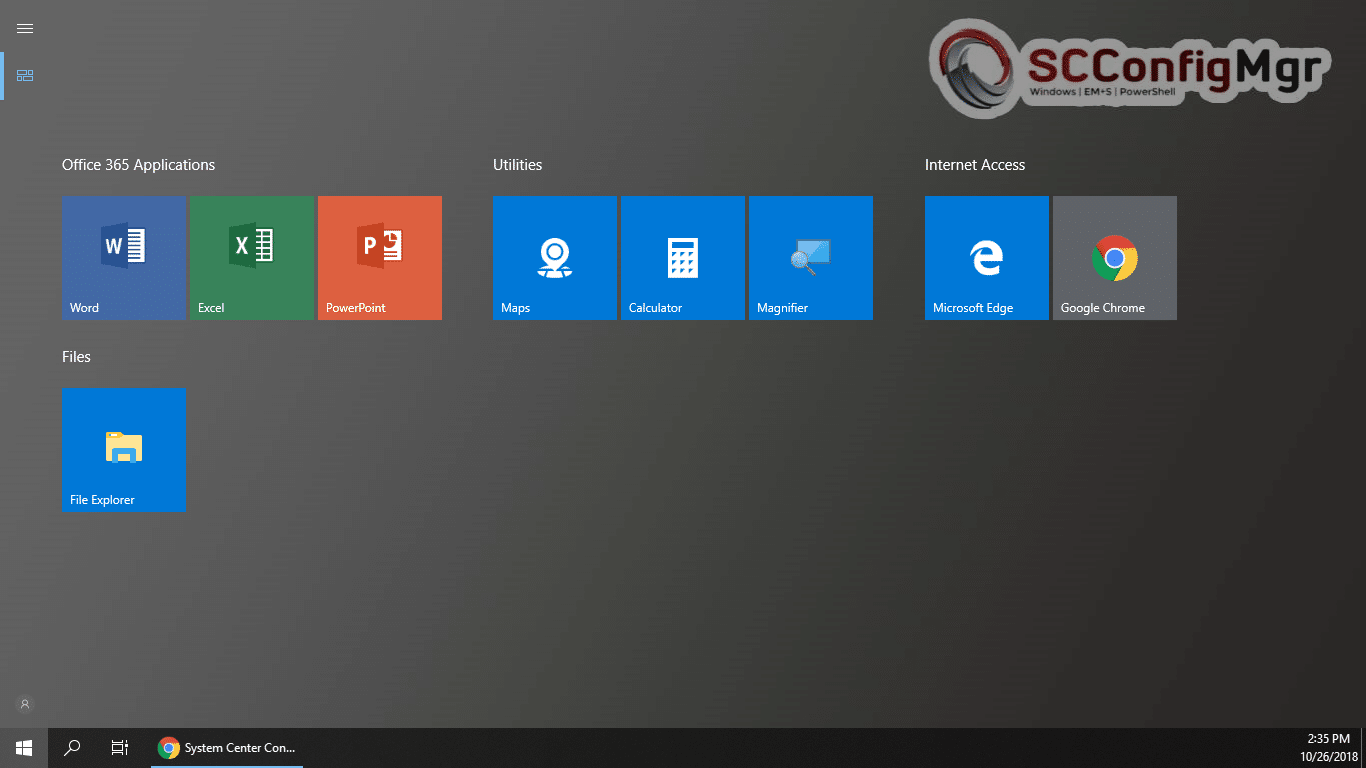
- Auto-launch of Google Chrome and loading the homepage defined in the applied GPO

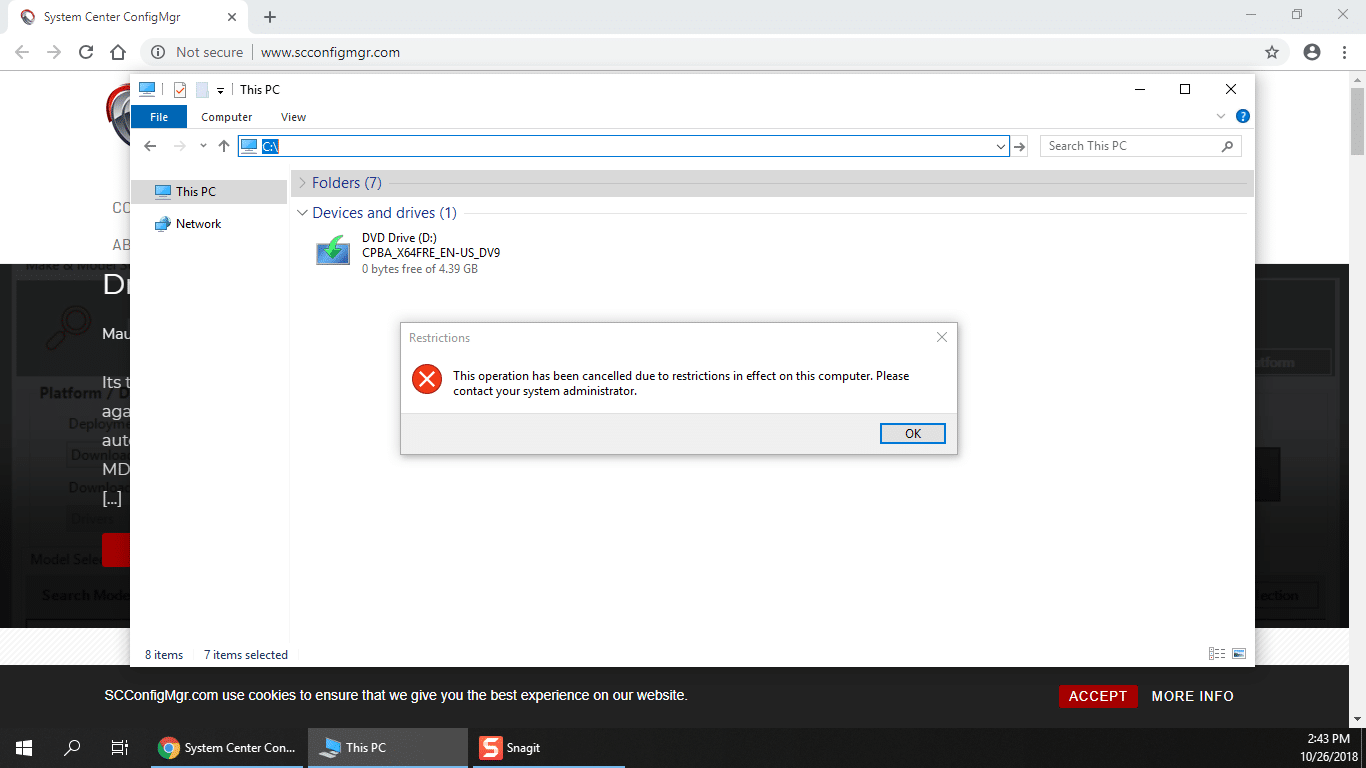
- Browse to the C:\ restricted message
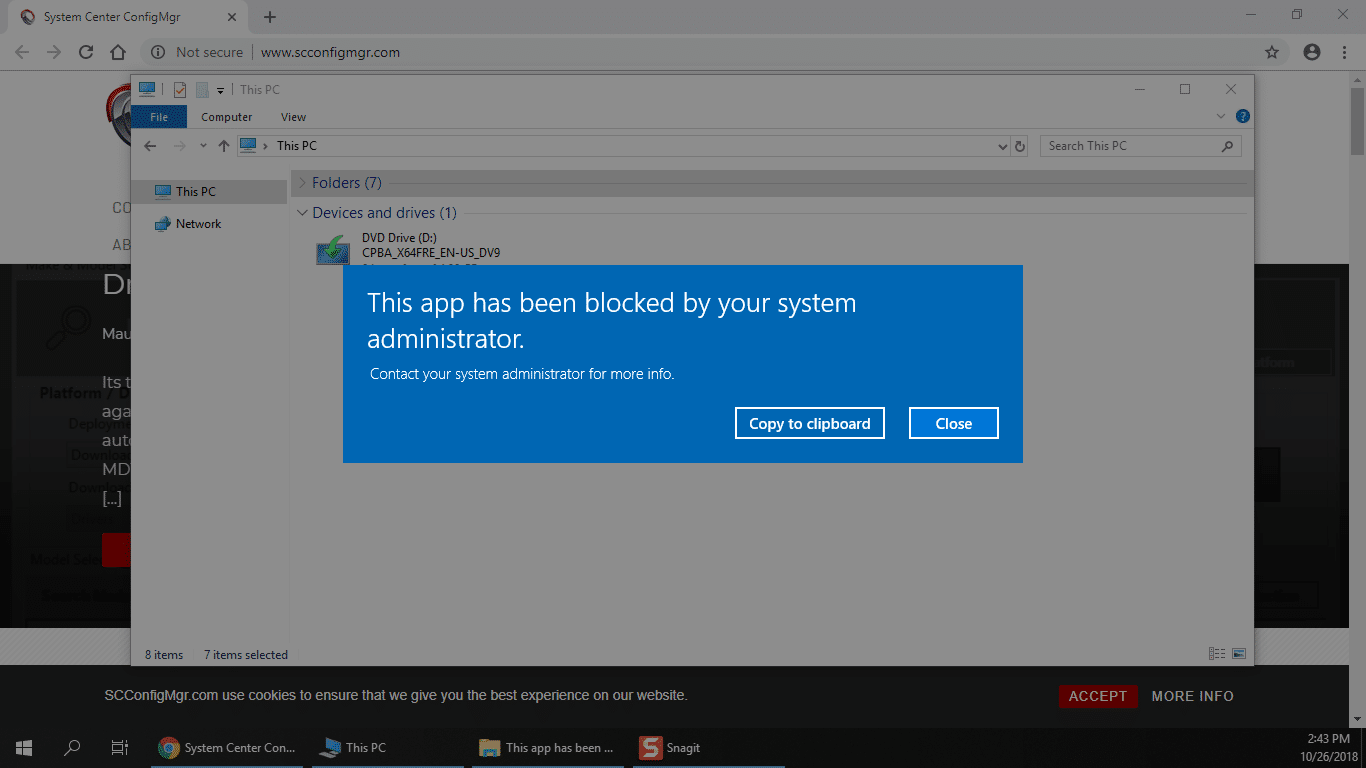
- Run PowerShell block message
The guest user can now log onto the machine, use the provided apps with access to USB and CD/DVD media while also being secured and their profile is never re-used.
Conclusion
Modern management of Windows can be as flexible as you need to be, so try it out and embrace it. With the continued development of the platform, some of what is listed in this post might well become obsolete in time, but I would hope that is a good thing as the platform continues to grow and allow you to do more.
Notes
Thanks to Sandy (Zeng Yinghua) for the helping out with the GPO policy and running through some of the CSP issues we found along the way. Windows 10 1809 was used for the purpose of the demonstration here due to the graphical improvement with the full screen start menu, however the same method applies to 1607 and greater but of course functionality might differ between builds.
Thanks for reading.


This is almost exactly howbi setup a Kiosk system as well for a proof of concept. The big sticking point for our client was autologon! Or at the least have the Guest login show up first in the login options. I’ve posted on Microsoft forums but apparently this is not an option .
Thanks for the post!
Hey Nigel,
Did you end up finding a solution for this? I have the exact same issue.