

With a focus on moving management of Windows devices to Endpoint Manager, the thing that I see often gets overlooked is, what to do with the internal server estate? In this post we will look at the options available in a cloud first world, looking specifically at what we can do with Azure automation and Azure Security Center, to help provide you with a sufficient level of Windows Server patching.
Moving away from existing patching solutions
If Configuration Manager was in place prior to the move, the temptation of course is to maintain that trusted management solution. The issue though is that this can come with a big cost when licensing changes are evaluated, something that many had not budgeted for during their foray into cloud first adoption. I have seen this with clients and the cost for maintaining their server fleet becomes cost prohibitive when compared with the cost of manual effort, to put it another way, its just cheaper to pay someone to do the updates manually. This is very much a regressive path though, as automation is not only about taking the chore away from the admins, but also about compliance, and of course removing human behavior (i.e. I forgot) .
WSUS of course is the typical approach then if we take Configuration Manager out of the equation, or if ConfigMgr it was never there to start with. WSUS itself has a bit of a love hate relationship with admins, as where as it does it job perfectly well, it doesn’t fit to the modern workplace environment. Managers want the ability to access data through an online portal at any time, and WSUS doesn’t fit into the modern office scenario where MPLS or WAN connectivity is deemed to be a luxury when the clients themselves only need an internet breakout.
Infrastructure Is Evolving
With devices being managed direct through Intune, email hosted online in Exchange Online, and data being stored in online tools like OneDrive, SharePoint and Teams, the traditional hub and spoke or mesh model of the corporate network is changing.
In my own experience I am seeing a shift in how branch offices are being set up, moving away from traditional WAN type topologies in favor of ensuring a high speed internet connection is available as the priority. This of course helps to reduce hardware and management cost on the LAN/WAN side, and allows businesses to be more flexible, especially those with a “pop-up” office model.
In this instance placing even the most entry level of servers, is something that some are simply opting to avoid, or at most a simple file and print server is all that is required. So how do we adopt the traditional patching model for servers, given that we are managing Windows devices through update rings in Intune?
Azure Security Center – The solution
I often hear from clients the question “Can we patch our servers through Intune?”, and I always explain that Endpoint Manager / Intune is for Windows client devices. The good news is however that Microsoft do have a solution which can help you patch your server estate through the cloud, the solution is called “Azure Security Center” (https://azure.microsoft.com/en-us/services/security-center/).
Azure Security Center comes in two models, the first of which is free, but that is limited to simply a recommendation type role. The features we are going to focus on are contained within the standard tier (https://azure.microsoft.com/en-us/pricing/details/security-center/), which provides not only the recommendations and continuous motoring, but also allows you to patch your server estate in a manner that isn’t too dissimilar to how you would do with Microsoft Endpoint Manager.
Patching through the cloud (or maybe not if you wish)
Patching servers through the cloud is for many the holy grail for some, as that helps them to remove their dependencies on WSUS. For others through, particularly in heavily secured environments, there will always be limitations on how servers access the internet.
The good news here is in the way in which the patching is orchestrated, as this is more about orchestration of the updates, rather than being an endpoint management solution that Intune for Windows clients is. Azure Security Center utilizes a local agent to control actions within the OS and in this example, pull security updates from an update source. Communications between the servers and Azure can also be proxied through a gateway service, thus allowing you to have minimal exposure.
The key point here is “a source“, as you see the updates themselves do not necessarily need to come from the cloud if that is something that would cause an issue. An internal WSUS server can still be the source, but with ASC you can control which updates are applied, at what time, and report on those through the cloud. In the example below though we are going to look at how to leverage ASC to patch directly from Microsoft update.
Below is s a diagram from Microsoft demonstrating how the service works;

Note: The update management feature will patch servers from Windows Server 2012 and upwards, Windows Server 2008R2 is only supported for detection of missing updates. For more information on compatibility, view this document – https://docs.microsoft.com/en-us/azure/automation/automation-update-management
The Microsoft Monitoring Agent
The entire process is handled through something that SCOM users might be familiar with, the Microsoft Monitoring Agent. Once the agent is installed all you need to do is link it to your OMS workspace and then through the power of Azure automation, the patching process can begin. There are also other benefits that you can leverage through this agent, including pulling back specific event logs, but for this post we will focus purely on Update Automation.
The set up process
The first thing we have to do is to obtain an Azure subscription, so for that you will need to talk to your licensing partner. Once in place we can go ahead and create a Log Analytics Workspace and start the process of setting up the automation account.
Log Analytics Workspace
- Create a new Log Analytics workspace (note you can skip to creating an automation account if this is already in place)
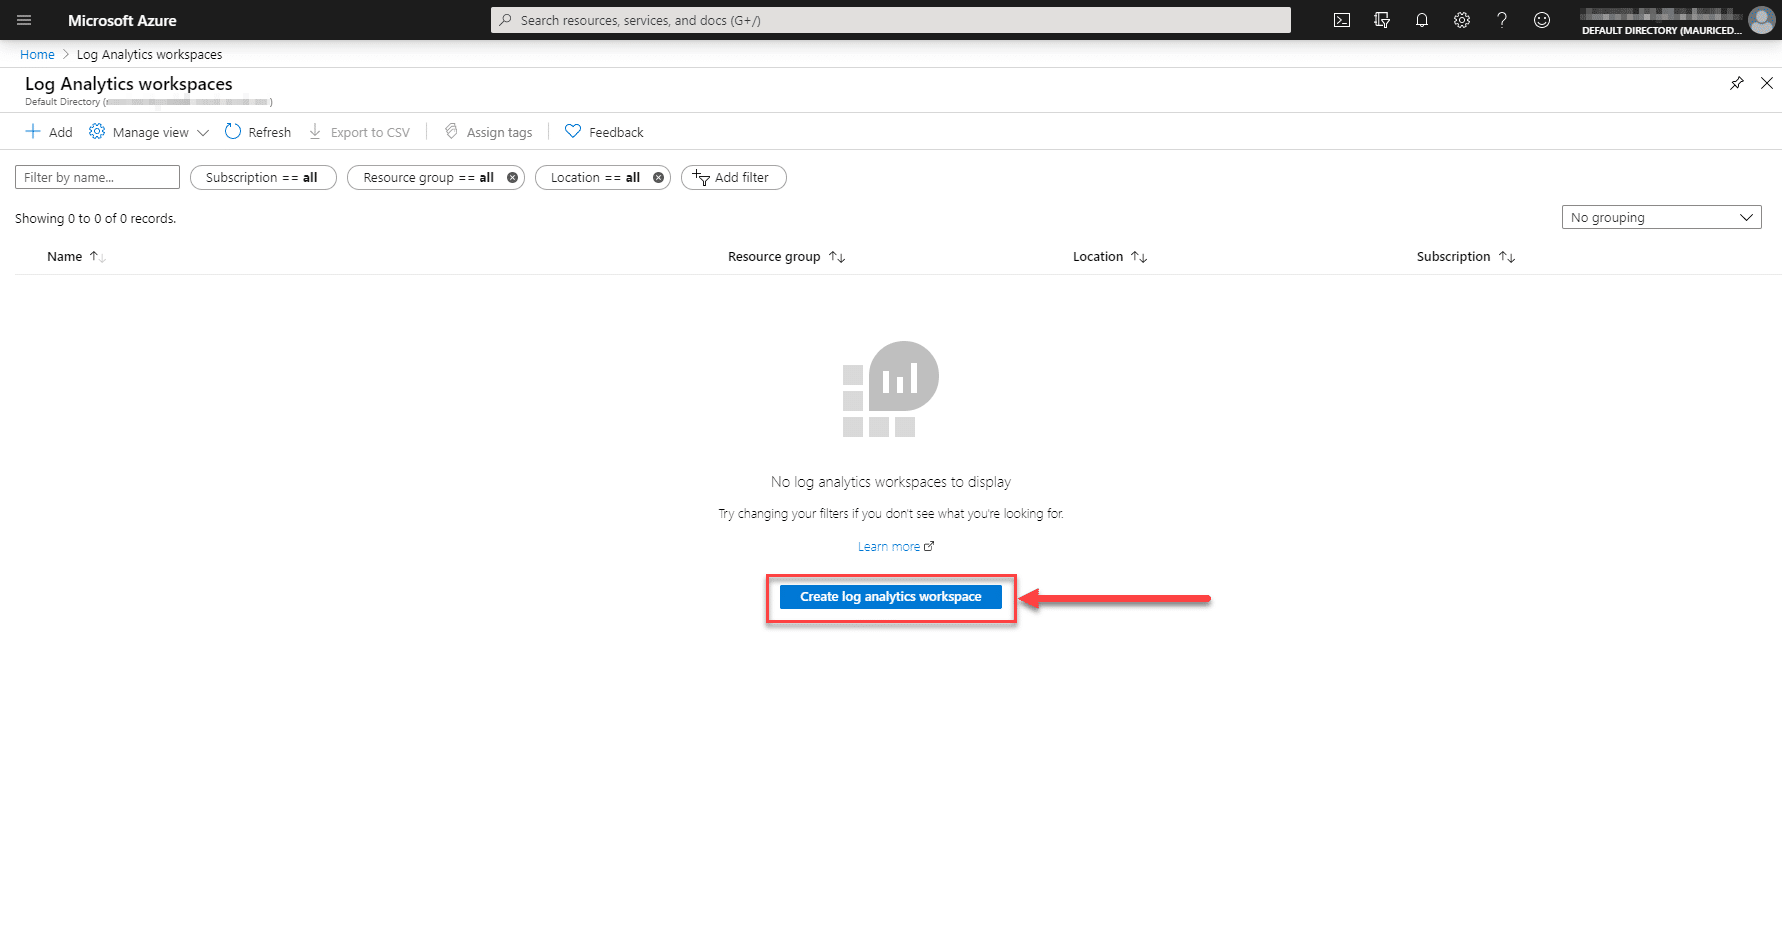
- Enter a name for the workspace, then select your subscription, resource group and hosted location;
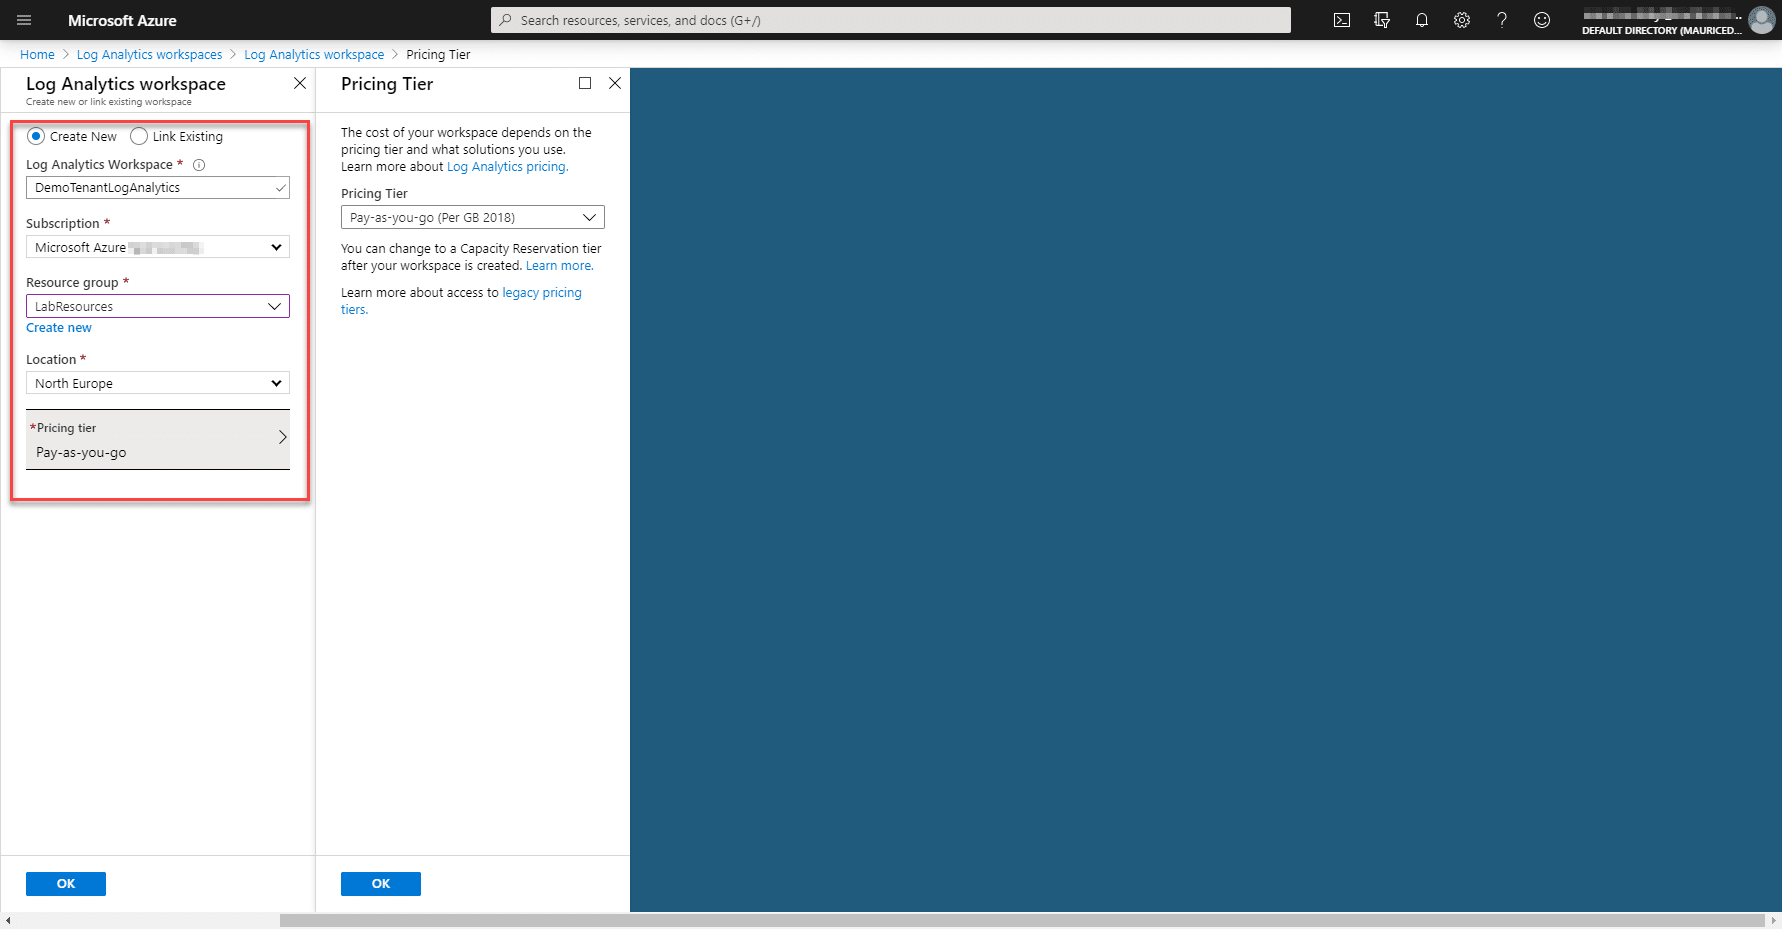
- After a few minutes, the workspace should be provisioned;
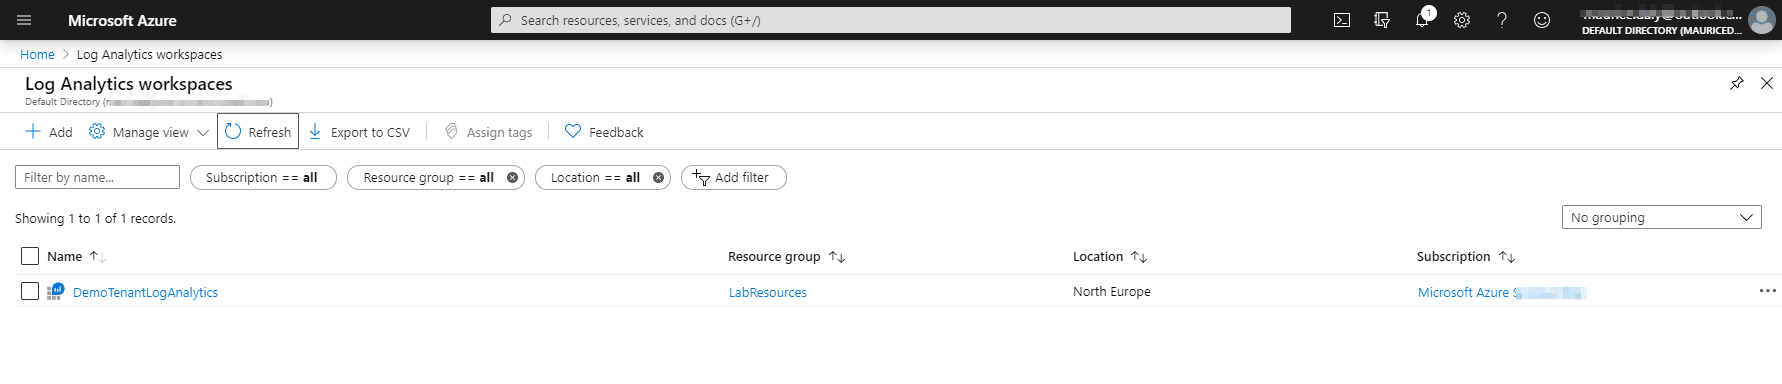
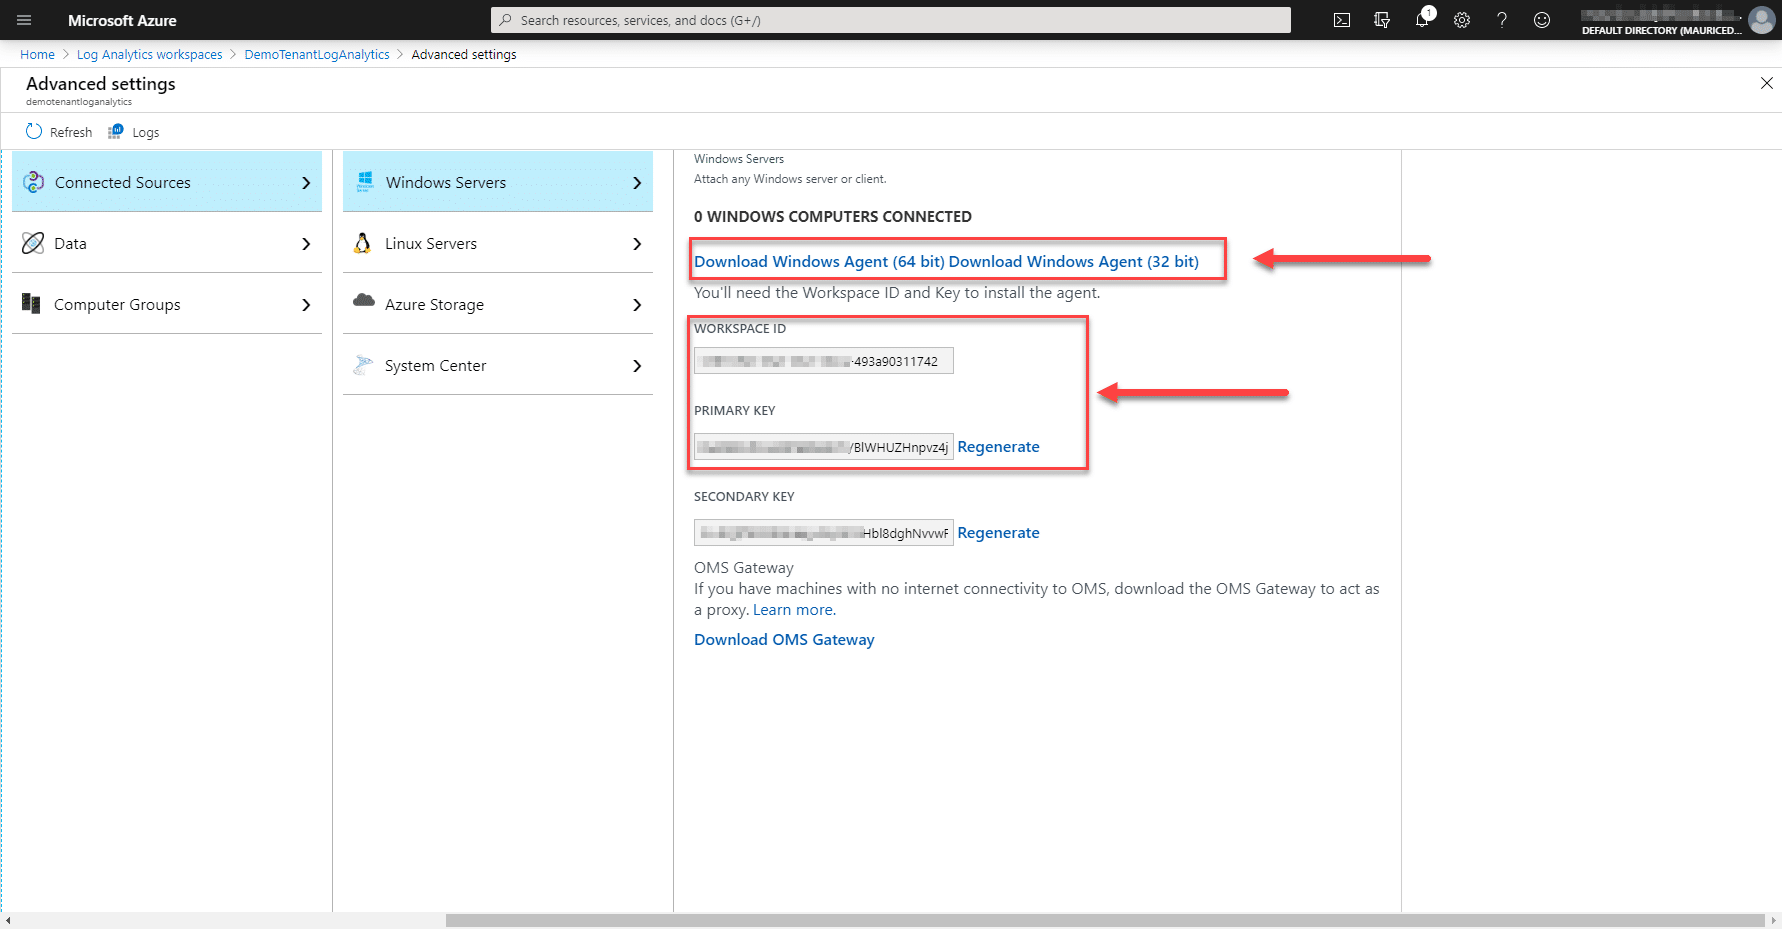
- Click on the newly provisioned worksapce, we then go to Advanced Settings;

- Here we can now download the required Microsoft Monitoring Agent and take note of the workspace ID and primary key as these will be required to connect machines to this tenant;
- Now we can also import Computer Groups which are detected by the Microsoft Monitoring Agent, which will be particularly useful when it comes to selecting groups of servers for patching

Installing the Microsoft Monitoring Agent
With the agent now downloaded, we can go about installing it on our on-premises servers.
Installation;
- Run the downloaded setup file and click Next

- Agree to the license agreement

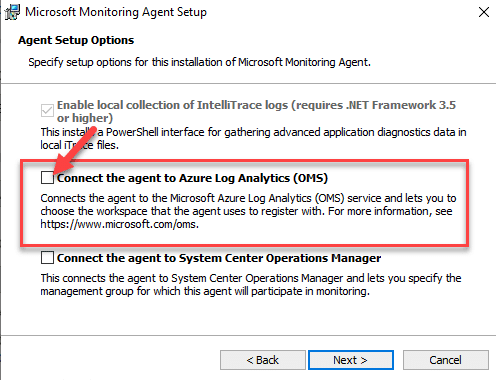
- Select the “Connect this agent to Azure Log Analytics (OMS)”
- Click through the installer and finish the installation process
- Once installed go to Control Panel and open the Microsoft Monitoring Agent
- Now enter the Workspace ID and Workspace Primary Key
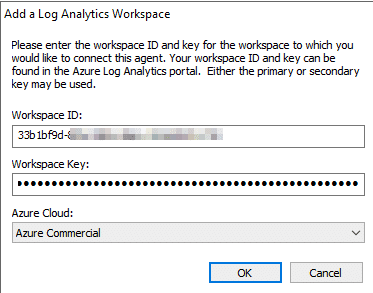
- After a moment you should receive visual confirmation that the server has connected to OMS

Note: As mentioned earlier, if your servers do not have internet access, you can also use an OMS gateway. Details can be found here – https://docs.microsoft.com/en-us/azure/azure-monitor/platform/gateway
Adding an Automation Account
The automation account is what ties everything together and where you will see the “Update Management” section, where you configure your update rings in much a similar process to how you would do client updates.
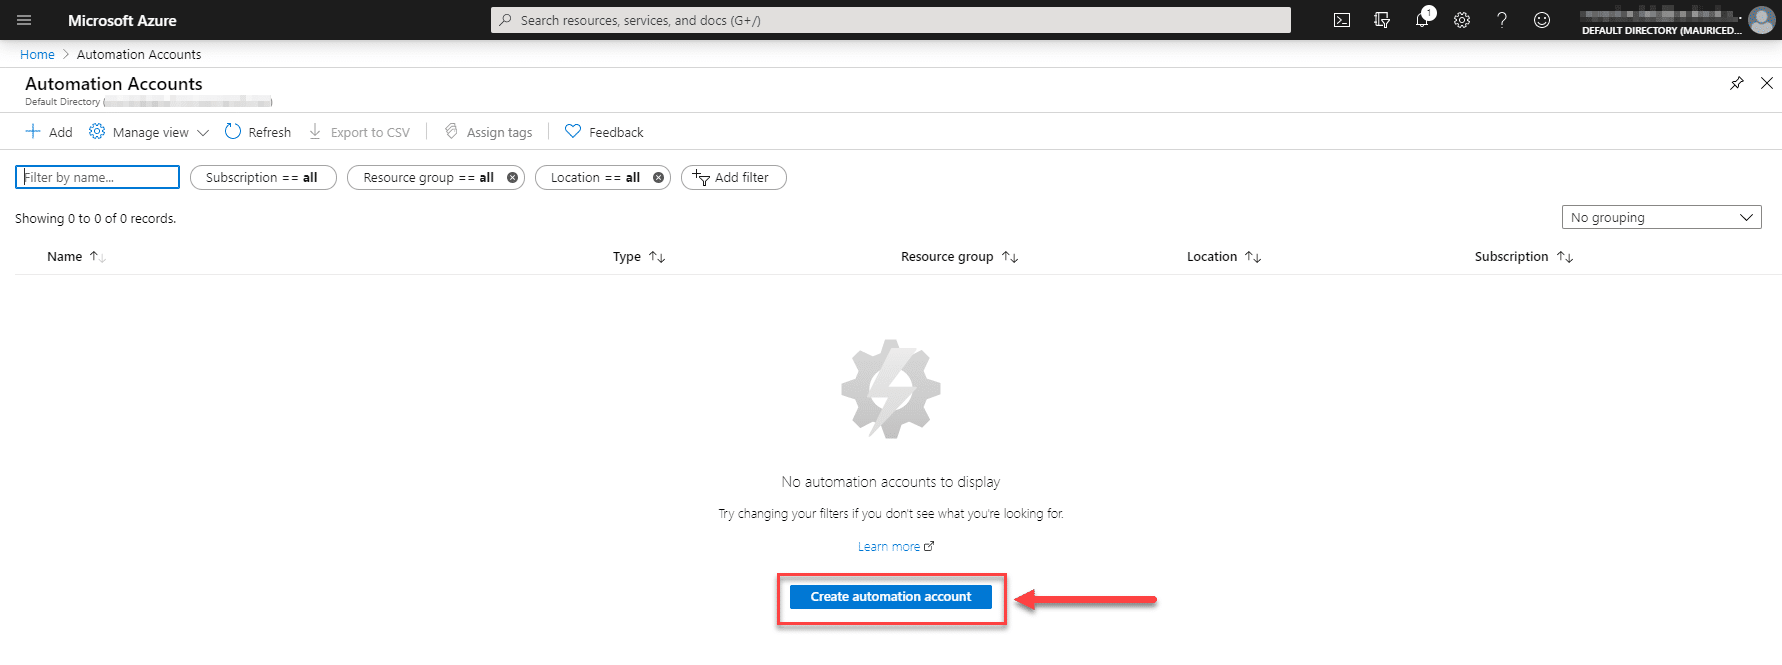
- Search for and then click on “Automation Accounts“
- Click on “Create Automation Account“;
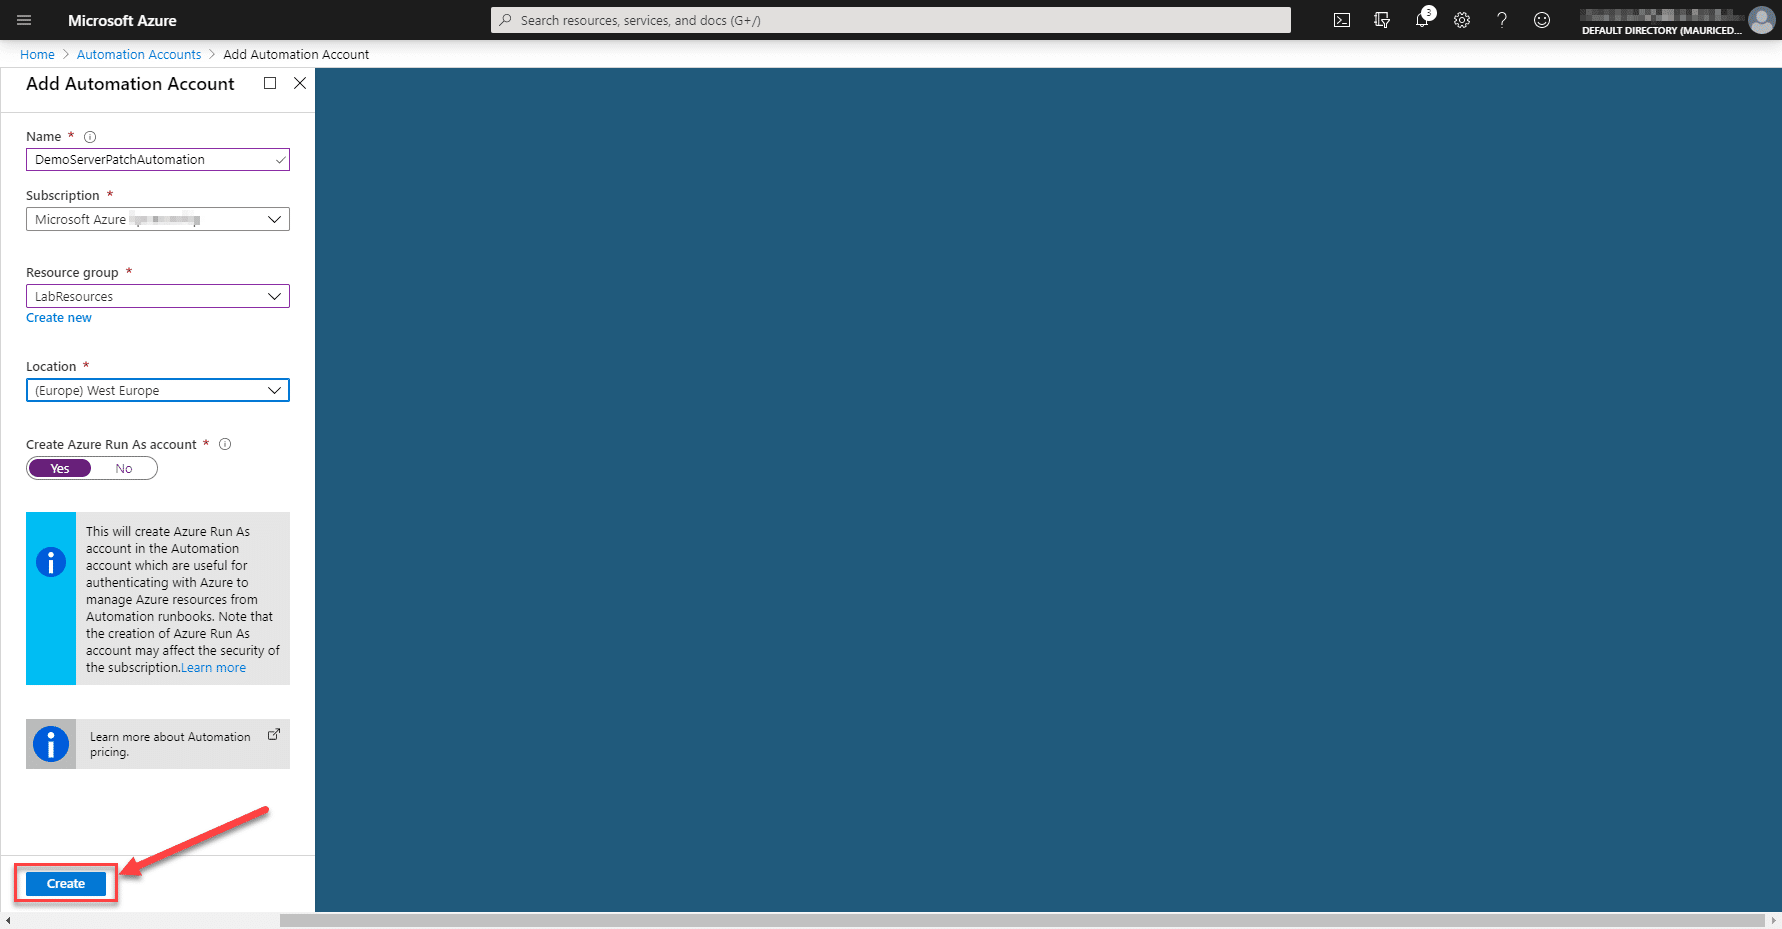
- Enter a Name
- Select the Azure Subscription
- Select your Resource group
- Select your Location
Note: Azure Automation Accounts at the time of writing are not available in all regions. For example, Europe (North) is not currently supported. You can view what is supported in your region here – https://azure.microsoft.com/en-us/global-infrastructure/services/?products=automation®ions=all
- Click on “Create”
- Click on the Automation Account once created, then go to “Update Management“
- Select the Log Analytics Workspace you created earlier and click Create
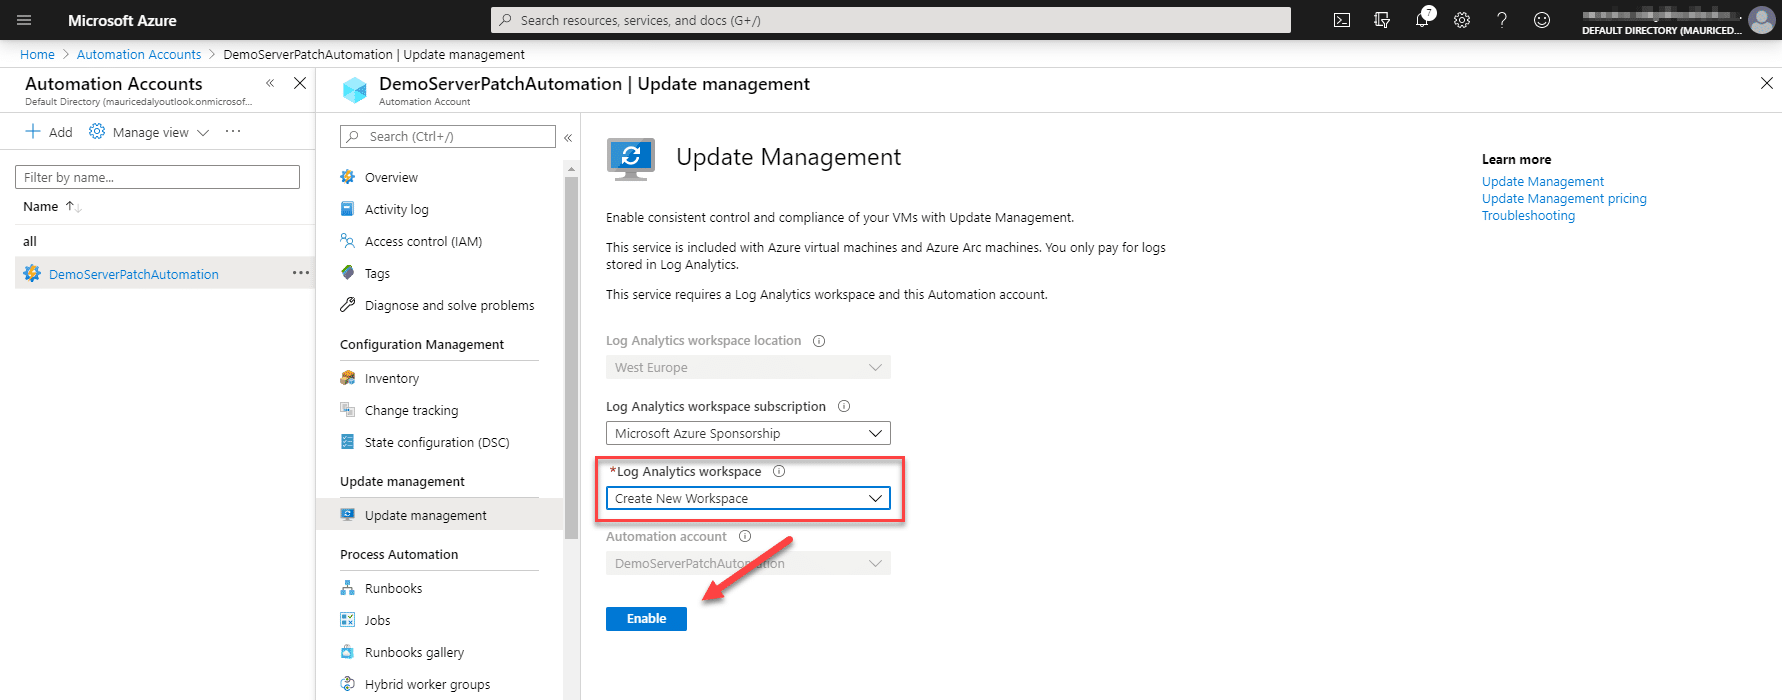
- Now we can set about adding in both Azure and Non-Azure (on-premises) VM’s and configuring the update deployments

Creating Update Rings / Scheduling Update Deployments
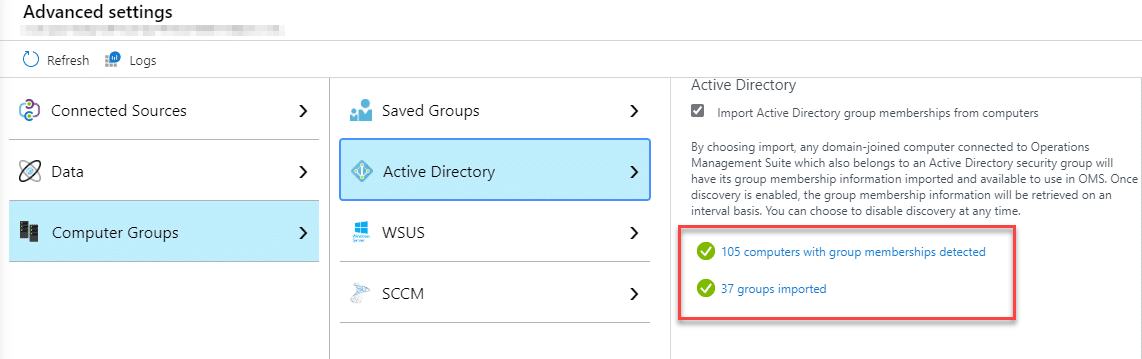
Now that we have everything in place and servers are talking to OMS, we can set about scheduling the update deployment jobs. Before we do so however, earlier we enabled Log Analytics to pull security group information, which includes security group membership.
The most straight forward way to import a large number of servers, is to use this option. Simply create a new Group in your AD and add the computer objects to it. Restarting the managed server or using the “klist -lh 0 -li 0x3e7 purge” command will force a refresh of the group membership. You can check the groups sychronised through the agent at any time by going into the Log Analytics advanced settings;
Going back to the Automation Account, we can now configure our first Scheduled Update Deployment group.
- Click on “Schedule Update Deployment”

- Enter a name for the update deployment
- Click on “Machines to update“
- Select the type “Imported groups (AD/WSUS/SCCM)“
- Now you can select a group that contains servers which you wish to patch, alternatively select “Machines” to select individual machines from a list
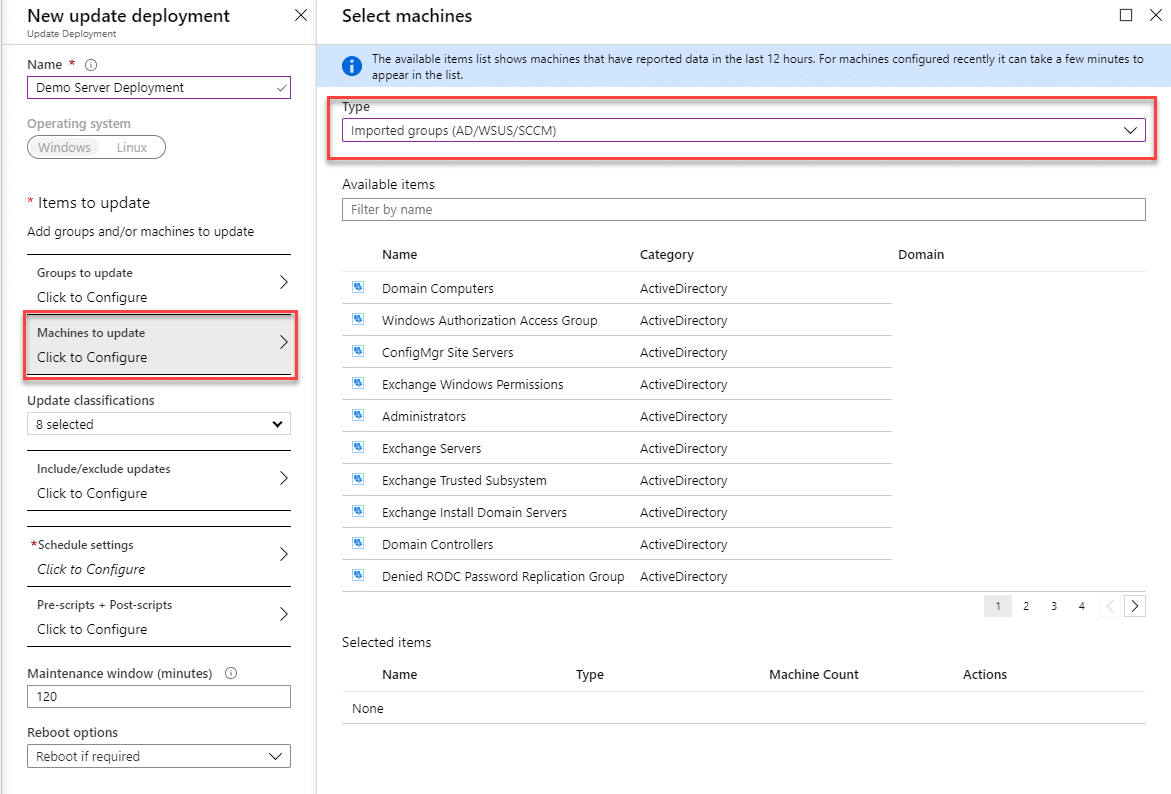
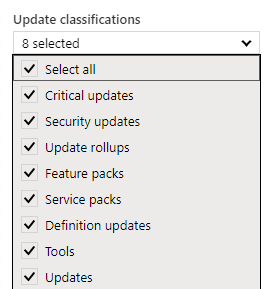
- Select the update classifications you wish to deploy
- You have the option to include or exclude installation of specific KB’s

-
Specify a schedule for the updates

- The Pre-Scripts and Post Scripts sections allows you to specify PowerShell scripts to further orchestrate a shutdown sequence for instance
- Enter a time value in minutes for the Maintenance Window
- Select the preferred restart option
- Click “Create”
Repeat this process as per your internal roll-out schedule, with servers in piloting, early roll-out, production roll-out etc. For Defender updates you can simply create a separate deployment schedule which runs every x number of hours, to keep the virus definitions up to date.
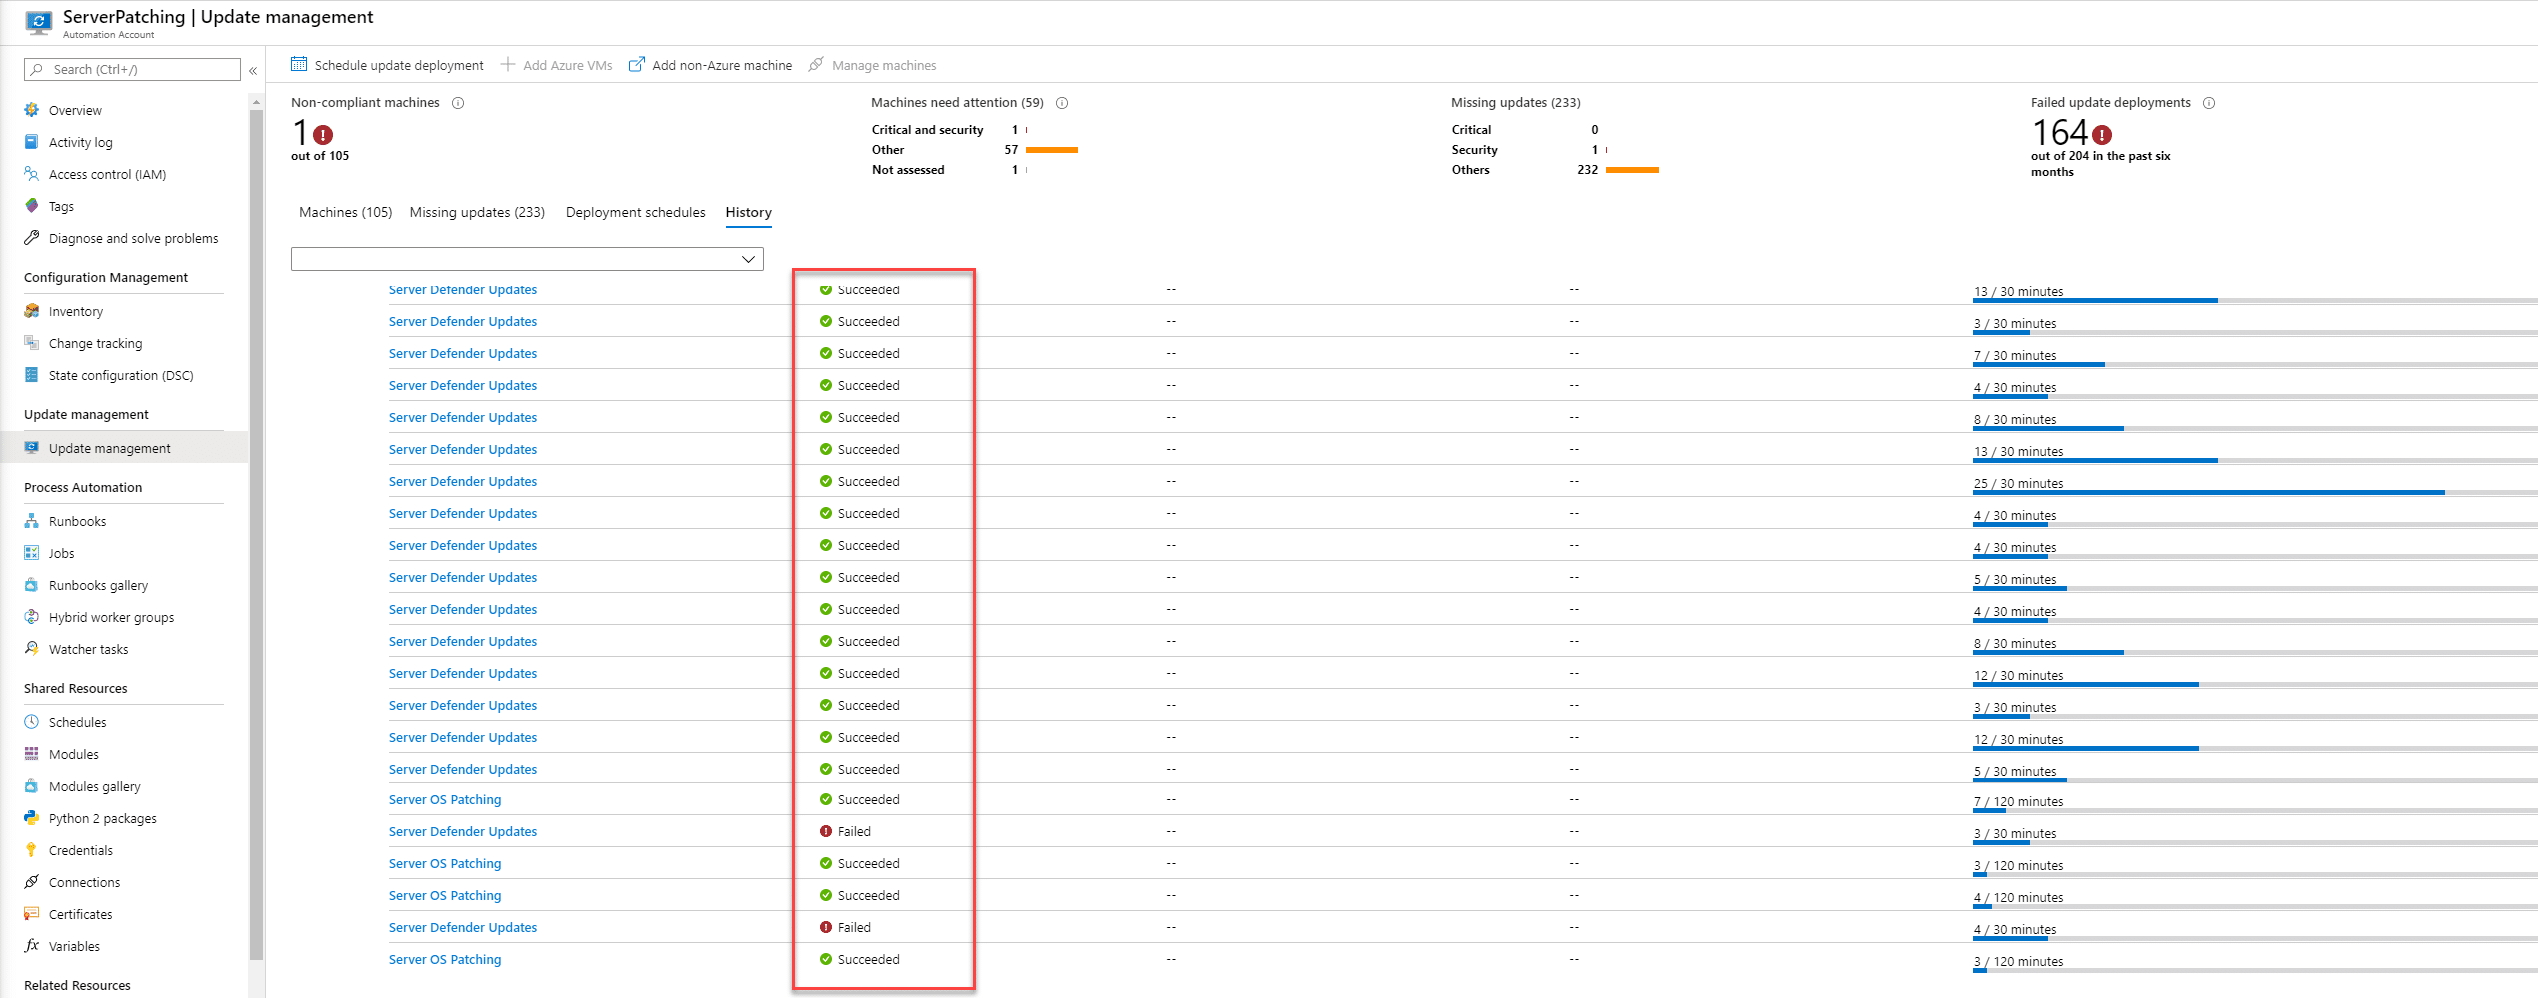
Monitoring Update Progress
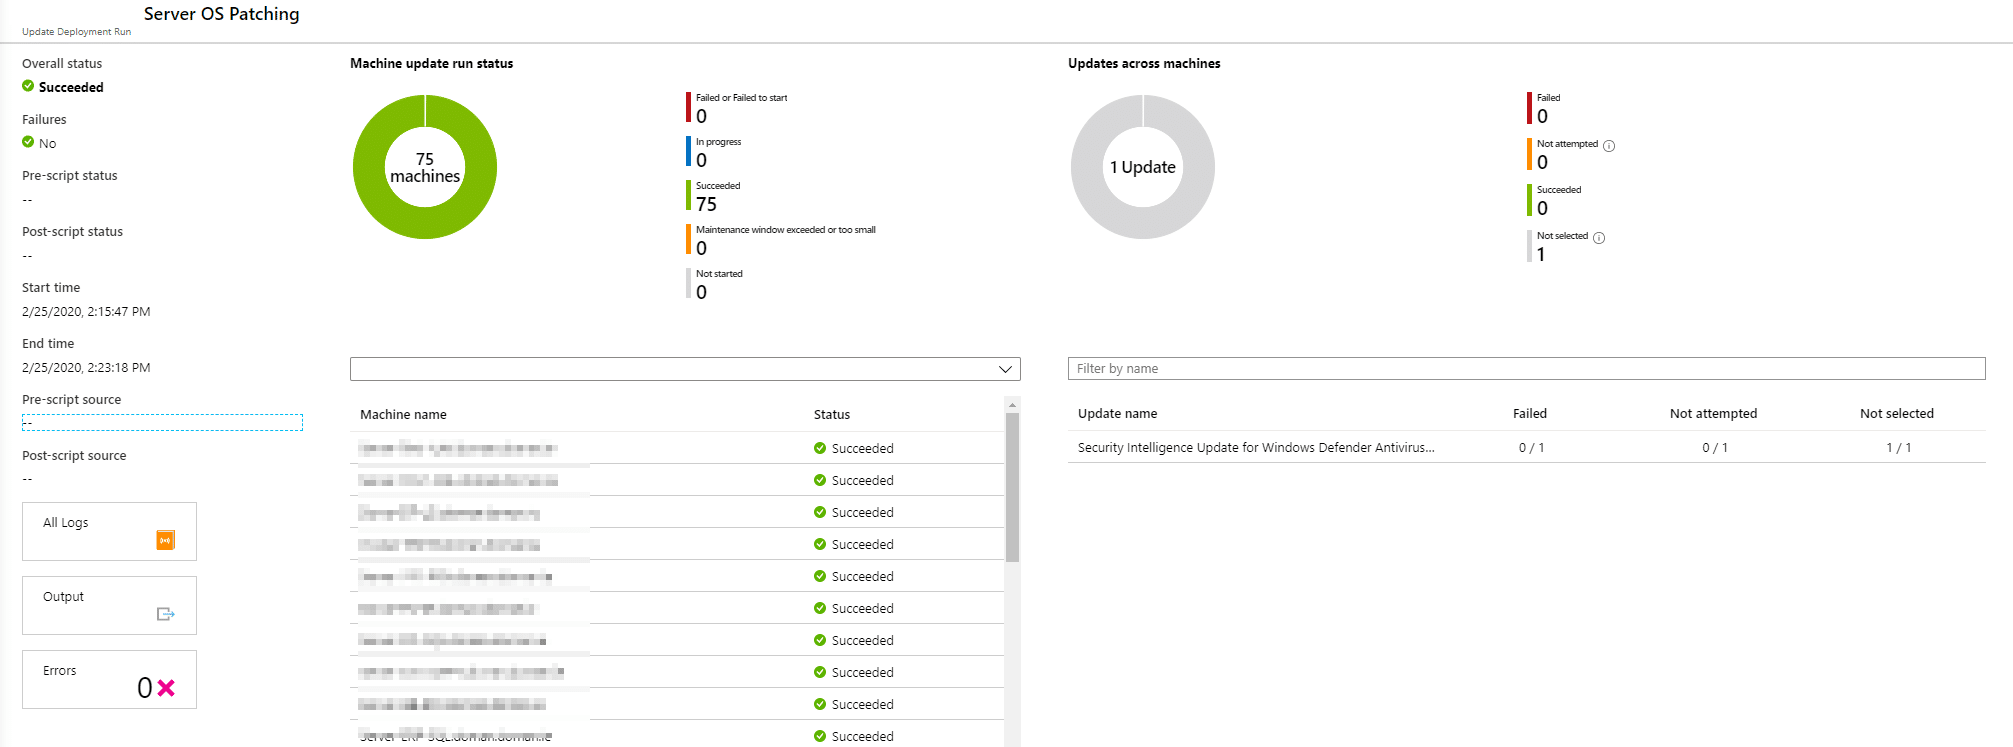
Once the Deployment Schedule has run, you can at any stage go back to check the progress and history for the jobs;
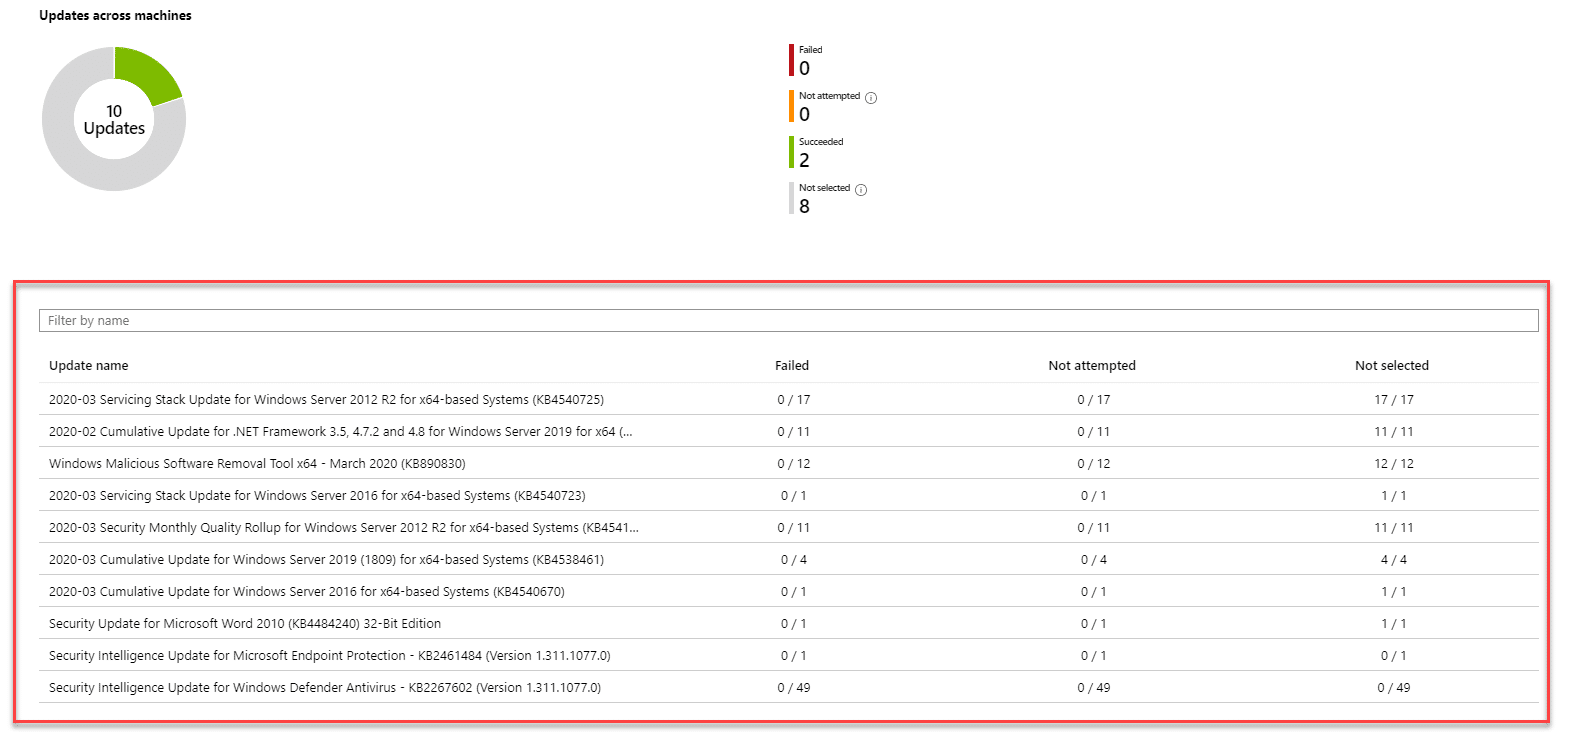
Drilling into any of the update jobs, we can see lists of computers which applied the updates;
Troubleshooting
One of the nice things here is the ability to instantly review logs when things fail to function as normal, aka “failed”. Here all we need to do is the following;
- Open the failed job
- Click on one of the servers which failed
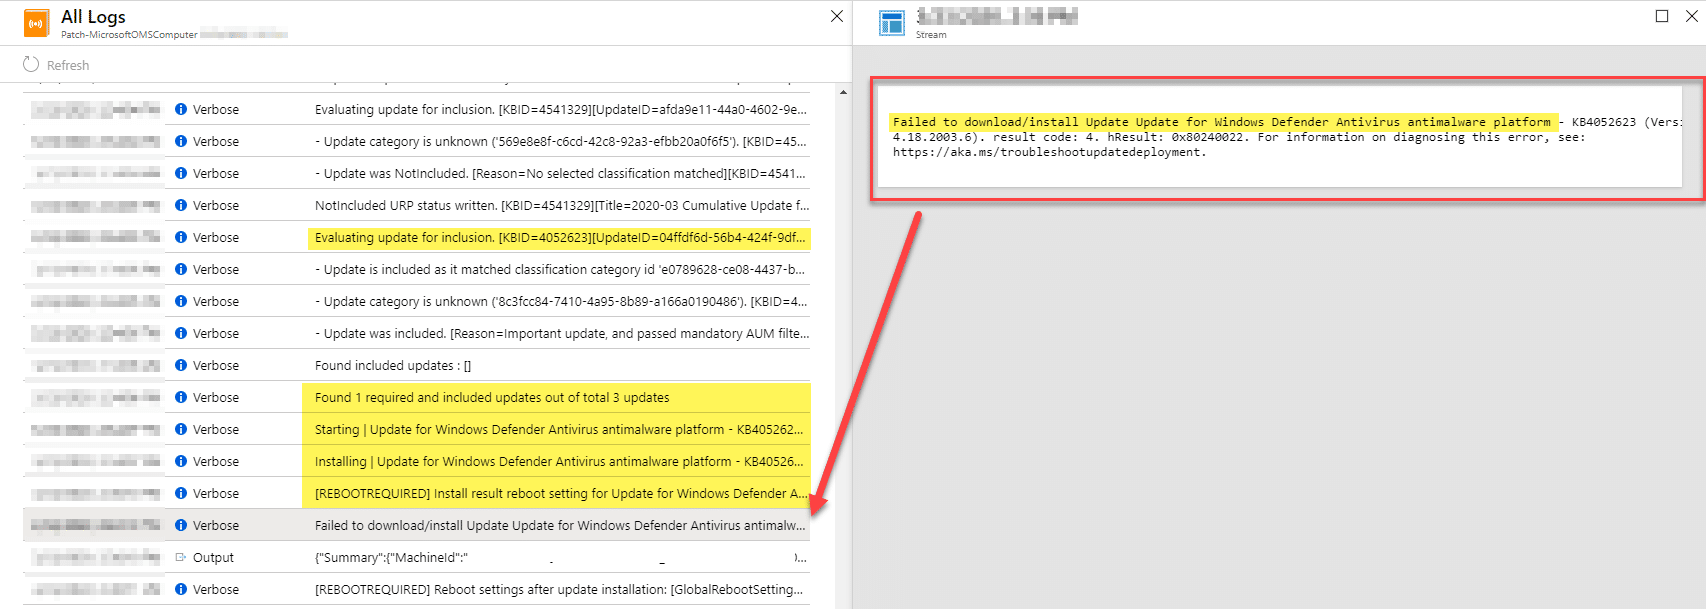
- Now click on the “All Logs” button

- You are now presented with a verbose output of the entire update process, including the KB’s being applied and any associated errors;
Conclusion
Through the use of Log Analytics and Azure Automation within the umbrella of Azure Security Center, we can now effectively manage server updates in a “modern” way. Thanks for reading.


Add comment