


In this, the final part of the series, we look at how the MBAM client and settings are deployed in the 2002 release of Configuration Manager.
Series Links
Goodbye MBAM – BitLocker Management in Configuration Manager – Part 1 (Server Components)
Goodbye MBAM – BitLocker Management in Configuration Manager – Part 2 (Portal Customisation)
Goodbye MBAM – BitLocker Management in Configuration Manager – Part 3 (Client Encryption)
The Agent & Policy Settings
As this is for the most part a straight port of the MBAM solution, we still need to deploy an MBAM client in order for the Windows 10 device to understand the settings being deployed and start the encryption process.
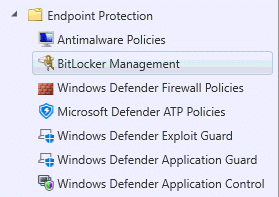
The first thing we need to do, is to set up a BitLocker policy as this controls the installation of the MBAM client. You will find the BitLocker policy in the Endpoint Protection settings in the Assets and Compliance blade;
So lets start with configuring a new policy
- Open the BitLocker Management section in Endpoint Protection settings
- Click on New Policy
- Name your Policy
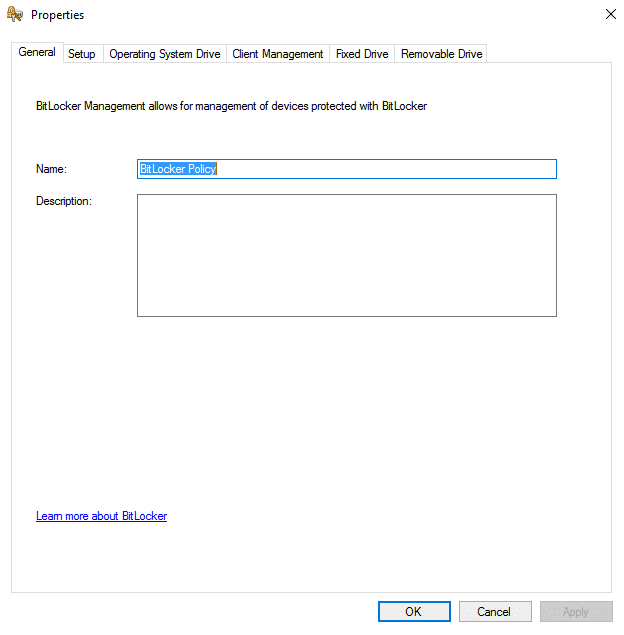
- Click on Operating System Drive options and specify the type of encryption you wish to use, in this example we are using TPM only and XTS-AES256 bit encryption;

- Click on Client Management, then enter your BitLocker key recovery options and status frequency in minutes;

- Should you wish to specify settings for additional data drives or removable drives, do so accordingly
- Now we can deploy the profile

- Upon assignment of the policy, the Configuration Manager client will install the MDOP MBAM agent on the targeted machines, if not already installed. The agent is actually located within the %SYSTEMROOT%\CCM folder, as part of the updated client agent;

- Once the agent is installed it will look for the BitLocker policy assigned to the device through Device Collection membership, and then pull down the configuration accordingly.
- We can see this process taking place within the registry, by looking for a registry key starting in HKLM:\Software\Policies\Microsoft\FVE.
- Once the agent is installed, the initial registry item settings are written in, as per default values;

- After a few minutes, the additional policies set within your policy should also appear in a “MDOPBitLockerManagement” subfolder;

- We can also check the Configuration Manager client agent to see that the settings are targeted and if the machine is compliant, by looking at the compliance tab;

Note: MBAM policies by default will enforce encryption after 90 minutes. Should you wish to speed this process up and enforce silent encryption immediately, you can simply create the following registry entries on your device either through a group policy preference or through a Configuration Baseline;
Registry Key Path: HKLM:\SOFTWARE\Policies\Microsoft\FVE\MDOPBitLockerManagement
Item Name: OSEnforcePolicyPeriod
Data Type: DWORD
Value: 0Registry Key Path: HKLM:\SOFTWARE\Policies\Microsoft\FVE\MDOPBitLockerManagement
Item Name: UseOSEnforcePolicy
Data Type: DWORD
Value: 1
The Encryption Process
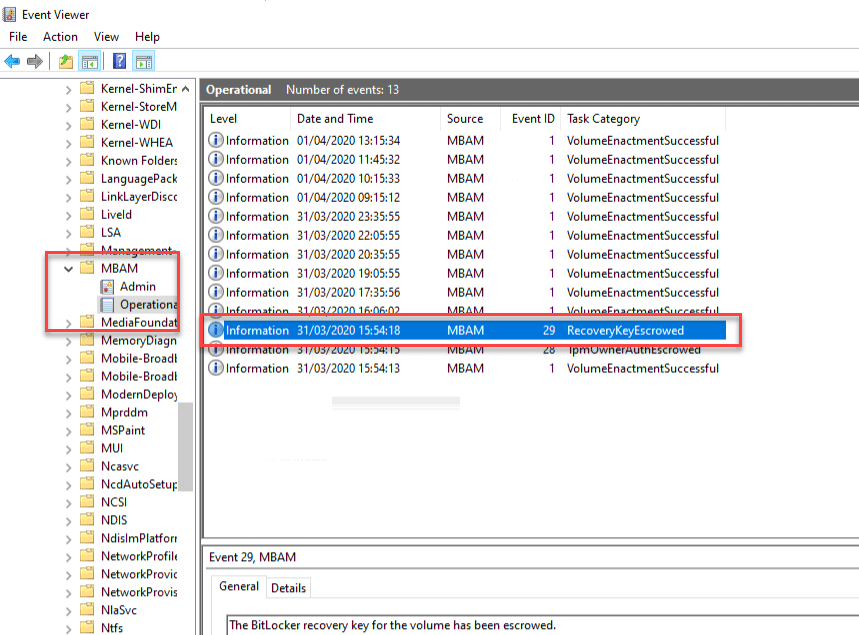
In the Applications and Services event logs we can look at the following log – Microsoft\Windows\MBAM. Here we will see the policies taking effect on the machine, along with the escrow status of the TPM and BitLocker recovery keys;
Task Sequence Deployment
For deployment of new systems, obviously we do not want to wait for device collection evaluation to run before the drive is encrypted. So the process of encryption here for those who have used MBAM, is almost identical, but for those who have not, let us step through this.
Package Up Deployment Scripts
Here we can simply leverage the Invoke-MBAMClientDeployment PowerShell script as the MBAM client itself is now installed
- Download the MBAM Client Deployment Scripts from this location – https://www.microsoft.com/en-us/download/details.aspx?id=54439
- Extract the files contained within. We will later use two of these files to first of all persist the TPM owner and then to enforce the encryption process
- Create a new Package
- Give your package a name, “MBAM Deployment Scripts” for example

- Distribute your package to your DP’s
The Task Sequence
With the application and script package in place, we can go ahead and add these to our task sequence.
- Create or edit and existing task sequence
- Create a group within the Windows PE stage and call it BitLocker Pre-Provisioning (or something similar)
- Add a Run Command line step, call it “Set BitLocker XTS AES 256” and enter the following details;
“reg add HKLM\SOFTWARE\Policies\Microsoft\FVE /v EncryptionMethod /t REG_DWORD /d 7 /f”
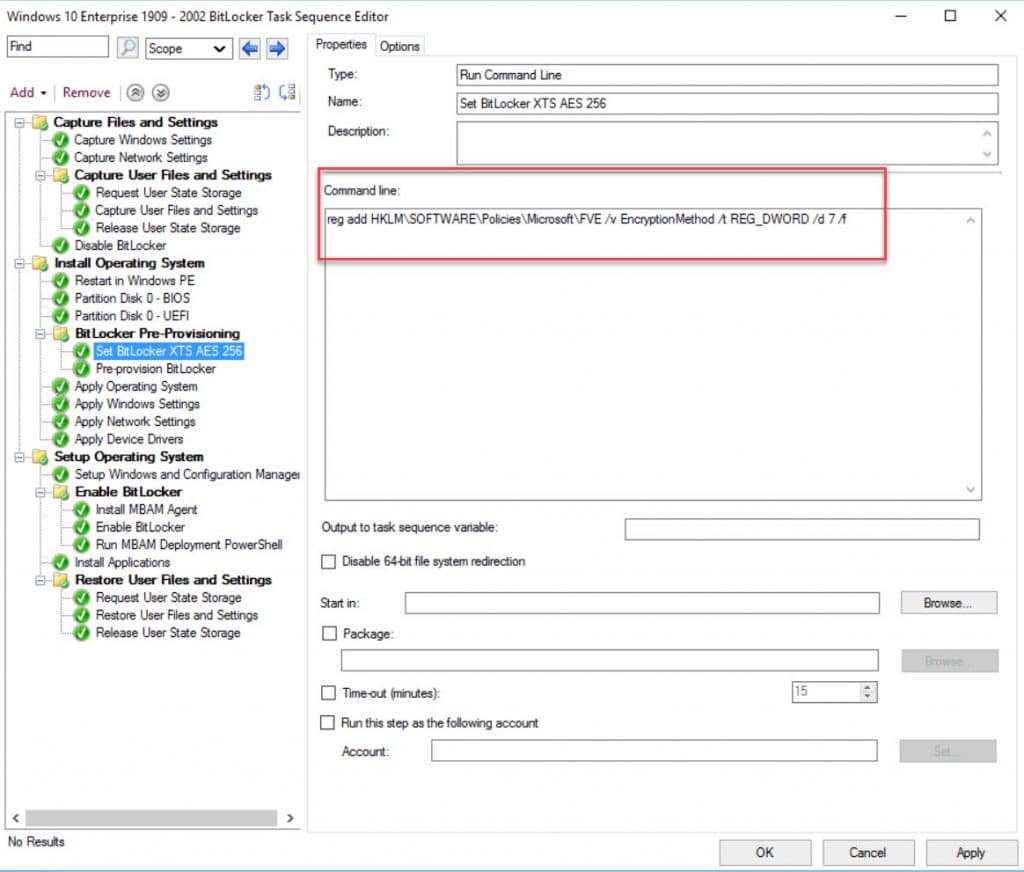
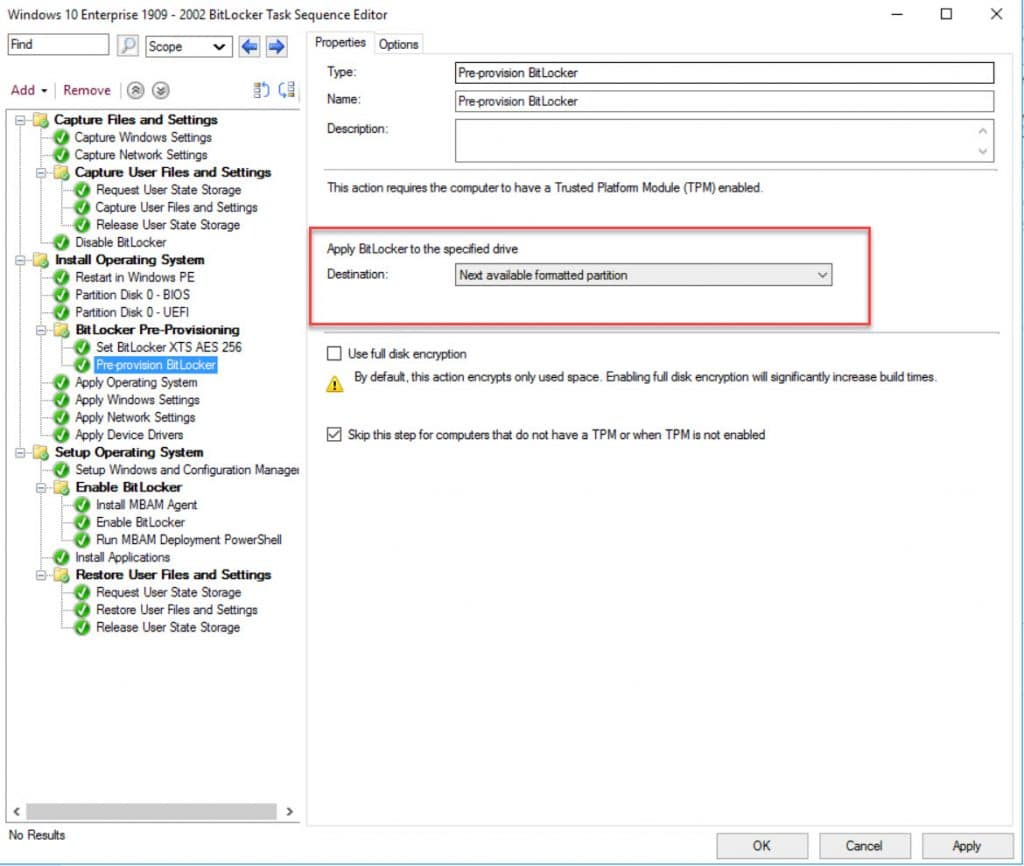
- Add a Pre-Provision BitLocker step to speed up the encryption process and help to ensure your machine is encrypted after OS deployment has completed (More info here – https://docs.microsoft.com/en-us/configmgr/osd/deploy-use/preprovision-bitlocker-in-windows-pe)
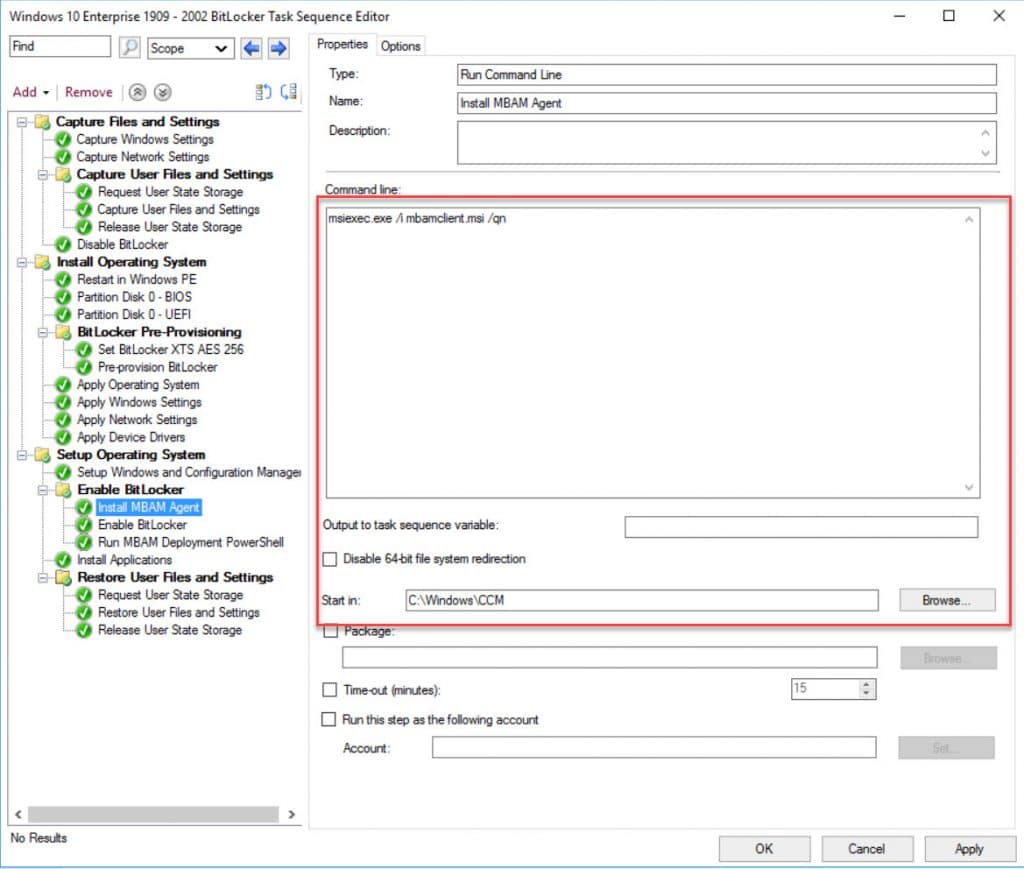
- Add a Run Command Line to install the MBAM client (which in this instance is now included within the Configuration Manager agent setup):
Command line; MSIExec.exe /i MBAMClient.msi /qn
Start in: C:\Windows\CCM
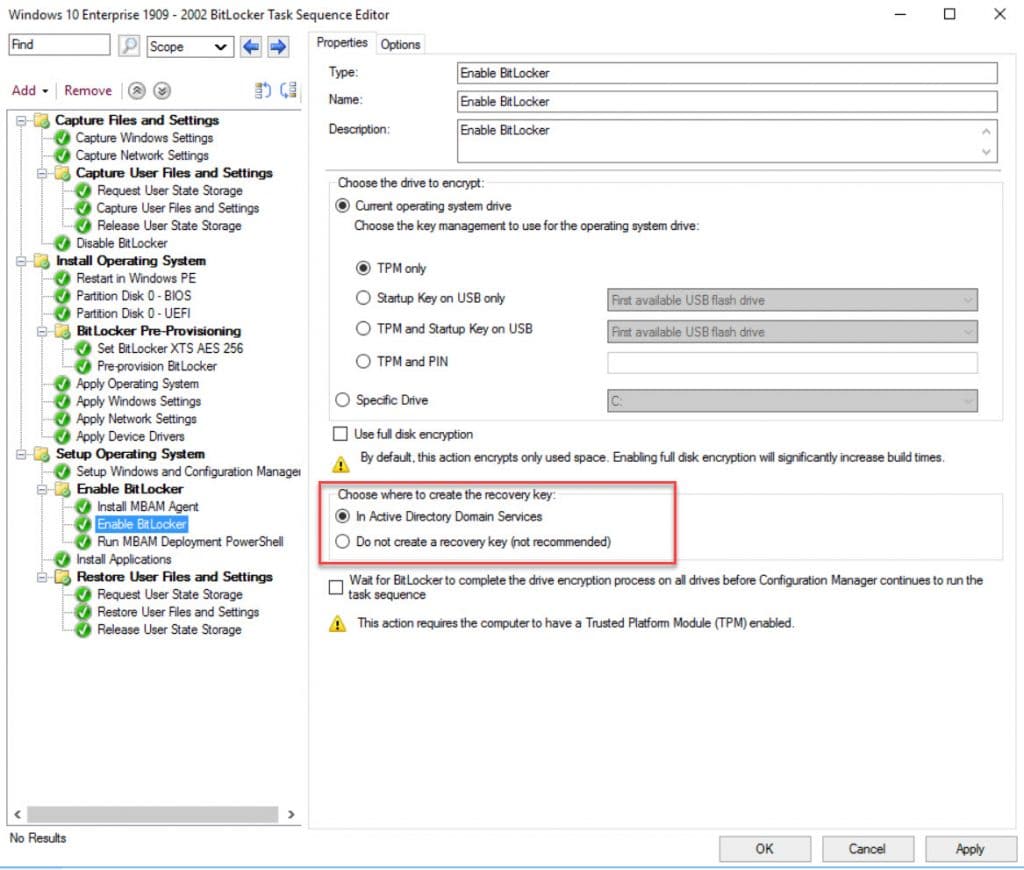
- This step is OPTIONAL. Here we will also escrow the BitLocker recovery key to Active Directory, prior to escrowing the key;
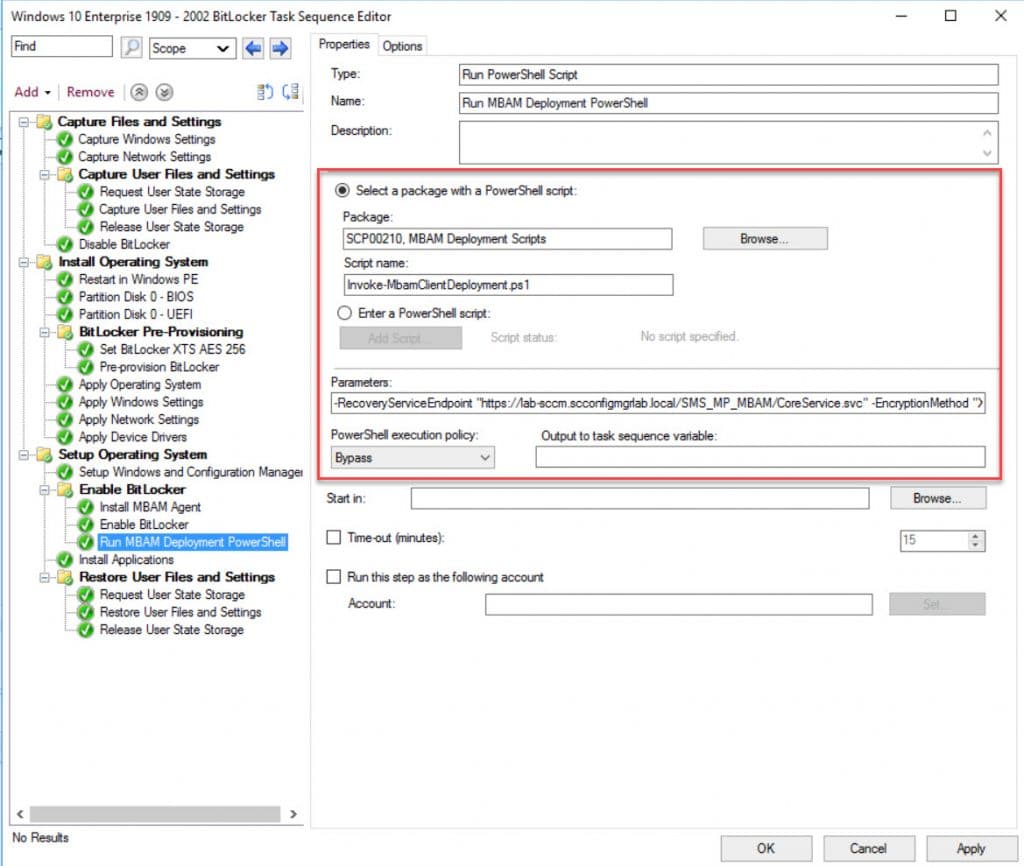
- Add a Run PowerShell Script step, enter “Invoke-MBamClientDeployment.ps1” as the script name and select the MBAM Deployment Script package. Now enter the following parameters;
-RecoveryServiceEndpoint “https://%YOURSERVER%/SMS_MP_MBAM/CoreService.svc” -EncryptionMethod “XTSAES256” -EncryptAndEscrowDataVolume -IgnoreEscrowOwnerAuthFailure -IgnoreReportStatusFailure -WaitForEncryptionToComplete
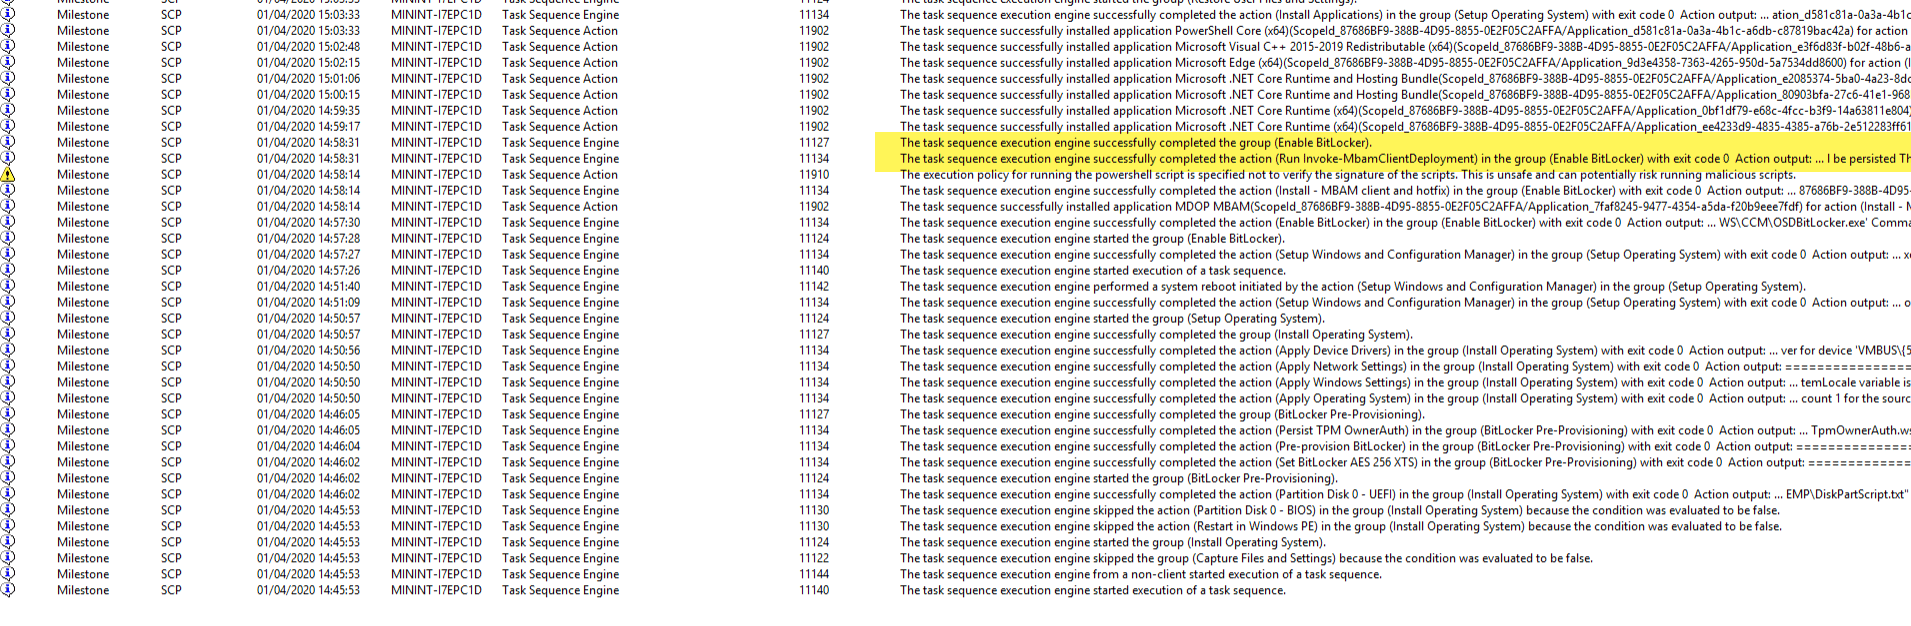
Monitoring the deployment via the status messages for the deployment, we can see the key was successfully escrowed to the Configuration Manager database;
Validating The Recovery Process
With your machine now deployed or having taken control of management of the device, we can now look at ensuring the keys are present in the database. So first of all we can run the manage-bde command on our Windows 10 device to obtain the BitLocker recovery key;
- Open a Command Prompt or PowerShell Window and type; Manage-BDE -Protectors -Get C:

- Now we have three options to verify if the key is in the database. The first is to look at the database table – dbo.RecoveryAndHardwareCore_Keys

- The second is to use the Helpdesk portal, by logging onto our server – https://%YOURSERVERHERE%/HelpDesk;

- And finally the last option is to use the SelfService portal – https://%YOURSERVERHERE%/SelfService;

- Optionally if you opted to escrow the keys to Active Directory, we can verify storage there;

In the above AD Computer Object screenshot you will also see that the recovery key was rolled over during testing, something which MBAM handles to ensure you can’t re-use keys.
Testing Recovery
With the recovery keys stored, we can now go about testing a recovery scenario. First of all we need to force recovery of the drive by running the following command;
Manage-BDE -ForceRecovery C:
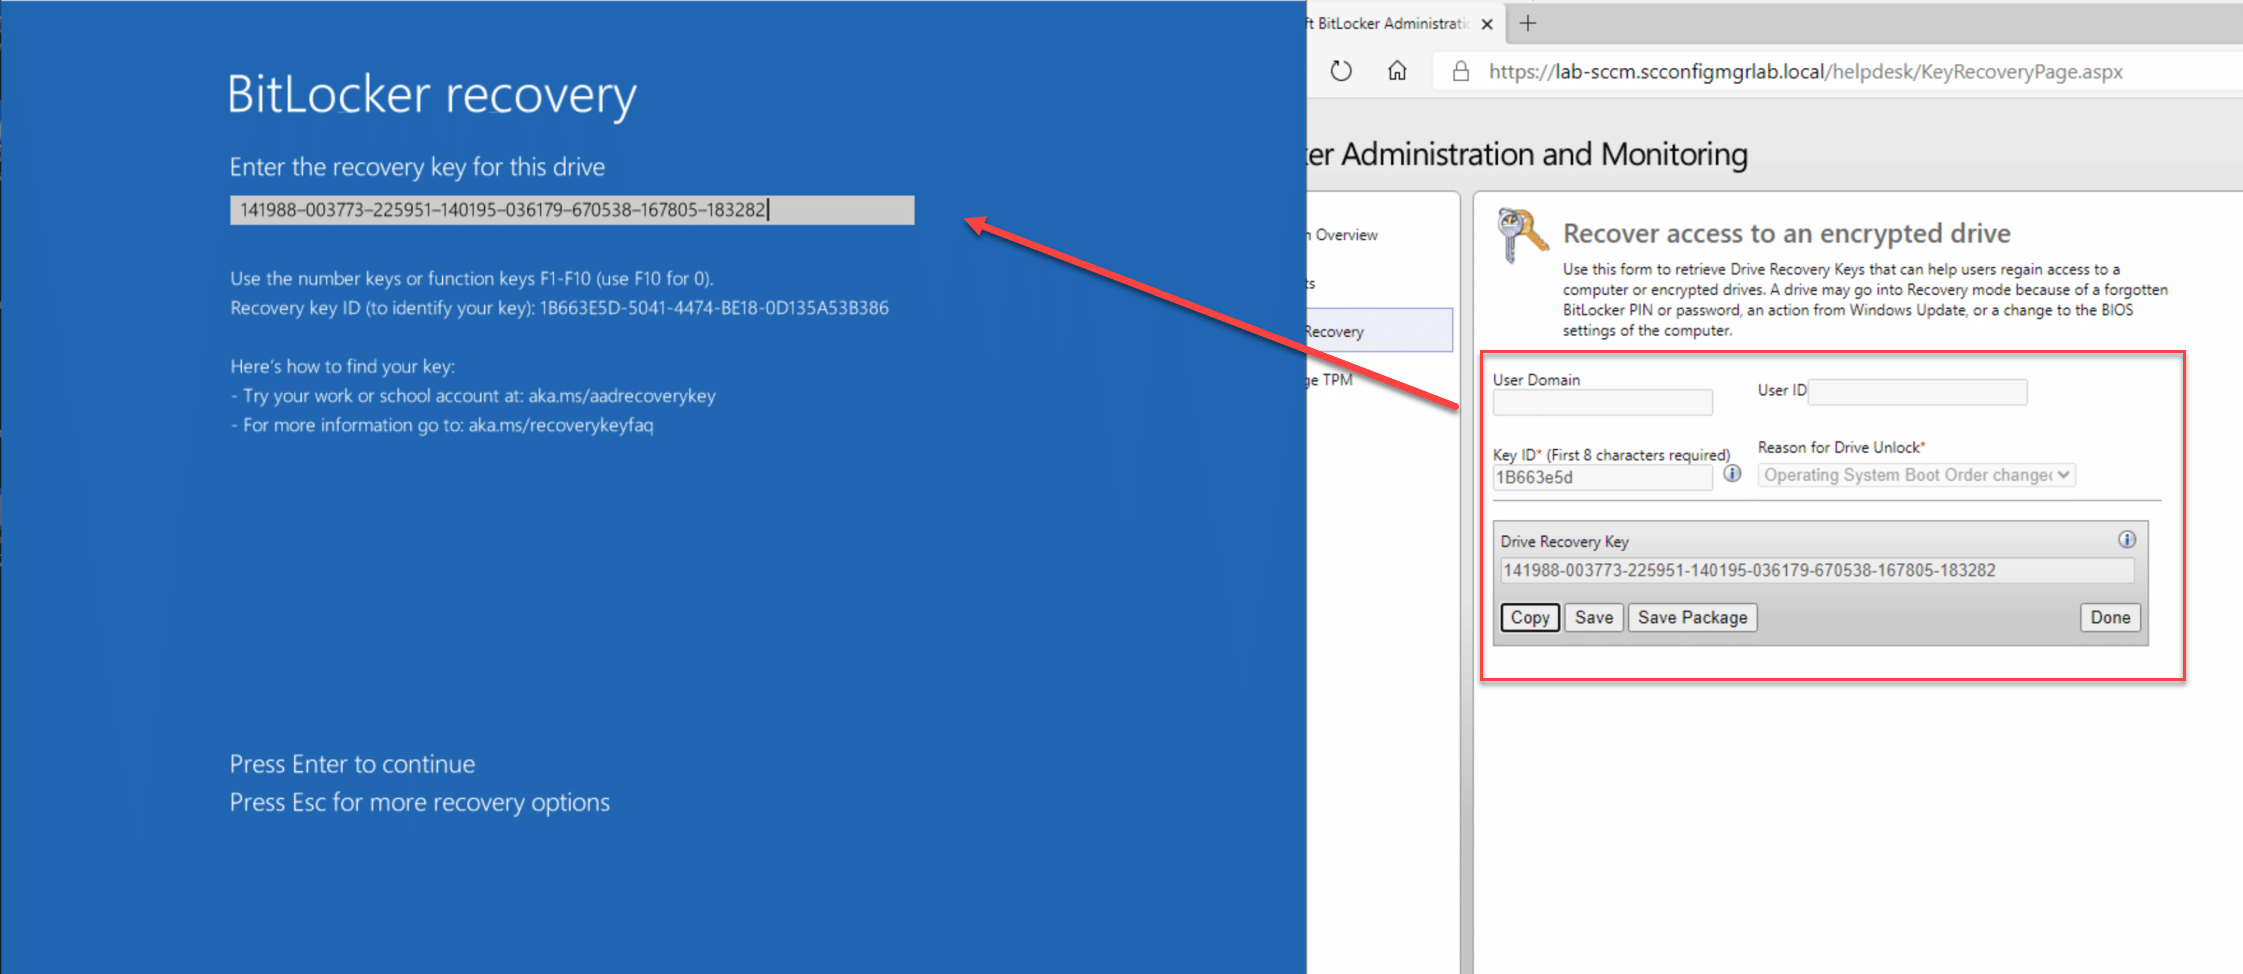
Now we can obtain the recovery key either through the self service portal or through the helpdesk (as per this example). Using the recovery key, your machine should then boot as normal;
Migration from MBAM Standalone to Configuration Manager
The process of moving active devices from MBAM standalone to Configuration Manager can be handled in this manner;
- Remove the existing MBAM group policies from the OU where the machines are located
- Assign the BitLocker policy you created in Configuration Manager to a device collection containing those machines
- Wait or force the policies to update both for Group Policy and the machine policy
- Check the event logs and you see the machine communicating and then escrowing the keys;

- Confirm the new server settings in the registry;

- At this point you can confirm that the keys are located in both environments;

Conclusion
At this point you should now be able to deploy the entire solution, securing your portal via HTTPS, customising the self service portal, and of course having the ability to deploy your machines and automatically having them encrypt their drives while escrowing the recovery keys to the database. Now to go about retiring out that old MBAM server..
Thanks for reading.


Another great writup – I’ll be implementing this on our 1909 build.
What about machines that are already MBAM enabled – is there a migration route or is this purely for new build machines ?
cheers