

When administering corporate Windows 10 devices, it’s common these days that these devices are present in Windows Autopilot for easier provisioning and access management. Getting an overview of what devices have been added in Windows Autopilot however, can easily be a nightmare with the current implementation of how the devices are made viewable within the Endpoint Manager portal. And what about reporting and Windows Autopilot? Which devices are in fact enrolled, what is the overall hardware vendor and model counts? Wouldn’t it be extremely useful if the data available in Windows Autopilot could be sent over to Log Analytics for custom reporting? If you think so, continue to read this blog post as it will cover the steps required to get you started.
Also, this blog post would not have been possible without the help from my excellent colleague and good friend Simon Wåhlin (@SimonWahlin), a big thank you for all the Azure Functions questions!
- Expanding on the idea of sending Autopilot data to Log Analytics
- Solution overview and high level details
- What is collected with Autopilot Collector
- Autopilot Collector components creation
- Autopilot Collector components configuration
- Trigger Autopilot Collector for the first time
- Use a workbook in Log Analytics to visualize the data
Expanding on the idea of sending Autopilot data to Log Analytics
Some of you that are reading this have probably already thought, why not just use PowerShell and make a request to Graph API to get whatever you may be looking for? Absolutely, that’s a valid point, although the data is not kept for further analyzation once the PowerShell console / script is terminated and it’s a relative narrow audience that gets access and can understand that data. Also, sending data to Log Analytics it’s not something that’s groundbreaking. For instance, audit data and device details can already today be added to a Log Analytics workspace, so why not also add Windows Autopilot data into the mix?
Here’s a couple of suggestions why sending the Windows Autopilot data to Log Analytics, building a workbook with queries for easier visualization, may help you to better manage your corporate Windows 10 devices:
- Get a visual overview of the hardware vendors and models that’s imported
- Ensure all your devices are assigned an appropriate GroupTag according to your requirements
- Depending on your GroupTag standards, parts of that string could easily be visualized
- Understand how many devices are in fact enrolled based on the imported device identities
- Validate that there are no duplicate entries of imported device identities
Basically, the sky (sort of, limited to the data sent over of course) is the limit here. And to help you better manage your devices, let me introduce a solution that we call Autopilot Collector.
Solution overview and high level details
Before we dig into the details, Autopilot Collector is a solution that leverages several Azure components in order to facilitate the data gathered from the Windows Autopilot database to be sent to a Log Analytics workspace. The components involved are the following:
- Azure Functions
- Responsible for the main script logic and triggering the overall solution
- Azure Monitor (Log Analytics)
- Where the data from Windows Autopilot is sent to for reporting and monitoring capabilities
- Azure Storage Queue
- Used for resiliency when triggering the Azure Functions app
- Azure Key Vault
- Securely stores connection strings and client secrets

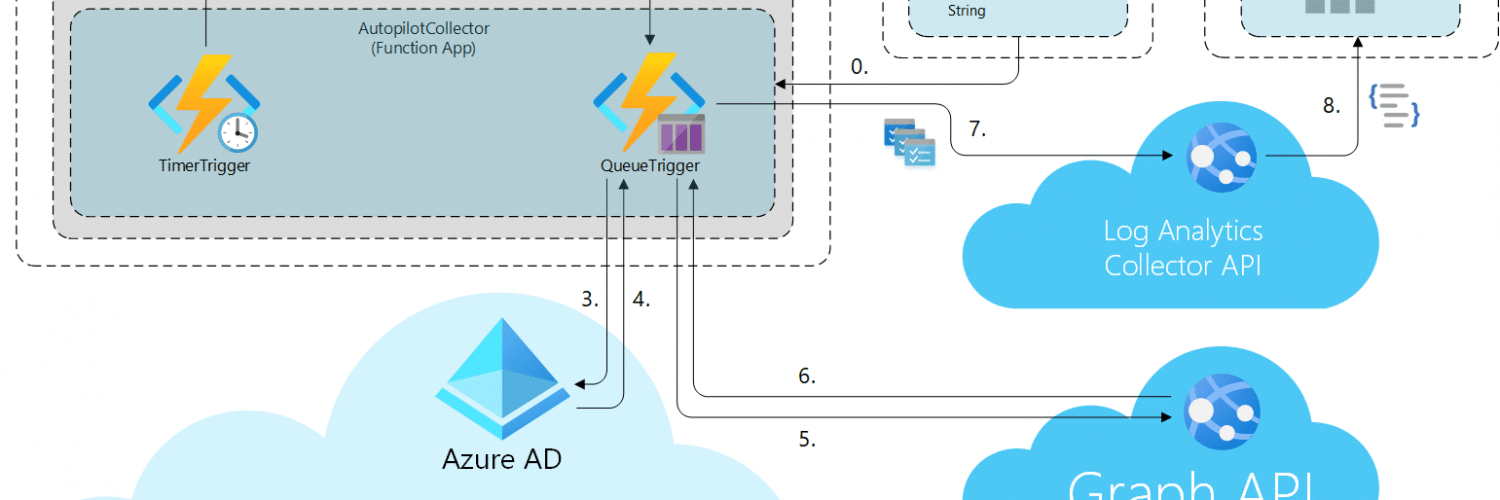
What’s referenced as step 0 in the above picture, illustrates when the Azure Functions app is started (warmed up), it resolves it’s application settings and retrieves a ConnectionString secret used by the TimerTrigger for when creating queue items, and finally it retrieves the ClientSecret used for when retrieving an access token to query Graph API.
- At the configured timer interval, the TimerTrigger function of the Azure Functions app is invoked and puts a queue item on the Queue Storage.
- The QueueTrigger function of the Azure Functions app is subscribing to any new items on the Queue Storage, and is notified that there’s a new item, which in turn invokes the functions and the main logic of Autopilot Collector.
- QueueTrigger Function app retrieves an access token from Azure AD with an audience for Graph API and the permissions to read Intune service configuration.
- Azure AD issues the access token and it’s returned to the Function app.
- QueueTrigger attempts to retrieve all Windows Autopilot device identities from Graph API.
- Graph API returns all Windows Autopilot device identities and Autopilot Collector starts processing the data returned, selecting the desired properties useful for reporting and monitoring.
- The processed Windows Autopilot device identity data is then sent to Log Analytics Collector API in batches, to not overload the API data limitations.
- Log Analytics Collector API finally puts the data in the designated Log Analytics workspace, and the retrieved Windows Autopilot device identity data can now be used for reporting or monitoring.
Autopilot Collector currently uses an App registration to retrieve an access token with the audience for Microsoft Graph API containing the permissions required to read the necessary data. This could be improved with removing the App registration requirement and provide the same API permissions of the App registration to the Managed System Identity of the Azure Functions app. However, since this is not possible to manage from the Azure portal (Global Admin permissions are required and PowerShell cmdlets are used to configure it) upon writing this post, once it’s possible in the future I’ll make sure to update the post to contain the re-configurations necessary.
The names used for resources in the above image, is what we’ll be using throughout this blog post, so that it’s easier to follow along in the configuration parts below. Now that we’ve talked about the high-level of the solution, let’s break it all into details and start the configuration.
What is collected with Autopilot Collector
With the initial release of this solution, the following data points are collected:
- Autopilot device identity ID (Id)
- Device serial number (SerialNumber)
- Device model (Model)
- Device manufacturer (Manufacturer)
- Device GroupTag (GroupTag)
- Current enrollment state (EnrollmentState)
- Azure AD device record ID (AzureADDeviceID)
- Intune device ID (IntuneDeviceID)
With future releases, additional data points will be added to the solution. An example such is the deployment profile assigned to a device identity, however it currently requires additional Graph API calls to collect such information, which would drastically decrease the performance and execution time of the solution, when used in larger environments.
Autopilot Collector components creation
To setup Autopilot Collector, let’s begin by creating the required components and afterwards we’ll configure them to tie it all together. Before you continue, ensure that you have the necessary permissions in your environment. For setting up resources in Azure, also make sure that you comply with your internal governance policies and think through where you not only place them but also how you name them. Throughout the configuration sections of this blog post, you’ll be needed at least the following two permissions:
- Global Admin permissions in Azure AD
- Contributor or Owner of a subscription in Azure
Whenever the Global Admin permissions are required, it’ll be mentioned before hand in that section. Otherwise, the Contributor / Owner permissions for the subscription where the resources will be created in is what’s going to be the main permission required for completing the Autopilot Collector configuration.
Create an App registration
This setup requires Global Admin permissions specifically for the admin consent part, since we’re adding Microsoft Graph API permissions.
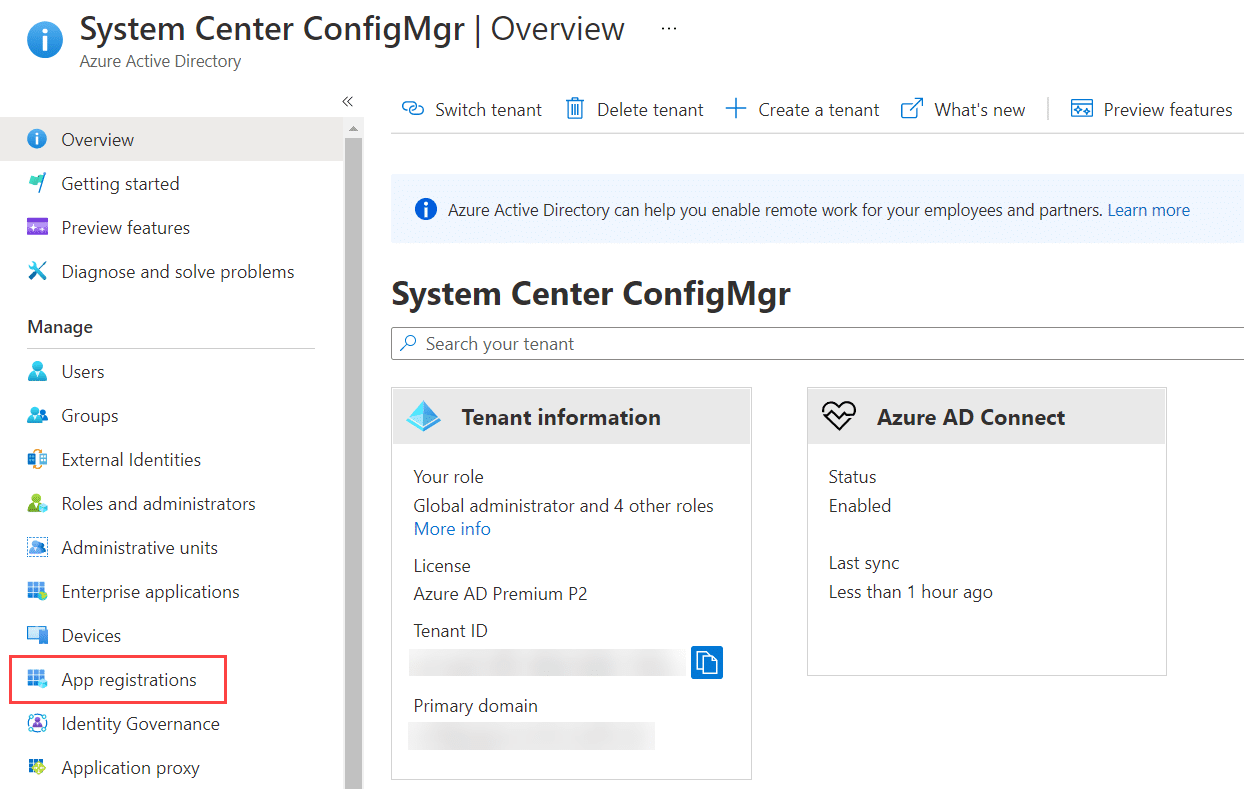
Log into the Azure portal, go to All services and search for Azure Active Directory.
Under Manage, select App registrations.
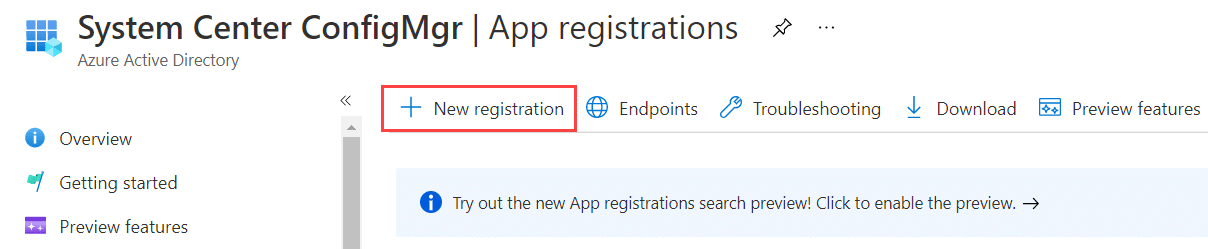
Click New registration.
Provide a name that aligns with your policies, select Accounts in this organizational directory only and under Redirect Uri select Public client/native (mobile & desktop).

Click Register.
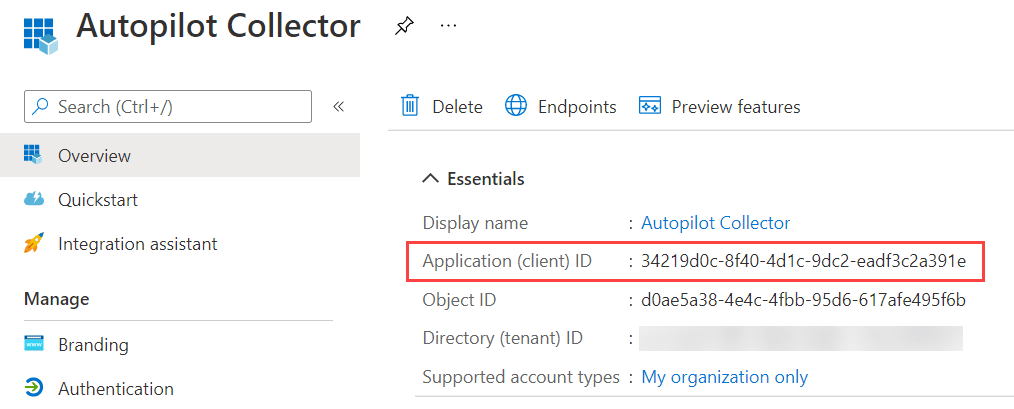
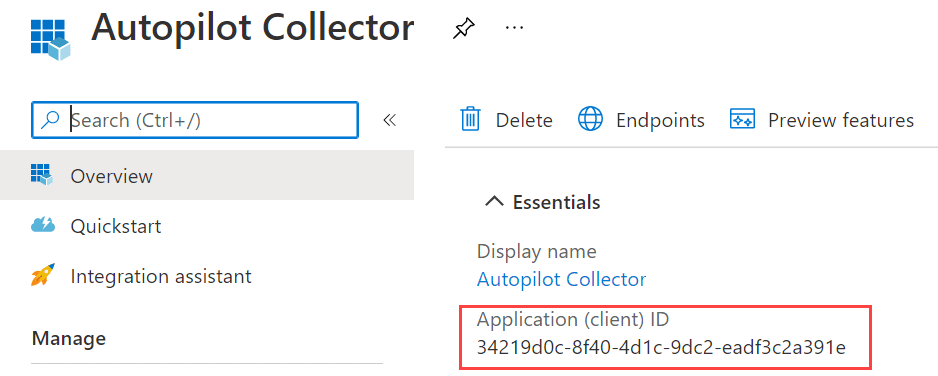
Once the registration is successful, from the Overview section, make a note of the Application (client) ID, as it will be used later when we configure the Function App application settings.
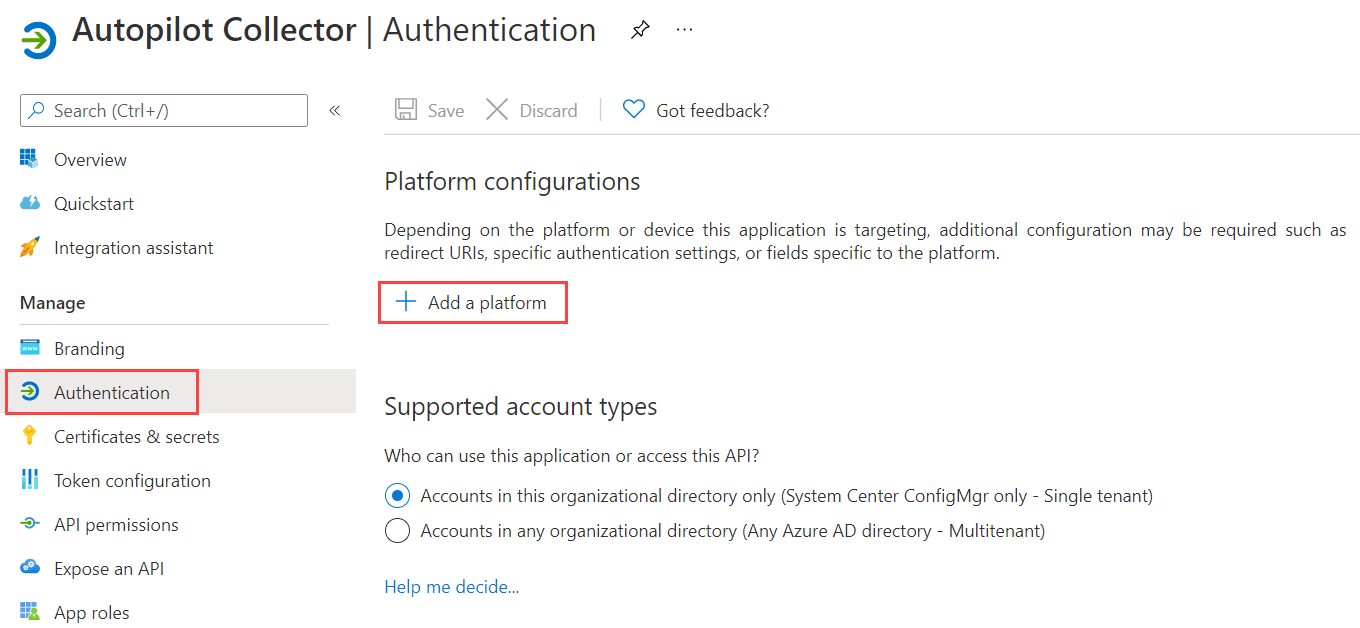
Go to the Authentication section under Manage and select Add a platform under Platform configurations.
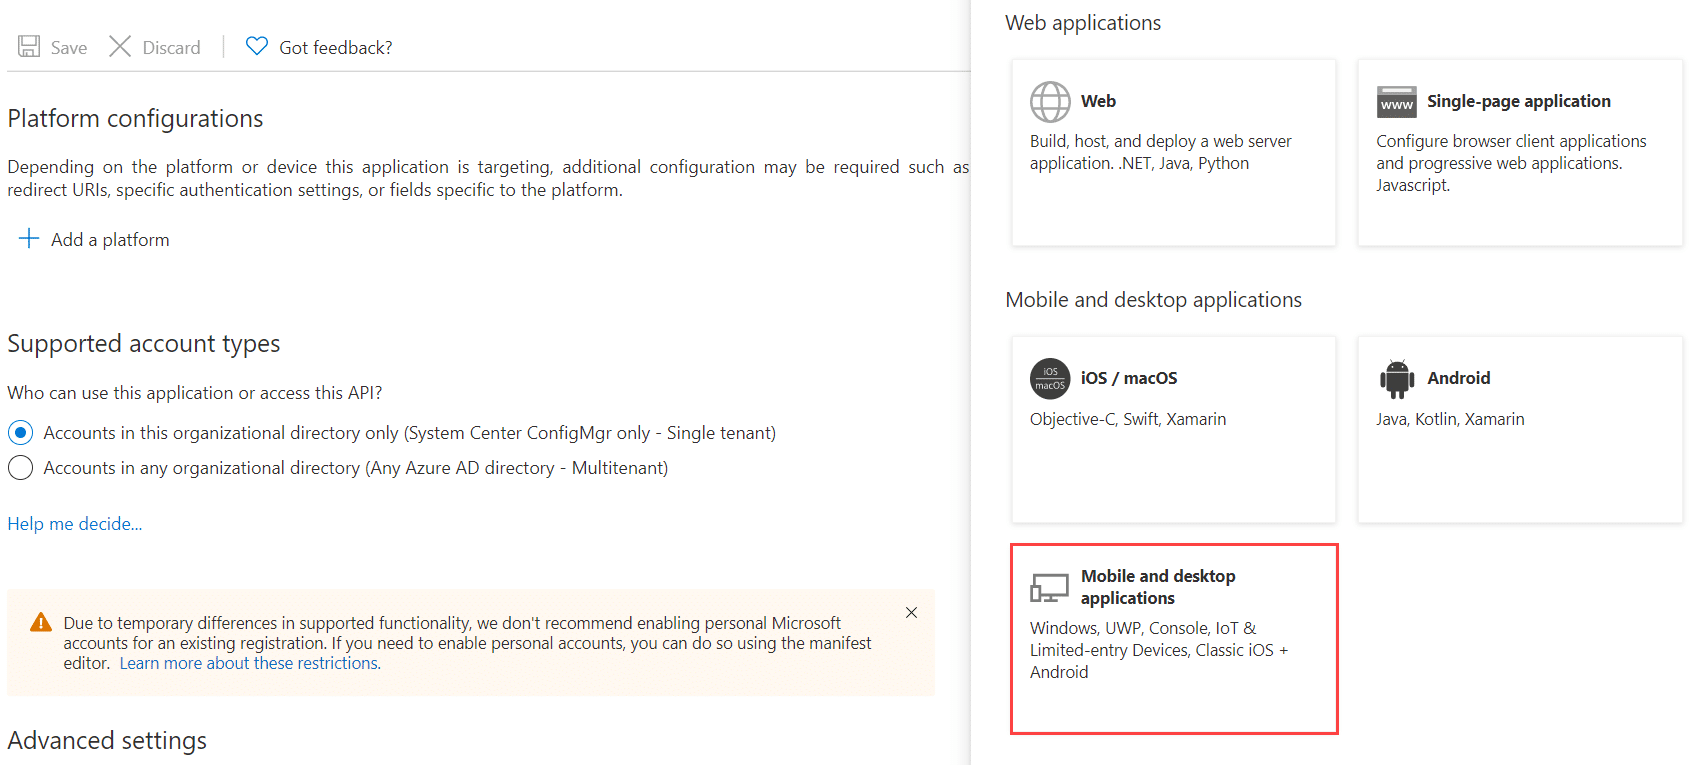
Select Mobile and desktop applications.
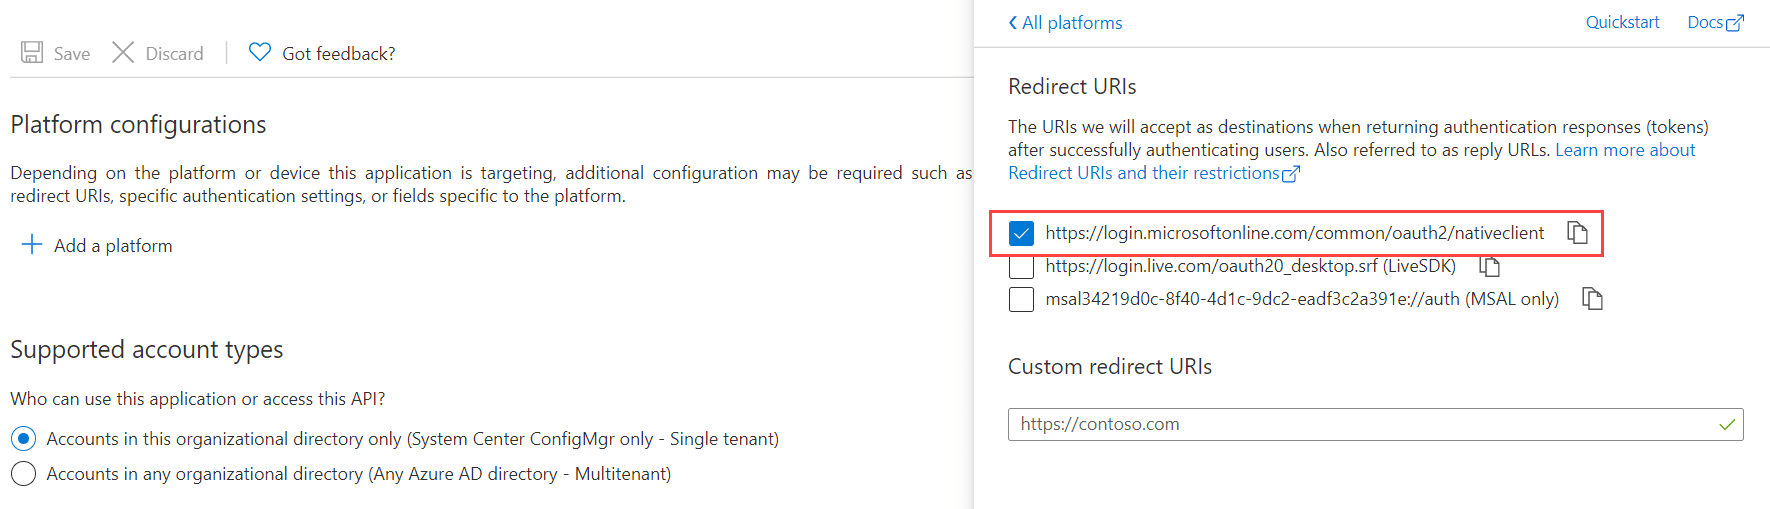
Select the first option (https://login.microsoftonline.com/common/oauth2/nativeclient) and click Configure.
The Authentication section should now look similar to this:
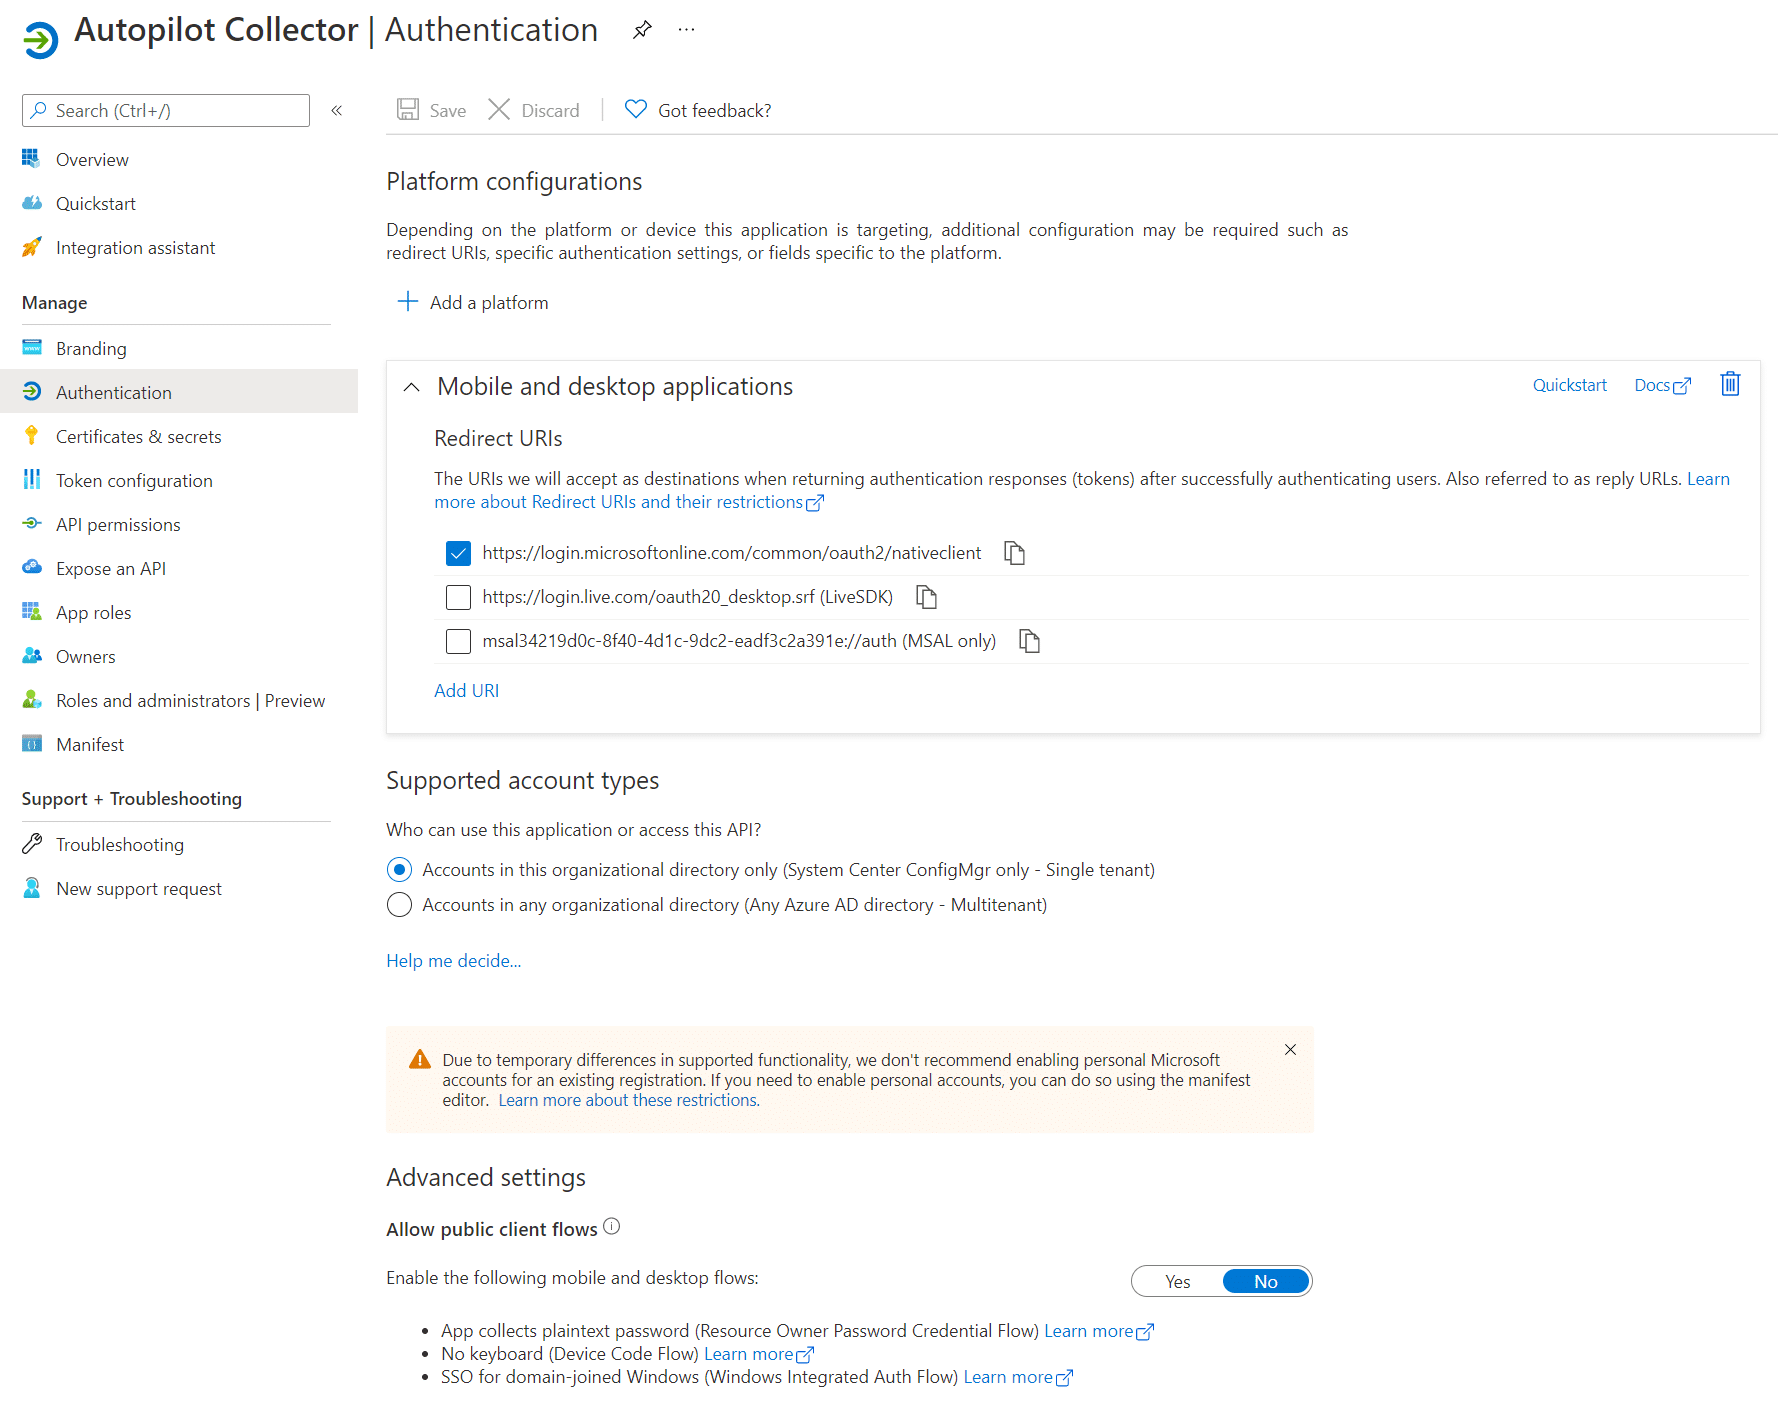
Remember to click Save, if required.
Go to the Certificates & secrets section, click New client secret, provide a name for it and select the desired expiration policy. When done, click Add.
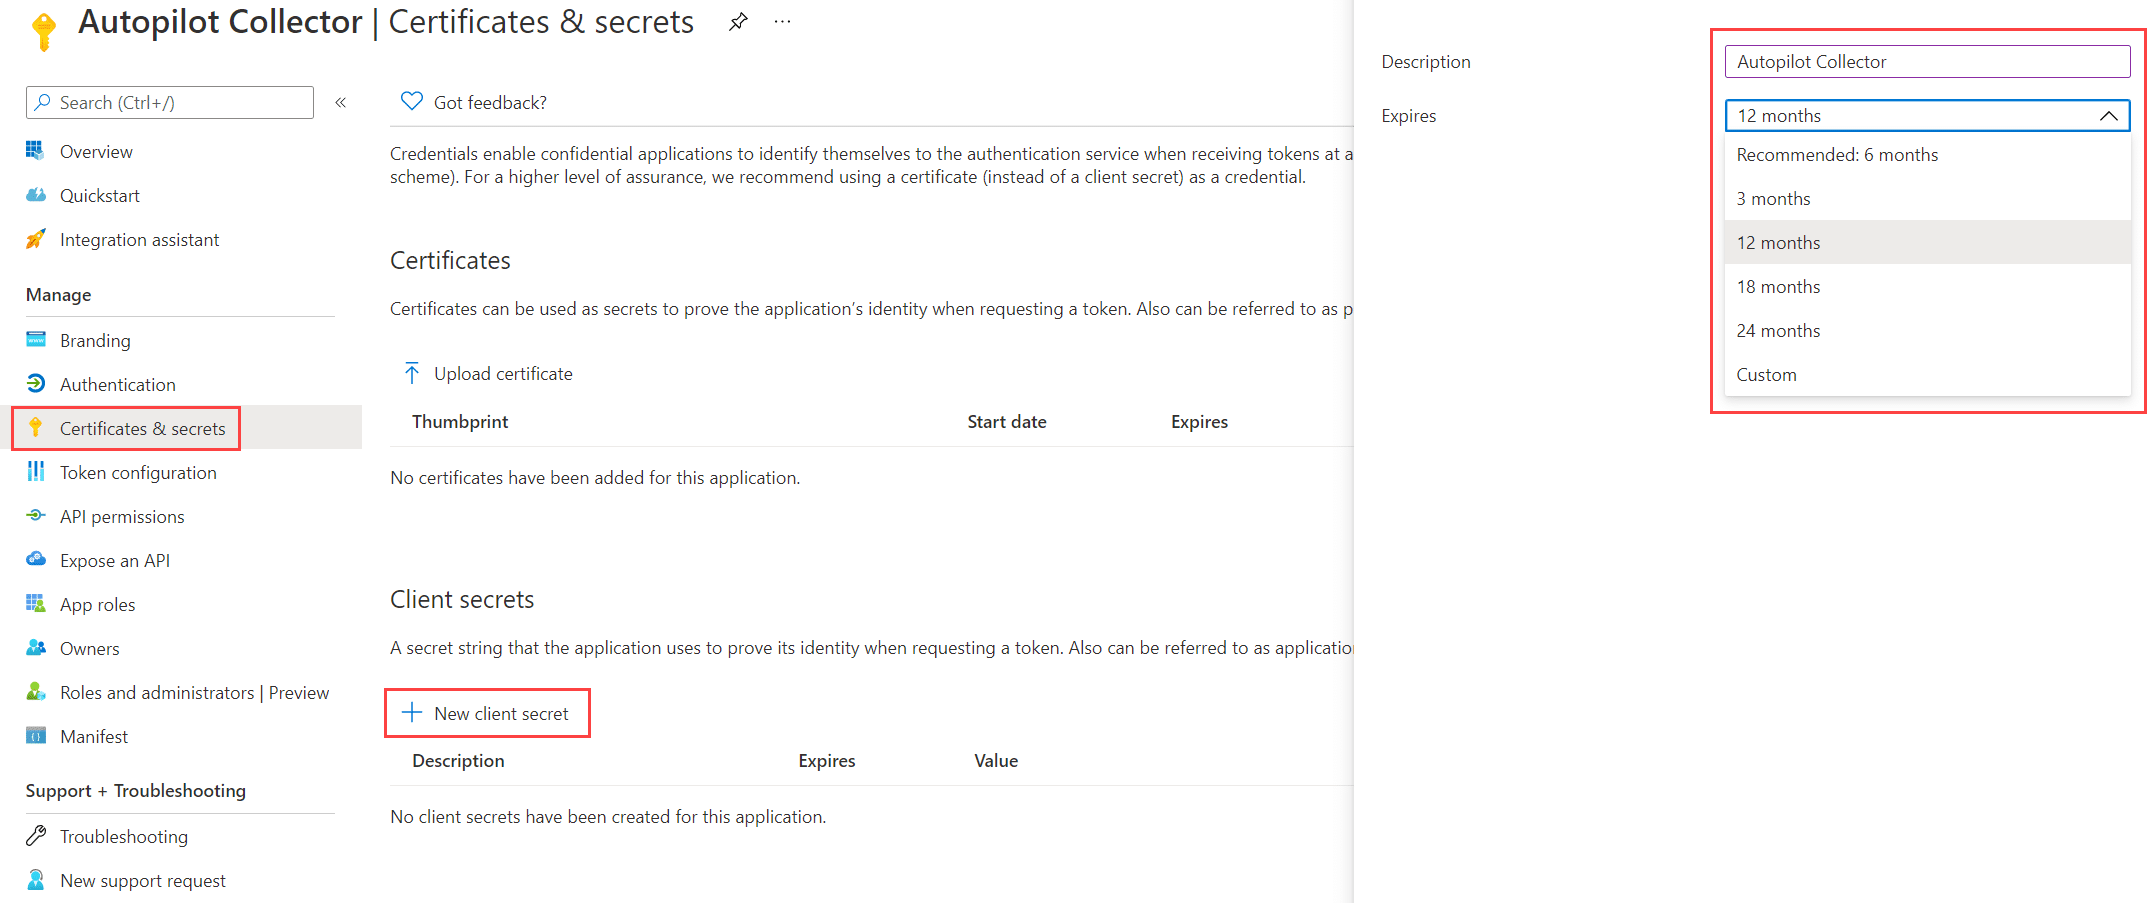
IMPORTANT: The value of the client secret should under no circumstances be stored locally or in any notebook or similar. It’s the key to the kingdom more or less. Anyone with this client secret have the means of accessing the data in your organization based on the API permissions configured for this app registration.
Below is an example of how it looks once the client secret have been added.

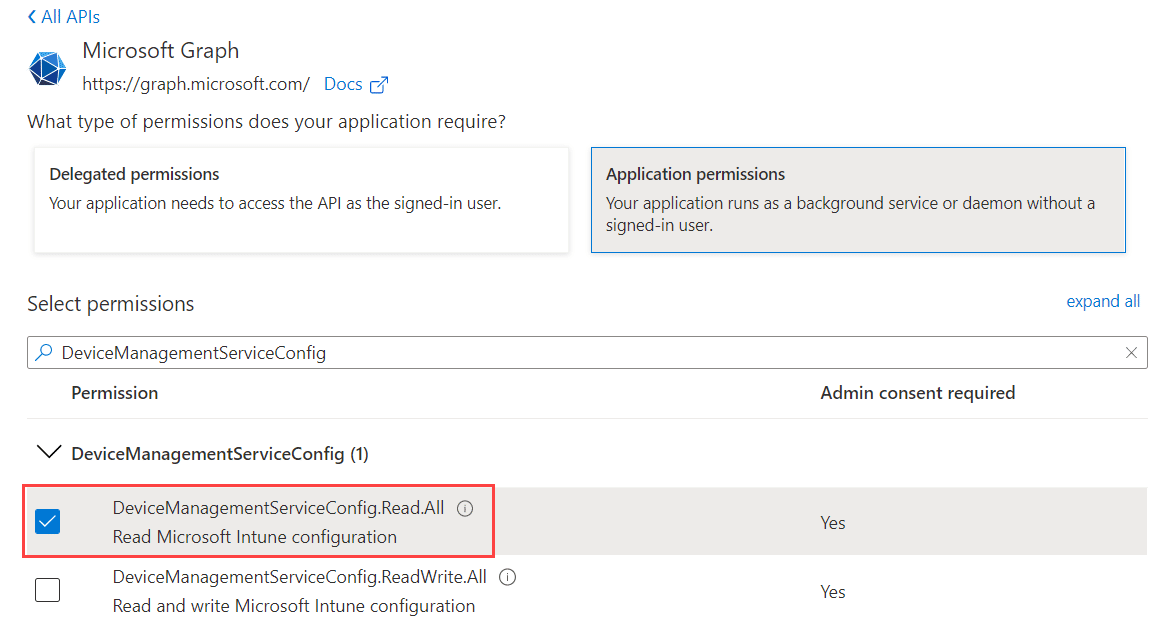
Go to API Permissions, click Add a permission and select Microsoft Graph.

Select Application permissions.

Search for DeviceManagementServiceConfig, select DeviceManagementServiceConfig.Read.All and click Add permission.
Click Grant admin consent for <tenant display name> and select Yes in the prompt that appears.
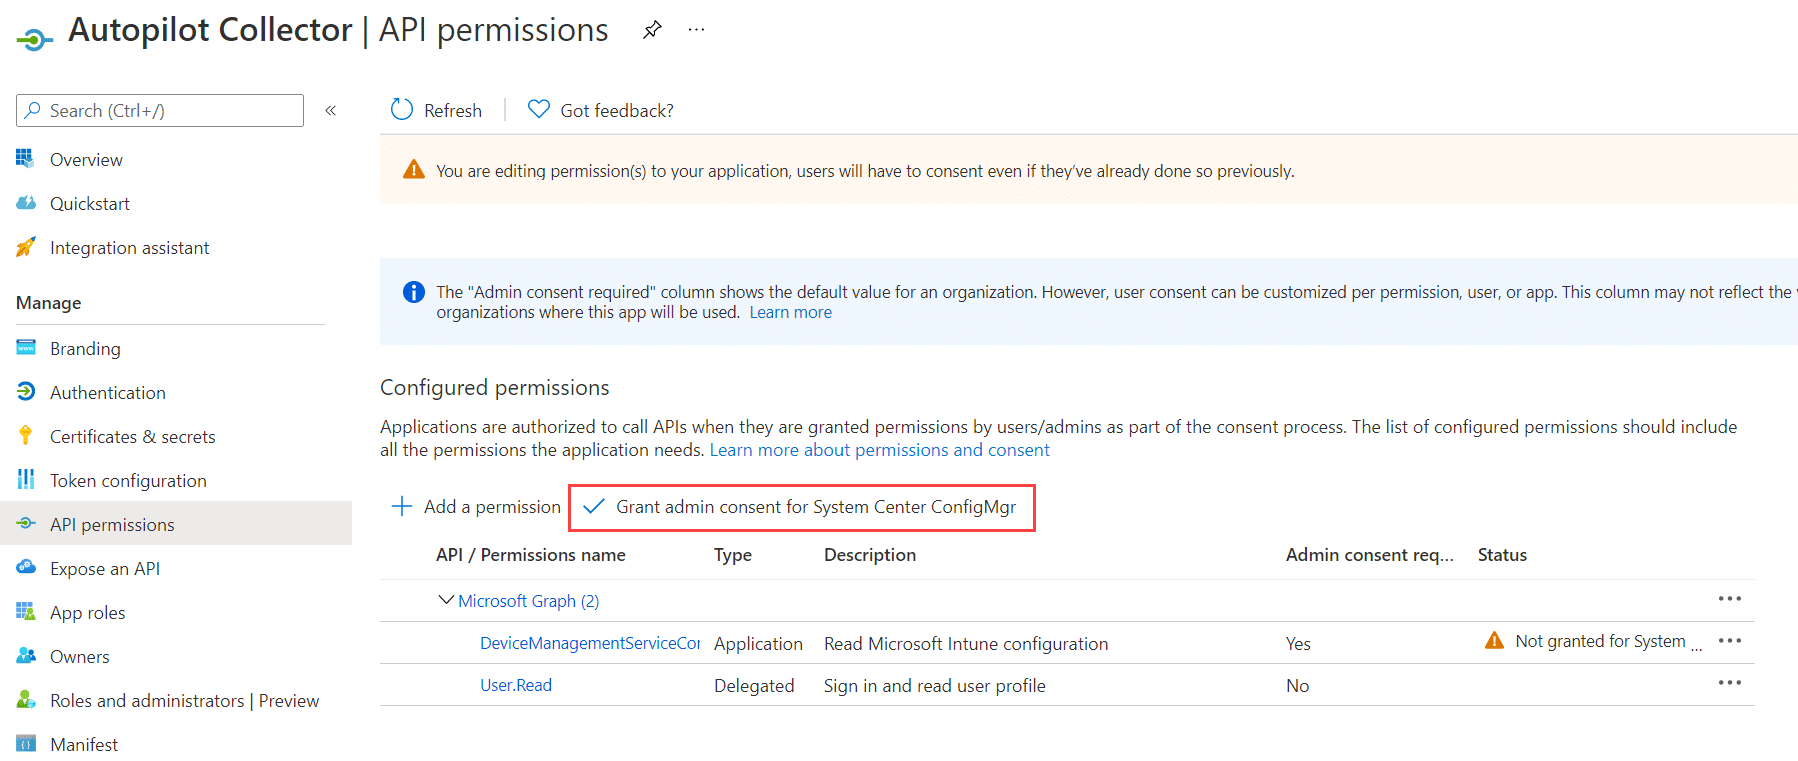
The API permissions section should now be configured similar to as below:
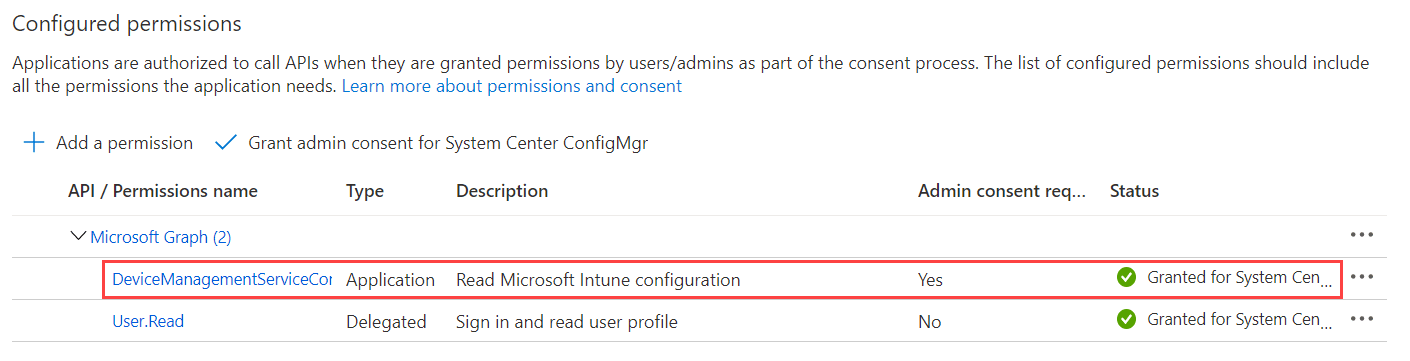
On a side note, the User.Read permissions could be removed, if wanted. It will not be used in this solution.
And that’s it, the App registration required for the QueueTrigger function of the Function App to retrieve an access token using a client secret, has now been completed.
Create an Azure Key Vault
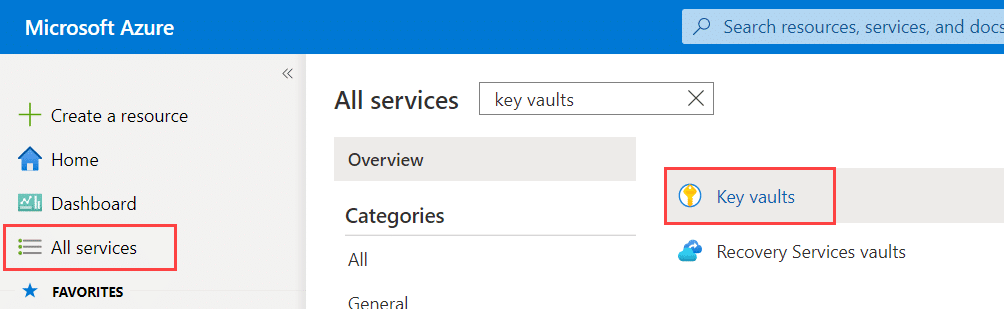
From within the Azure portal, select All services and search for Key Vaults.
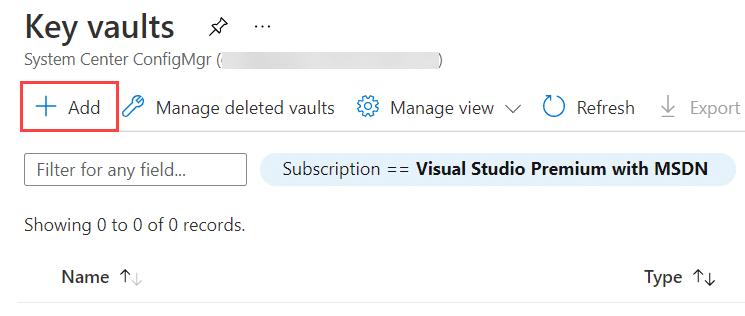
Click Add.
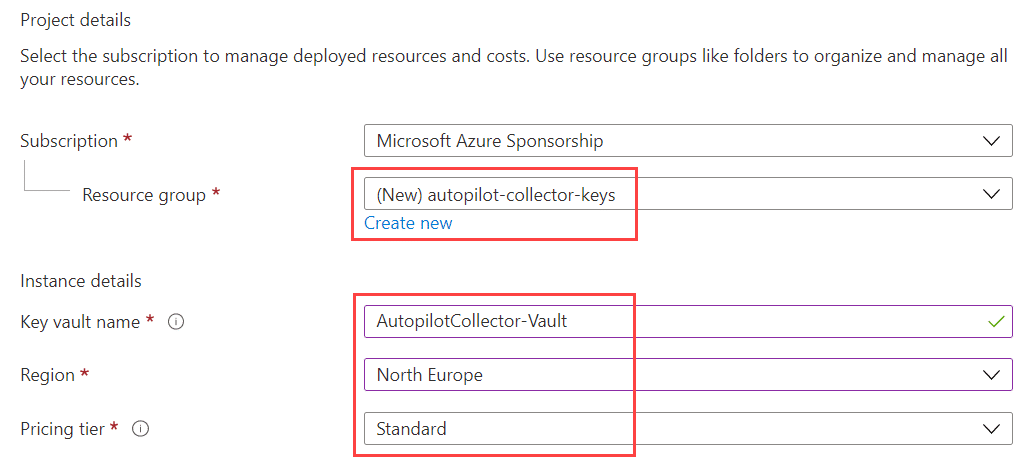
Ensure the proper subscription is selected, click Create new under Resource Group and provide a name that aligns with your policies. For the Key vault name, it needs to be unique in Azure. Select your desired region and a pricing tier that goes along with your policies. Generally, for most cases, the Standard tier is sufficient enough for many organizations.
With regards to the Recovery options, for this particular use case I’ll leave the defaults. However, ensure that you configure them in compliance with your organization policies.
Click Next : Access policy.
By default, the identity that creates the Key Vault is provided ‘administrative access’ directly, with permissions to manage any aspects of the vault. Later in this blog post, we’ll provide access for the Managed System Identity of the Function App, so that it can read secrets such as the Client Secret (from the app registration created earlier). Ensure however that you do not loose access to the Key Vault, so configure the access policy accordingly with any other identity that your organizational policies may require.
Click Next : Networking.
Leave the defaults selected with Public endpoint (all networks).
Click Next : Tags.
Provide any required tags for your environment and click Review + create. Click Create once the validation has passed. The deployment of the Key Vault will now begin. Give it some time to complete, it usually just takes a couple of seconds.
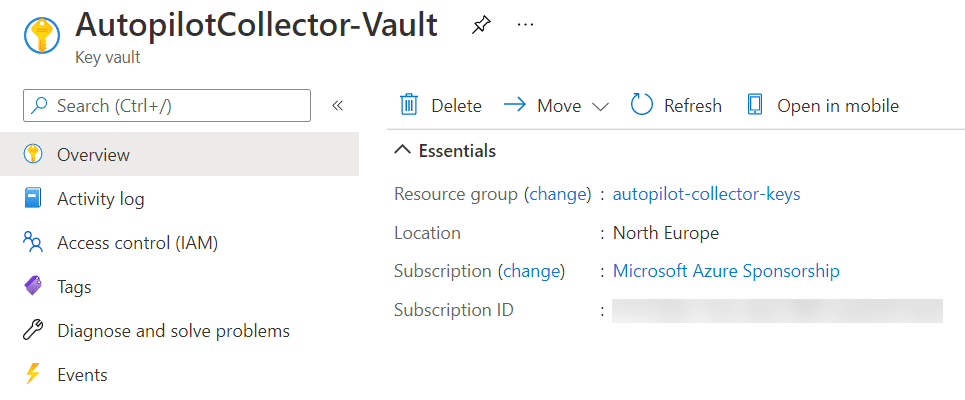
Now with the Key Vault created, let’s move on to the next component.
Create a Log Analytics workspace
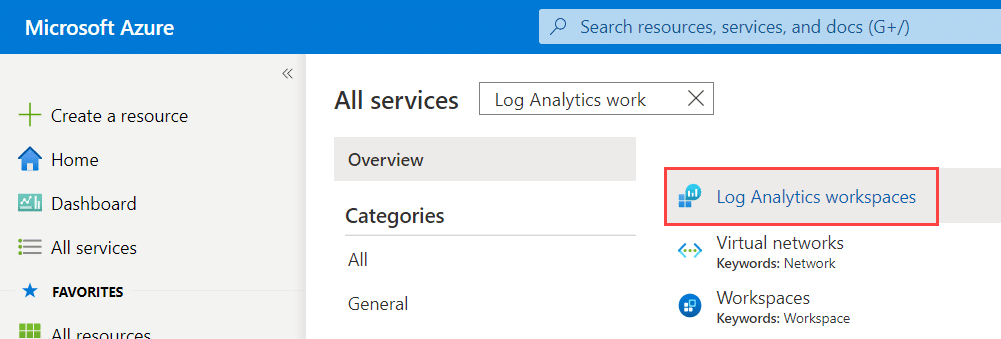
From within the Azure portal, select All services and search for Log Analytics workspaces.
Click Add.

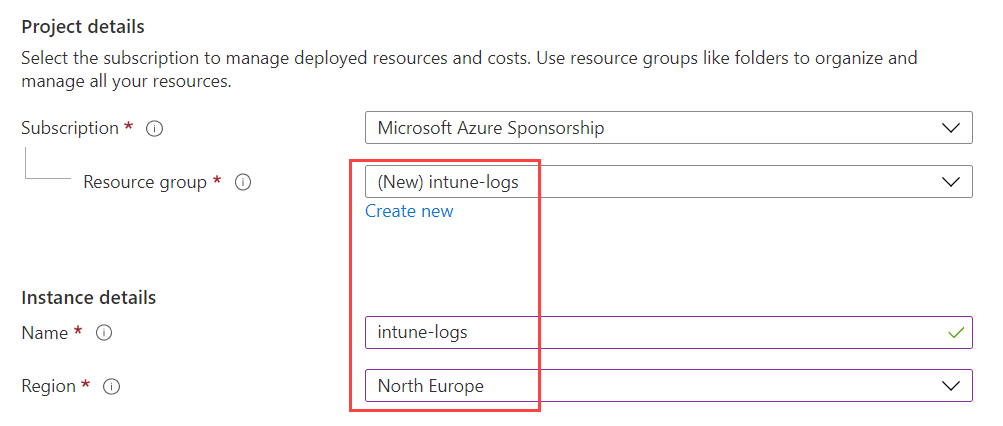
Ensure the proper subscription is selected, click Create new under Resource Group and provide a name that aligns with your policies. Under Instance details, provide a name for the Log Analytics workspace and select the desired region.
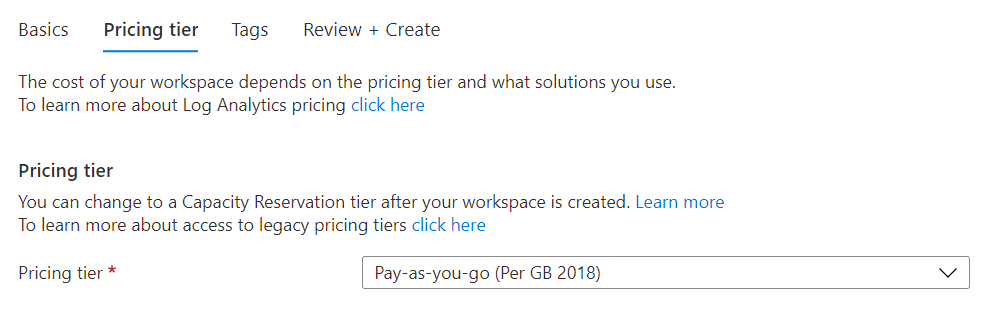
Click Next : Pricing tier.
Select your pricing tier as you see fit. In my lab environment I only have the Pay-as-you-go option available.
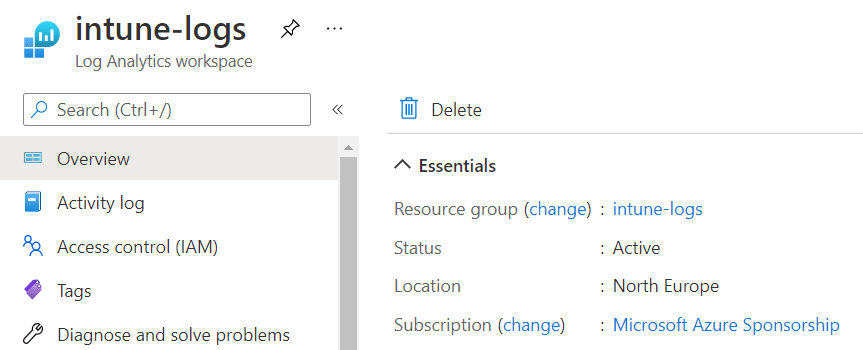
Click Next : Tags.
Provide any required tags for your environment and click Review + create. Click Create once the validation has passed. The deployment of the Log Analytics workspace will now begin. Give it some time to complete, it usually just takes a couple of seconds.
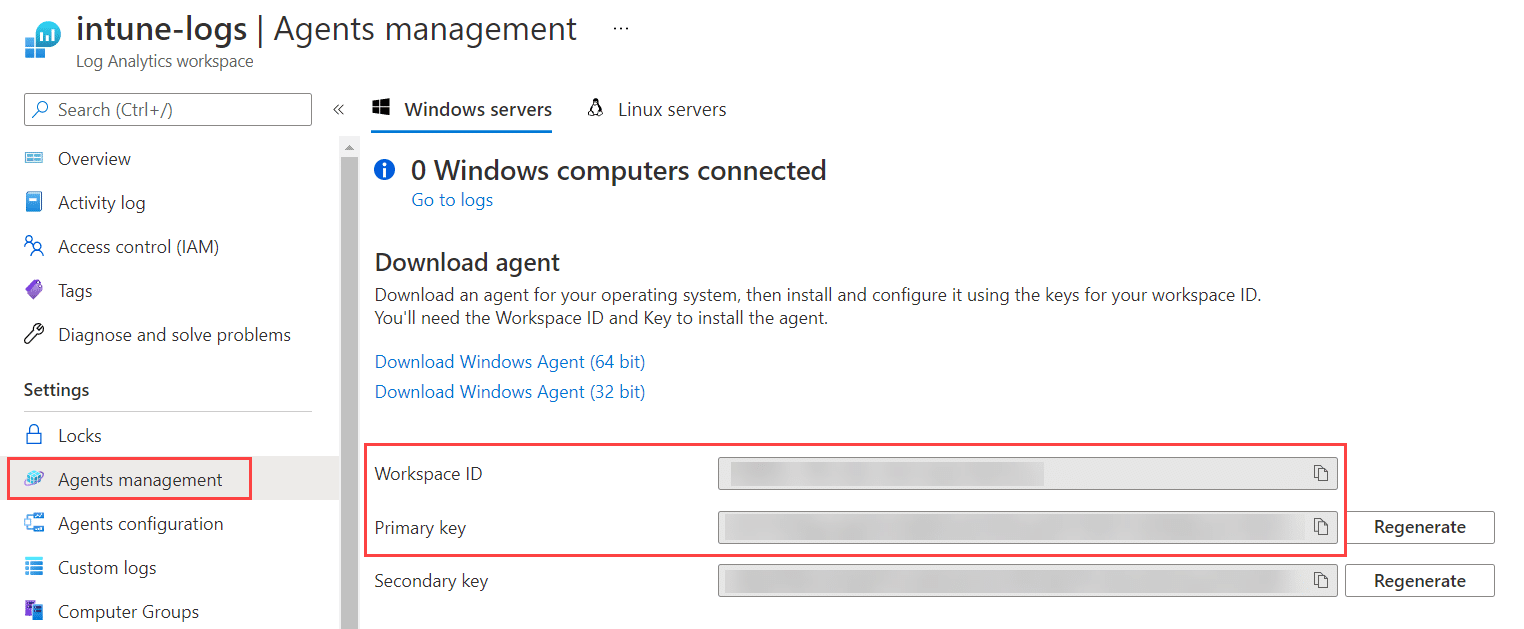
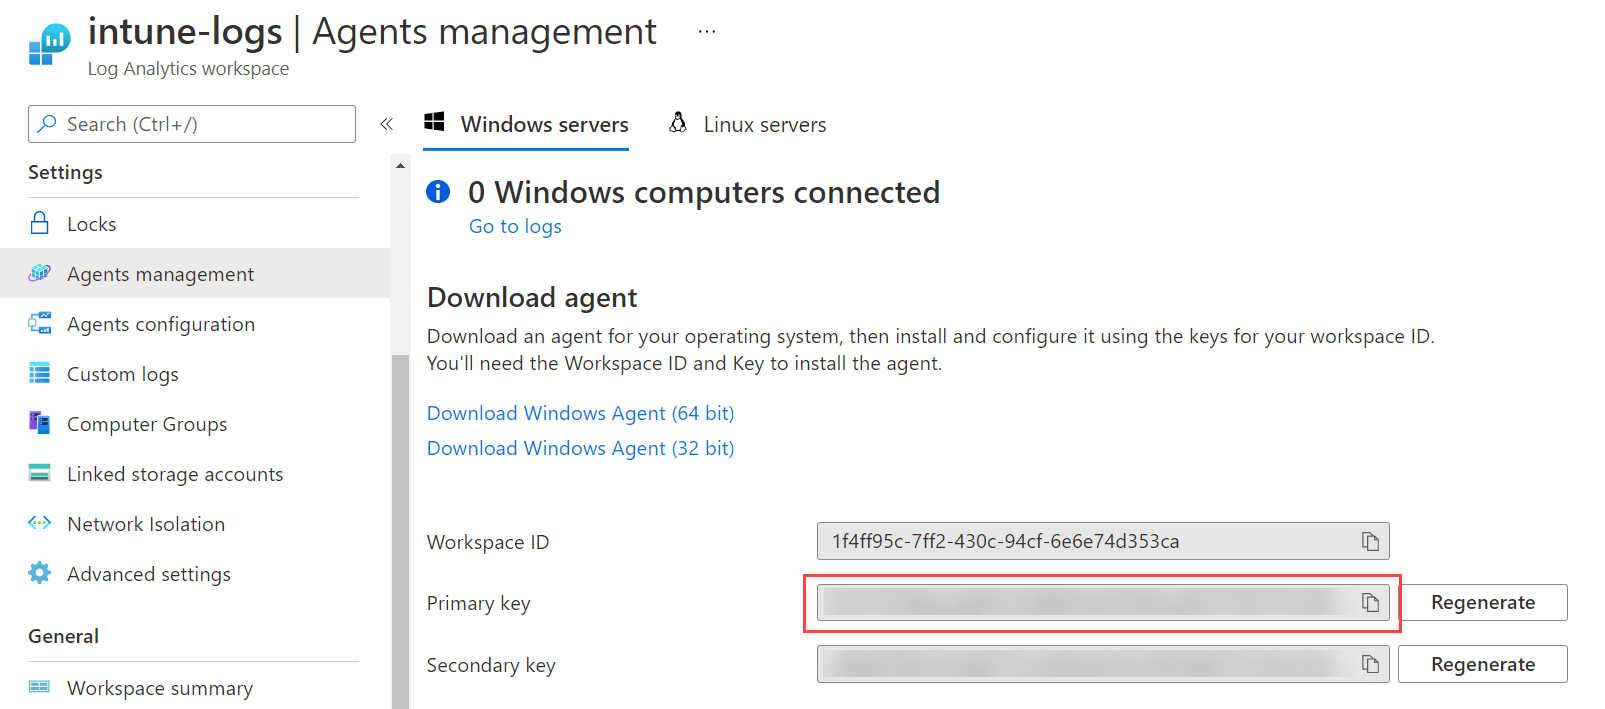
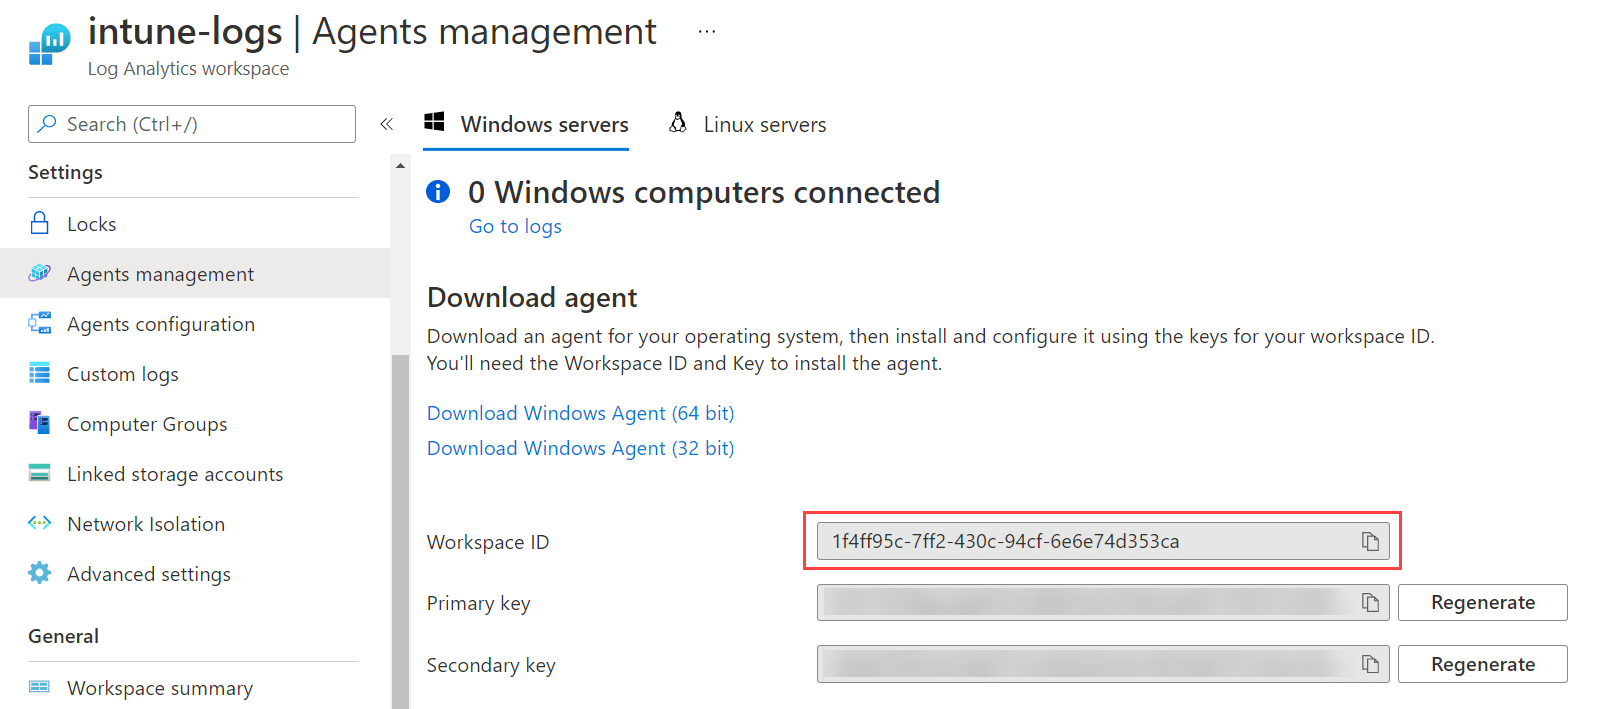
Now with the Log Analytics workspace resource created, it’s important that the Workspace ID and Primary Key is noted down, as it will be used later in this blog post when the Function App is being configured. These properties are available from within the workspace under Settings – Agents management, as shown in the below picture:
Create a Function App
The main component in Autopilot Collector is the Function App, that will contain two functions. For reference, the code that will be running in the two function apps, are hosted on GitHub and can be found here:
MSEndpointMgr/AutopilotCollector (github.com)
Log into the Azure portal, go to All services and search for Function App. Click Add.

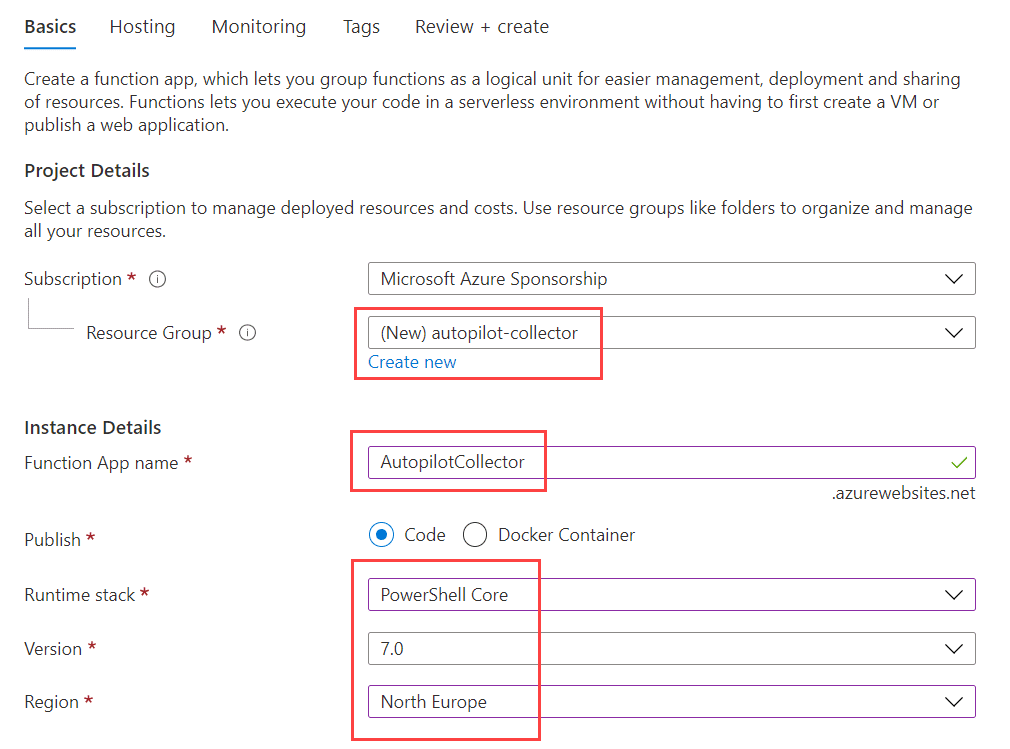
Ensure the proper subscription is selected, click Create new under Resource group and provide a name that aligns with your policies. As for the Function App name, it needs to be unique globally in Azure. Select Code as value for Publish, Runtime stack needs to be PowerShell Core and finally select your desired region.
Click Next : Hosting.
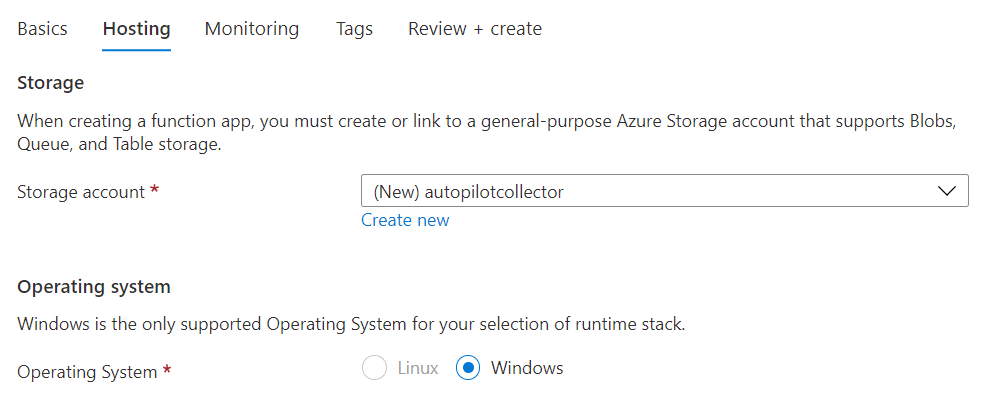
For the Storage account, select Create new and provide it a name other than the default suggested. Since we’ve selected PowerShell Core, the operating system for the runtime stack will be defaulted to Windows.
Now comes an important part of this configuration for the Function App, the selection of the Plan type. Generally, the Consumption (Serverless) option is going to be sufficient for most, however in the event that your Windows Autopilot database contains several thousands of device identities, the maximum runtime of the PowerShell script that will be running in the QueueTrigger function, could potentially exceed the 5 minutes default limit (which can be increased to 10 in the configuration). From the tests performed during development of this solution, if your count of device identities exceeds over 100.000, Consumption (Serverless) is not going to cut it, and the Plan type of Functions Premium is required. That requirement will drive the costs a bit for this solution, so the decision is up to you. Something to point out though, is that you cannot go back and change from Consumption (Serverless) to Function Premium afterwards, you’ll have to create a new Function App for that.
But, like I said, the Consumption (Serverless) Plan type is going to be sufficient in most scenarios, which is also what I’ll be using in this example.

Click Next : Monitoring.
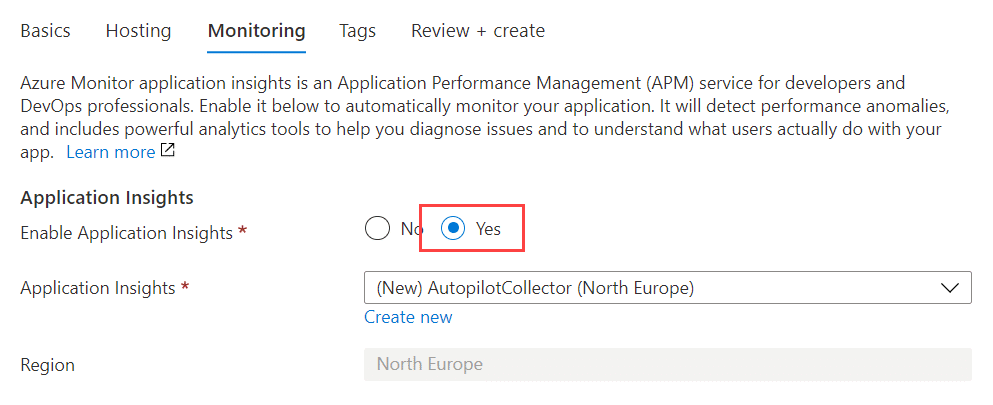
Make sure that you enable Application Insights, in order to be able to monitor the Function App and it’s running functions in real-time.
Click Next : Tags and provide any required tags for your environment and finally click Review + create. Review the configuration and click Create. The deployment of the Function App will now begin. Give it some time to complete, it usually takes a minute or two.

Once completed, the newly created Function App is now up and running and this completes the setup of the Function App.
Create functions in the Function App
Up until this point, we’ve completed the setup of all the required components in this solution. Now it’s time to start the configuration of the various components to make them all integrate well with each other where needed. Let’s start off with adding the actual logic and brains behind this whole solution, the code in the functions of the Function App.
Create the QueueTrigger function
Browse the source code on GitHub for this function, and copy it for use later in this section:
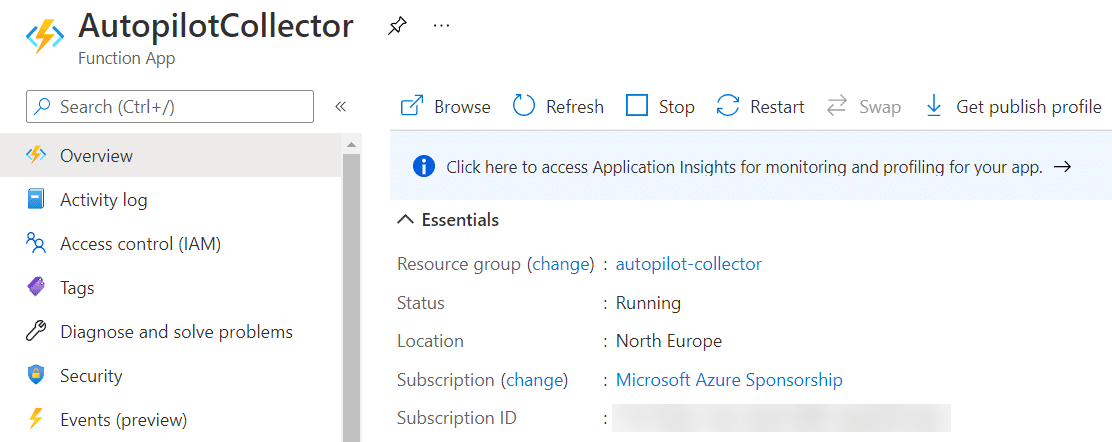
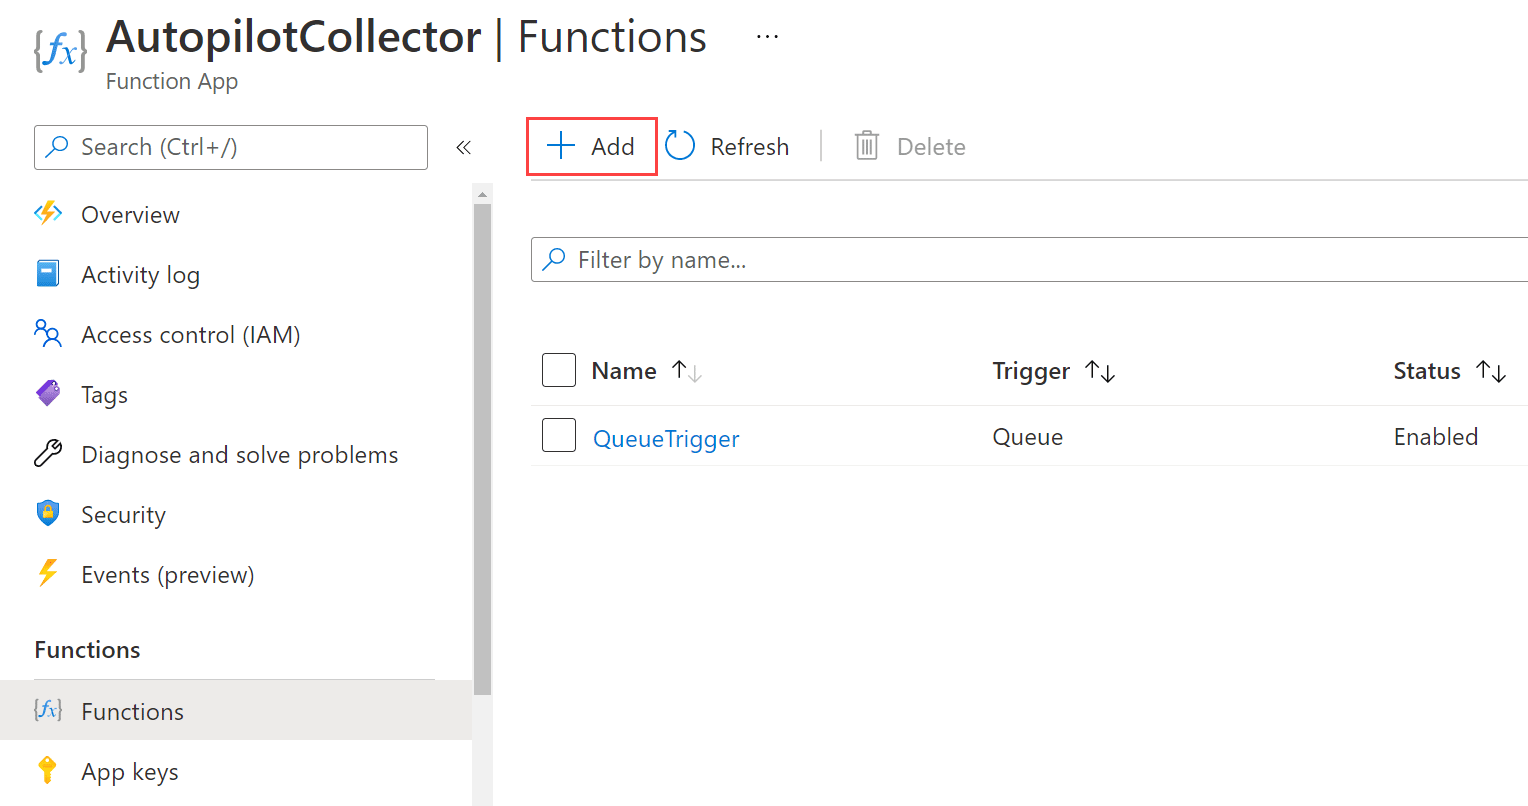
From the Azure portal, search for the Function App and browse to the one created earlier, e.g. similar to this depending on what you named it:

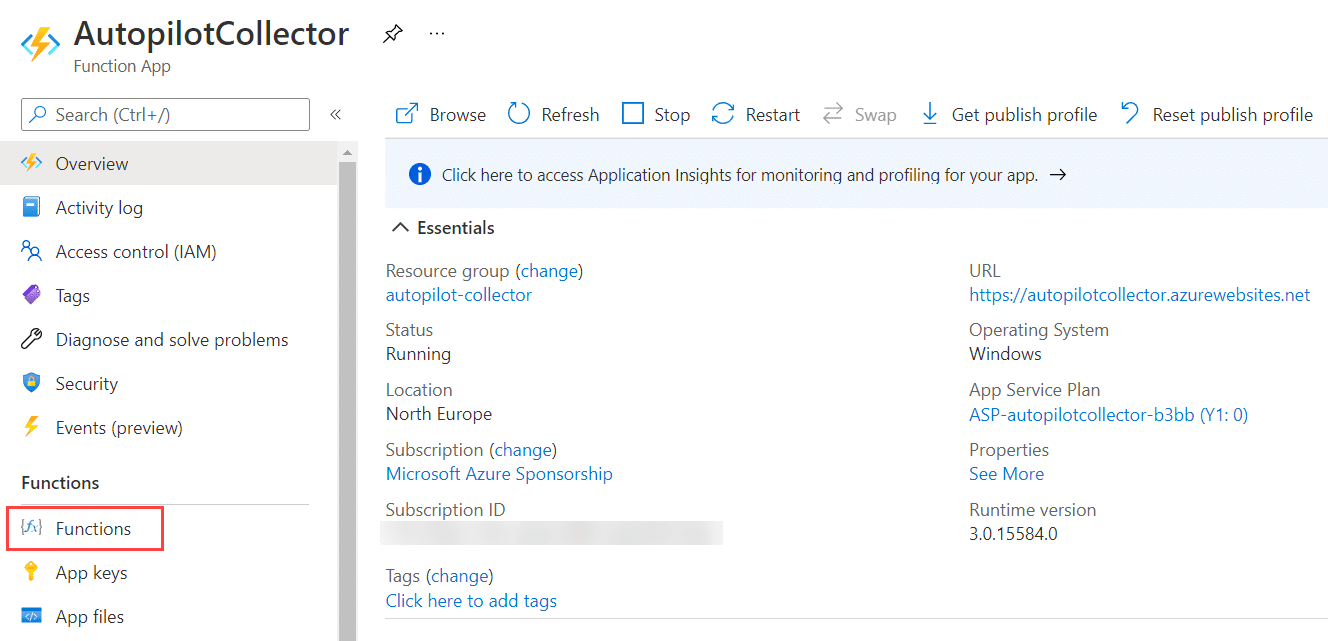
Under Functions, select Functions.
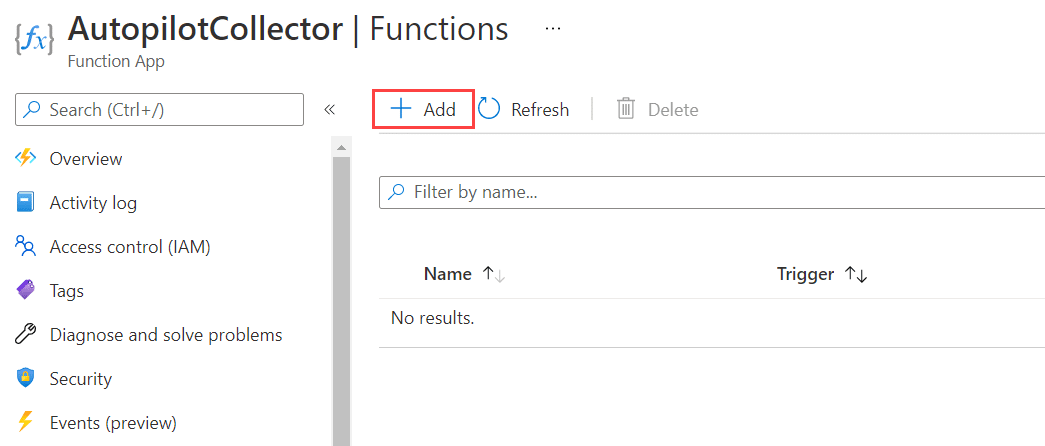
Click Add.
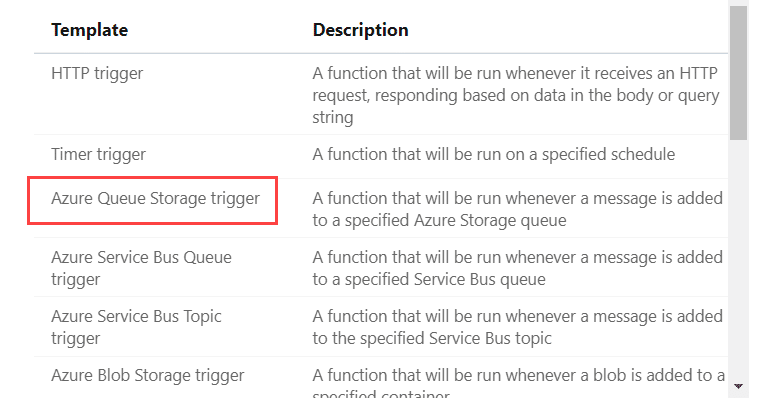
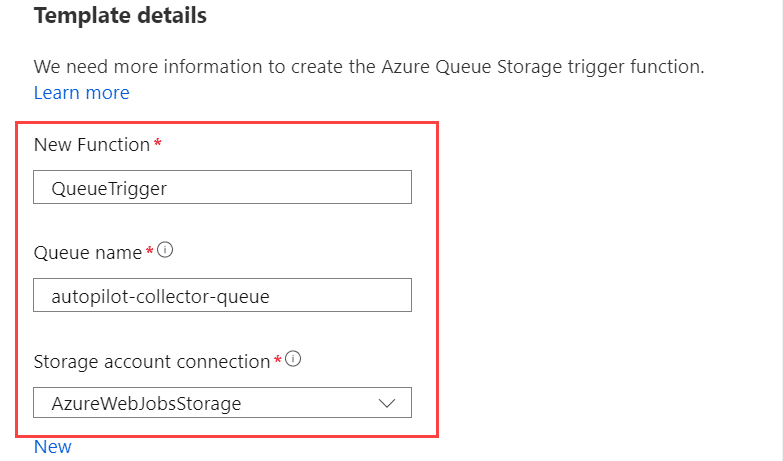
Leave the Development environment set as Develop in portal and select the Template named Azure Queue Storage trigger.
Name the new function as e.g. QueueTrigger.
As for the queue name, it’s important to note that if you want to use something differently than what’s suggested in the below image (something other than autopilot-collector-queue), you’d have to update the PowerShell code for the TimerTrigger function on line 7 in the $AzureQueueStorageName variable, to reflect this name change. I suggest that you use what’s shown below, as the name aligns well with the solution name and such. It’s also important to note, that further down in this post we’ll be creating and configuring the Queue Storage, that should be named after what’s configured at this point for the QueueTrigger function.
Make sure the AzureWebJobsStorage selection is used for the Storage account connection.
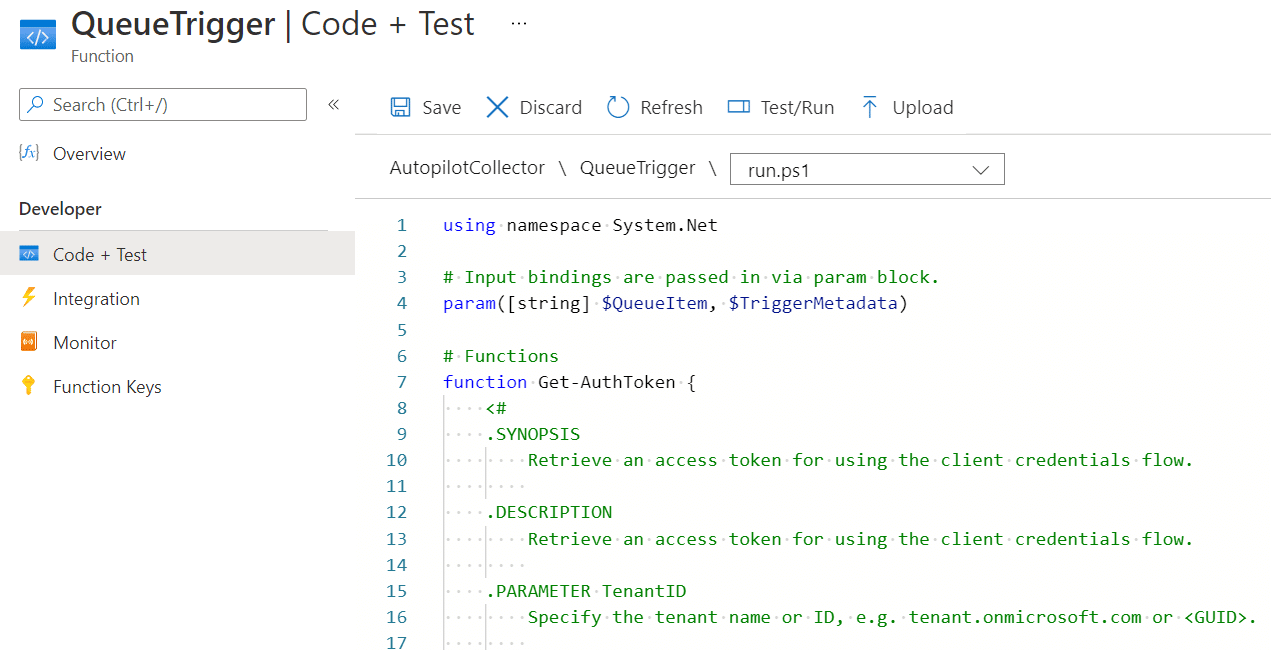
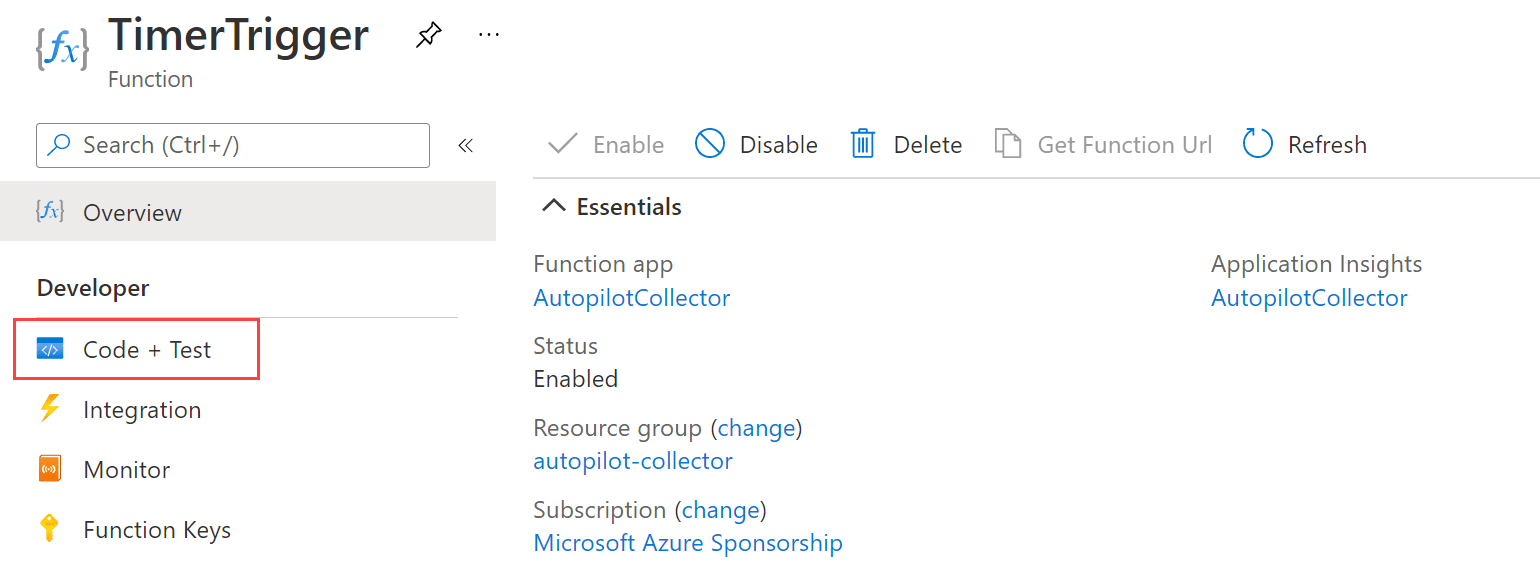
Click Add and the function will now be created. Once completed it takes you to the blade of the function itself, as shown below. Click on Code + Test.

Remove all the existing sample code, and replace it with the code from the GitHub repository linked right in the beginning of this section.
Click Save.
That’s the QueueTrigger function created and configured, let’s move on to the TimerTrigger that will eventually be the component that triggers the QueueTrigger function’s logic to collect and send the Autopilot device identities to the Log Analytics workspace.
Create the TimerTrigger function
Browse the source code on GitHub for this function, and copy it for use later in this section:
Under Functions of the Function App, select Functions.
Click Add.
Leave the Development environment set as Develop in portal and select the Template named Timer trigger.
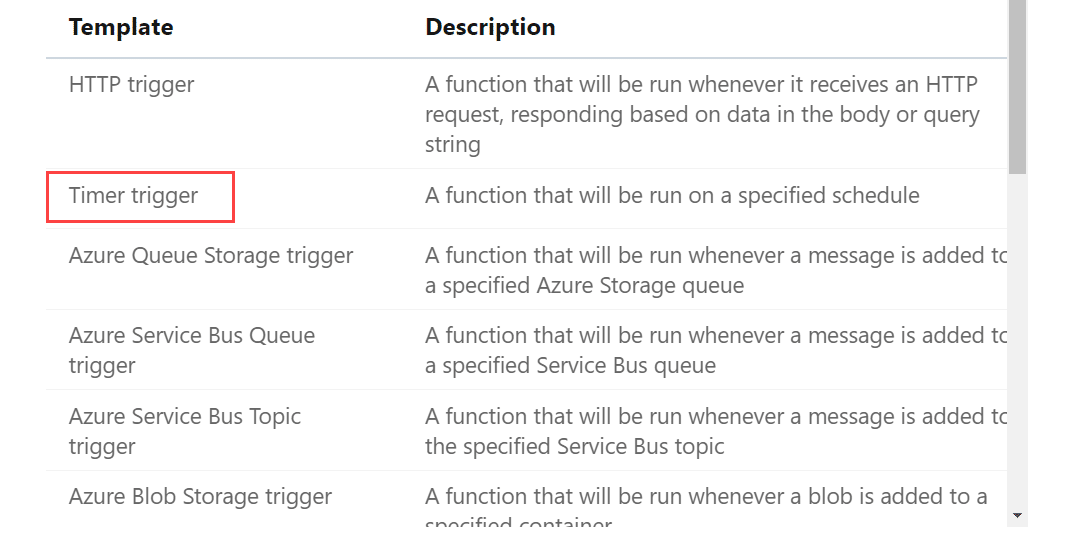
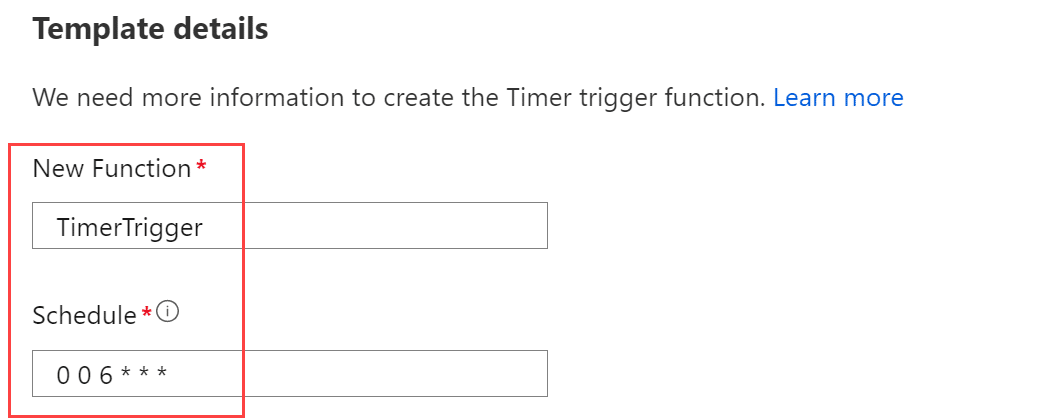
Name the function as e.g. TimerTrigger.
For the schedule when the Timer trigger function will run, it’s a bit different from what you may be use to, as it’s to be specified as a crontab expression. To understand how these expression are constructed, refer to the documentation from Microsoft:
Timer trigger for Azure Functions | Microsoft Docs
In this example, let’s say the TimerTrigger should execute daily at 6AM, such a crontab expression are written as below:
0 0 6 * * *
Enter the above in the Schedule field, if that’s how you want it to execute. And let me just be clear, this would be the daily time when the whole Autopilot Collector solution would be triggered on an automatic basis.
Click Add and the function will now be created. Once completed it takes you to the blade of the function itself, as shown below. Click on Code + Test.
Remove all the existing sample code, and replace it with the code from the GitHub repository linked right in the beginning of this section.
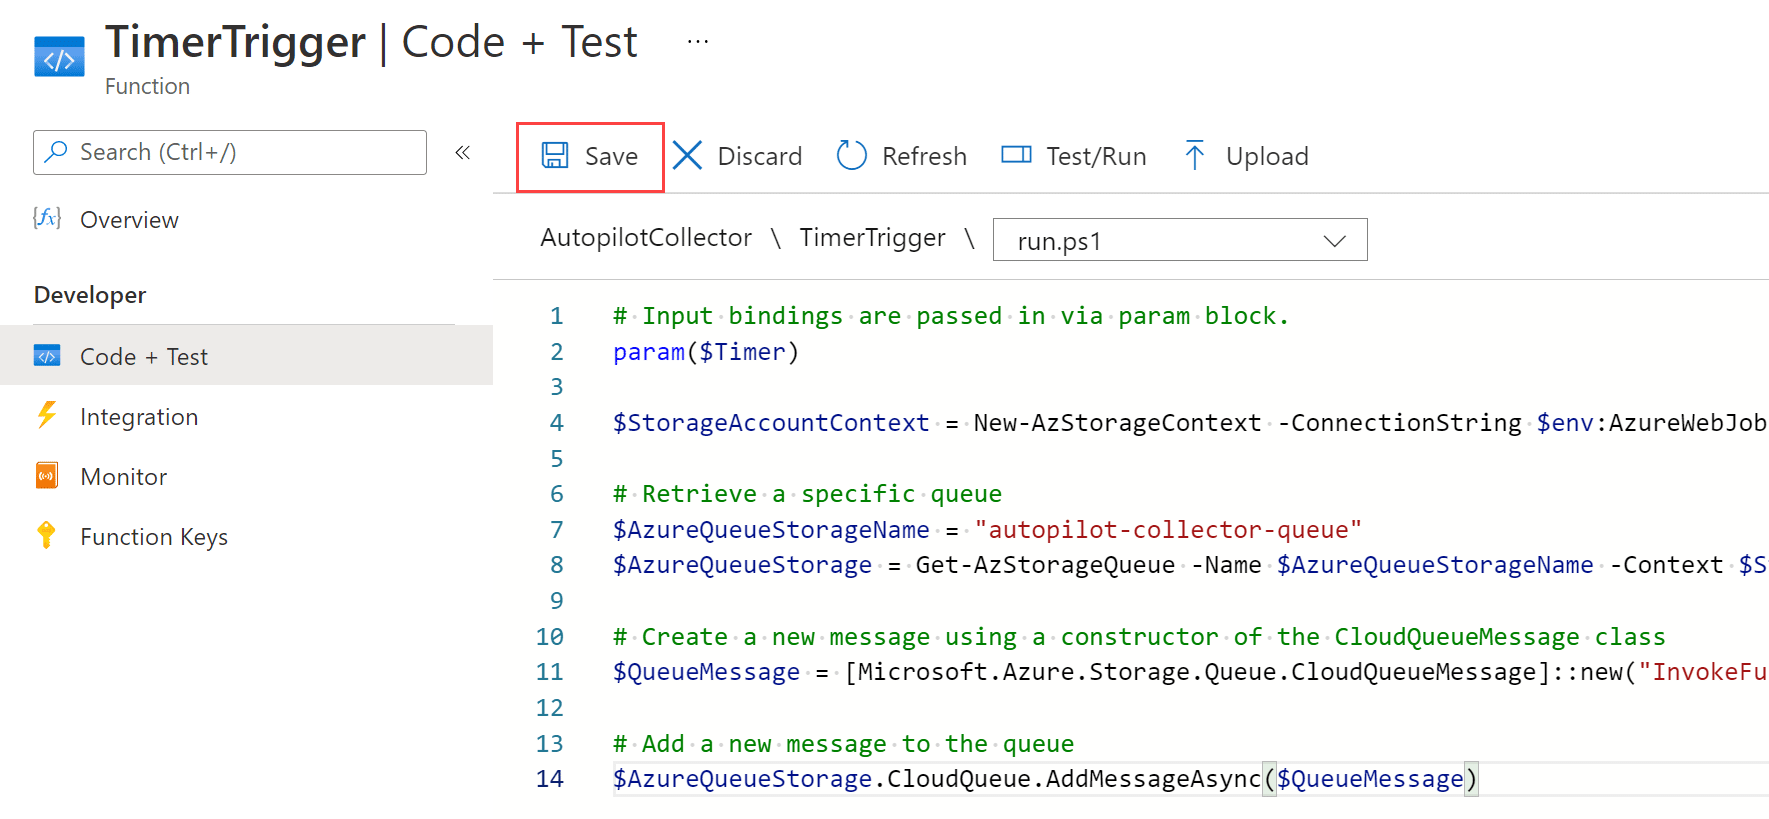
Pay attention to the value of the $AzureQueueStorageName again, this is what you configured for the QueueTrigger earlier (unless you decided to use something differently, then the corresponding value of your choosing must be amended in the code above). For the next section in this post, it’s time to create the queue itself.
Create Queue Storage in Storage Account
The Azure Queue Storage is in fact a feature of a Storage Account. You create a Queue in a specific storage account and something, and in this case the TimerTrigger will use the connection string to get the context of the storage account to put an item on the queue.
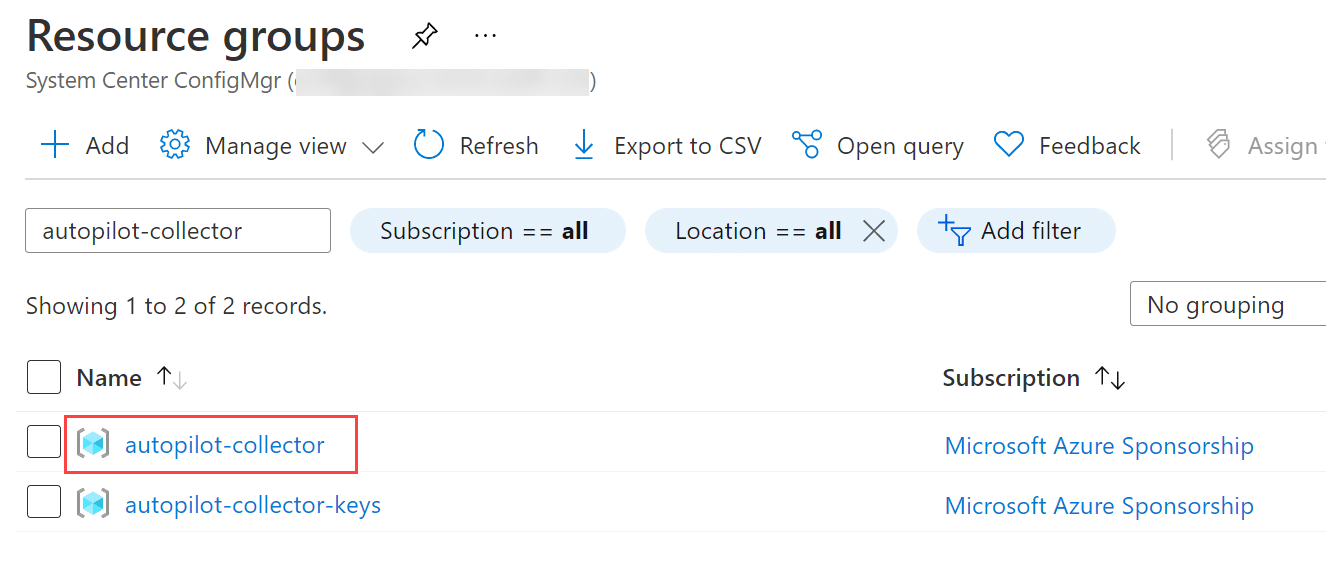
From he Azure portal, search for Resource groups.
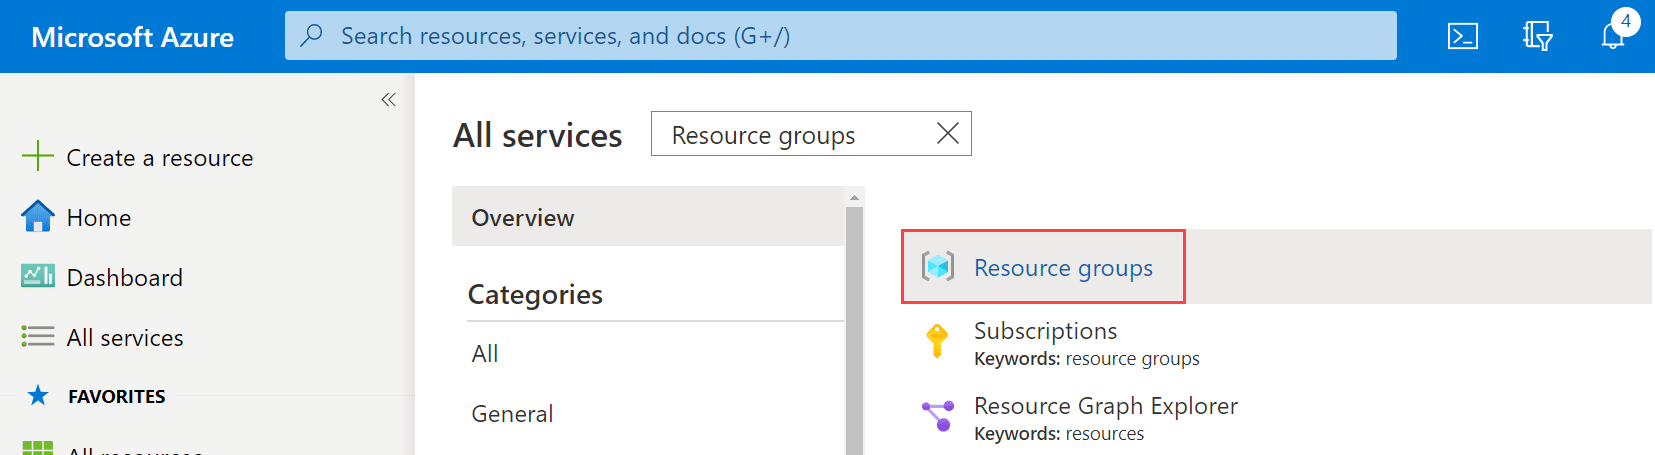
When the Function App was created earlier, you specified a name for the new resource group that would get created and be used to contain the items related to the Function App. Search for this resource group, e.g. autopilot-collector and click on it.
From the Overview blade of the resource group, locate the autopilotcollector (or the name specified earlier when settings up the Function App) storage account. Click on the storage account.
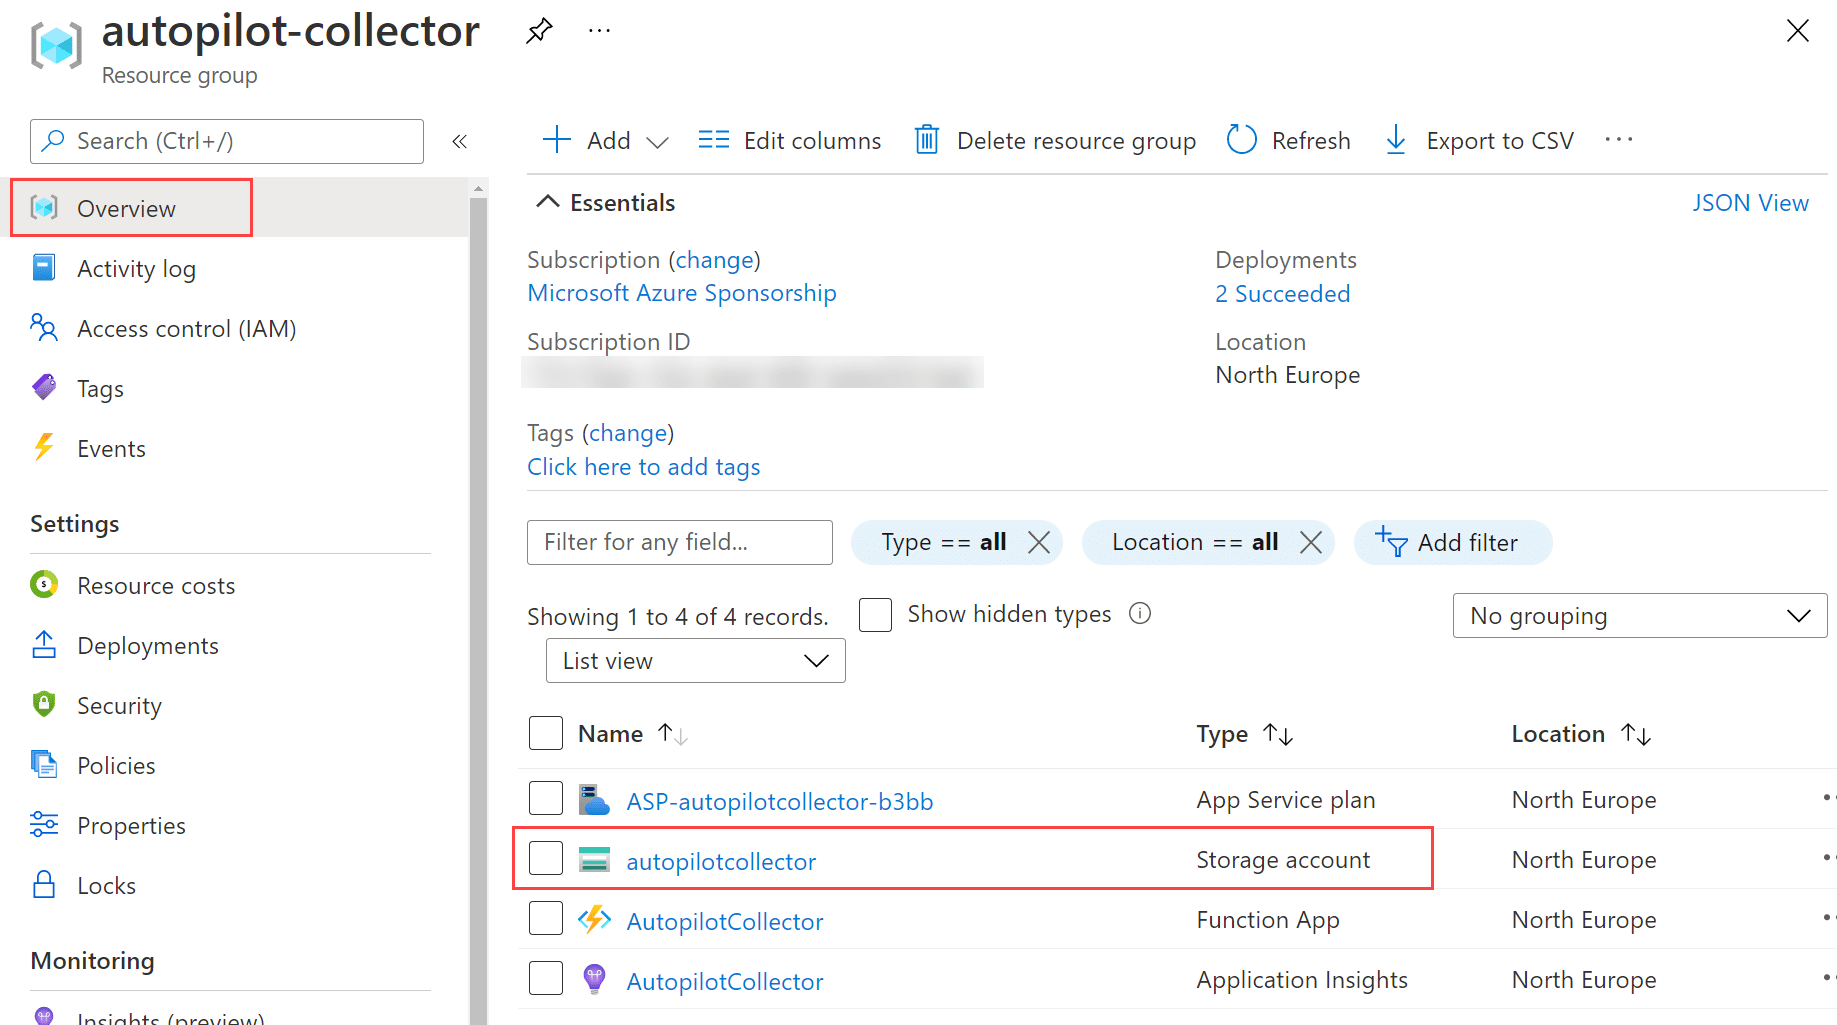
In the Data storage section, click on Queues.

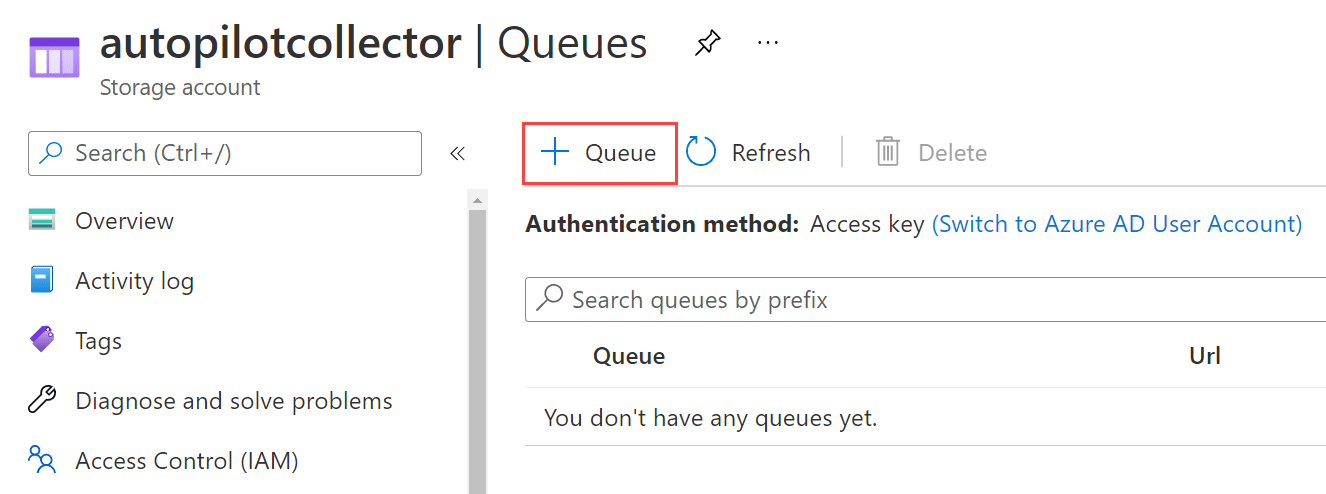
Click Queue.
Name the queue the same that was specified for the TimerTrigger function and what was also configured for the QueueTrigger function, e.g. autopilot-collector-queue.
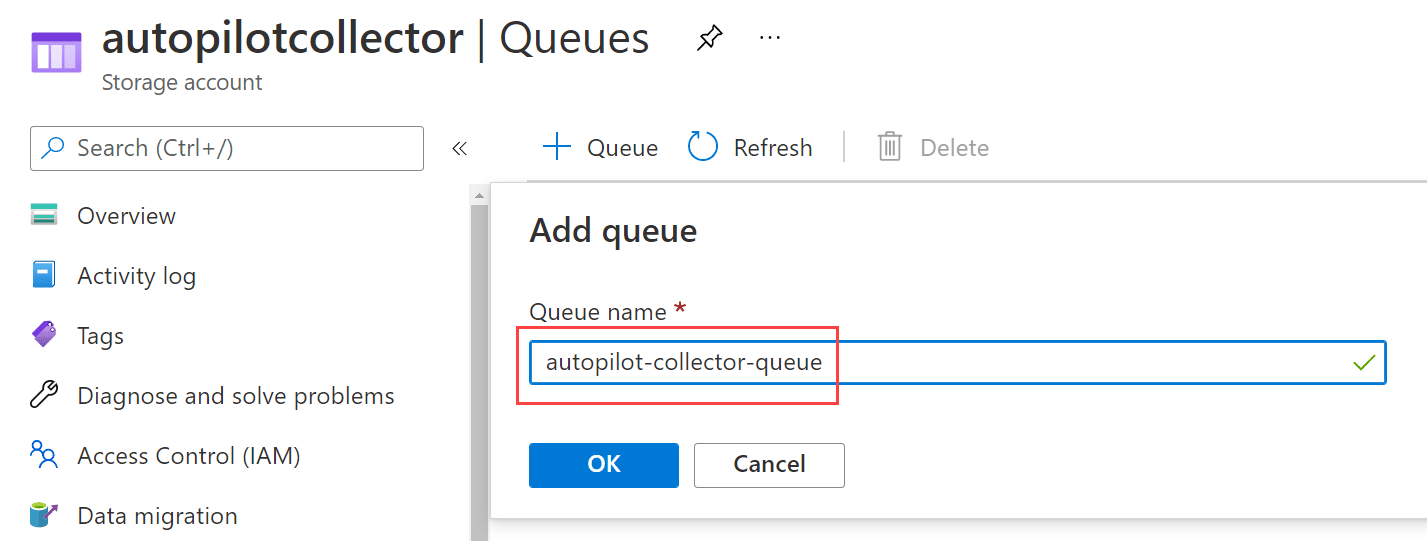
The Queue Storage has now been created and it’s ready to receive messages.
Autopilot Collector components configuration
Up until this point, all the required components have been created:
- Function App
- Azure Key Vault
- Log Analytics workspace
- Azure Queue Storage
What still remains, is to tie the solution together and finalize the component configuration. From now on, I’ll assume that you’ve learned how to locate the different resources and components in this solution within the Azure portal, and have good understanding of what’s included. Therefor, I’ll leave out the parts going forward where to find the different components, and just reference similar to ‘go to the Function App’.
Setup Managed System Identity for Function App
In the Function App, scroll down to the Settings section and click on Identity.

Flip the Status switch to On.
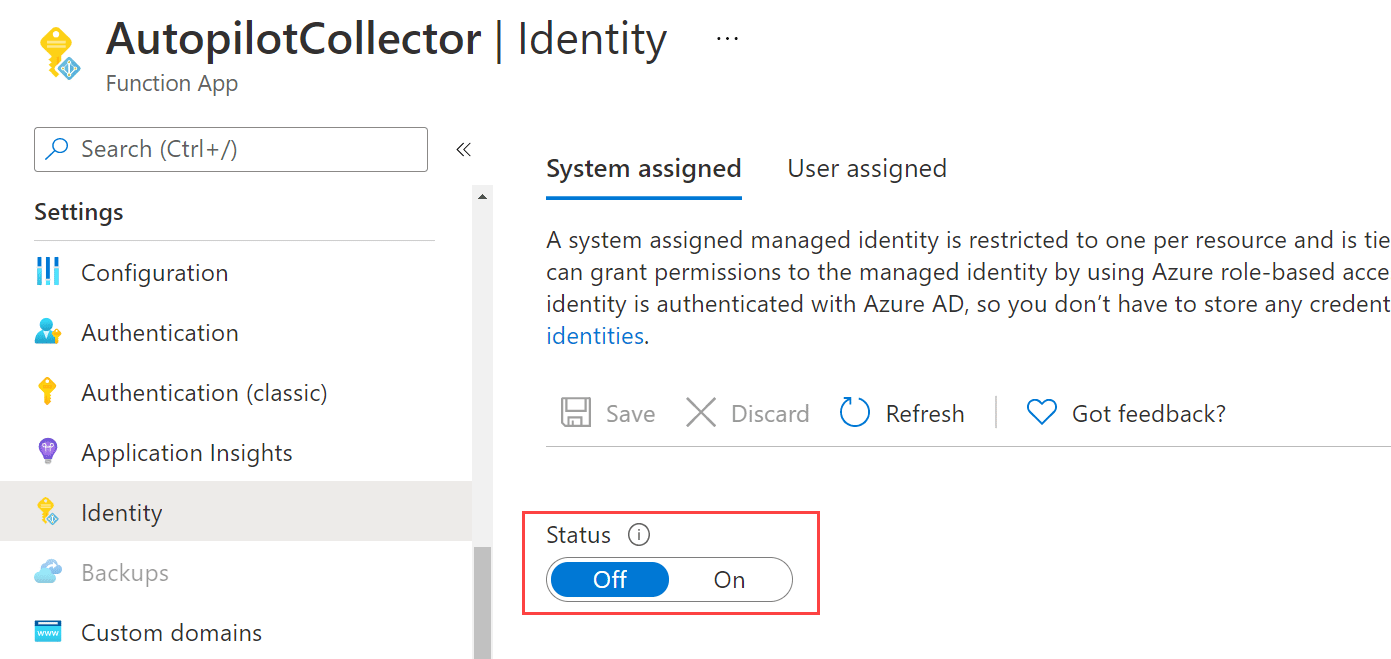
Click Save.

Click Yes in the prompt.
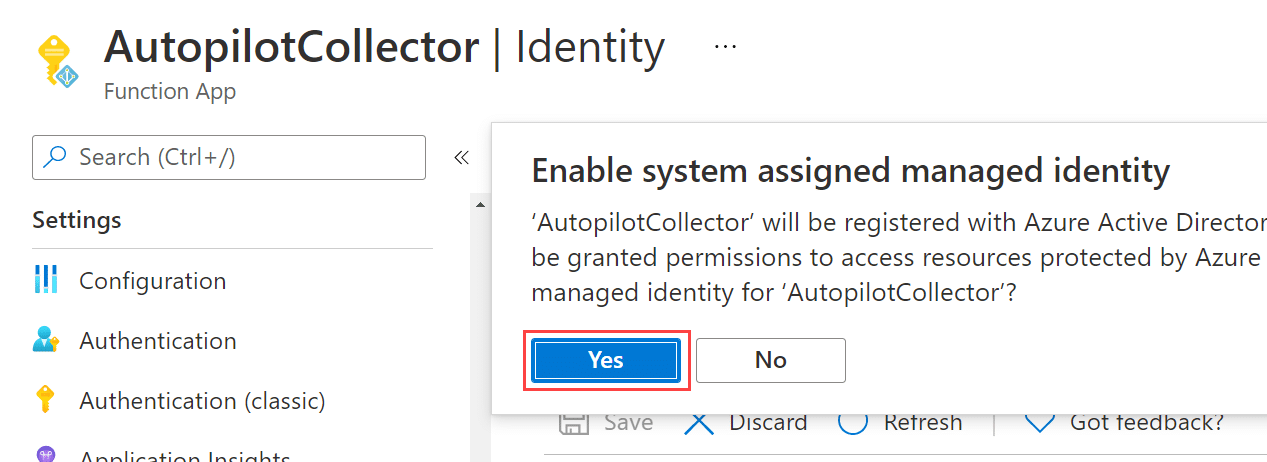
This will result in that a new Managed System Identity (essentially a service principal) will be created for this specific Function App, and can be used whenever any parts of the code running inside a function requires to authenticate against other resources in Azure, such as a Key Vault.
Provide Managed System Identity access to secrets in Key Vault
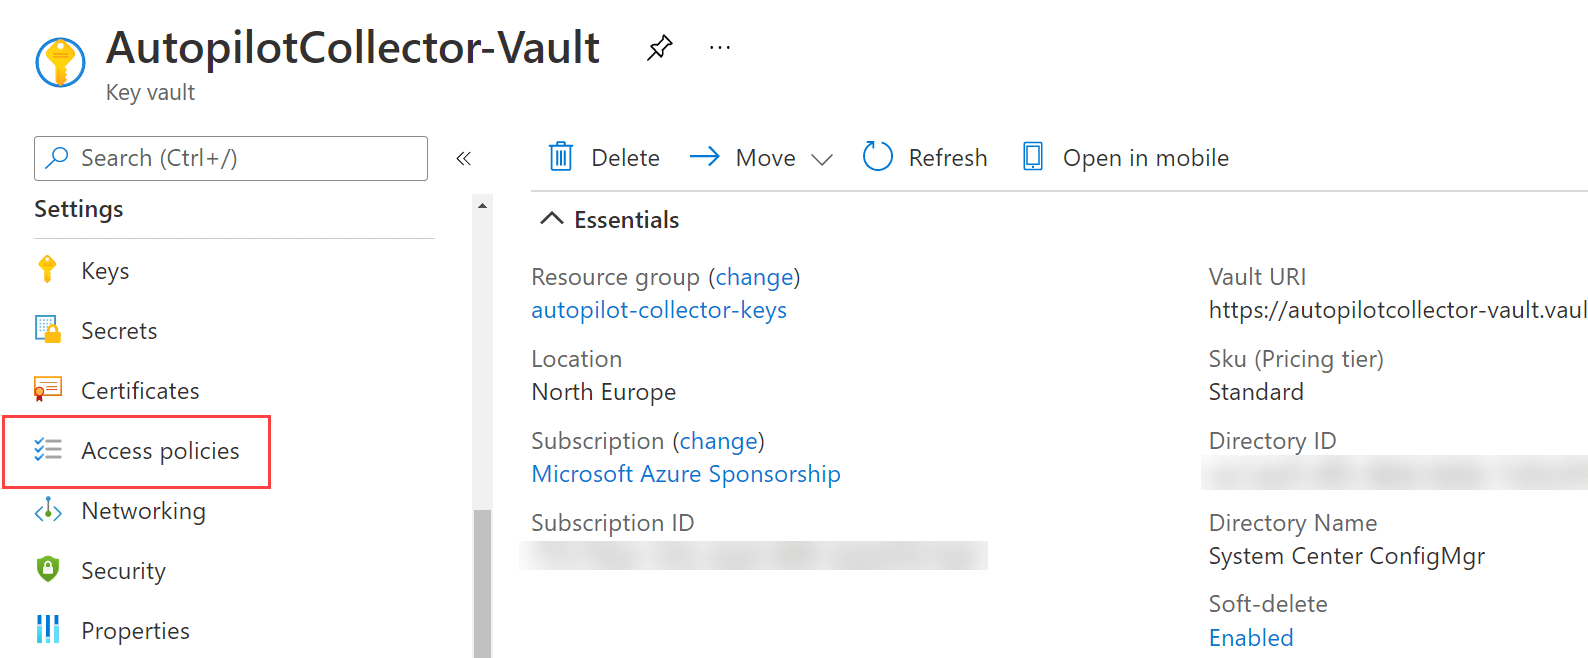
With the Managed System Identity service principal created, it needs to be given access to the Key Vault created earlier, named e.g. AutopilotCollector-Vault.
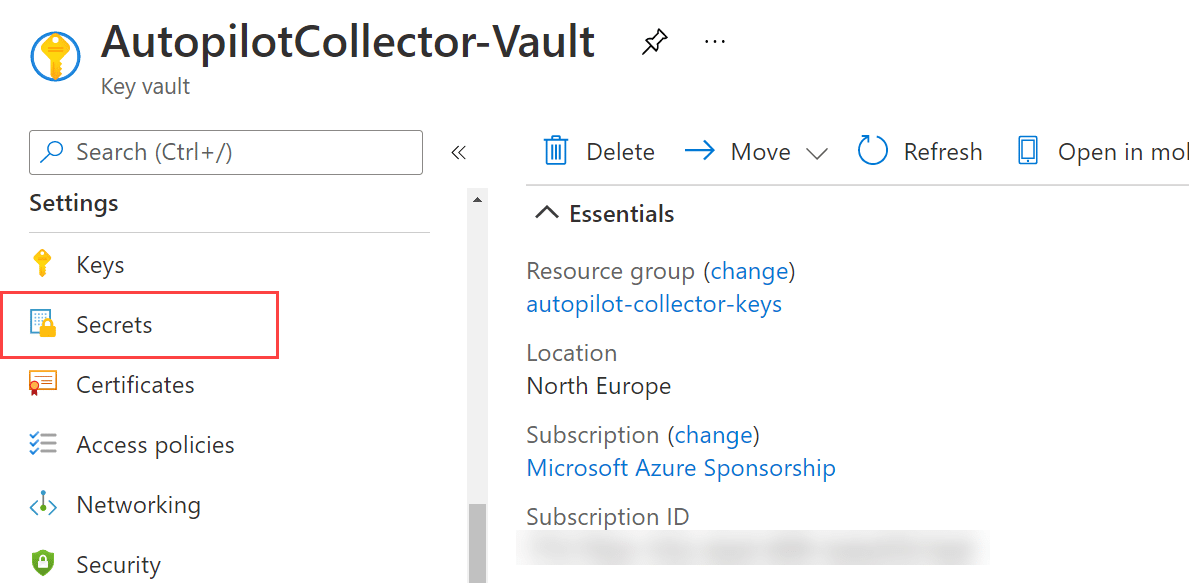
From the Key Vault and under Settings select Access policies.
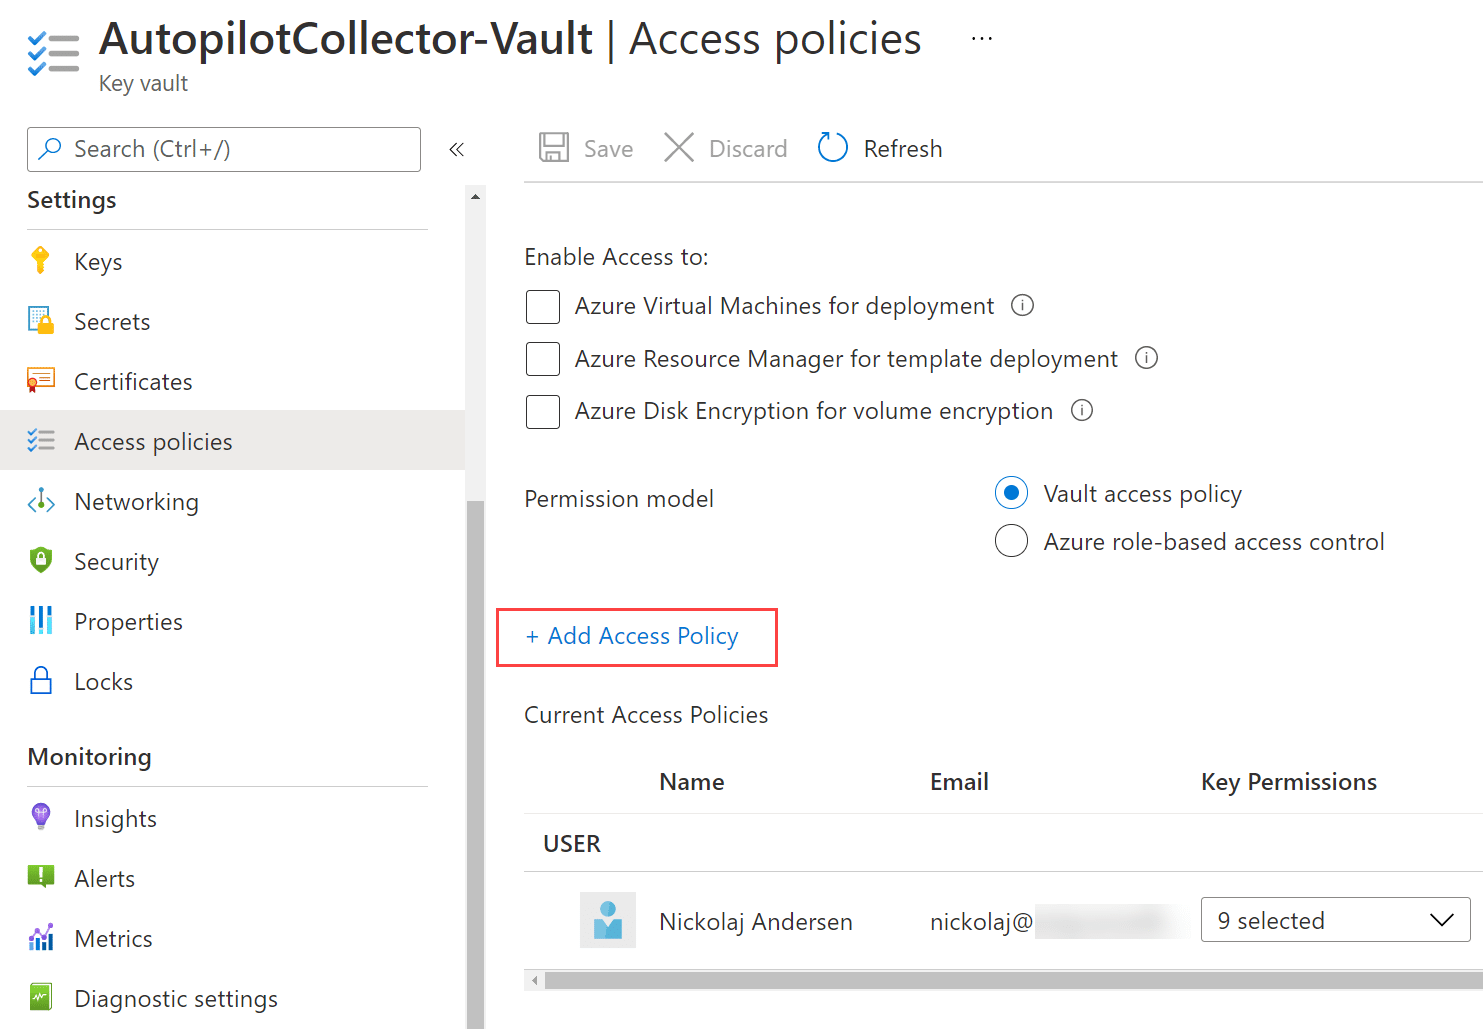
Notice that the user identity that was used to create the Key Vault, have automatically been given access. The Managed System Identity service principal of the Function App should now also be added here.
Click on Add Access Policy.
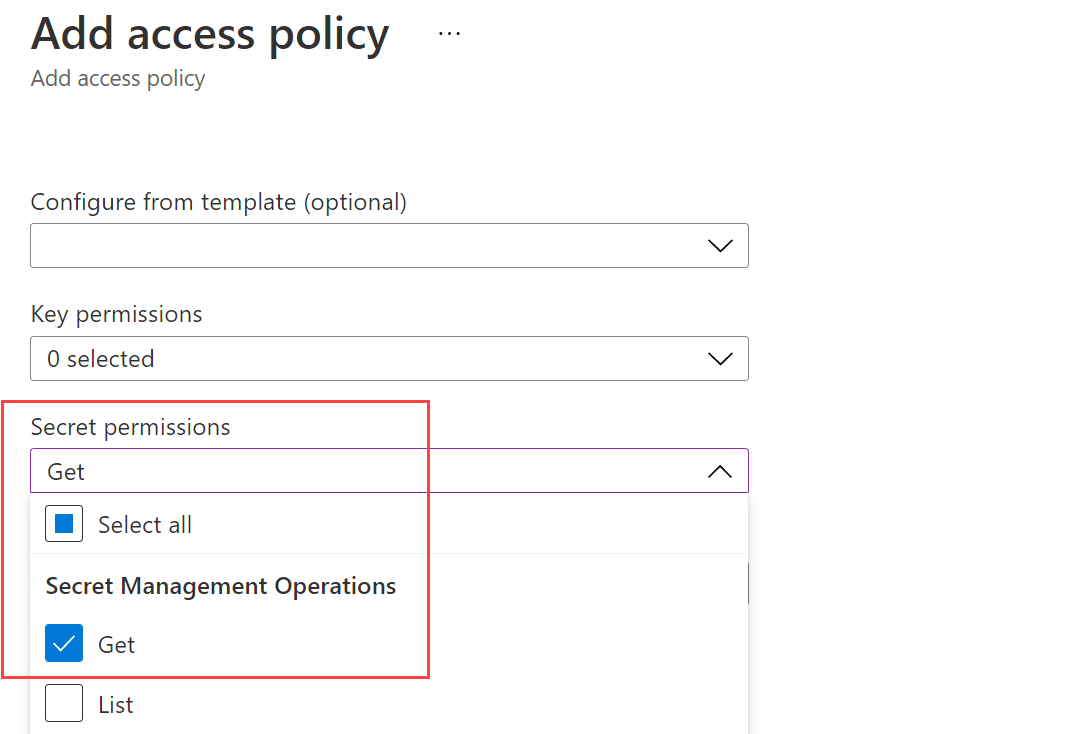
In the Secret permissions drop down, select Get for Secret Management Operations.
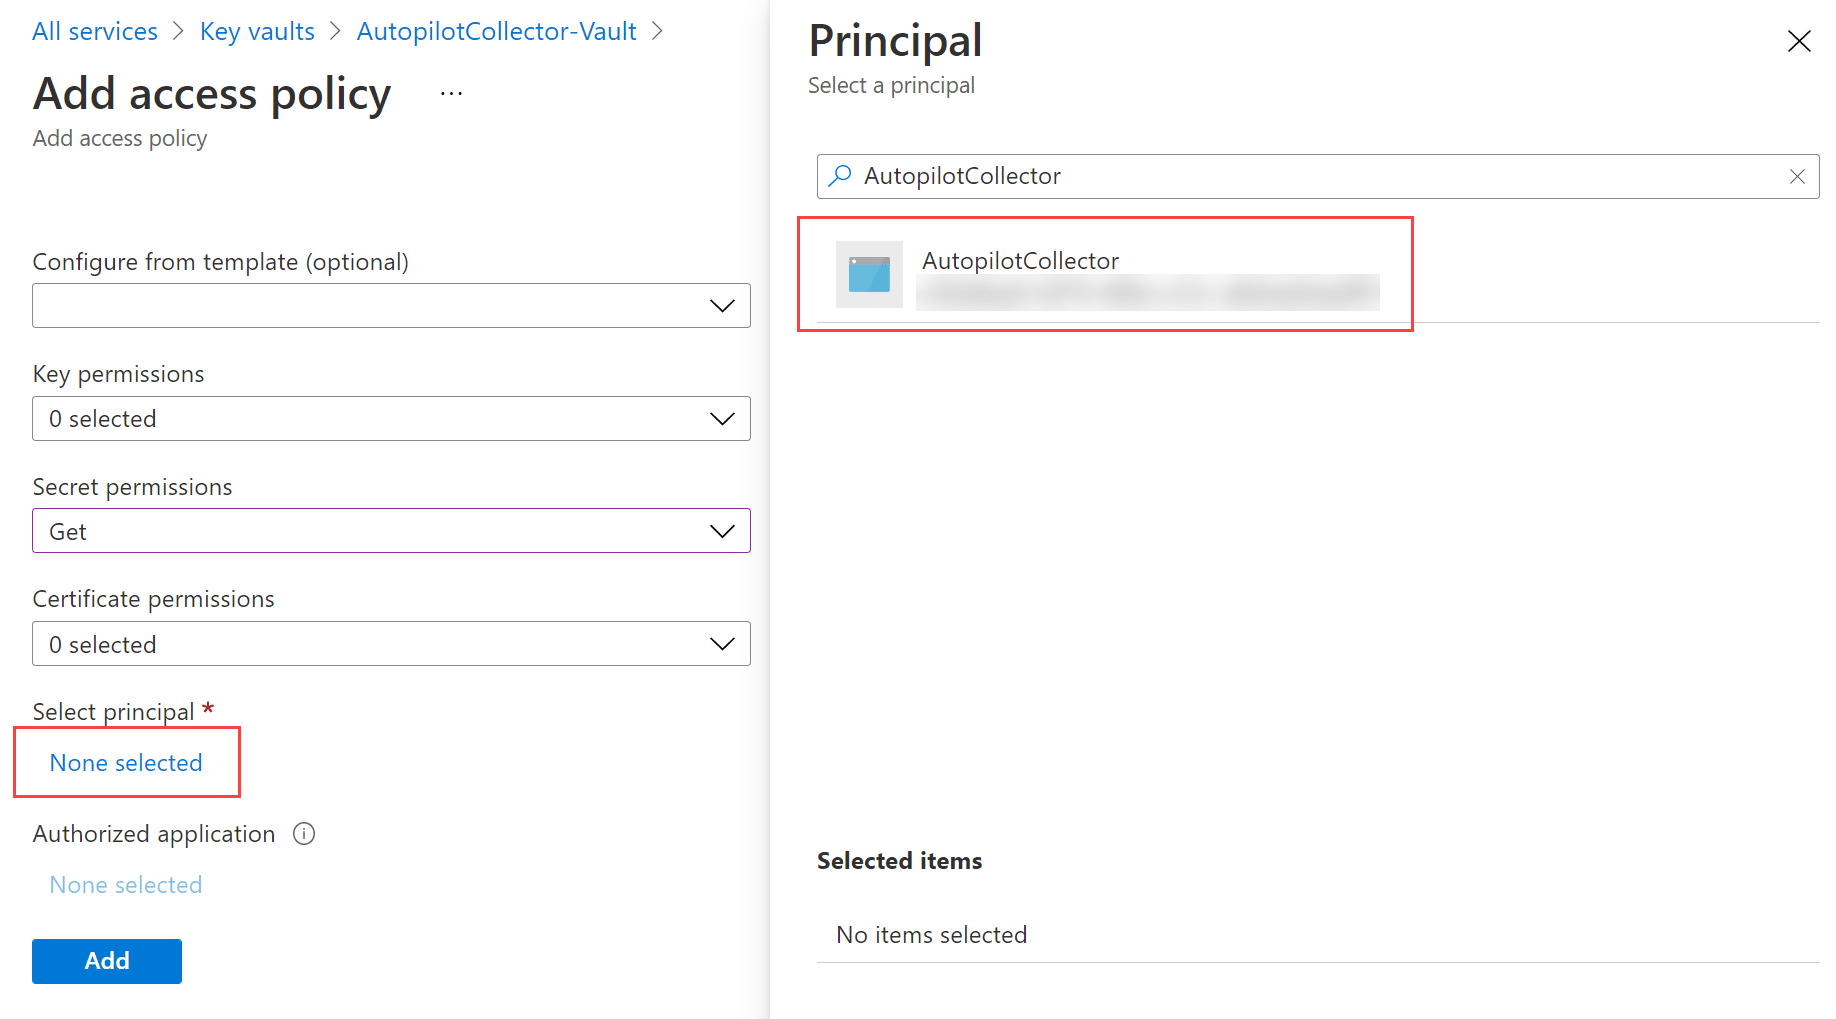
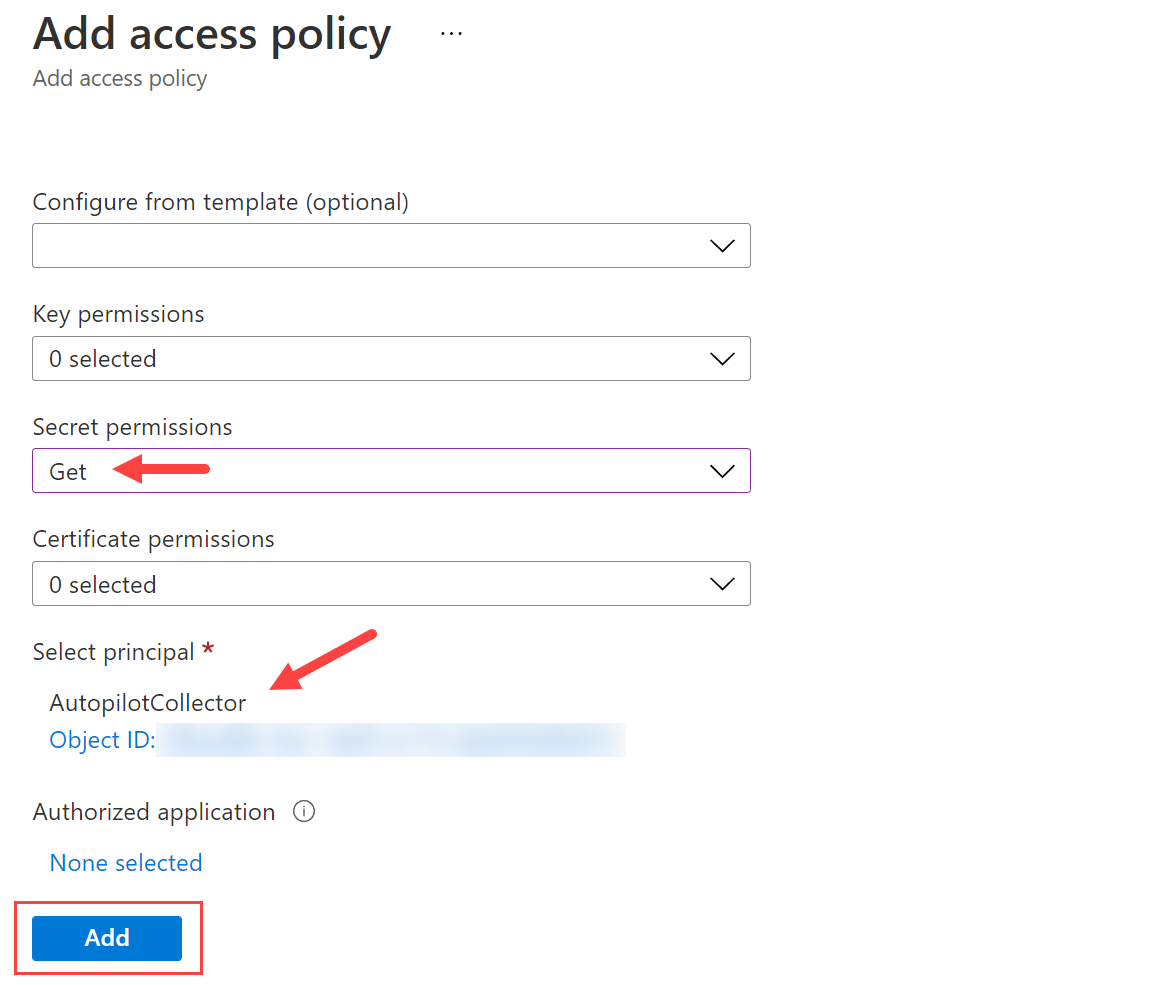
Click on None selected under Select principal and search for the name of the Function App, e.g. AutopilotCollector (or the name you specified for it). Select it when it appears in the list of principals and click Select.
Click Add.
Click Save.

The Managed System Identity service principal have now been given access to retrieve secrets stored in the Key Vault. Currently, there’s no secrets stored in here, but in the next section we’ll add two of them that the Function App will retrieve upon warmup (when it starts).
Add secrets to Key Vault
When we created the app registration in the beginning of this post, the client secret that was shown only once should be kept in a Key Vault to enhance the security aspect of the Function App. You should always treat client secrets with the highest security whenever possible, since whoever gets a hold of the string have the access to the resource configured in the app registration (in this instance, it’s limited to a read operation of Intune service configuration, but the same methodology applies anyway to keep a good security practice).
There’s also another secret that we’re going to be adding to the Key Vault, more specifically the connection string to the Storage Account where the Function App keeps it’s related files. This connection string is already pre-configured in the Function App, as an application setting named AzureWebJobsStorage.
Add Client Secret to Key Vault
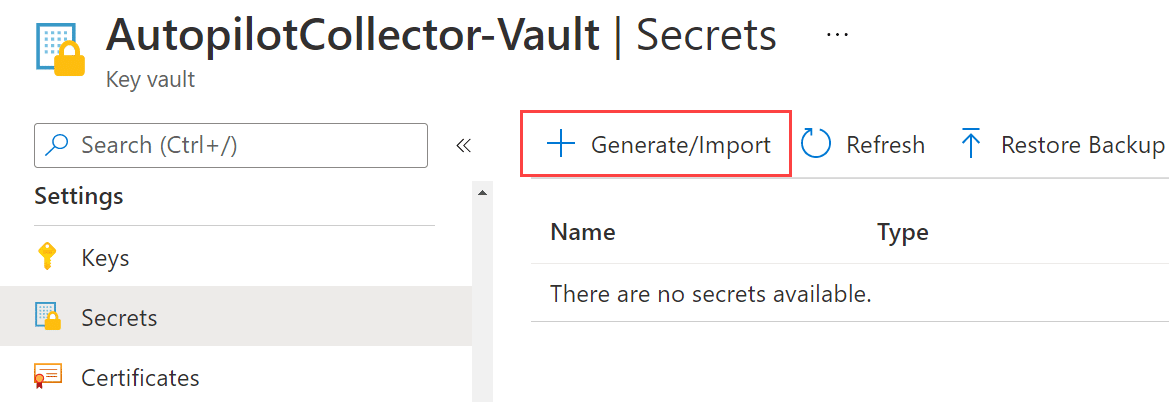
From the Key Vault, click on Secret under Settings.
Click Generate/Import.
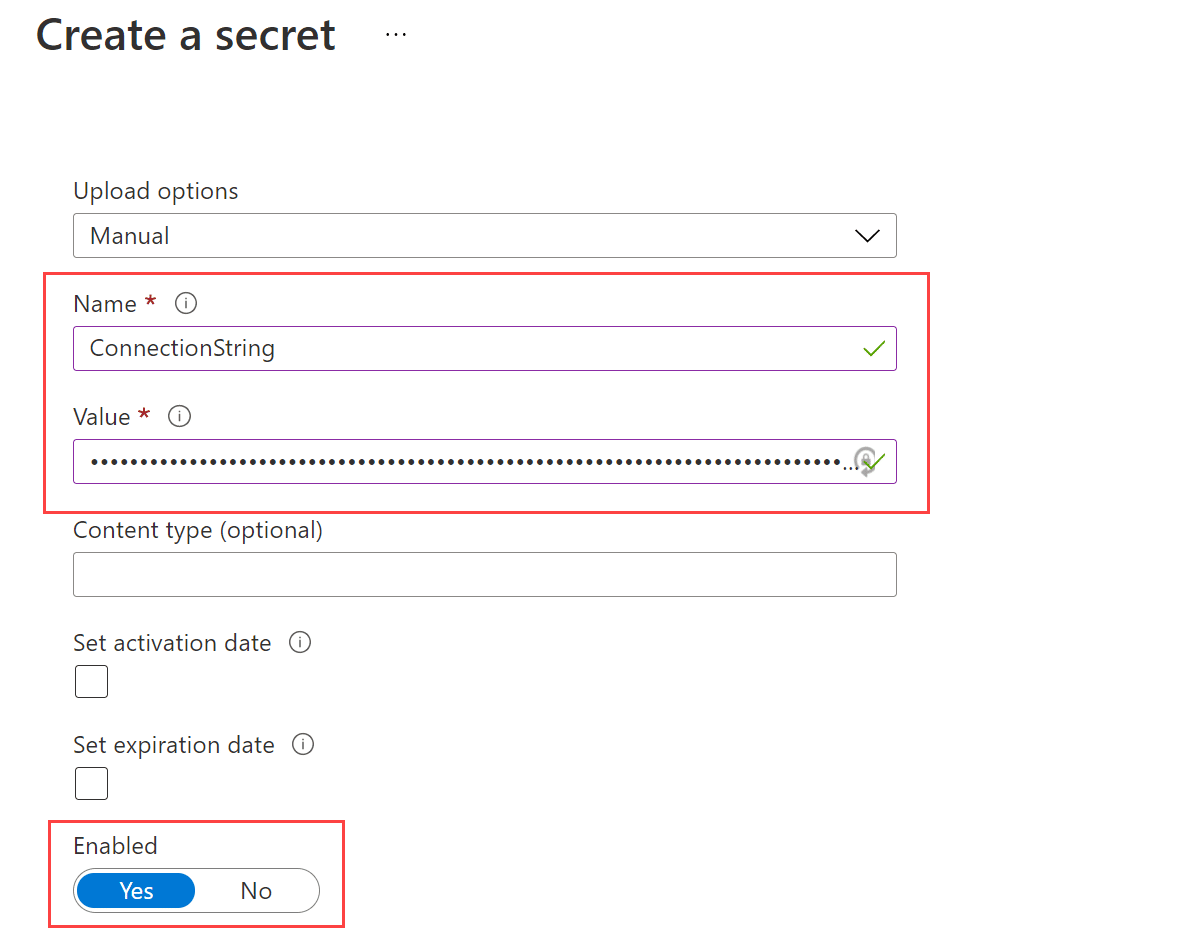
Name the secret e.g. ClientSecret and enter the value from the app registration saved earlier. Ensure that you do not keep a local copy of the client secret somewhere at this point, once it has been added to the Key Vault successfully, it’s safe to remove it from your notepad. Also, ensure that the Enabled option is set to Yes.
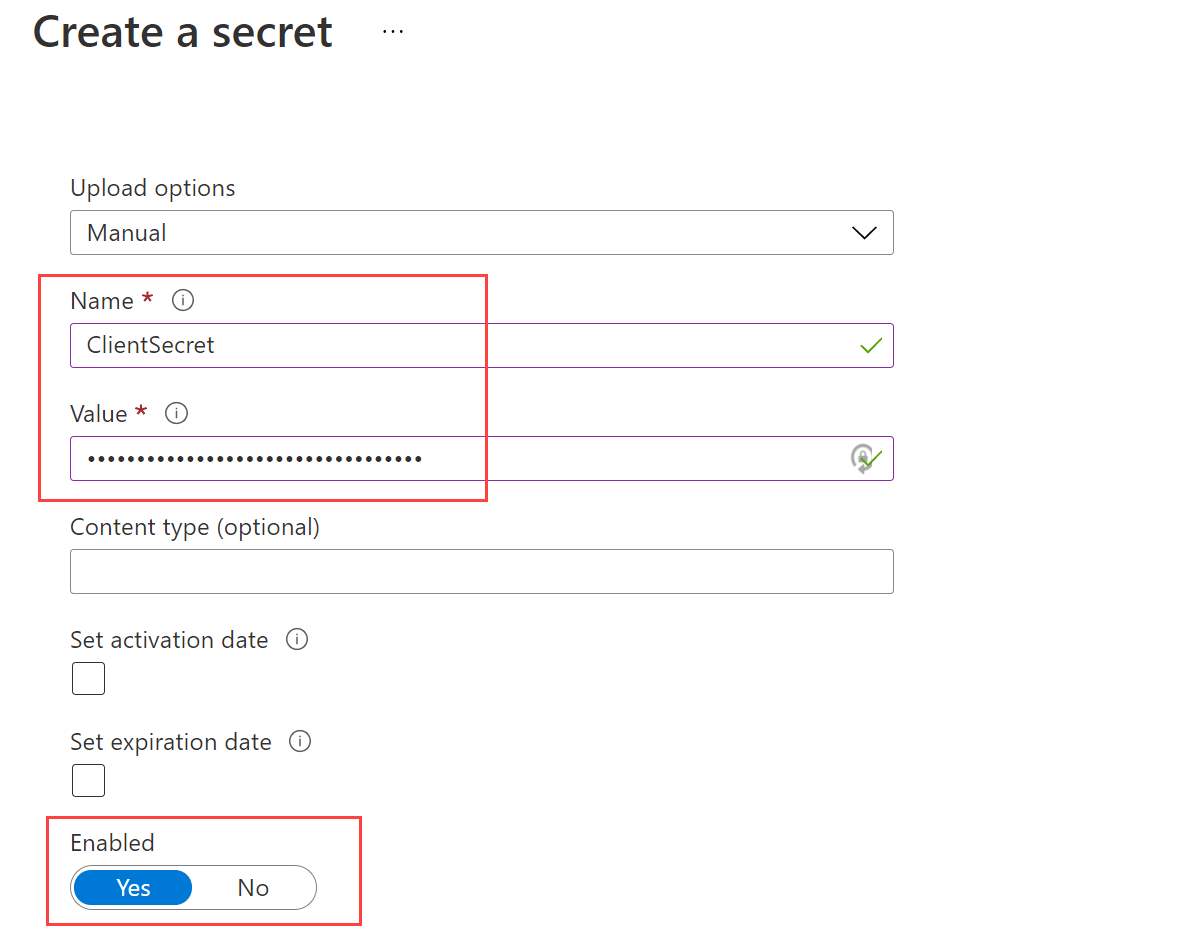
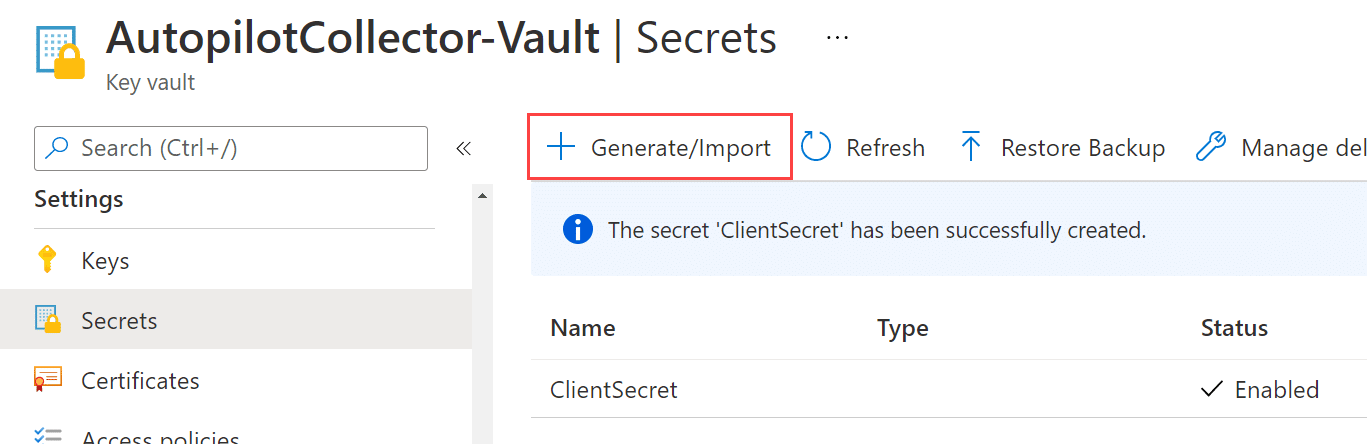
Click Create.
The client secret has now successfully been added to the Key Vault. Next up is the Connection String that should be added as a secret.
Add Connection String to Key Vault
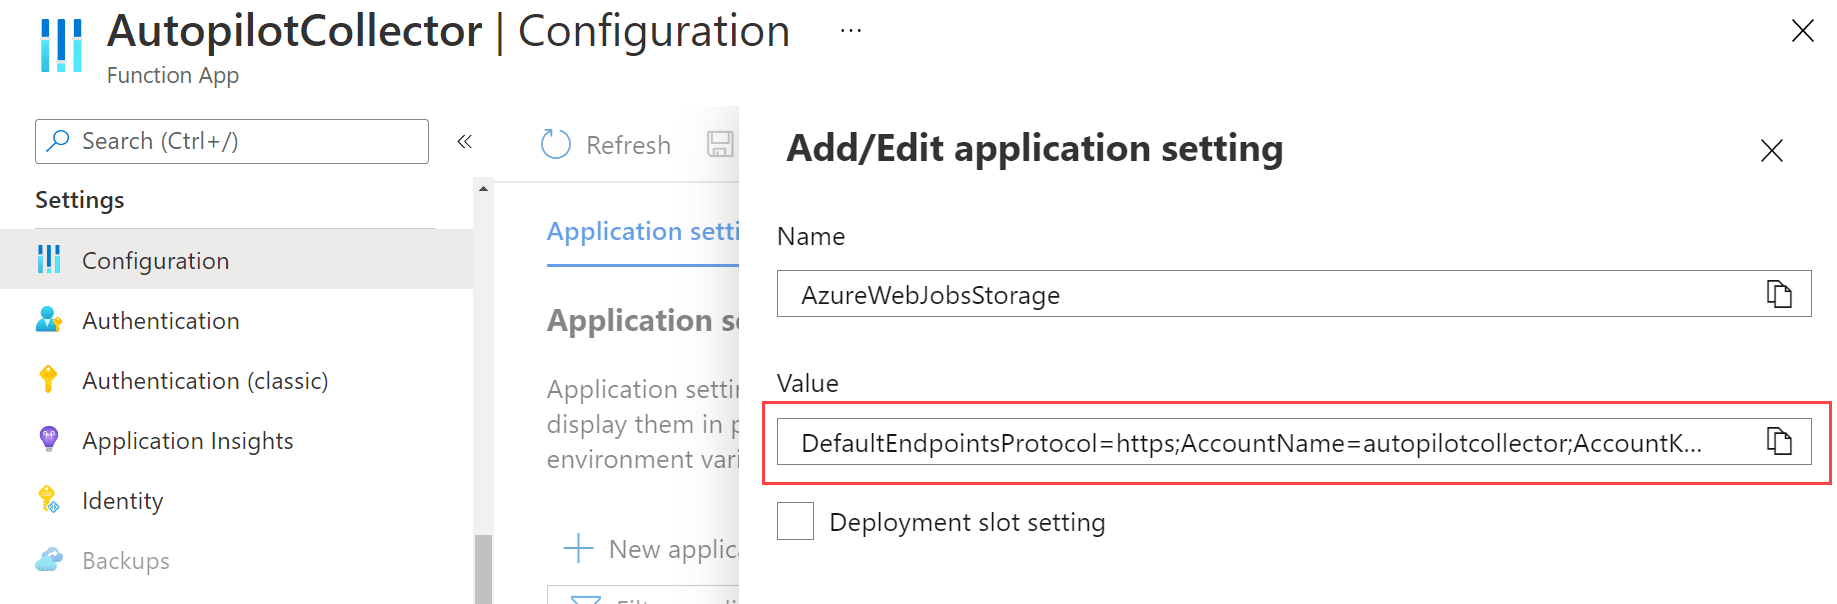
From your Function App, click on Configuration under Settings. In the Application settings tab, scroll down to the AzureWebJobsStorage setting and click on it’s name.

Copy the contents of the Value field and click Cancel.
Go back to the Key Vault again, and click on Generate/Import, under Secrets in the Settings section.
Name the secret e.g. ConnectionString and paste in the value from the AzureWebJobStorage application setting copied earlier. Ensure Enabled is set to Yes.
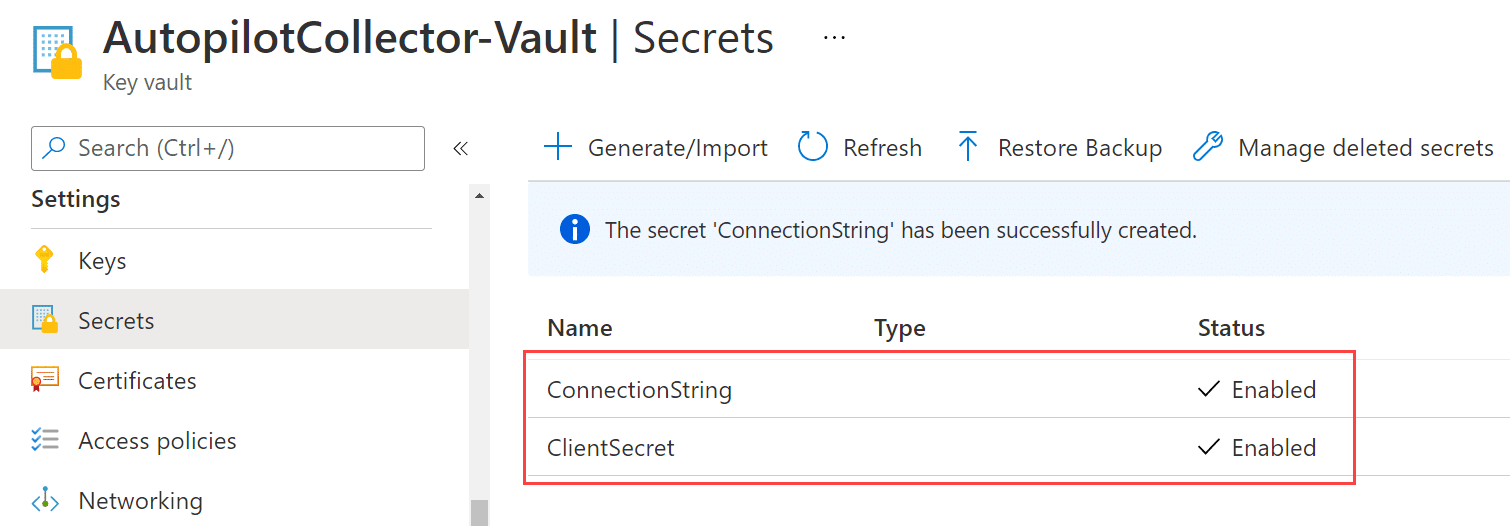
Click Create.
Both of the secrets should now have been created, and the Secret blade of the Key Vault should look similar to this:
Add Function App application settings
Last, but not the least, the application settings of the Function App needs to be configured. We’ve already touched on this topic slightly when we retrieved the connection string for the storage account the Function App keeps its files within. The set of settings below needs to be configured for the logic within the Function App’s QueueTrigger function to interact with the other components we’ve configured up until this point:
- BatchCount
- ClientID
- ClientSecret
- LogType
- SharedKey
- TenantID
- WorkspaceID
All of the application settings above are not present by default, hence we need to add them. Adding a new application setting is very straight forward.
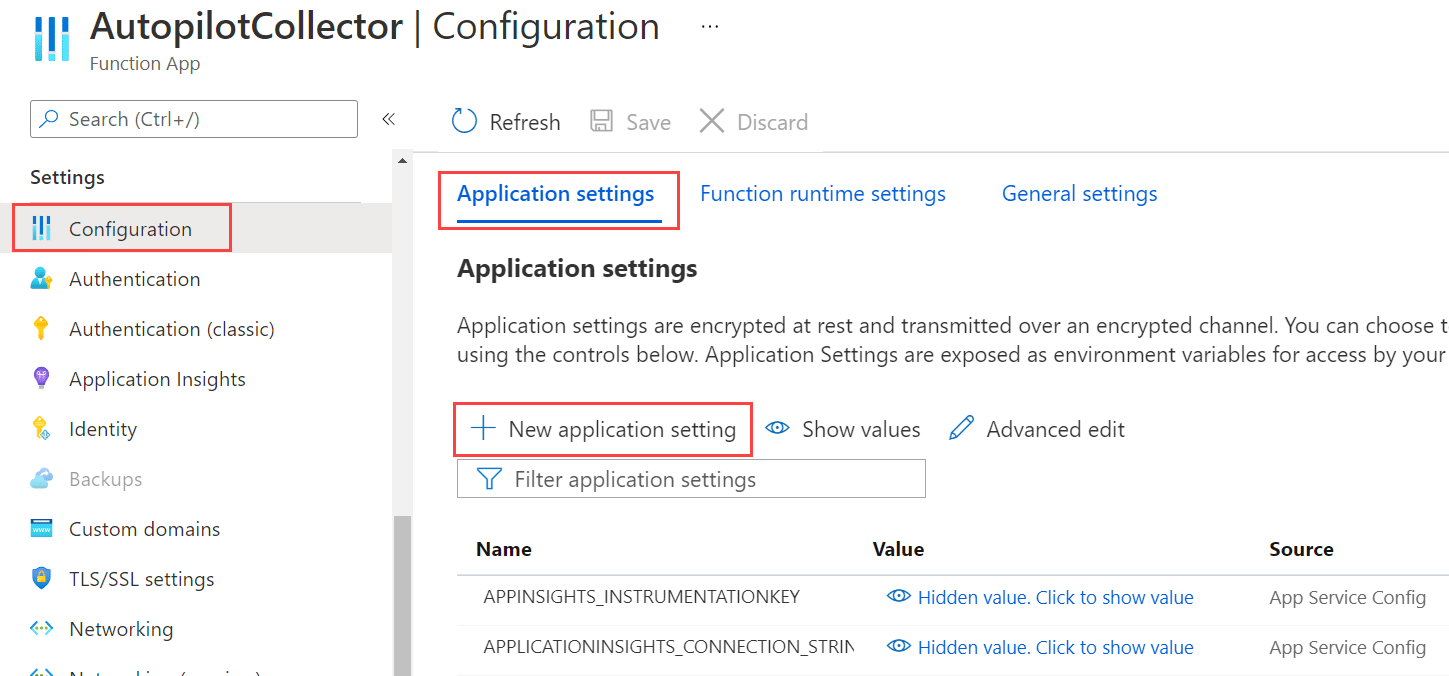
In your Function App, go to Configuration under Settings and click on New application setting, as shown below. Follow these instructions for each of the mentioned application above. Further details on how to configure the application settings more in detail and their respective values are described in the sub-sections that follow.
BatchCount
This application setting controls the amount of Autopilot device identities that will be sent within a single batch to the Log Analytics Collector API when all identities have been retrieved. Depending on your environment and the total amount of Autopilot device identities, it’s hard to recommend a specific value. Although like mentioned earlier, in an environment where I’ve used Autopilot Collector that contains well over 100.000 devices, I’ve used the batch count of 5000 and it has been running steadily since implemented. Give it a value that simply makes sense for your circumstances.
Configure the application setting as shown below:

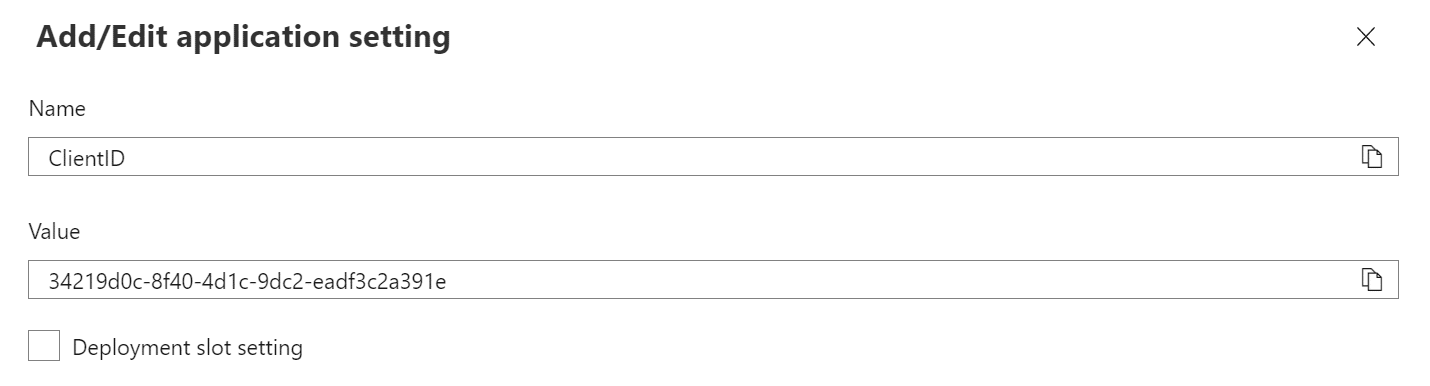
ClientID
This application setting is used by the QueueTrigger function to understand where it should reach out to when it requires to acquire an access token with the audience for Graph API, when the call is made to retrieve all Autopilot device identities. The value of the Application (Client) ID from the App registration (service principal) should be configured here.
Configure the application setting as shown below:
ClientSecret
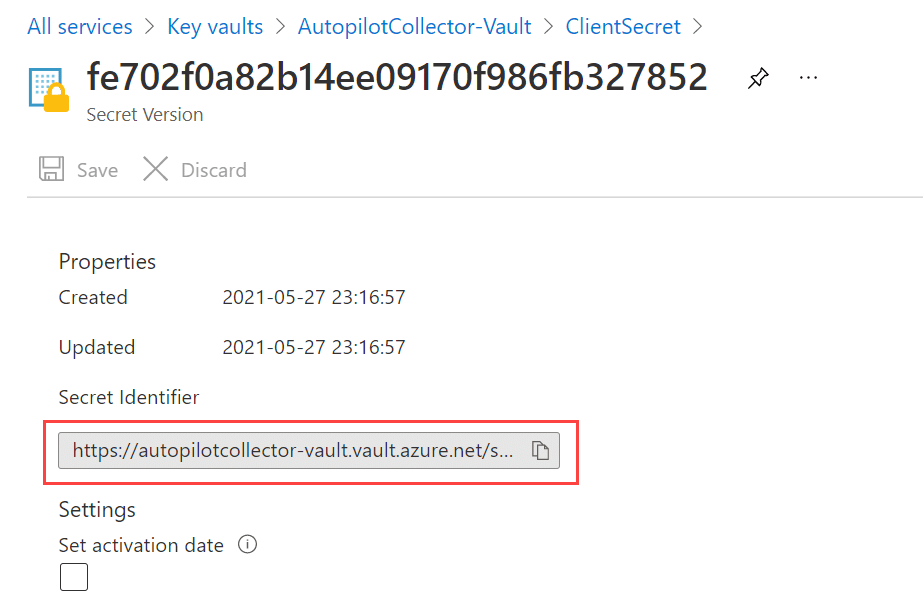
This application setting needs to be configured a bit differently, and utilize a built-in functionality of the Function App, which is to upon warmup (startup) of the Function App, read secrets from an Azure Key Vault. The value of the Client Secret created for the App registration, were previously in this post stored in the Key Vault as a secret with the name of ClientSecret.
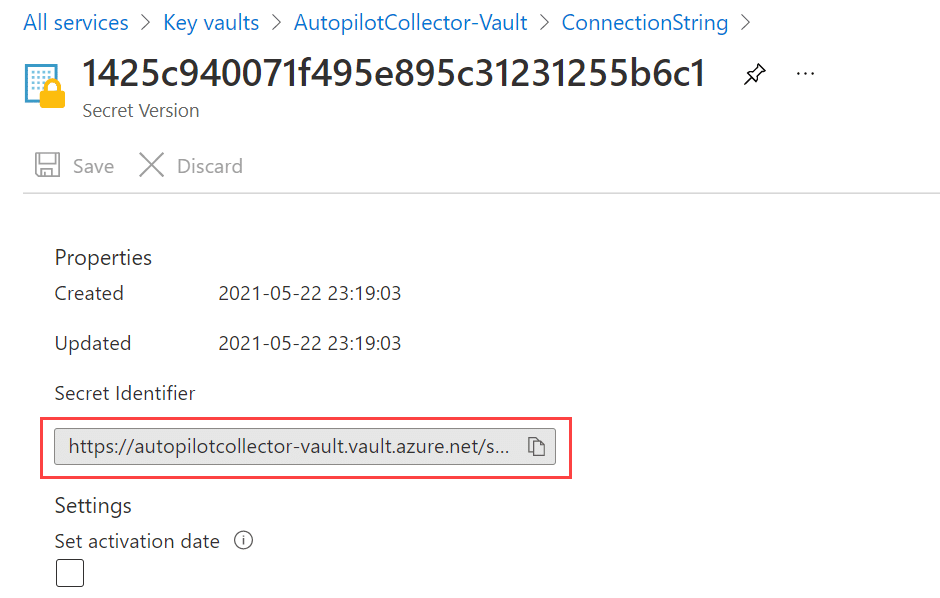
Go to the Key Vault and browse to the ClientSecret secret item. Copy the Secret Identifier value as shown below:
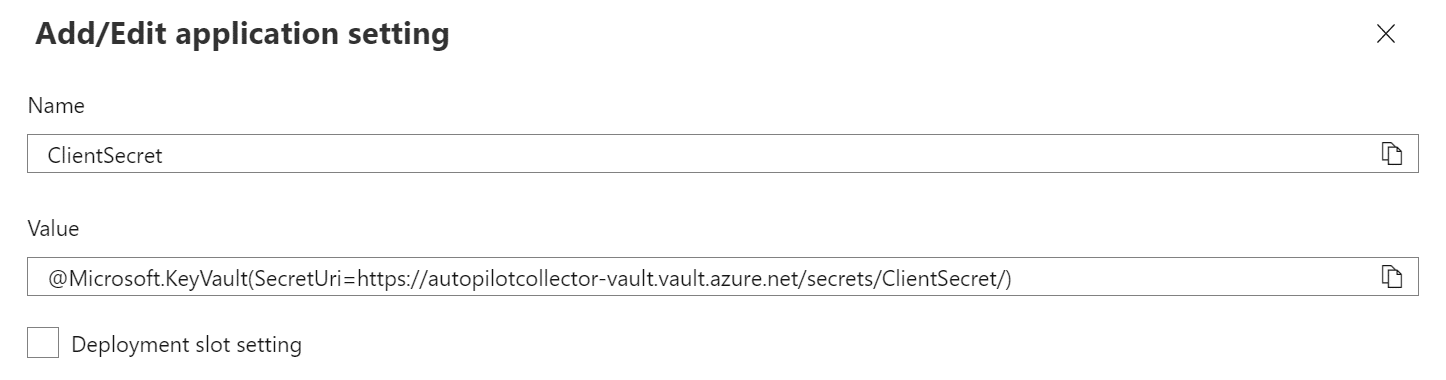
Replace the tag below with the copied value from above. The sort of GUID look a like at the end of the URL from above should be left out, it’s not necessary but that will ensure that the most current value of the secret from the Key Vault is always read, instead of a specific version.
@Microsoft.KeyVault(SecretUri=<TAG_REPLACE_ME>/)
After you’ve replaced the tag, an example of the value for the ClientSecret application setting could look similar to the following (the trailing backslash should be kept):
@Microsoft.KeyVault(SecretUri=https://<name_of_your_vault>.vault.azure.net/secrets/ClientSecret/)
Configure the application setting as shown below:
LogType
This application setting’s value should contain the name of the custom log that will be created in the Log Analytics workspace. In order to use the embedded workbook example for this solution, it’s recommended that you specify the solution default value.
Configure the application setting as shown below:

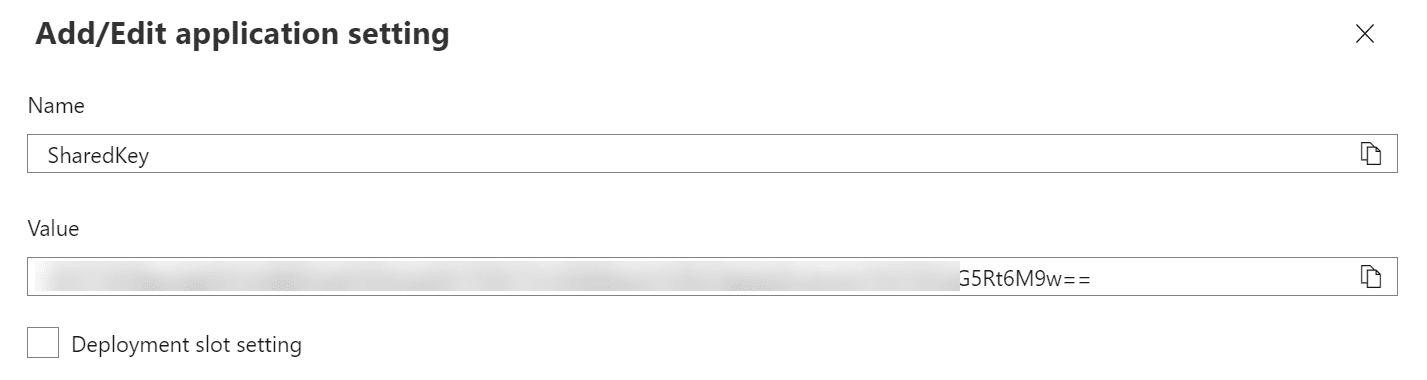
SharedKey
This application setting needs to contain the value of the Primary Key from the Log Analytics workspace that was saved away earlier in this blog post. One could also argue that this value should be kept in the Key Vault, which is true. If that’s desired, the post already contains the necessary steps and details for you to go back and look at how e.g. the ClientSecret secret was added and how the value in the application setting should be constructed in order to be automatically be retrieved from the Key Vault upon warmup. But in this example, I’ll just go with copying in the primary key directly.
Configure the application setting as shown below:
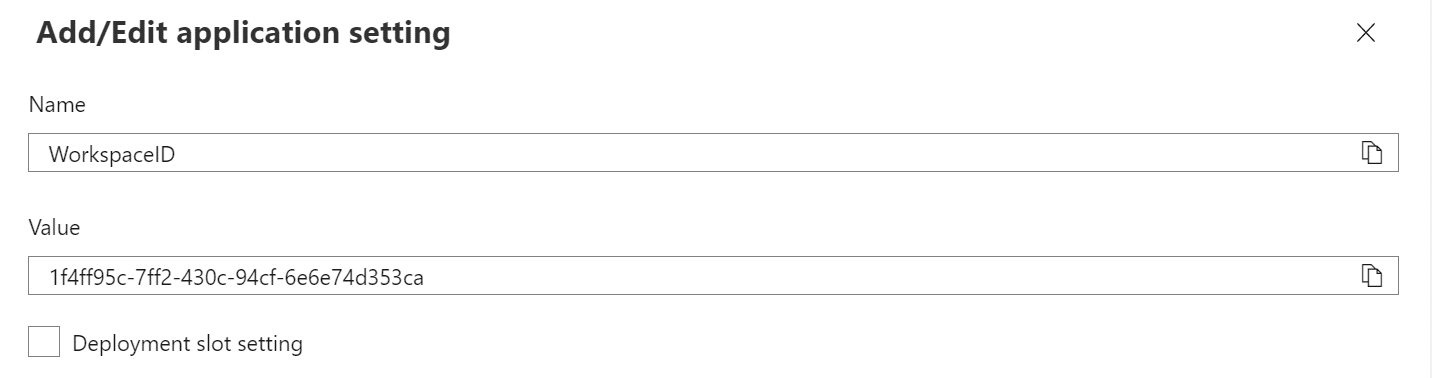
WorkspaceID
This application setting needs to contain the Workspace ID from the Log Analytics workspace.
Configure the application setting as shown below:
TenantID
This application settings needs to contain the tenant identifier, e.g. the tenant.onmicrosoft.com name or the GUID representation.
Configure the application setting as shown below:

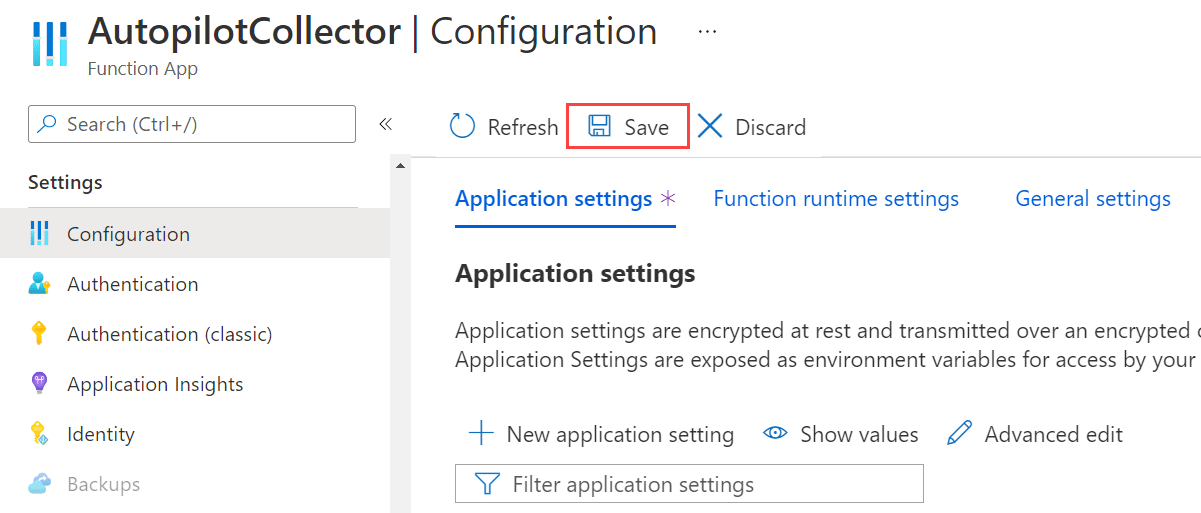
Save application settings configuration
When all the new application settings have been added successfully, make sure that you click the Save button.
Amend default Function App application settings
Now that we’ve added a set of new application settings to the Function App, there’s however two application settings that gets added by default when it’s created, that we need to amend. Recall the connection string from the AzureWebJobsStorage application setting that was added to the Key Vault. There’s another application setting with the same value. The following application settings needs to be amended:
- AzureWebJobsStorage
- WEBSITE_CONTENTAZUREFILECONNECTIONSTRING
Perform the steps outlined below for each of the mentioned application settings above.
From the Key Vault, browse to the ConnectionString secret and copy the Secret Identifier value.
Replace the tag below with the copied value from above. The sort of GUID look a like at the end of the URL from above should be left out, it’s not necessary but that will ensure that the most current value of the secret from the Key Vault is always read, instead of a specific version.
@Microsoft.KeyVault(SecretUri=<TAG_REPLACE_ME>/)
After you’ve replaced the tag, an example of the value for the ClientSecret application setting could look similar to the following (the trailing backslash should be kept):
@Microsoft.KeyVault(SecretUri=https://<name_of_your_vault>.vault.azure.net/secrets/ConnectionString/)
From the Function App under Configuration, click the Edit button next to the application setting name.
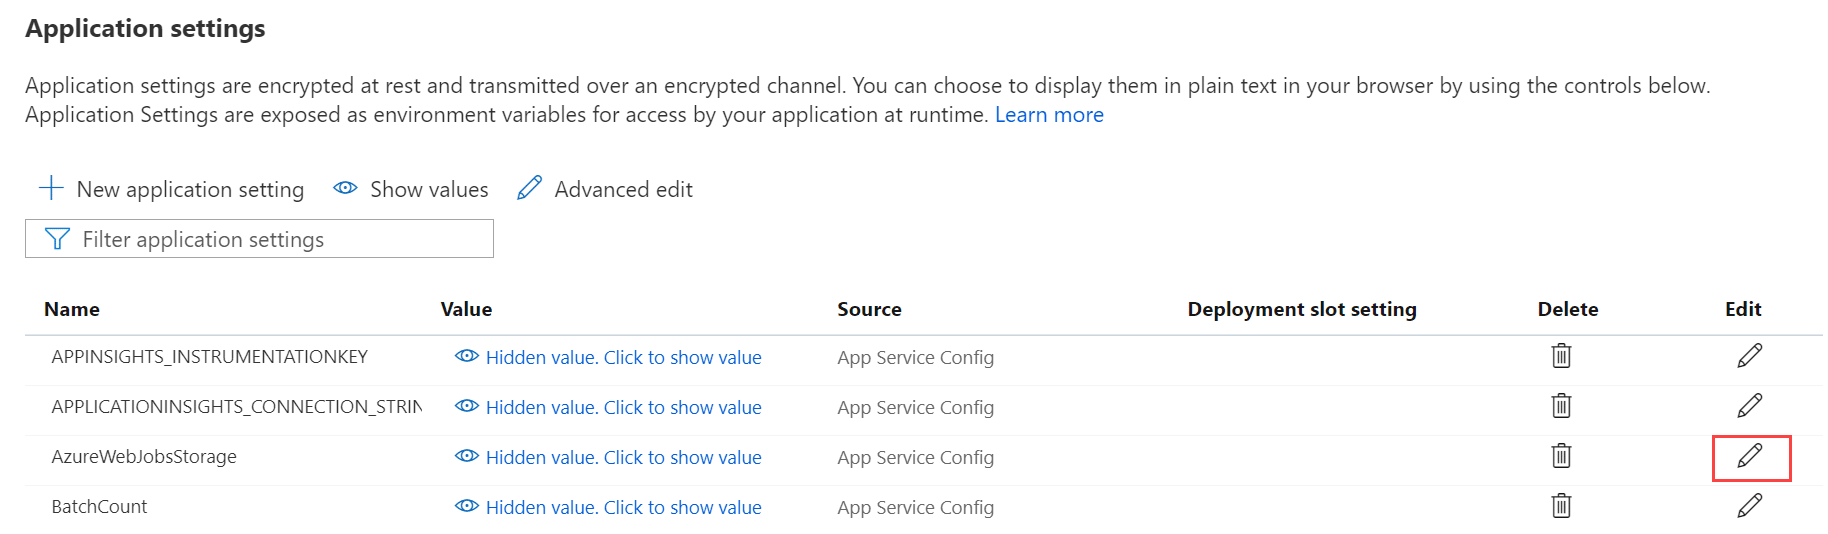
Configure the application setting as shown below:

Finally, save the application settings configuration again.

Configure Function App app files
Since none of the function of the Function App have been executed yet, you’d think that it’s all good to go at this point. However, there’s one key aspect of the Function App left to configure, the app files.
Configure profile.ps1
Within the Function App, under Functions click on App files, and then change to profile.ps1 in the drop down.

Copy the content from the following file on GitHub:
AutopilotCollector/profile.ps1 at main · MSEndpointMgr/AutopilotCollector (github.com)
Paste the content into the profile.ps1 app file and click Save.

Configure requirements.psd1
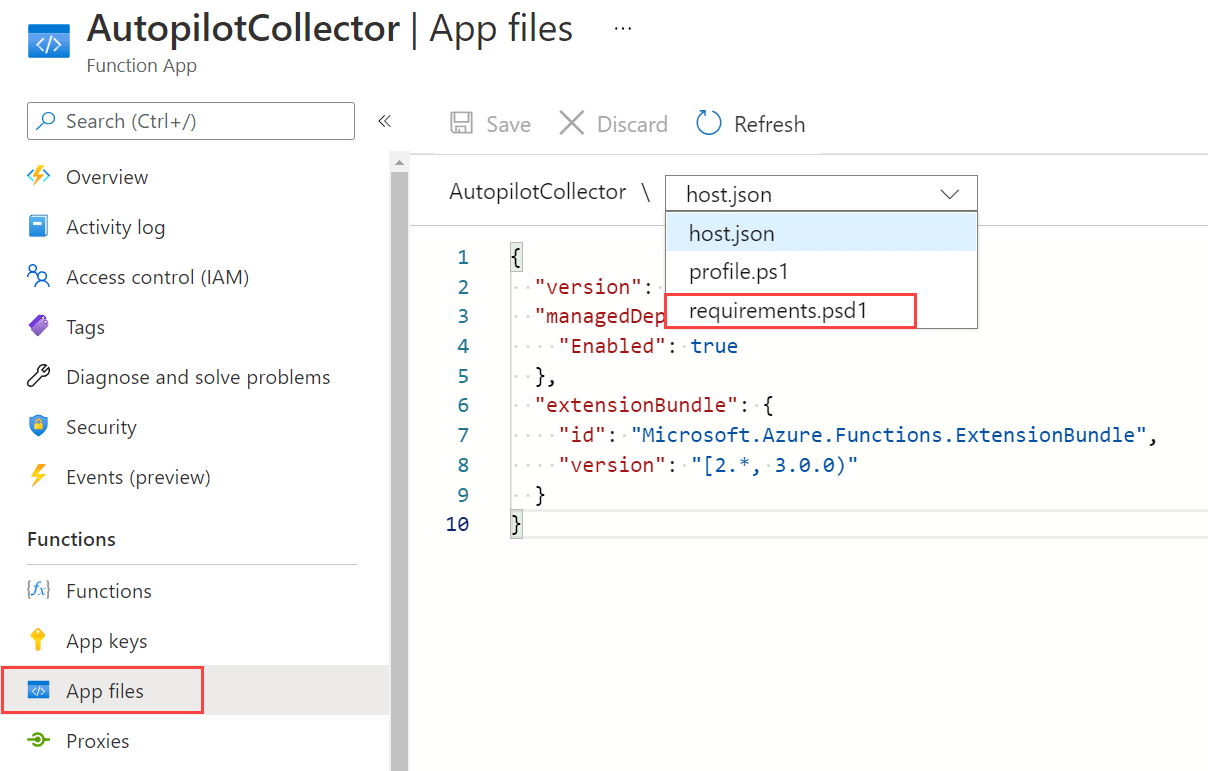
Within the Function App, under Functions click on App files, and then change to requirements.psd1 in the drop down.
Copy the content from the following file on GitHub:
AutopilotCollector/requirements.psd1 at main · MSEndpointMgr/AutopilotCollector (github.com)
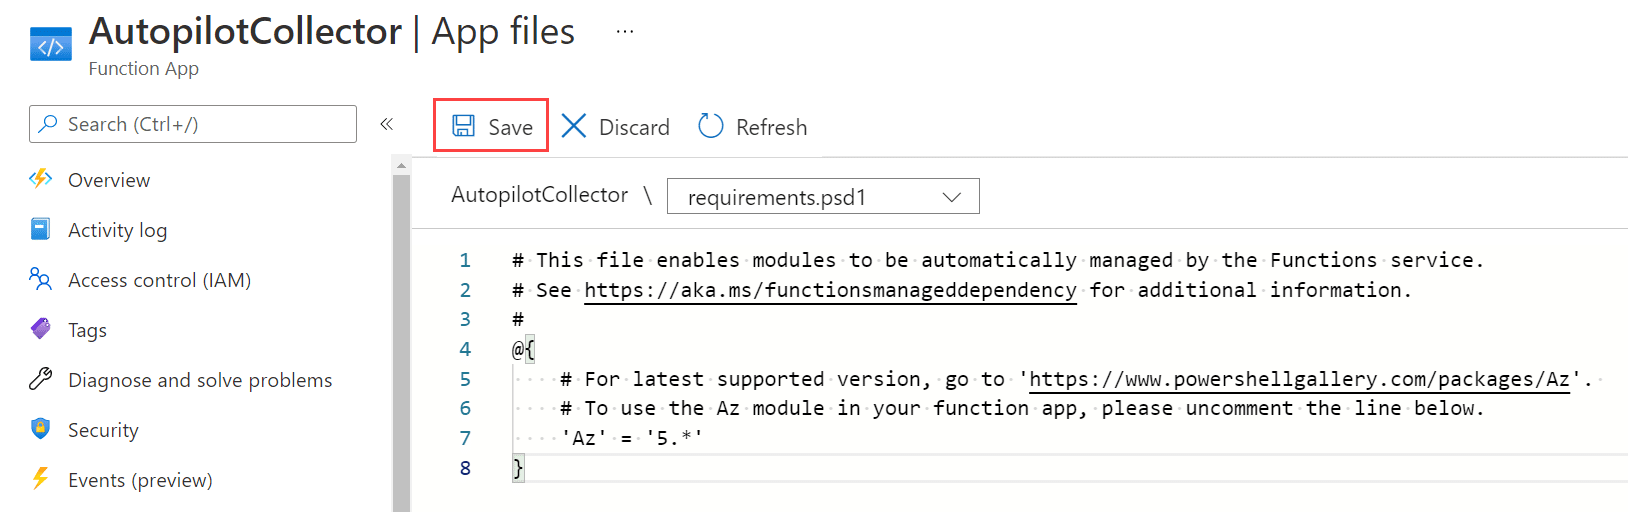
Paste the content into the requirements.psd1 app file and click Save.
Trigger Autopilot Collector for the first time
At this point, all the components have been created and also configured. It’s now time to trigger the Autopilot Collector solution for the first time to see if it works, and if we get any data in the Log Analytics workspace.
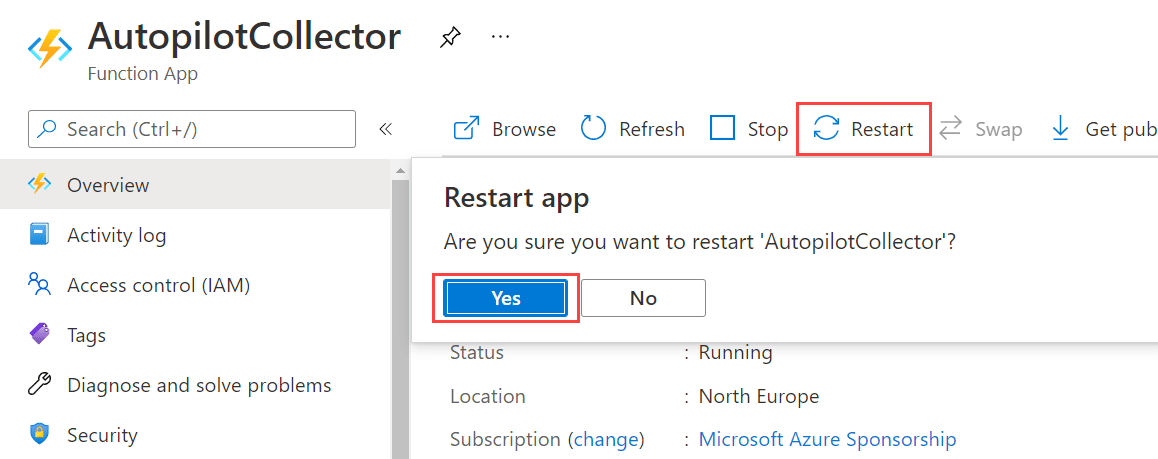
But, we need first need to restart the Function App to make sure that the changes to the profile.ps1 and requirements.psd1 app files are picked up.
From the Function App overview blade, click Restart and then Yes. It only takes a couple of seconds for the Function App to restart.
Within the Function App, go to the QueueTrigger function, click on Test/Run and click Run.

Click on the Maximize button at the bottom to bring up the log stream. Below is an example output from my lab environment where I’ve just executed the Autopilot Collector solution for the first time:

As you can probably notice, the BatchCount was set to 1000 earlier and it’s also showing in the log stream. However my environment doesn’t contain more than 10 Autopilot device identities, hence the execution of the function is extremely quick and the batch capabilities is not really visualized.
Autopilot Collector has now successfully executed and the device identities have been sent to the Log Analytics workspace.
NOTE: Initially, it could take up to about 10 minutes before the data is visible within the Log Analytics workspace, so be patient.
If we jump over to the Log Analytics workspace and go to Logs, we can see that the data is available in a custom log, with a similar name to what we provided as value for the LogType application setting (with _CL added to the end).

What’s next, what can now be done with this data except for querying for it directly as shown above? We can create visual workbooks and present the data more appealing.
Use a workbook in Log Analytics to visualize the data
With the Autopilot device identity data now in Log Analytics, designing a workbook could be the next step at making more sense out of it all. For this solution, I’ve pre-created a simple workbook with a few examples of how you could visualize the data.
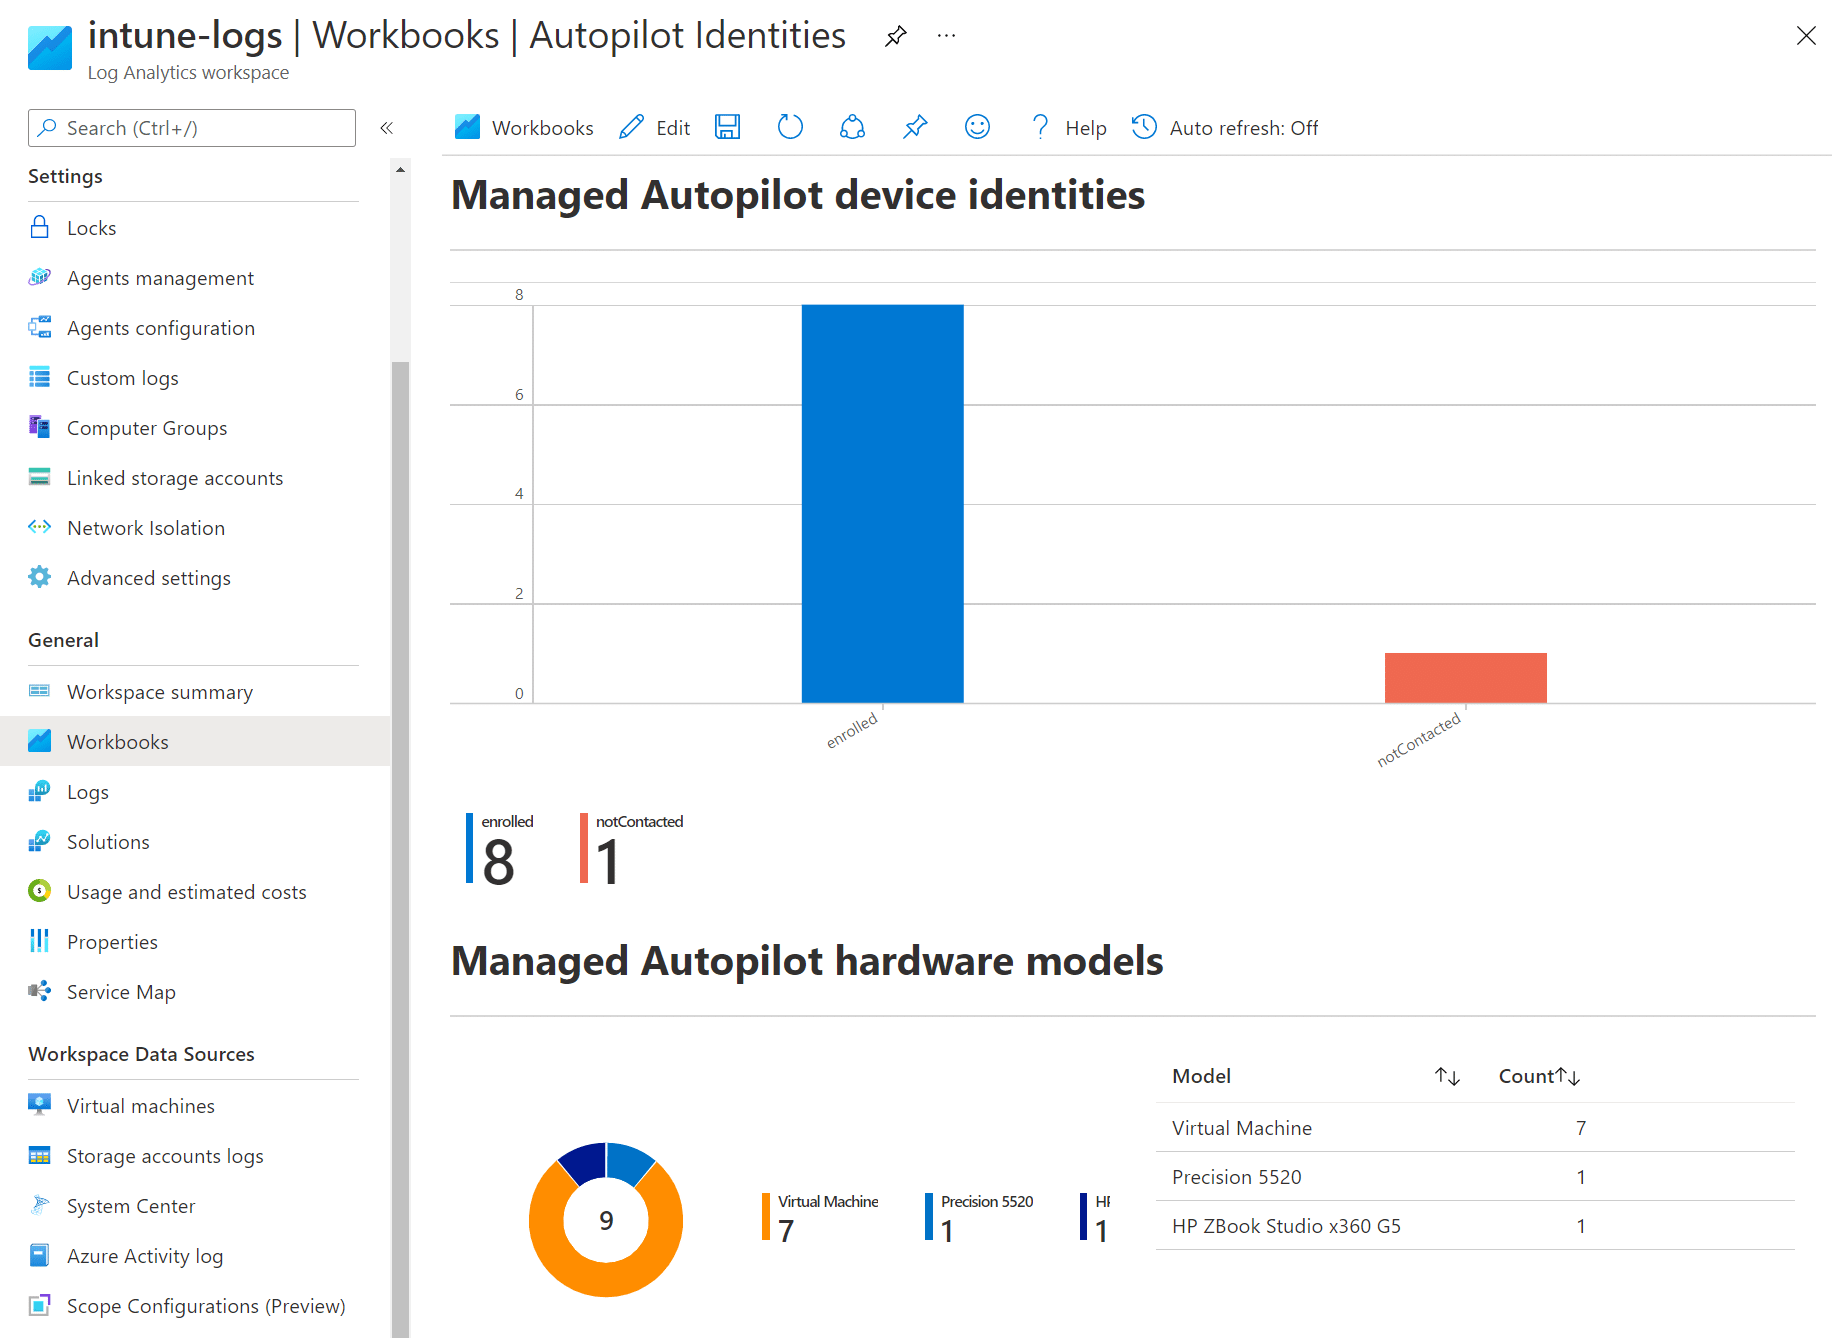
You can get this example workbook from our GitHub repository and customize it any way you see fit to suite your organization’s needs.
Before you use the above example workbook, you need to make a few changes to the last pieces of it that references the subscription ID, the resource group and the workspace name that should be used.
NOTE: Log Analytics is most of the time really clever, and it may succeed in replacing the below mentioned tags in your environment automatically, without any changes to the sample workbook. However, since the tags are environment specific, I’ve omitted the values from my lab environment in the sample on GitHub.
See the highlighted tags below:

As an example, it could look similar to this:

Go back to this section and update the JSON data if the below instructions fail to render any data.
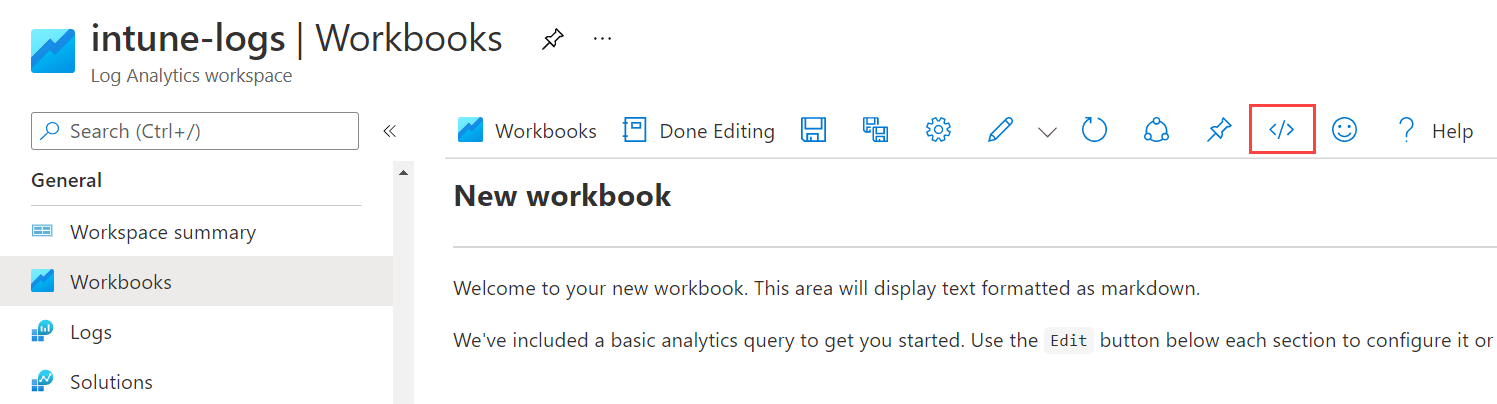
From within the Log Analytics workspace, click on Workbooks under General and click New.

Click on the code-snippet sign.
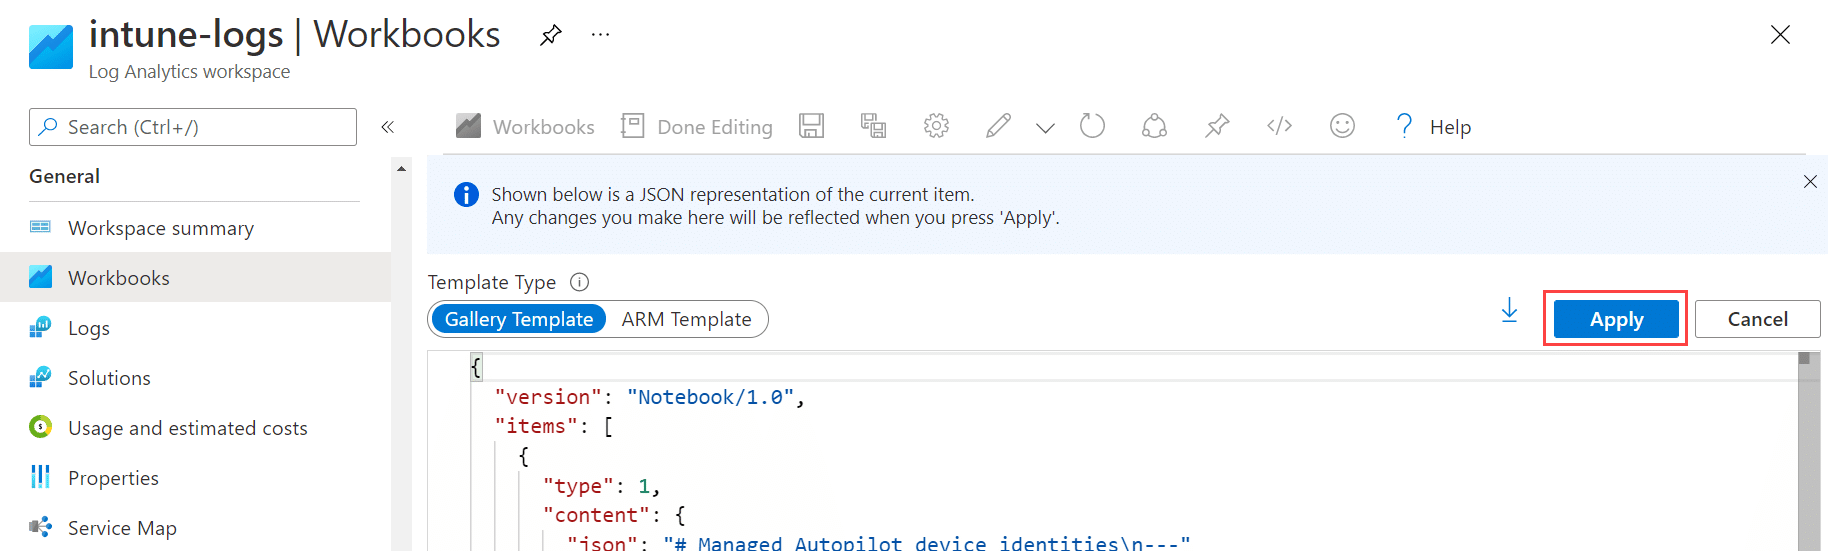
Copy in the JSON data from the workbook sample and click Apply.
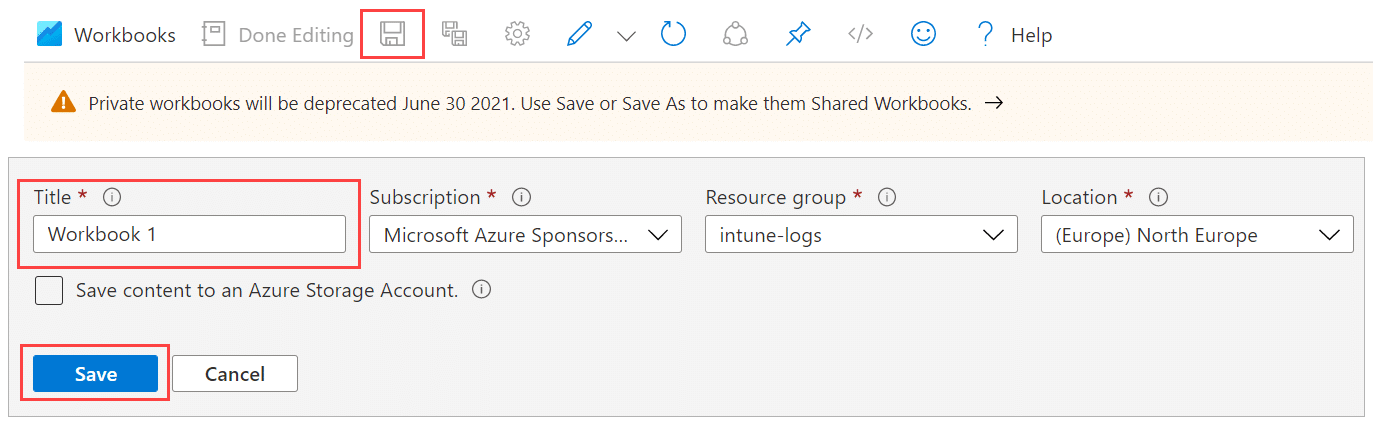
Click Save, provide a name for the workbook and click Save again.
There you have it, Autopilot Collector in action. Enjoy all the new data available!


Add comment