

I haven’t been shy about blogging about the Microsoft Graph SDK recently. If you’ve ever used the SDK, you’ve probably taken for granted how it magically handles authentication for you. Modules like MSAL.PS (deprecated now cry) and its successor Microsoft.Graph.Authentication are like a good cheese – they just work, and get better with age and refinement.
I have always been fascinated by token issuance and renewal and just took it for granted. The authentication modules just abstracted that complexity away from me. This is actually a good thing! Do I have enough skill and discipline to handle tokens safely? Maybe not…so that spawned this journey.
In this deep dive, we’ll build an OAuth authentication flow from scratch in PowerShell. We’ll see exactly what happens during the authentication flow, understand the security challenges, and learn why certain protective measures like PKCE are crucial. By the end, hopefully I’ll have helped you understand both how to implement your own OAuth solution and why actually bother….the SDK might still be your best choice for your automation projects.
Setting Up Your Application
Before we dive into code, let’s understand what we need and why. To authenticate to Microsoft services, you’ll need to register an application in Entra ID.
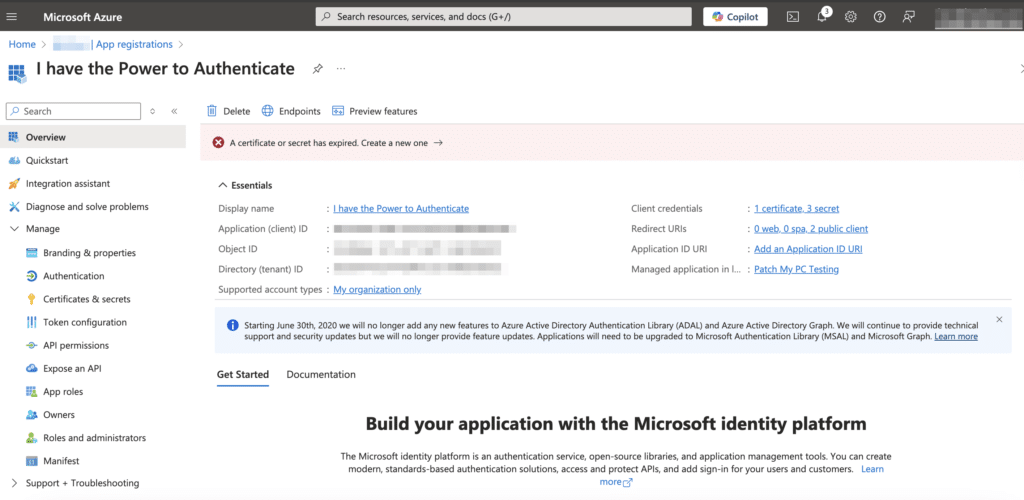
In Microsoft Entra ID, an app registration is necessary when you want an application to authenticate and interact with Microsoft services such as Microsoft Graph.
What Does an App Registration Provide?
One thing I always used to ask myself is “Why?” Why do I need an app registration? Can I not just authenticate to the thing in the cloud without the added overhead of creating one?
A logical follow on question, before we answer the previous one, is can I just use the existing enterprise applications for Graph Explorer and the Microsoft Graph SDK? They work just fine right?
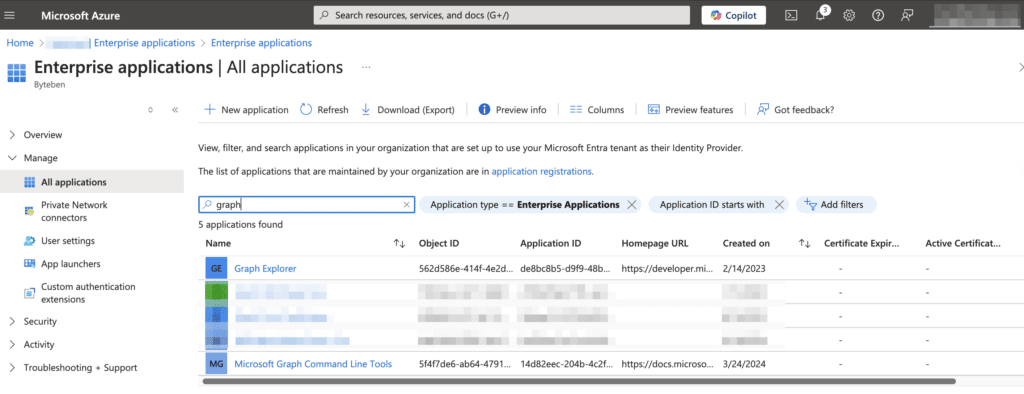
If you didn’t already know, when you sign into Graph Explorer, it authenticates using an enterprise app managed by Microsoft called Graph Explorer. Similarly, when using the Microsoft Graph SDK, authentication is handled through another Microsoft-managed enterprise application, called Microsoft Graph Command Line Tools, ensuring an out-of-the-box seamless experience without requiring manual app registration.
When designing your own authentication flows, it is best to create your own app registration in Entra ID. This gives you, as the application owner, full control over things like optional claims, API permissions, stricter control with conditional access policies and ensures that the client app can only perform actions within the scope of your project’s needs. By managing your own app, you define exactly what your application can and cannot do.
Authentication Flows – Application vs Delegated
In my previous blog https://msendpointmgr.com/2025/01/12/deep-diving-microsoft-graph-sdk-authentication-methods/ we covered some of this in detail.
Basically, in the delegated flow, the client application acts on behalf of the signed-in user, meaning the level of access to your application (or the Microsoft Graph) is determined by the combination of the permissions granted to the user and the permissions defined by the scopes you request during authentication. This means that even if you request broad scopes, such as User.Read.All, you are still limited by what the user’s role and permissions in Entra ID allow. In other words, the client app (app registration) can only perform actions that the signed-in user is authorized to do.
In the application flow, the client app authenticates as itself rather than impersonating a user. This means the app’s access to your application (or the Microsoft Graph) is controlled entirely by the application permissions assigned to it in Entra ID and not influenced by a user’s role or permissions. In this flow, the app does not request specific granular scopes like in the delegated flow. Instead, it uses a default scope that tells Microsoft Graph to apply the app’s pre-assigned permissions.
Can you spot which API permissions have been granted for the application and which have been delegated to the application by the user?
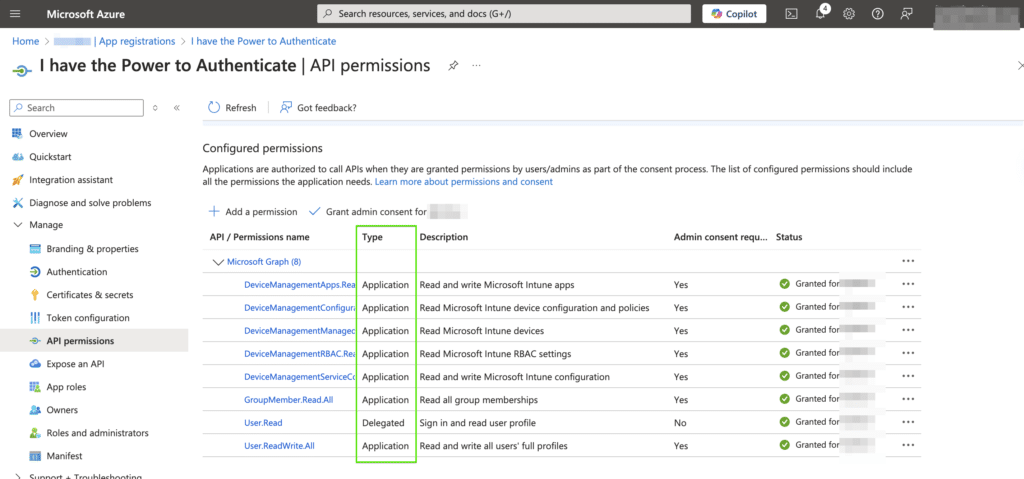
For the code examples in this blog, we’ll be mostly using a delegated authentication flow, meaning the client application (app registration) will perform actions on behalf of an authenticated user. The user must sign in, and the app will only be able to access resources within the permissions granted to that user.
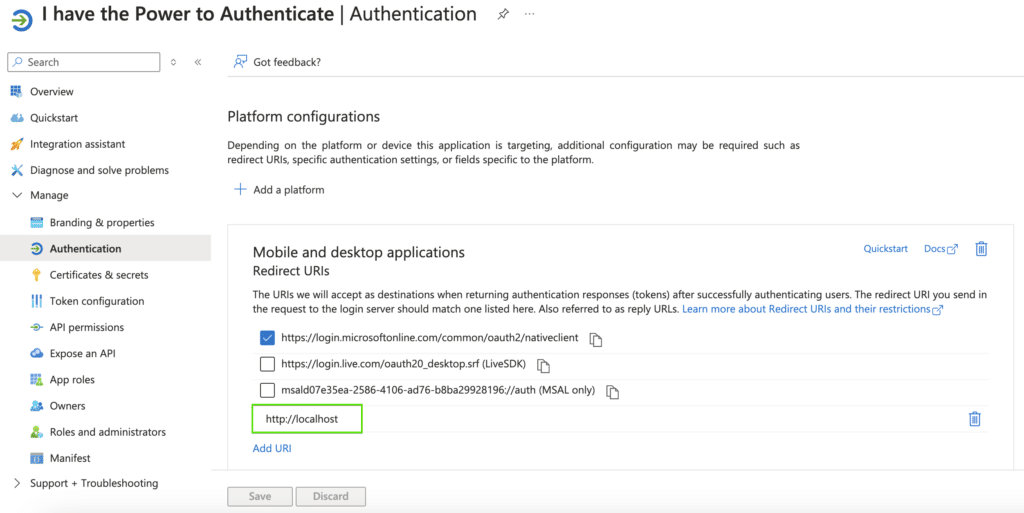
Setting Up Your Redirect URI
When you register your application in Entra ID, you’ll notice some redirect URIs are pre-configured. However, for both our custom PowerShell script and if you’re using the Microsoft Graph SDK, you’ll need to add your own localhost redirect URI.
The Redirect URI is super important. An authorization code, a temporary credential issued by the authorization server after a user/principal successfully authenticates, is sent to the redirect URI, acting as a one-time token that your application can exchange for an access token. An authorization code is short-lived (10 minutes) and single-use only, with specific security restrictions, like the code can only be redeemed by the same application (client ID) that requested it.
Adding Your Redirect URI
- Go to Azure Portal > Entra ID > App Registrations
- Select your application
- Under ‘Authentication’, scroll to ‘Platform configurations’
- Choose ‘Add a platform’ if you haven’t already
- Select ‘Mobile and desktop applications’
- Add ‘http://localhost‘ in the suggested redirect URIs
HTTP Listeners
For our custom PowerShell implementation, this localhost URI is crucial because our script creates a temporary web server (HTTP Listener) to receive the authorization code. Similarly, the Microsoft Graph SDK also uses localhost for its authentication flow and listens on localhost for a response.
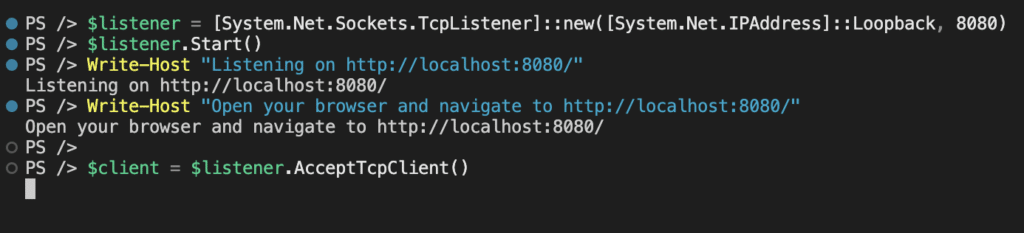
We could create a simple http listener on a specific port like this:-
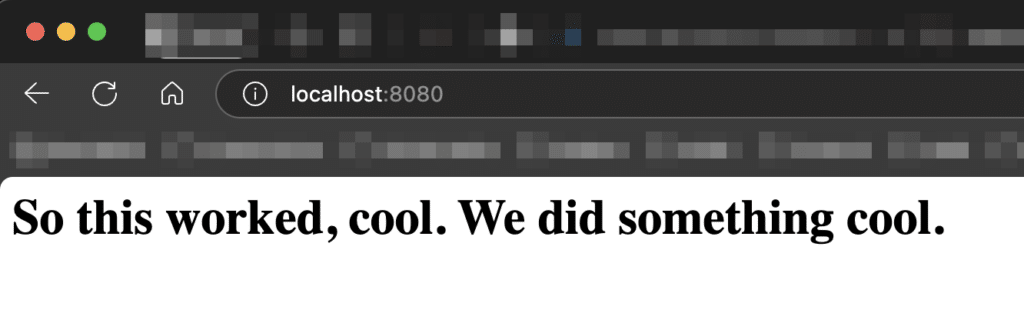
$listener = [System.Net.Sockets.TcpListener]::new([System.Net.IPAddress]::Loopback, 8080)
$listener.Start()
Write-Host "Listening on http://localhost:8080/"
Write-Host "Open your browser and navigate to http://localhost:8080/"

$client = $listener.AcceptTcpClient()
Write-Host "Connection received!"

# Send a simple HTTP response
$html = @"
HTTP/1.1 200 OK
Content-Type: text/html
Content-Length: 100

<html><body><h1>So this worked, cool. We did something cool.</h1></body></html>
"@

$stream = $client.GetStream()
$buffer = [System.Text.Encoding]::UTF8.GetBytes($html)
$stream.Write($buffer, 0, $buffer.Length)
$stream.Flush()

# Close connection and stop listener
$client.Close()
$listener.Stop()
Write-Host "Server stopped."
This example code will create the listener and wait for a connection, before finally closing the listener.

The problem with using static ports, like the example above, is the port may already be in use. We need to find a port in the dynamic range (49152 – 65535) that isn’t being used.
function Get-AvailablePort {

    # Try getting a dynamic port first
    $tcpListener = New-Object System.Net.Sockets.TcpListener([System.Net.IPAddress]::Loopback, 0)
    try {
        $tcpListener.Start()
        $port = ([System.Net.IPEndPoint]$tcpListener.LocalEndpoint).Port

        # If we got a port outside dynamic range, try again with explicit range
        if ($port -lt 49152) {
            $tcpListener.Stop()

            # Try ports in dynamic range
            for ($port = 49152; $port -le 65535; $port++) {
                $tcpListener = New-Object System.Net.Sockets.TcpListener([System.Net.IPAddress]::Loopback, $port)
                try {
                    $tcpListener.Start()
                    return $port
                }
                catch {
                    $tcpListener.Stop()
                    continue
                }
            }
            throw "No available ports found in dynamic range"
        }
        return $port
    }
    finally {
        $tcpListener.Stop()
    }
}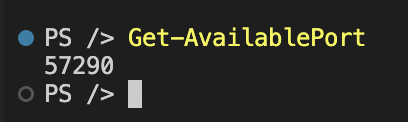
This approach is good because we use a random port in the dynamic range to avoid conflict and the temporary web server only exists during the auth flow. Keep your room tidy!
Protecting the Authorization Code
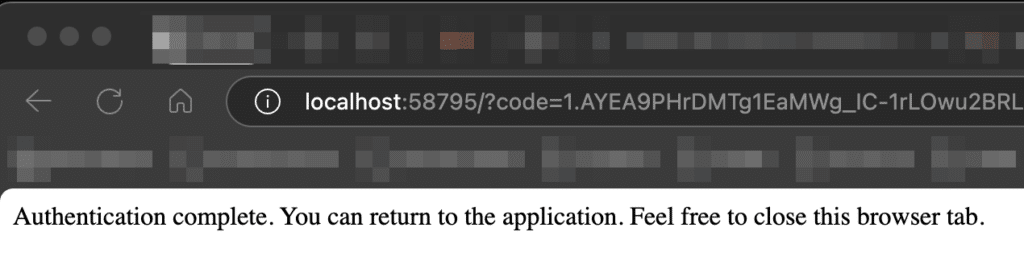
We briefly discussed that the localhost is where Entra ID is going to send the authorization code that we will use to obtain a token. Unless you protect the token, it could be intercepted and used maliciously (albeit within 10 minutes and using the same app registration). Here is what an unprotected response would look like, the authorization code is in the header in plain text.
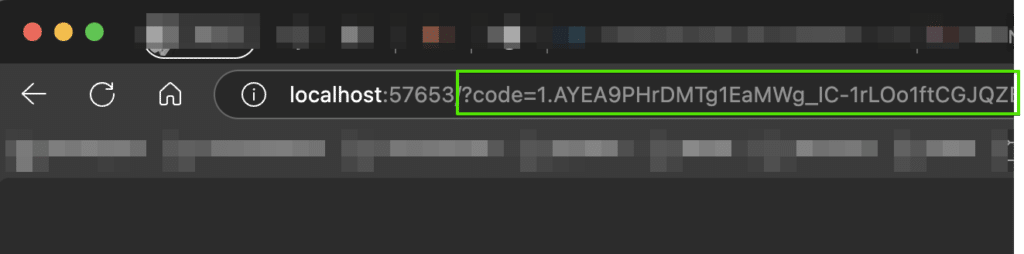
http://localhost:57653/?
code=1.AYEA9PHrDMTg1EaMWg_IC-1rLOo1ftCGJQZBrXa4uimSgZZEAfSBAA.AgABBAIAAABVrSpeuWamRam2jAF1XRQEAwDs_wUA9P9FhhenZn8FmZM_CO_KSJXpkWqY_uikoVln1-V7vMEyMmExoQqQqniCnYZCPA7reYCm9L8dOiz1zhQ8ybuHRk5OmZEVSFY__GNHdNglKkI18Mei2Q09wyMZHClpVcWkmoh78BR1H9lBK1eGZIKflK-piJKLIQCUzJb_1hoRPkm0L_JHCkZcMGT2ncOvc4q85eik-zP8bpY1vEtlS3q8vUmSdmaTOjxZYpl0JETB4kDC9EsBPvI7l5YMKHlidvspWvguMuHsFt00C_YLfAMGp6KIQi3niTQukgQUNy4ntit4aCoIglM8B1epmjQeeBIHOyKktr2oOdUMGjYQtWqRkzk4WNd5MWSSDlXxyv1Hbf2WWhaws6tJCCqlKi8Ope_GDdx9JlWYTzM0LxN7fpkOgHQx5f4bm6nzaYsUFNfZ3ejX01Be1AfDPWw4V6nIPxw-YNptpgVYxWjNWBq6kTx1JAovzNEq1d7uKa1XW5YKOrF50_z_d1xzZwtdWpybqGGtjpnmMzHQvVW9QoJb9wCM9Ykk7af6uE-7o-4noCVXUDKB-PZOEf8iP5C2bG9Ui-iLwLG_uyZiYlMRAkaqAkuKaws3SLQepzOkFyukWwjg-v8CEuC6hxcvmdFLZ4LhhUmcR7x27Ck61CU53Wm1avsx-IXiJZAcBIoFcY7lXy2t9y27iVwr-Xh_1L0G48DqjCpZHHx8gn1j2zwxhbjQcdTBe2gYWm4MNZW_SRosjO6-YjVu0pT39y3sHh5v3GN--ejQaS7s9aKMuzKltdXPxuZ90EthBhUtpaKQfM2Bdf3-_aeXUTZZX84sr-pTwfux2lNWdD2jnFlmrsjVAEK-Er7ZC-holm1ynF1ytGjX3VirEi4quNJpH2GRUCRE9ZwJW870VAoL6mQ
session_state=001febf9-9e69-f198-9bc4-71b5686a6b2d
The SessionState is unimportant, its what the identity platform is using to track this authentication request. The code is the important part!
Here’s how an attacker could intercept and misuse your authorization code. First lets assume its a normal day in Smallville and perform an authentication and grab the authorization code.
$tenantId = ''
$clientId = ''

# Get a dynamic available port using the function we created earlier
$port = Get-AvailablePort
$redirectUri = "http://localhost:$port"

# Construct the auth URL
$authUrl = "https://login.microsoftonline.com/$tenantId/oauth2/v2.0/authorize" `
    + "?client_id=$clientId" `
    + "&response_type=code" `
    + "&redirect_uri=$redirectUri" `
    + "&scope=User.Read"

# Open in Edge on macOS - just because
if ($IsMacOS) {
    & "/Applications/Microsoft Edge.app/Contents/MacOS/Microsoft Edge" $authUrl
} else {
    Start-Process $authUrl
}
Can I use this code from another device? Let’s try
# Authorization code from the browser
$code = "1.AYEA9PHrDMTg1EaMWg_IC-1rLOo1ftCGJQZBrXa4uimSgZZEAfSBAA.AgABBAIAAABVrSpeuWamRam2jAF1XRQEAwDs_wUA9P9FhhenZn8FmZM_CO_KSJXpkWqY_uikoVln1-V7vMEyMmExoQqQqniCnYZCPA7reYCm9L8dOiz1zhQ8ybuHRk5OmZEVSFY__GNHdNglKkI18Mei2Q09wyMZHClpVcWkmoh78BR1H9lBK1eGZIKflK-piJKLIQCUzJb_1hoRPkm0L_JHCkZcMGT2ncOvc4q85eik-zP8bpY1vEtlS3q8vUmSdmaTOjxZYpl0JETB4kDC9EsBPvI7l5YMKHlidvspWvguMuHsFt00C_YLfAMGp6KIQi3niTQukgQUNy4ntit4aCoIglM8B1epmjQeeBIHOyKktr2oOdUMGjYQtWqRkzk4WNd5MWSSDlXxyv1Hbf2WWhaws6tJCCqlKi8Ope_GDdx9JlWYTzM0LxN7fpkOgHQx5f4bm6nzaYsUFNfZ3ejX01Be1AfDPWw4V6nIPxw-YNptpgVYxWjNWBq6kTx1JAovzNEq1d7uKa1XW5YKOrF50_z_d1xzZwtdWpybqGGtjpnmMzHQvVW9QoJb9wCM9Ykk7af6uE-7o-4noCVXUDKB-PZOEf8iP5C2bG9Ui-iLwLG_uyZiYlMRAkaqAkuKaws3SLQepzOkFyukWwjg-v8CEuC6hxcvmdFLZ4LhhUmcR7x27Ck61CU53Wm1avsx-IXiJZAcBIoFcY7lXy2t9y27iVwr-Xh_1L0G48DqjCpZHHx8gn1j2zwxhbjQcdTBe2gYWm4MNZW_SRosjO6-YjVu0pT39y3sHh5v3GN--ejQaS7s9aKMuzKltdXPxuZ90EthBhUtpaKQfM2Bdf3-_aeXUTZZX84sr-pTwfux2lNWdD2jnFlmrsjVAEK-Er7ZC-holm1ynF1ytGjX3VirEi4quNJpH2GRUCRE9ZwJW870VAoL6mQ"

# Construct the token URL
$tokenUrl = "https://login.microsoftonline.com/$tenantId/oauth2/v2.0/token"
$body = @{
    client_id = $clientId
    code = $code
    redirect_uri = $redirectUri
    grant_type = "authorization_code"
    scope = "User.Read"
}

# Make the token request
$token = Invoke-RestMethod -Uri $tokenUrl -Method Post -Body $body

# Show the token response
$token | ConvertTo-Json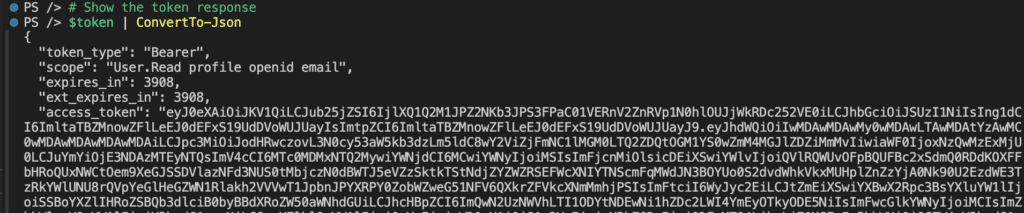
We have a token! Just to demonstrate, for completeness, we cannot use the same authorization code again to request a token.
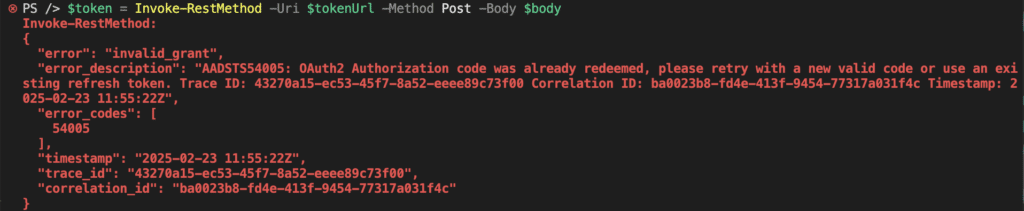
Whats the big deal Ben? An attacker could trick users into using a malicious app that registers a similar-looking redirect URI (like localh0st instead of localhost) or perform a man-in-the-middle attack on a network to intercept the authentication response. This is known as an “Authorization Code Interception Attack” (ACIA) and is specifically addressed in RFC 7636. Basically, the authorization code is about as secure as a thermal exhaust port on the Death Star.
When the auth code appears in the URL, the attacker could race to submit their token request first. Since an auth code can only be exchanged once for a token, if the attacker’s request succeeds first, your legitimate app’s request would fail.
Let me show you how to protect against this with Proof Key for Code Exchange (PKCE). PKCE prevents this type of attack by requiring the attacker to also know a secret code verifier value that was generated by your legitimate app at the start of the auth flow.
Implementing PKCE Protection
PKCE prevents this type of attack by requiring proof that the application exchanging the code is the same one that initiated the flow. It works by creating a one-way relationship between two values – a random code verifier and its SHA256 hashed equivalent called a code challenge. The code verifier remains private with the legitimate app while the code challenge is sent with the initial authorization request. Since SHA256 is a one-way hash, an attacker who intercepts the code challenge cannot reverse it to get the code verifier. PKCE primarily protects against attacks where the auth code is intercepted at a different point than the token exchange (like malicious redirects or network sniffing between different machines).
The PKCE flow summarised:-
Get-RedirectUri → Generate-PKCE → Get-AuthorizationCode → Exchange-AuthCodeForToken
Here’s how we could implement it with a simple function:-
function Generate-PKCE {

    # Generate a random code verifier
    $codeVerifier = -join ((65..90) + (97..122) | Get-Random -Count 128 | % {[char]$_})

    # Create a SHA256 hash of the verifier
    $sha256 = [System.Security.Cryptography.SHA256]::Create()
    $bytes = [System.Text.Encoding]::UTF8.GetBytes($codeVerifier)

    # Base64URL encode the hash to create the challenge
    $codeChallenge = [System.Convert]::ToBase64String($sha256.ComputeHash($bytes)) `
        -replace '\+','-' -replace '/','_' -replace '='

    return @{
        Verifier = $codeVerifier  # Keep this secret until token exchange
        Challenge = $codeChallenge # Send this with initial auth request
    }
}
Now when we request the token, we can prove we are the original requester by providing the code verifier in our request. This code example uses Write-Host to show the PKCE values in use.
$tenantId = ''
$clientId = ''

# Get a dynamic available port using the function we previously created
$port = Get-AvailablePort
$redirectUri = "http://localhost:$port"
Write-Host ("Using redirect URI: {0}" -f $redirectUri) -ForegroundColor Cyan

# Set up HTTP listener before launching browser
$http = [System.Net.HttpListener]::new()
$http.Prefixes.Add("$redirectUri/")
$http.Start()

# Generate PKCE values for protection using the function we just created
$PKCE = Generate-PKCE
Write-Host "`nPKCE Values:" -ForegroundColor Yellow
Write-Host ("Code Verifier: {0}" -f $PKCE.Verifier) -ForegroundColor Yellow
Write-Host ("Code Challenge: {0}" -f $PKCE.Challenge) -ForegroundColor Yellow

# Construct auth URL with PKCE challenge
$authUrl = "https://login.microsoftonline.com/$tenantId/oauth2/v2.0/authorize" `
    + "?client_id=$clientId" `
    + "&response_type=code" `
    + "&redirect_uri=$redirectUri" `
    + "&scope=User.Read" `
    + "&code_challenge=$($PKCE.Challenge)" `
    + "&code_challenge_method=S256"

Write-Host "`nLaunching browser with auth URL..." -ForegroundColor Green

# Launch browser
if ($IsMacOS) {
    & "/Applications/Microsoft Edge.app/Contents/MacOS/Microsoft Edge" $authUrl
} else {
    Start-Process $authUrl
}

# Wait for and get the auth code from the response
Write-Host "Waiting for auth code..." -ForegroundColor Cyan
$context = $http.GetContext()
$code = $context.Request.QueryString["code"]
$http.Stop()

Write-Host "`nReceived auth code:" -ForegroundColor Green
Write-Host ("{0}" -f $code) -ForegroundColor Green

Write-Host "`nExchanging code for token using PKCE verifier..." -ForegroundColor Yellow
$tokenUrl = "https://login.microsoftonline.com/$tenantId/oauth2/v2.0/token"
$body = @{
    client_id = $clientId
    code = $code
    code_verifier = $PKCE.Verifier
    redirect_uri = $redirectUri
    grant_type = "authorization_code"
    scope = "User.Read"
}

# Make the token request
$token = Invoke-RestMethod -Uri $tokenUrl -Method Post -Body $body

Write-Host "`nToken Response:" -ForegroundColor Cyan
$token | ConvertTo-Json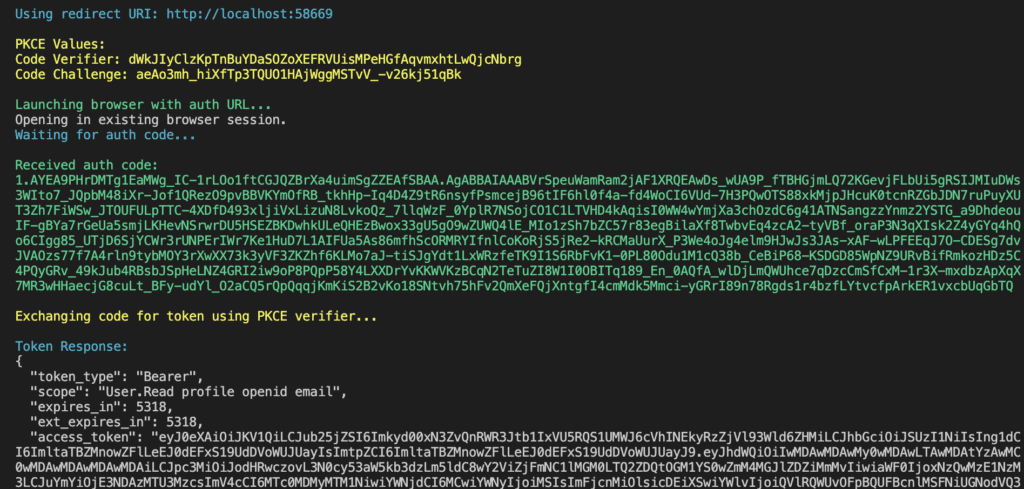
The Microsoft Graph SDK, to my complete surprise (I hadn’t taken any notice before) leaves the authorization code exposed in the address bar. queue impending disaster music…
While the code is short-lived (10 minutes) and single-use, clearing it from the address bar is still considered good security practice in my opinion. Maybe i’m missing something and the SDK team know something I don’t.. shrugs
Pretty Redirect Pages
One thing you see a lot when using the Microsoft Graph SDK, is the lack of creativity in the redirect URL HTML. Im not pointing fingers. Keeping code light is always keys but you can get a little more adventurous then the SDK does. Its also nice to brand the page a little so your users know they didn’t just click on something thats gonna get them fired.
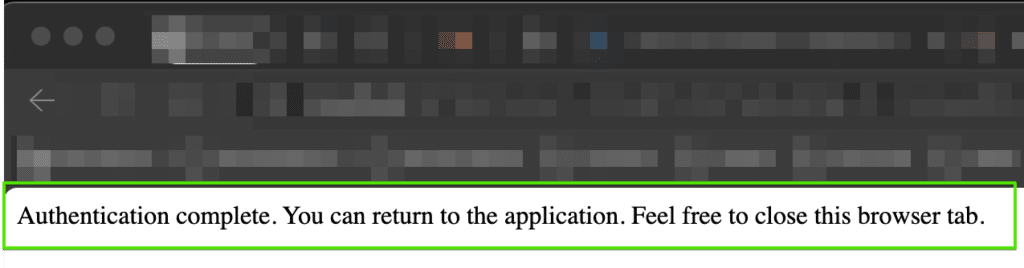
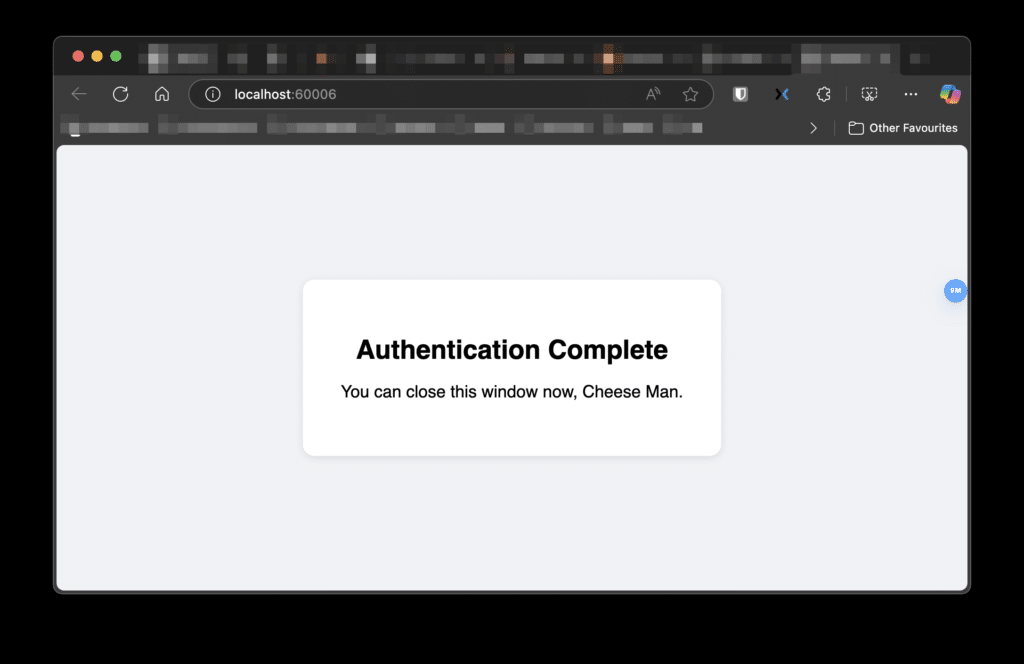
I’m no graphic designer but this looks great, right?
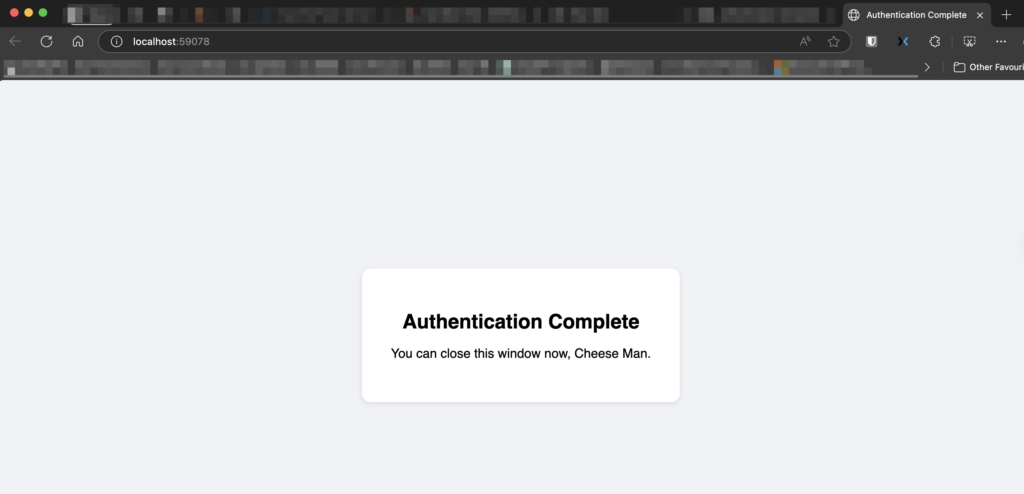
In our custom code, we can create some pretty messages, using colour schemes and base64 logos (perhaps). The function below sends a styled HTML response page to the browser after the authentication is complete. It takes a HttpListenerResponse parameter to handle the web response and creates a HTML page with a centred container, white background, “Authentication Complete” heading, and a message telling the user they can close the window. The page includes CSS styling for a modern, clean look and importantly.
Thinking back to PKCE, this function also use a JavaScript snippet that clears the auth code from the URL bar. Nice touch I thought…security through obscurity 😀
function Send-ResponseHtml {
    param ([System.Net.HttpListenerResponse]$Response)

    $html = @"
<!DOCTYPE html>
<html>
<head>
    <title>Authentication Complete</title>
    <style>
        body { font-family: "Segoe UI", sans-serif; display: flex; justify-content: center; align-items: center; height: 100vh; margin: 0; background-color: #f0f2f5; }
        .container { background-color: white; padding: 40px; border-radius: 12px; box-shadow: 0 2px 8px rgba(0,0,0,0.1); text-align: center; }
        h1 { margin-bottom: 16px; font-size: 28px; }
        p { font-size: 18px; }
    </style>
</head>
<body>
    <div class="container">
        <h1>Authentication Complete</h1>
        <p>You can close this window now, Cheese Man.</p>
    </div>
    <script>window.onload = function() { history.replaceState({}, document.title, '/'); }</script>
</body>
</html>
"@

    $buffer = [System.Text.Encoding]::UTF8.GetBytes($html)
    $Response.ContentType = "text/html"
    $Response.ContentLength64 = $buffer.Length
    $Response.StatusCode = 200
    $Response.StatusDescription = "OK"
    $Response.OutputStream.Write($buffer, 0, $buffer.Length)
    $Response.OutputStream.Flush()
    $Response.Close()
}
The Complete Implementation
Here’s our complete implementation. This PowerShell script performs OAuth 2.0 PKCE authentication to get an access token from Microsoft Entra ID. The token allows authenticated API requests, like calling Microsoft Graph.
Find an Available Port → Get-RedirectUri
- Chooses a free port, in the dynamic range, for the redirect URI (
http://localhost:<port>).
Generate a PKCE Code → Generate-PKCE
- Creates a secure Code Verifier and Code Challenge to improve security.
Start Authentication → Get-AuthorizationCode
- Opens a browser for the user to sign in.
- Waits for Entra ID to send back an authorization code.
Exchange Code for Token → Exchange-AuthCodeForToken
- Sends the authorization code and PKCE verifier to Entra ID.
- Receives an access token (used for API requests and such).
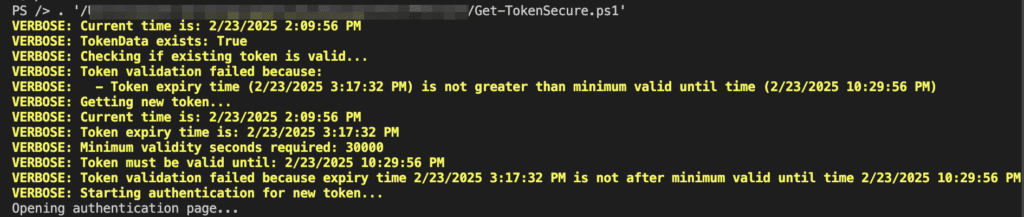
Check Token Validity → Get-AccessToken
If no valid token exists, it starts the authentication flow again.
Note: This script doesn’t use refresh tokens because it follows an interactive authentication flow where the user must log in each time a new token is needed. Since the authentication happens in real-time, Entra ID only issues a short-lived access token (1 hour). When the token expires, the script repeats the authentication process instead of using a refresh token. This approach avoids storing long-term credentials, making it more secure for a PowerShell script.
[CmdletBinding(SupportsShouldProcess)]
param (
[string]$TenantId = '',
[string]$ClientId = '',
[string]$Scope = "User.Read",
[int]$MinimumValiditySeconds = 300
)
function Get-AvailablePort {
$tcpListener = New-Object System.Net.Sockets.TcpListener([System.Net.IPAddress]::Loopback, 0)
try {
$tcpListener.Start()
$port = ([System.Net.IPEndPoint]$tcpListener.LocalEndpoint).Port
return $port
}
finally {
$tcpListener.Stop()
}
}
function Get-RedirectUri {
$port = Get-AvailablePort
return "http://localhost:$port"
}
function Generate-PKCE {
$codeVerifier = -join ((65..90) + (97..122) | Get-Random -Count 128 | % { [char]$_ })
$sha256 = [System.Security.Cryptography.SHA256]::Create()
$bytes = [System.Text.Encoding]::UTF8.GetBytes($codeVerifier)
$codeChallenge = [System.Convert]::ToBase64String($sha256.ComputeHash($bytes)) -replace '\+', '-' -replace '/', '_' -replace '='
return @{ Verifier = $codeVerifier; Challenge = $codeChallenge }
}
function Get-AuthorizationCode {
param (
[string]$TenantId,
[string]$ClientId,
[string]$RedirectUri,
[string]$CodeChallenge,
[string]$Scope
)
$http = [System.Net.HttpListener]::new()
$http.Prefixes.Add("$RedirectUri/")
$http.Start()
$state = -join ((65..90) + (97..122) | Get-Random -Count 32 | % {[char]$_})
$encodedState = [System.Web.HttpUtility]::UrlEncode($state)
$authUrl = "https://login.microsoftonline.com/$TenantId/oauth2/v2.0/authorize" `
+ "?client_id=$ClientId" `
+ "&response_type=code" `
+ "&redirect_uri=$RedirectUri" `
+ "&scope=$Scope" `
+ "&code_challenge=$CodeChallenge" `
+ "&code_challenge_method=S256" `
+ "&state=$encodedState"
Write-Host "Opening authentication page..."
Start-Process $authUrl
$context = $http.GetContext()
$receivedState = $context.Request.QueryString["state"]
if ($receivedState -ne $encodedState) {
throw "State parameter mismatch"
}
$code = $context.Request.QueryString["code"]
Send-ResponseHtml -Response $context.Response
$http.Stop()
return $code
}
function Send-ResponseHtml {
param ([System.Net.HttpListenerResponse]$Response)
$html = @"
<!DOCTYPE html>
<html>
<head>
<title>Authentication Complete</title>
<style>
body { font-family: "Segoe UI", sans-serif; display: flex; justify-content: center; align-items: center; height: 100vh; margin: 0; background-color: #f0f2f5; }
.container { background-color: white; padding: 40px; border-radius: 12px; box-shadow: 0 2px 8px rgba(0,0,0,0.1); text-align: center; }
h1 { margin-bottom: 16px; font-size: 28px; }
p { font-size: 18px; }
</style>
</head>
<body>
<div class="container">
<h1>Authentication Complete</h1>
<p>You can close this window now, Cheese Man.</p>
</div>
<script>window.onload = function() { history.replaceState({}, document.title, '/'); }</script>
</body>
</html>
"@
$buffer = [System.Text.Encoding]::UTF8.GetBytes($html)
$Response.ContentType = "text/html"
$Response.ContentLength64 = $buffer.Length
$Response.StatusCode = 200
$Response.StatusDescription = "OK"
$Response.OutputStream.Write($buffer, 0, $buffer.Length)
$Response.OutputStream.Flush()
$Response.Close()
}
function Exchange-AuthCodeForToken {
param (
[string]$TenantId,
[string]$ClientId,
[string]$RedirectUri,
[string]$Code,
[string]$CodeVerifier,
[string]$Scope
)
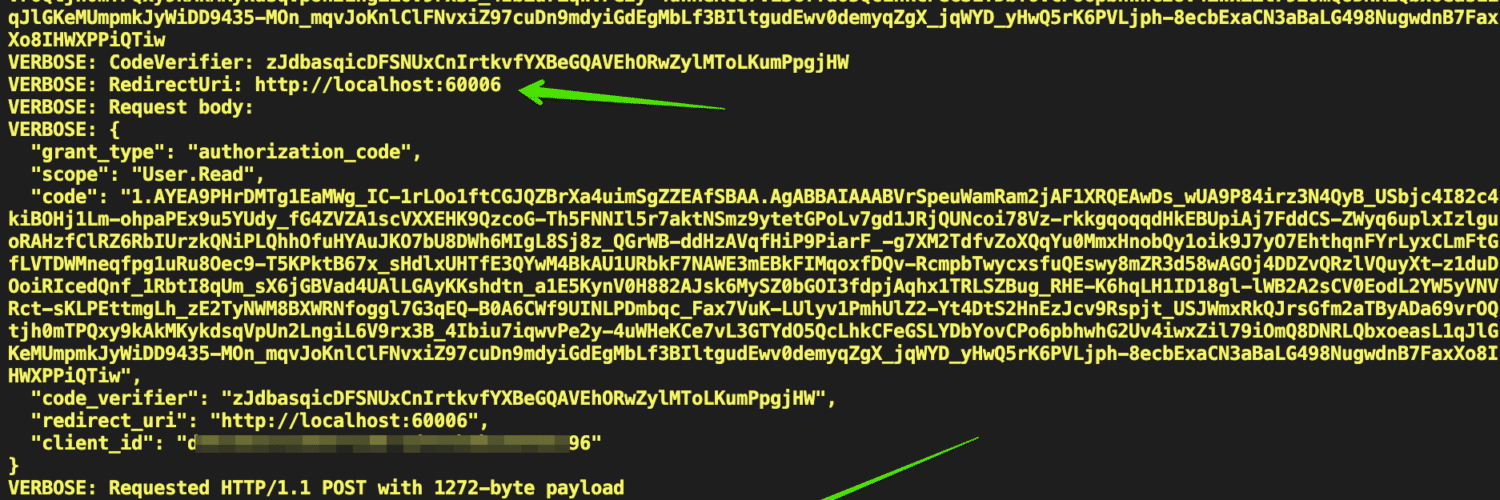
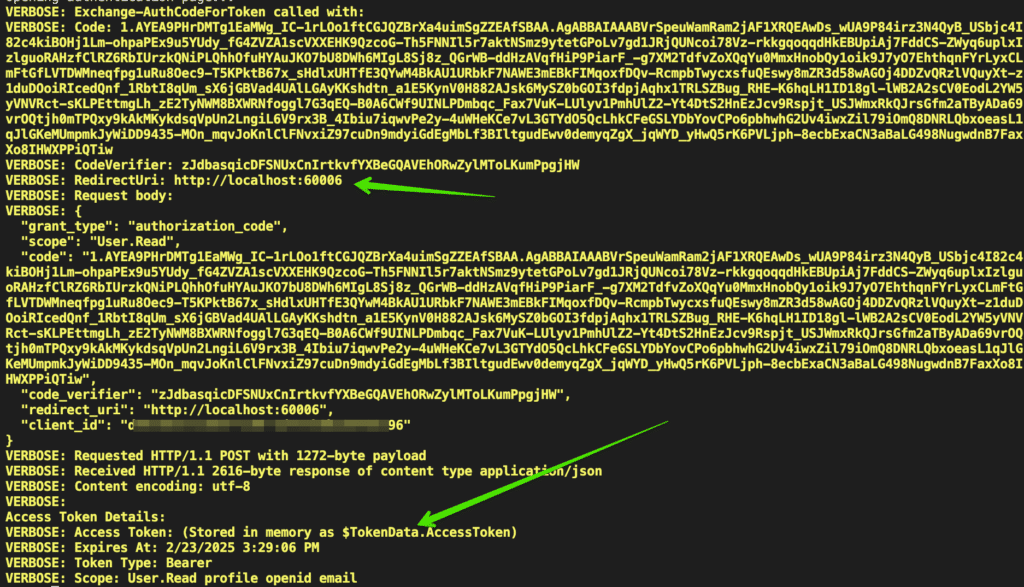
Write-Verbose "Exchange-AuthCodeForToken called with:"
Write-Verbose "Code: $Code"
Write-Verbose "CodeVerifier: $CodeVerifier"
Write-Verbose "RedirectUri: $RedirectUri"
$tokenUrl = "https://login.microsoftonline.com/$TenantId/oauth2/v2.0/token"
$body = @{
client_id = $ClientId
code = $Code
code_verifier = $CodeVerifier
redirect_uri = $RedirectUri
grant_type = "authorization_code"
scope = $Scope
}
Write-Verbose "Request body:"
Write-Verbose ($body | ConvertTo-Json)
# Add content type explicitly
$token = Invoke-RestMethod -Uri $tokenUrl -Method Post -Body $body -ContentType "application/x-www-form-urlencoded"
return @{
AccessToken = $token.access_token
ExpiresAt = (Get-Date).AddSeconds($token.expires_in)
TokenType = $token.token_type
Scope = $token.scope
}
}
function Get-AccessToken {
param (
[string]$TenantId,
[string]$ClientId,
[string]$Scope,
[datetime]$TokenExpiry = [DateTime]::MinValue,
[int]$MinimumValiditySeconds
)
Write-Verbose ("Current time is: {0}" -f (Get-Date))
Write-Verbose ("Token expiry time is: {0}" -f $TokenExpiry)
Write-Verbose ("Minimum validity seconds required: {0}" -f $MinimumValiditySeconds)
$minimumValidUntil = (Get-Date).AddSeconds($MinimumValiditySeconds)
Write-Verbose ("Token must be valid until: {0}" -f $minimumValidUntil)
if ($TokenData -and $TokenExpiry -gt $minimumValidUntil) {
$timeUntilExpiry = ($TokenExpiry - (Get-Date)).ToString("hh\:mm\:ss")
Write-Verbose ("Using existing valid access token. Token expires in: {0}" -f $timeUntilExpiry)
return $TokenData
}
Write-Verbose ("Token validation failed because expiry time {0} is not after minimum valid until time {1}" -f $TokenExpiry, $minimumValidUntil)
Write-Verbose "Starting authentication for new token..."
$RedirectUri = Get-RedirectUri
$PKCE = Generate-PKCE
$Code = Get-AuthorizationCode -TenantId $TenantId -ClientId $ClientId -RedirectUri $RedirectUri -CodeChallenge $PKCE.Challenge -Scope $Scope
return Exchange-AuthCodeForToken -TenantId $TenantId -ClientId $ClientId -RedirectUri $RedirectUri -Code $Code -CodeVerifier $PKCE.Verifier -Scope $Scope
}
# Main execution flow
$minimumValidUntil = (Get-Date).AddSeconds($MinimumValiditySeconds)
Write-Verbose ("Current time is: {0}" -f (Get-Date))
Write-Verbose ("TokenData exists: {0}" -f ($null -ne $TokenData))
Write-Verbose "Checking if existing token is valid..."
if ($TokenData -and $TokenData.ExpiresAt -gt $minimumValidUntil) {
$timeUntilExpiry = ($TokenData.ExpiresAt - (Get-Date)).ToString("hh\:mm\:ss")
Write-Verbose ("Using existing valid access token. Token expires in: {0}" -f $timeUntilExpiry)
}
else {
Write-Verbose "Token validation failed because:"
if (-not $TokenData) {
Write-Verbose " - TokenData is null or empty"
}
elseif (-not ($TokenData.ExpiresAt -gt $minimumValidUntil)) {
Write-Verbose (" - Token expiry time ({0}) is not greater than minimum valid until time ({1})" -f $TokenData.ExpiresAt, $minimumValidUntil)
}
Write-Verbose "Getting new token..."
$tokenExpiry = if ($TokenData) { $TokenData.ExpiresAt } else { [DateTime]::MinValue }
$TokenData = Get-AccessToken -TenantId $TenantId -ClientId $ClientId -Scope $Scope `
-TokenExpiry $tokenExpiry -MinimumValiditySeconds $MinimumValiditySeconds
}
Write-Verbose "`nAccess Token Details:"
Write-Verbose "Access Token: (Stored in memory as `$TokenData.AccessToken)"
Write-Verbose ("Expires At: {0}" -f $TokenData.ExpiresAt)
Write-Verbose ("Token Type: {0}" -f $TokenData.TokenType)
Write-Verbose ("Scope: {0}" -f $TokenData.Scope)Why Use the SDK Instead?
Now that we understand how OAuth works, let’s talk about why the Microsoft Graph PowerShell SDK is often the better choice still.
Simplicity……
# Install and import the module if you haven't already
Install-Module Microsoft.Graph.Authentication
Import-Module Microsoft.Graph.Authentication

# Connect and get an access token automatically
Connect-MgGraph -Scopes "DeviceManagementConfiguration.Read.All"

# Now you can use any Graph API endpoints
Invoke-MgGraphRequest -Uri 'https://graph.microsoft.com/v1.0/deviceManagement/managedDevices'
The Microsoft Graph PowerShell SDK abstracts the complexity of authentication and API interactions. Unlike manually handling OAuth authentication in the example above, the SDK automatically refreshes tokens (in the right authentication flow scenarios), eliminating the need for re-authentication when an access token expires.
Secondly, the continuous updates of the managed SDK ensure alignment with the latest security practices, protecting against potential vulnerabilities that might emerge in custom implementations.
Conclusion
While you might be reaching the end of the blog thinking “man that wasted my time”, working through PKCE and OAuth step-by-step provides invaluable insights into the underlying security mechanisms. It’s an educational exercise that demystifies the intricate processes SDKs seamlessly manage, helping developers understand the sophisticated dance of modern authentication. Hopefully it also tilted the cap towards the idea of creating “prettier” redirect pages.
Final thought – keep that token secure! Keeping access tokens secure is critical to preventing unauthorized access to your application or the Microsoft Graph API. Consider using Credential Manager or DPAPI to store your token (not covered in this post). Absolutely do not store the token in global variables like ($global:TokenData). Finally, Never store plain text tokens in files or use them in logs.
Until next time, thanks for reading!


Add comment