


Now that we have in Part 1 integrated Jamf Pro with Intune and Azure AD we need to deploy the Company portal app to our users and a policy for end users to register the devices in Azure Active Directory. This post will cover the following:
- Deploy Intune Company portal to macOS devices
- Create and deploy the device registration policy
Deploy Company Portal
Step 1: Download the required files
First we need to download the company portal installer from this page: https://go.microsoft.com/fwlink/?linkid=862280 so that we can upload it to Jamf Pro for deployment. After you have downloaded the company portal. I also recommend that you deploy the Microsoft AutoUpdate (MAU) to your devices if you have not done that already so that your Microsoft applications are up to date. That can be found here: https://docs.microsoft.com/en-us/officeupdates/release-history-microsoft-autoupdate
Step 2: Upload the applications to Jamf Pro
Log on to your jamf pro instance and navigate to Settings -> Computer managment -> Packages and create a new package:
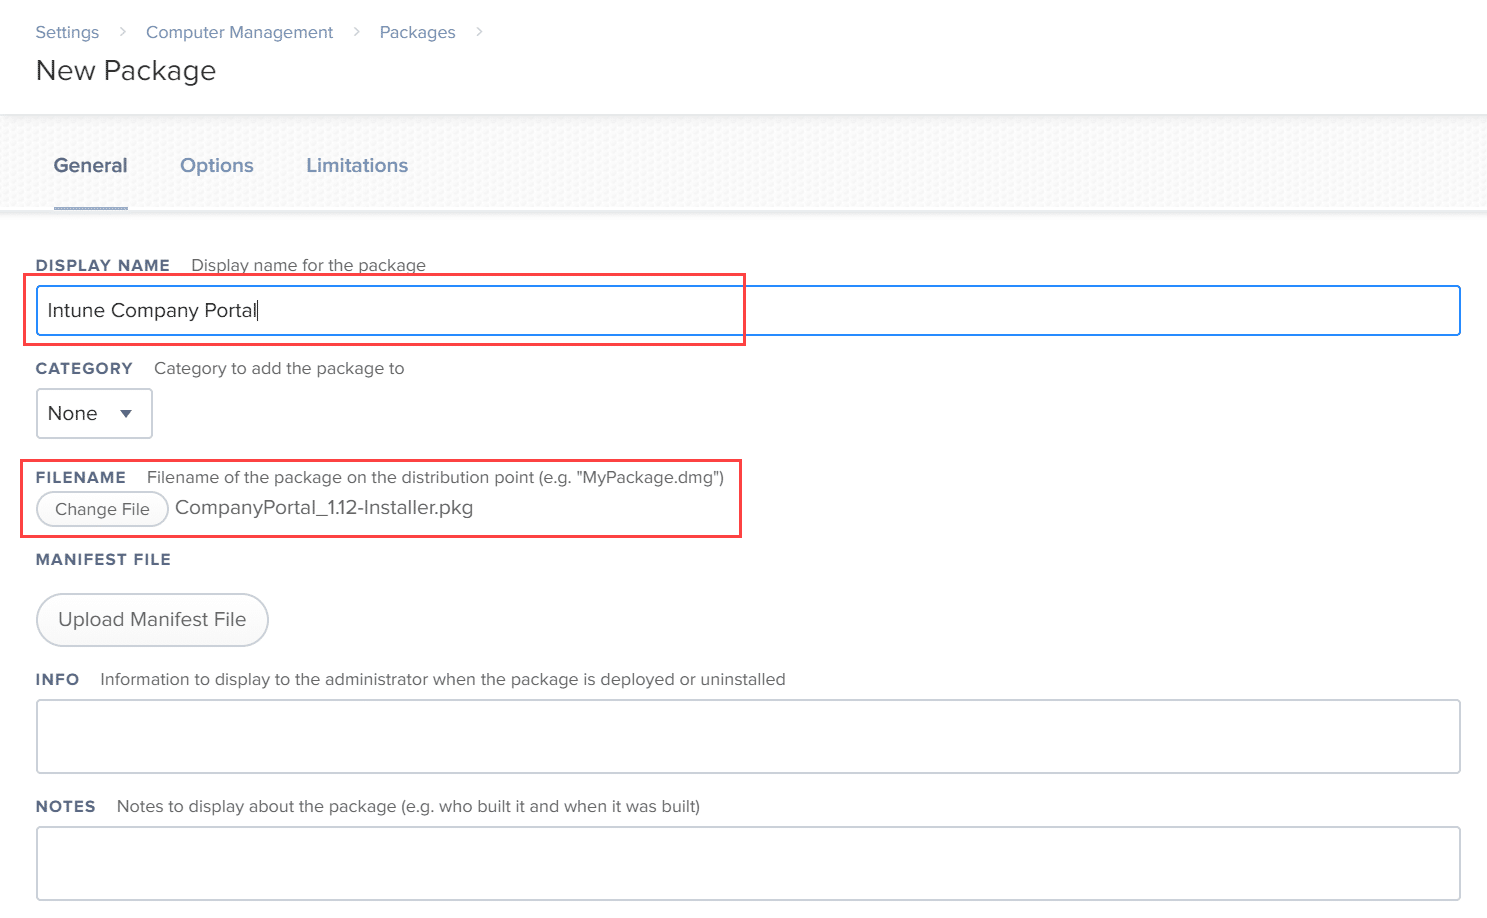
Optional: Repeat this step for the MAU package as well. I know have 2 packages available in Jamf Pro:

Step 3: Identify Mac Computers that don’t have the Company Portal installed
In Jamf Pro, go to Computers – Smart Computer Groups and click on New
Give it a Display Name and go to Criteria to define a criteria that does identifies computers without Company portal installed.
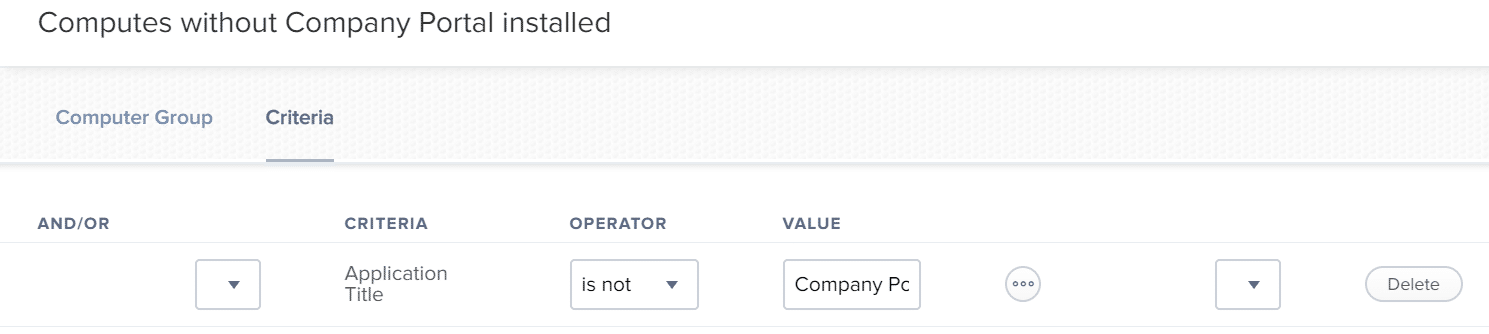
I have been successfully using “Application Title” – “is not” – “Company Portal.app” (if you want to see this group in your dashboard, remember to click Show in Jamf Pro Dashboard)
Step 4: Deploy Intune Company Portal
In Jamf Pro, navigate to Computers -> Policies and create a policy that deploys the Intune Company Portal to your users
Under General do the following Configuration:
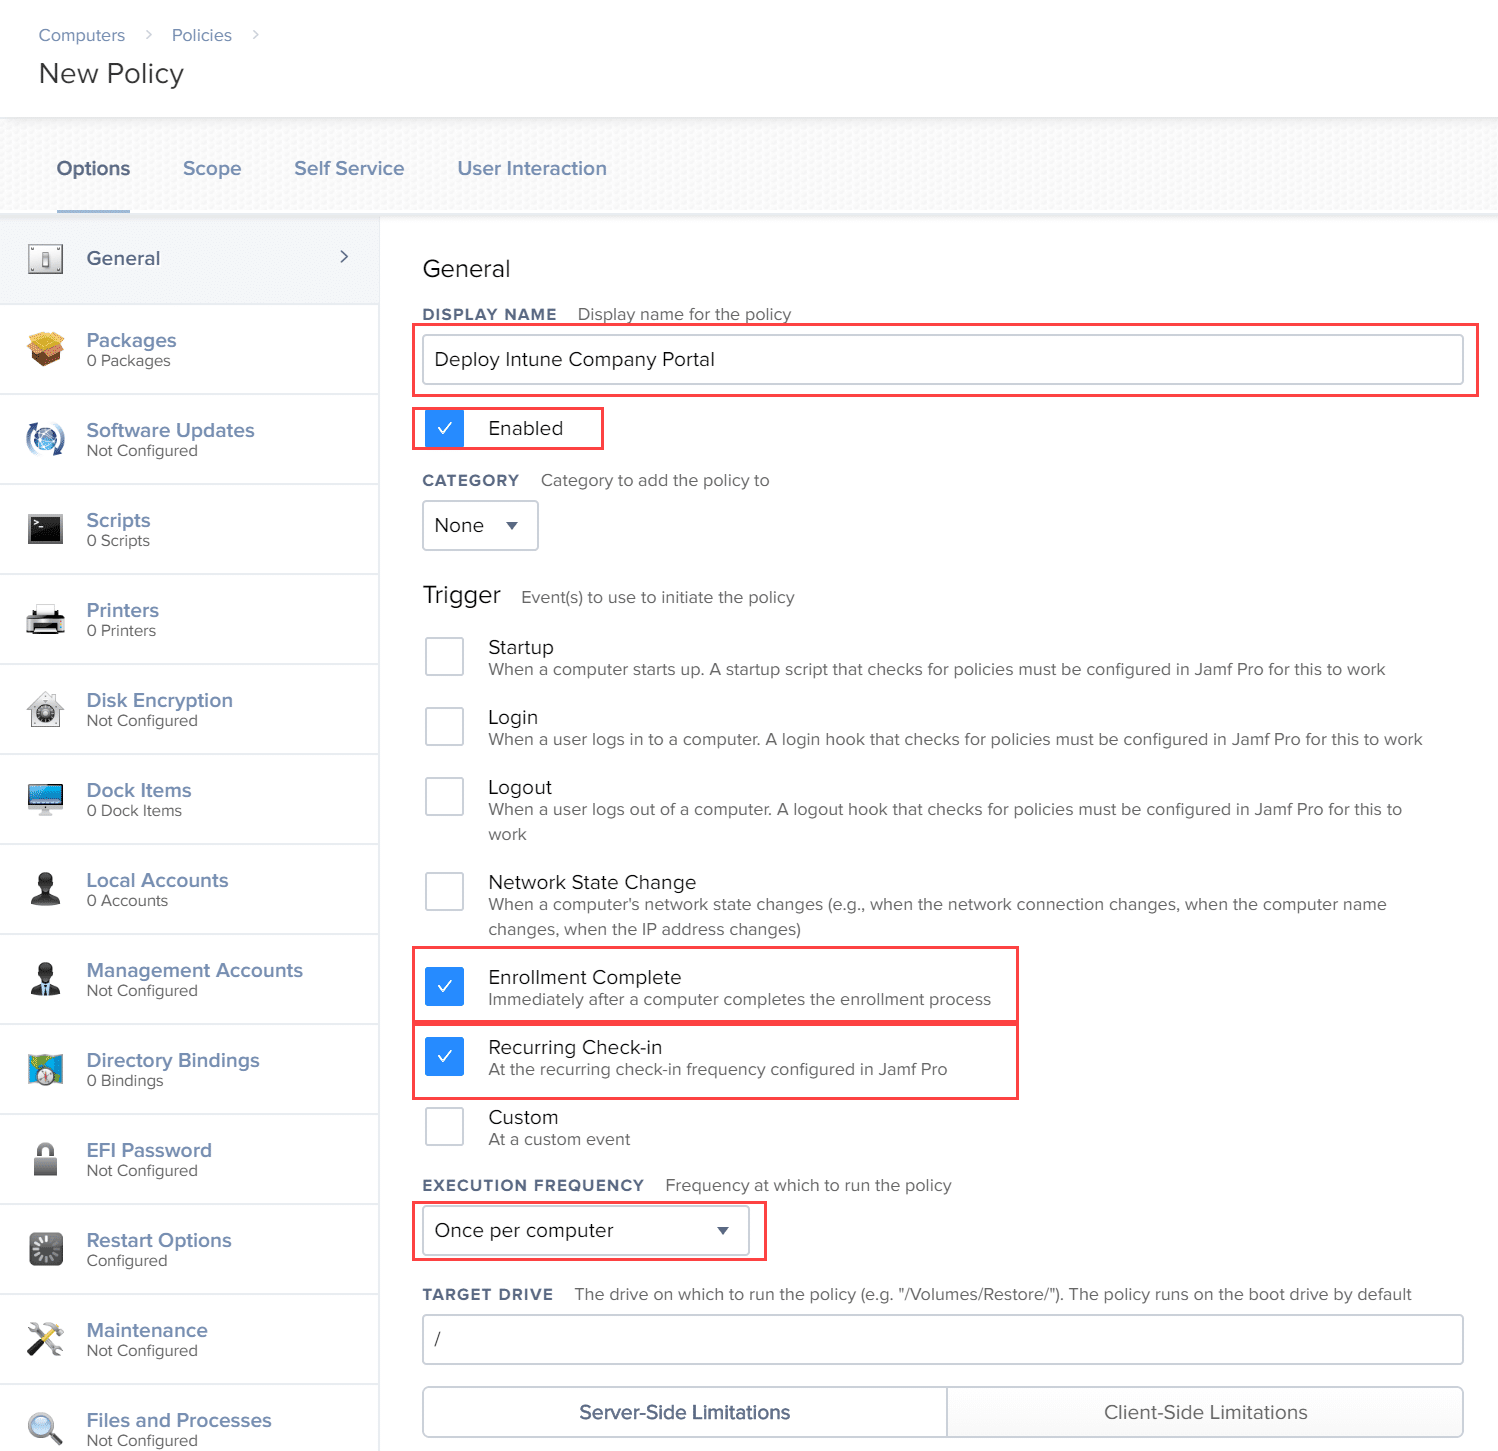
Displayname: Deploy Intune Company Portal
Enabled: Yes
Trigger: Enrollment Complete + Recurring Check-in
Frequency: Once Per Computer
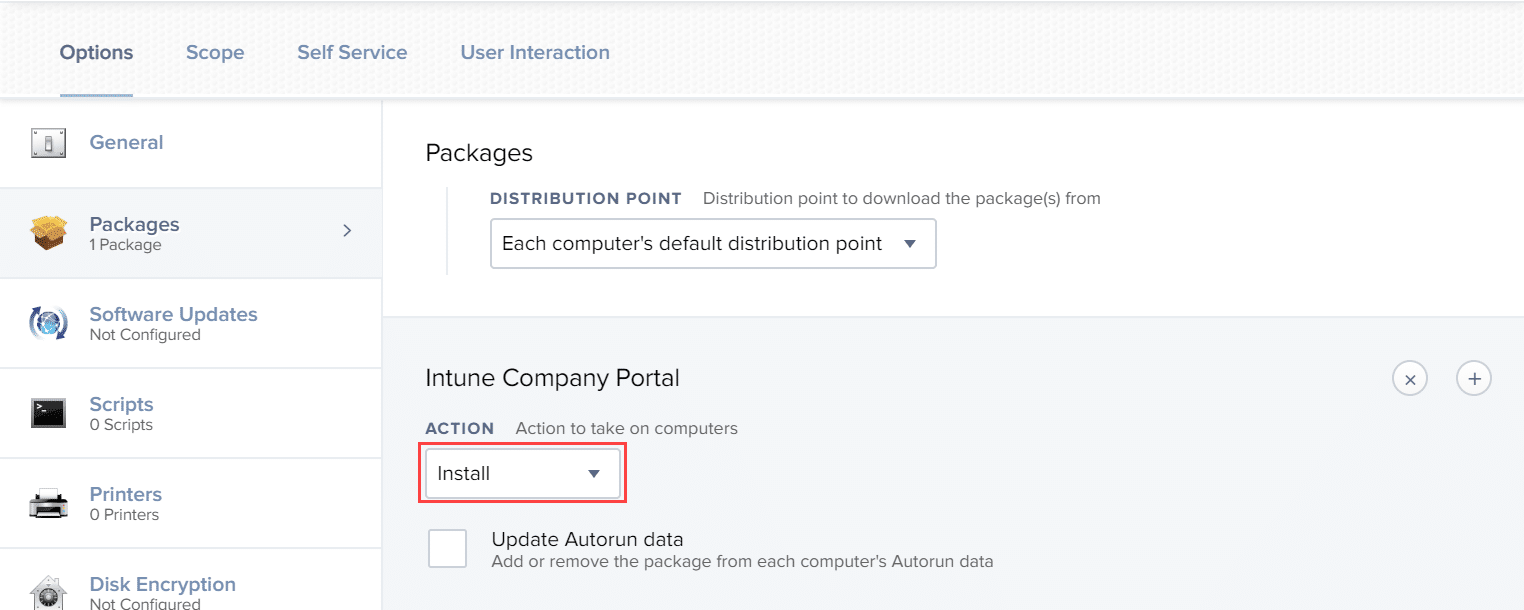
Under Packages click on Configure:

Add your Company Portal Package and Action = Install
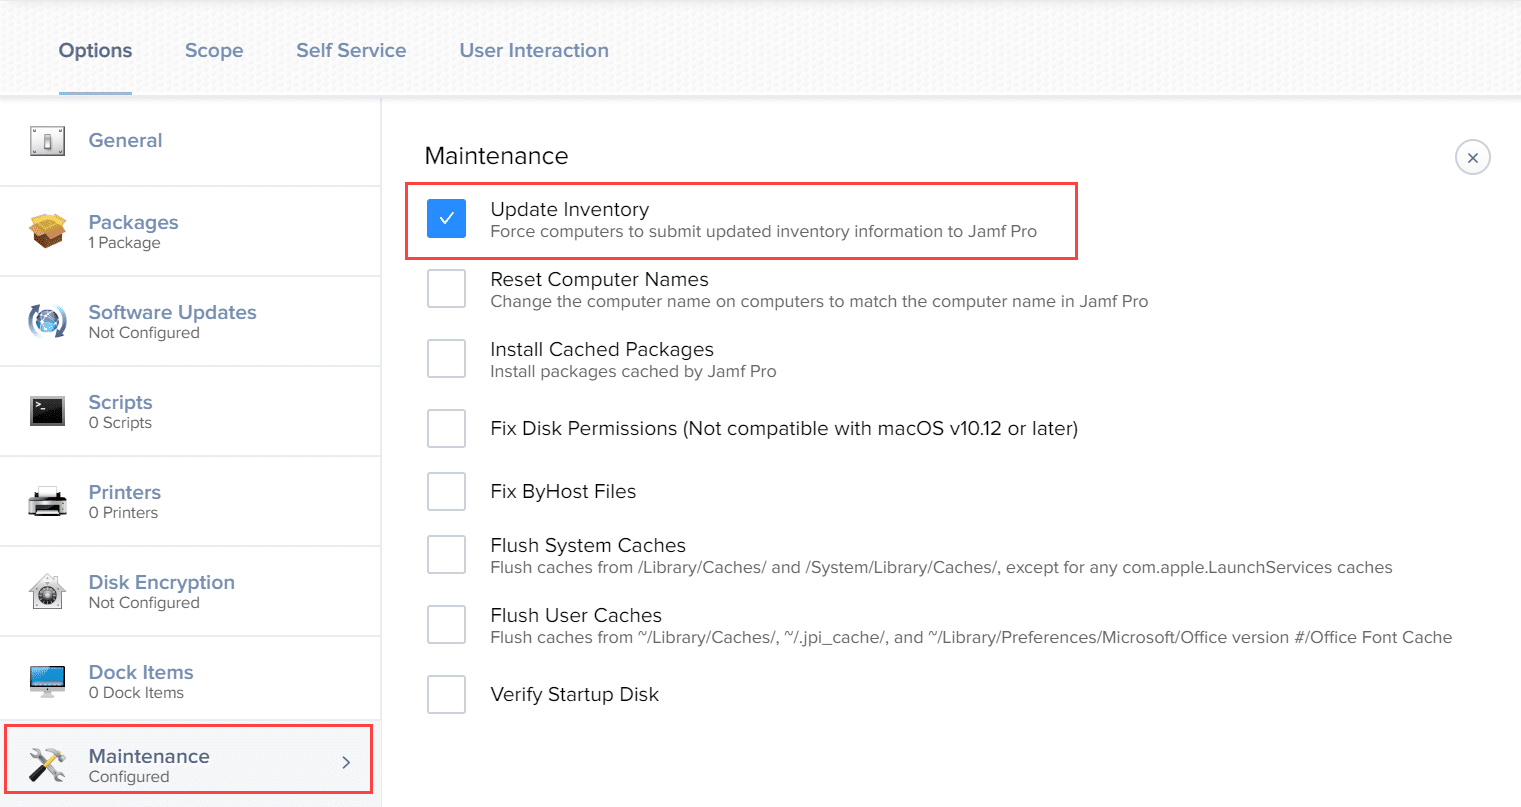
Now go to Maintenance and click on Configure Maintenance. After we have installed the package we would like to force a update of inventory as well.
Click the Scope tab and choose the Smart Group we created in step 3.

Click on Save – The Company portal will now be deployed to all computers that does not have it installed. This is how my policy looks after I am done:

Device Registration Policy
Now that we have deployed Intune Company portal we need to create a policy for device registration as well. The reason we need to do this is that the end users MUST launch the Company portal from Jamf Self Service for macOS to register their computer with Azure Active Directory as a device managed by Jamf Pro.
I strongly advise that you inform your users that they need to take action and how to do this.
Step 1: Create a Smart Group for Computers with Company Portal Installed
First I am create a new Computer Smart Group containing devices that has the Company Portal installed.
Go to Computers -> Smart Computer Group and click on New.
Now I use the same type of group as in Step 3 over, but i use IS instead of is not.
“Application Title” – “is” – “Company Portal.app”

Step 2: Create the registration policy
This policy should be deployed to the Jamf Self Service portal so that the user can start the registration interactively.
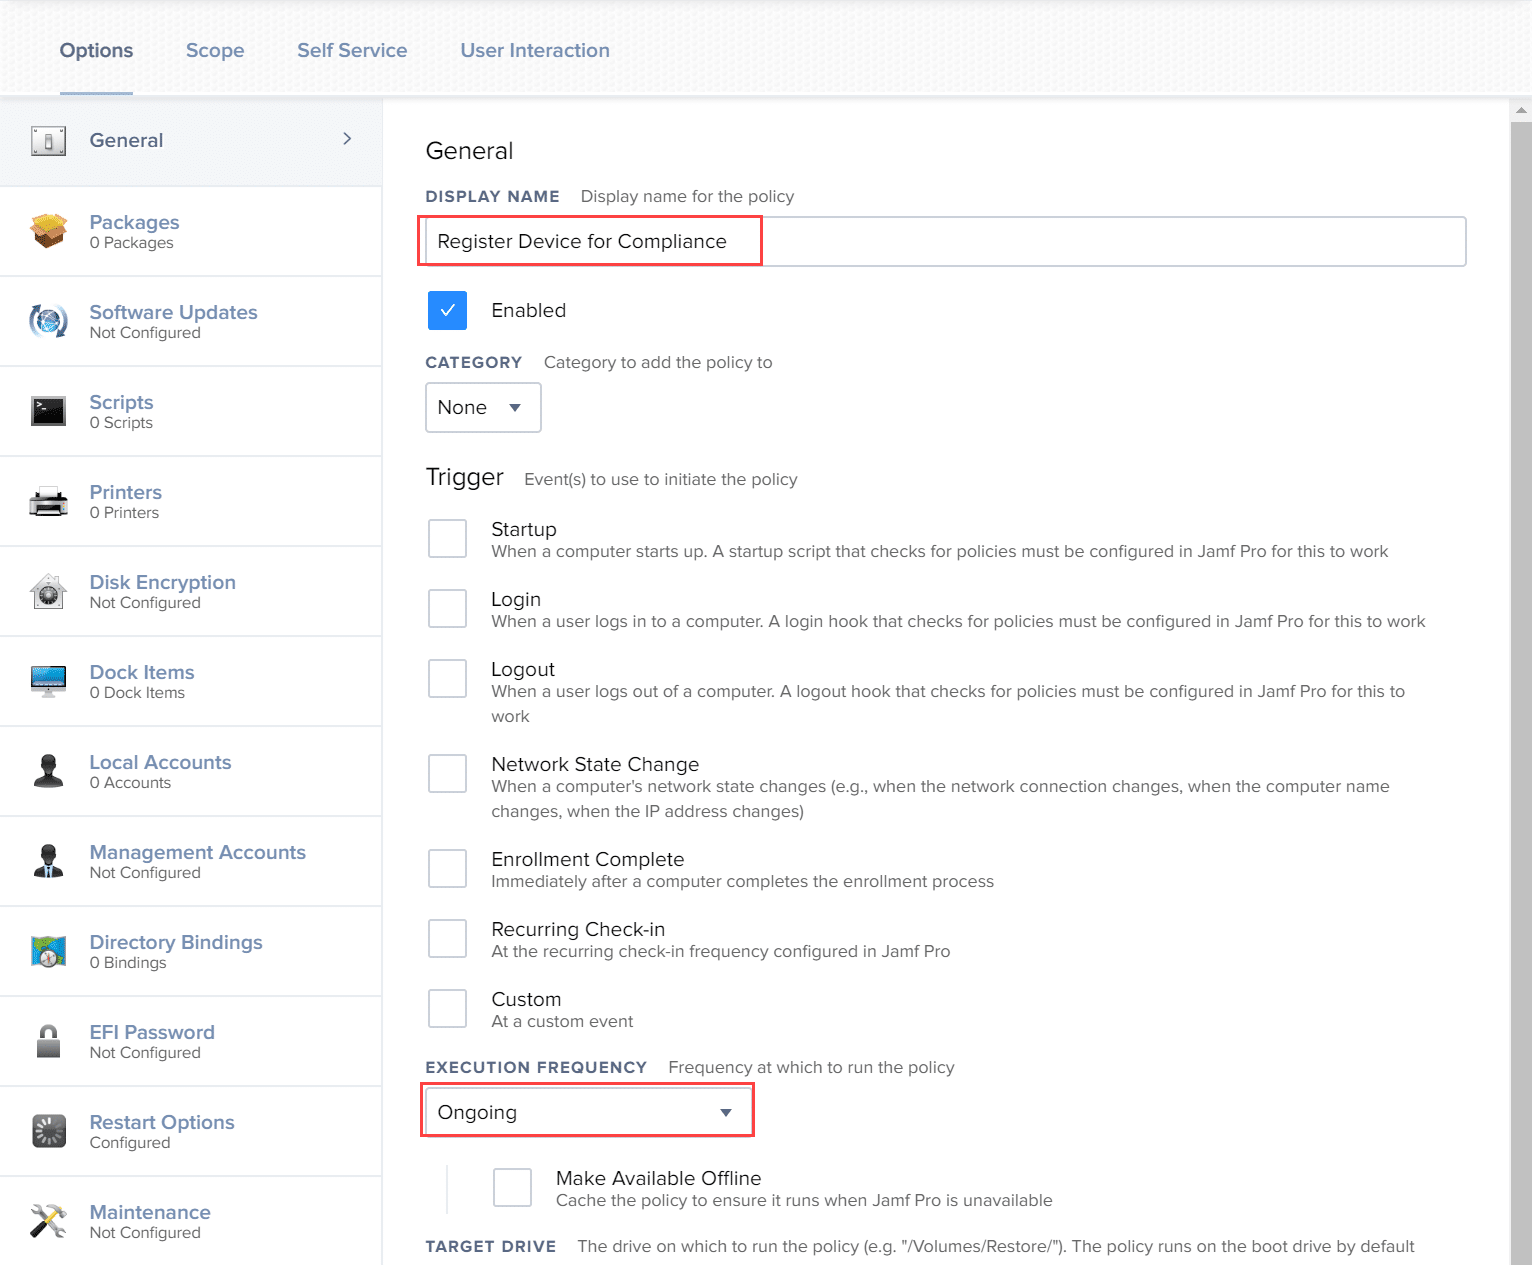
Go to Computers -> Policy and create a new policy for users to register with Azure Active Directory.
Displayname: Register Device for Compliance
Execution Frequency: Ongoing
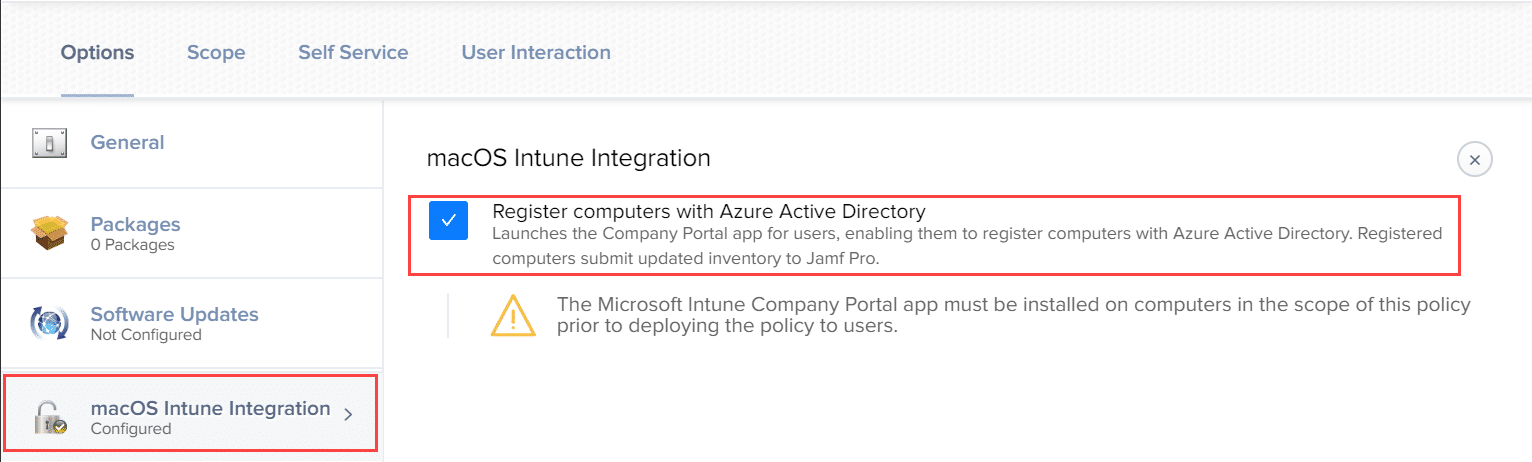
Now on the bottom click on macOS Intune Configuration and click on Configure:
Go to the Scope tab and target the Smart Group we created in previous step:

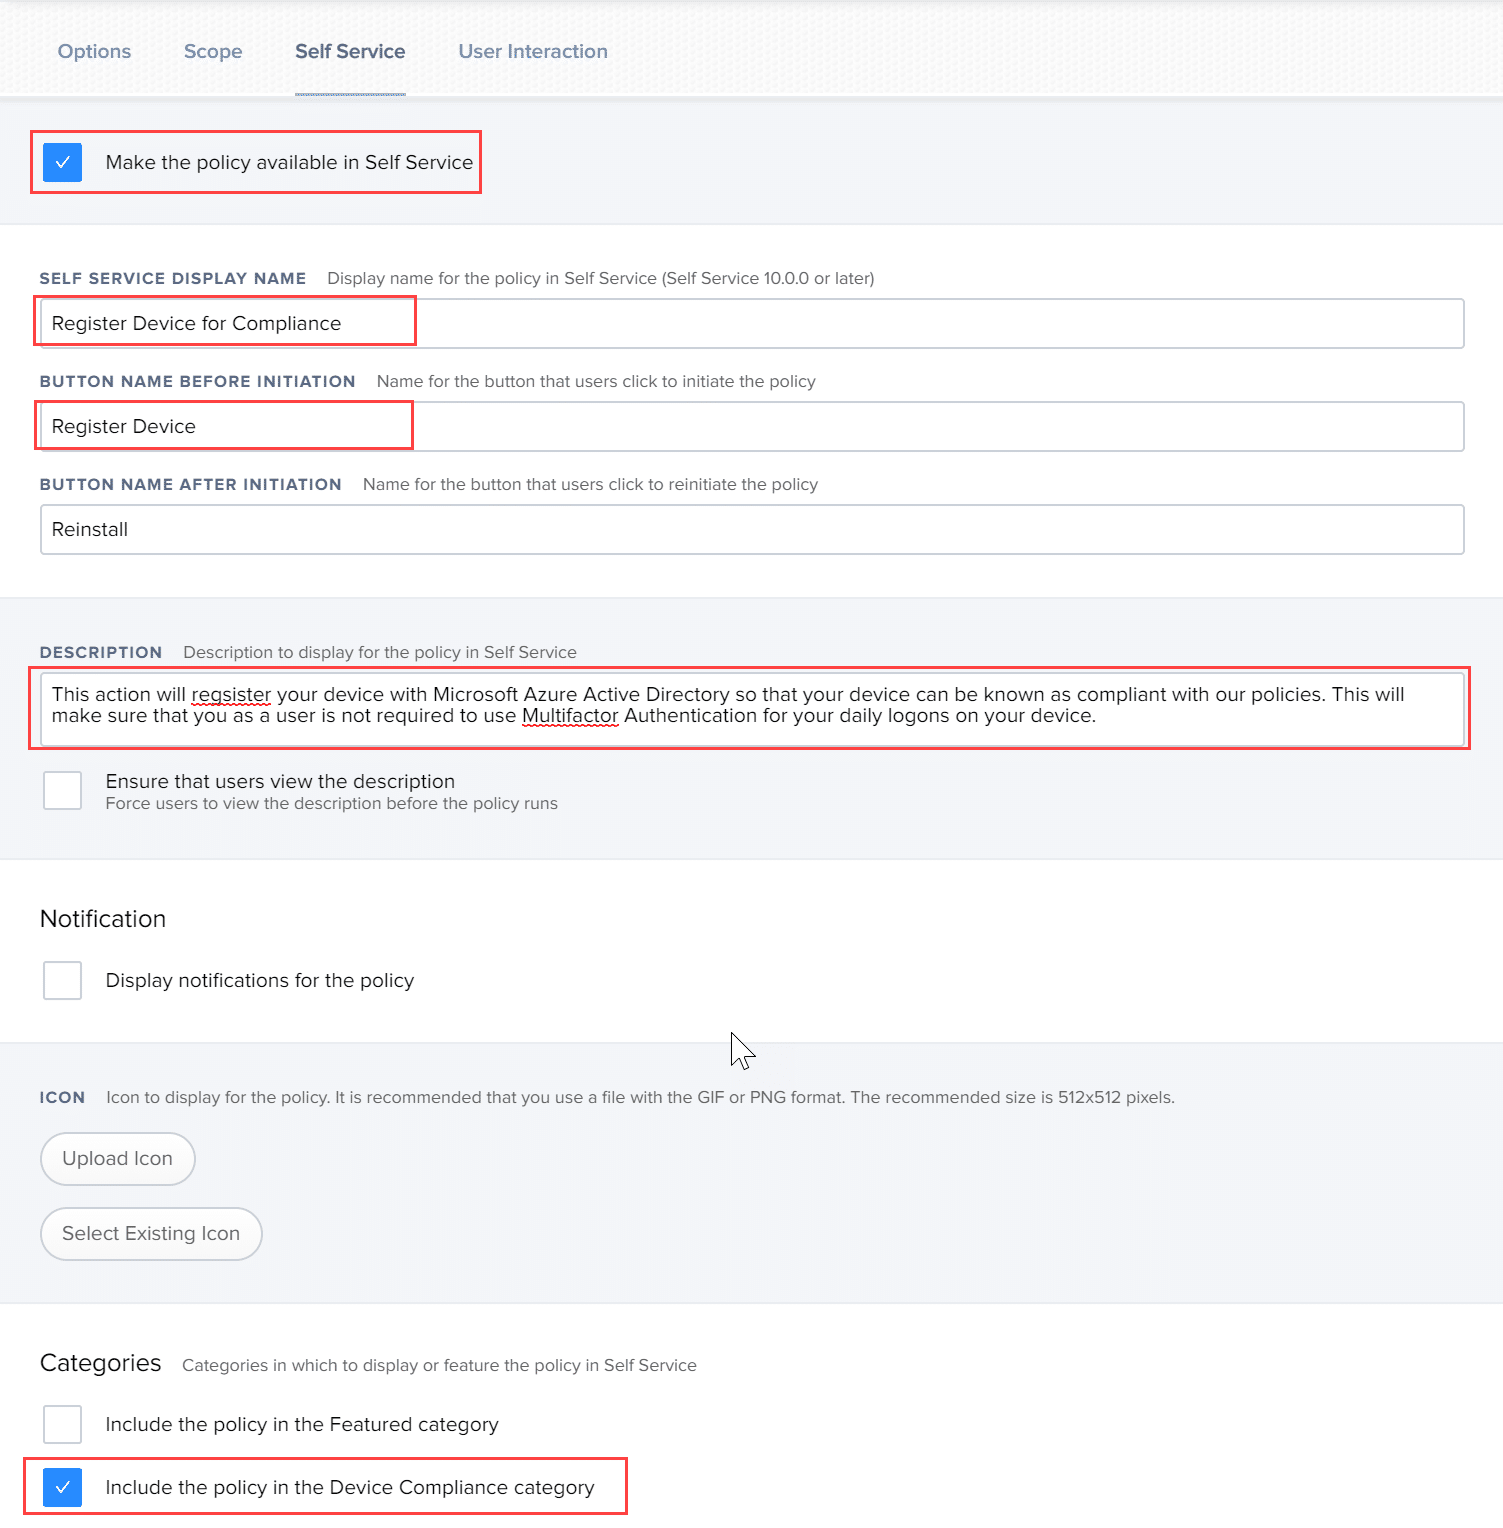
Go to the Self Service Tab and make this policy available in Self Service. I have configured it this way:
Important: The Company Portal app must be launched from Jamf Self Service to begin device registration. Launching the Company Portal app manually will not register the device. If an end user launches the Company Portal app manually, they will see an 'AccountNotOnboarded' warning message.
Inventory information is sent to Microsoft Intune only for Mac computers that have completed the device registration process with Azure AD. Jamf Pro sends the inventory state of each managed Mac computer that has checked in with Jamf Pro within the last 24 hours. To view inventory data sent to Microsoft Intune for each username associated with a computer, navigate to a computer’s history and click the macOS Intune Integration Logs category.
This concludes part 2. Next post in this series will focus on the end user experience of registering the device with Azure AD.


Add comment