


Cloud Kerberos Trust for Windows Hello for Business is the apex of single sign-on solutions for your Windows devices. in this Trilogy you can expect to learn the what, the how and the wow!
Looking for other parts?
Part 1 – Part 3
The story so far
We continue our mini series on Windows Hello for Business Cloud Kerberos Trust. In part 1 we introduced the concept of Cloud Kerberos Trust and spoke to some of the challenges it can help organisations overcome. One of the things that we love is the simplicity of configuration – both for green field tenants and for organisations already using a different trust method with Windows Hello for Business (WHfB).
Simplicity is elegance

In this post, we will show you how to configure Cloud Kerberos Trust for your on-premises infrastructure and how to create a configuration policy for your client devices.
Enabling Azure AD Kerberos for Cloud Kerberos Trust
This is so easy. Honestly, put one hand behind you back, juggle some wet frogs and sing “I will always love you”, all at the same time, and you will still be able to configure Azure AD Kerberos too.
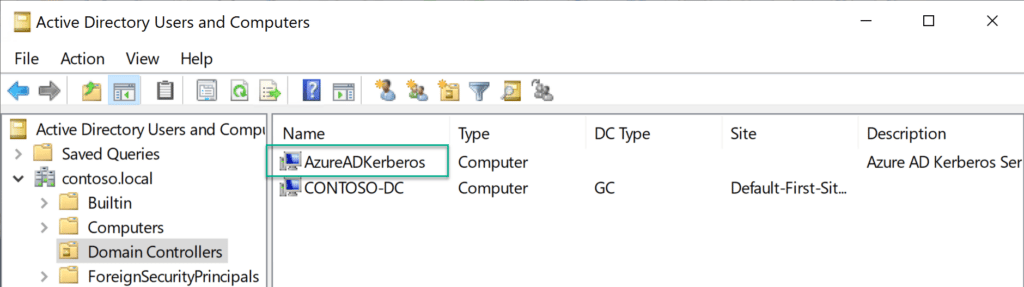
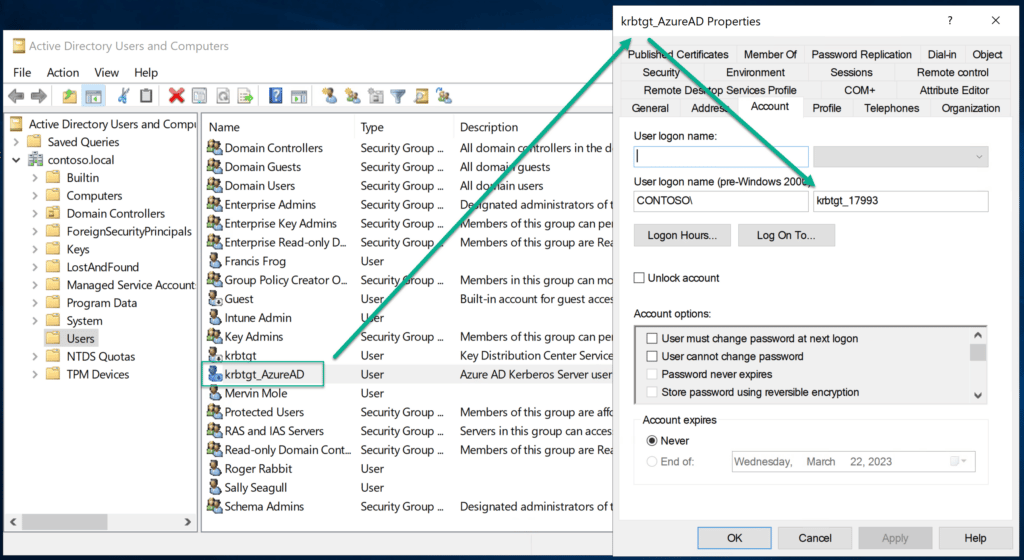
Enabling Azure AD Kerberos creates an “Azure AD Kerberos” server object in the domain.
This server object:
- Appears as a Read Only Domain Controller (RODC) object, but isn’t associated with any physical servers.
- Is only used by Azure AD to generate partial TGTs for the Active Directory domain. The same rules and restrictions used for RODCs apply to the Azure AD Kerberos Server object.
We will configure Azure AD Kerberos in our lab. Full prerequisites can be found here and the code samples are taken from the Microsoft docs here
1. Download and install the Azure AD Kerberos PowerShell module
from the PowerShell Gallery. This can be done directly on the Domain Controller or from a computer that can access the Domain Controller.
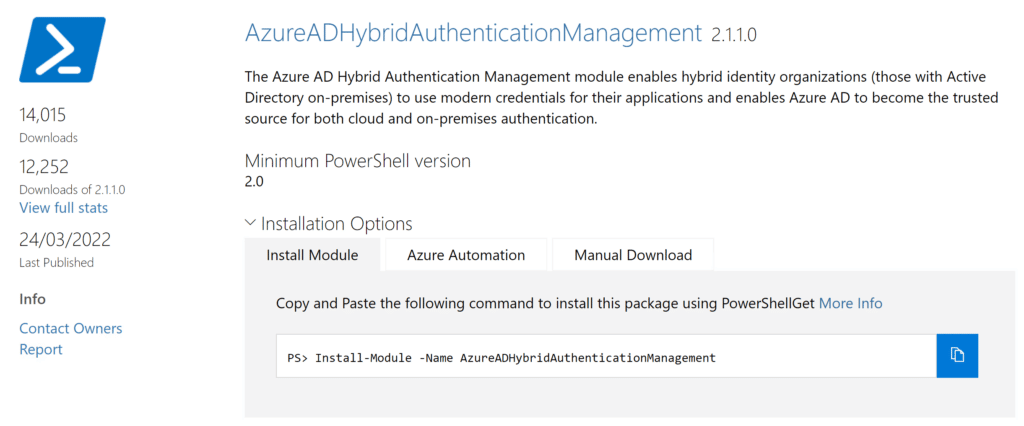
Install-Module -Name AzureADHybridAuthenticationManagement -AllowClobber
TLS 1.2 is required to access the PowerShell Gallery. Run the following command if it is not enabled.
[Net.ServicePointManager]::SecurityProtocol = [Net.ServicePointManager]::SecurityProtocol -bor [Net.SecurityProtocolType]::Tls12
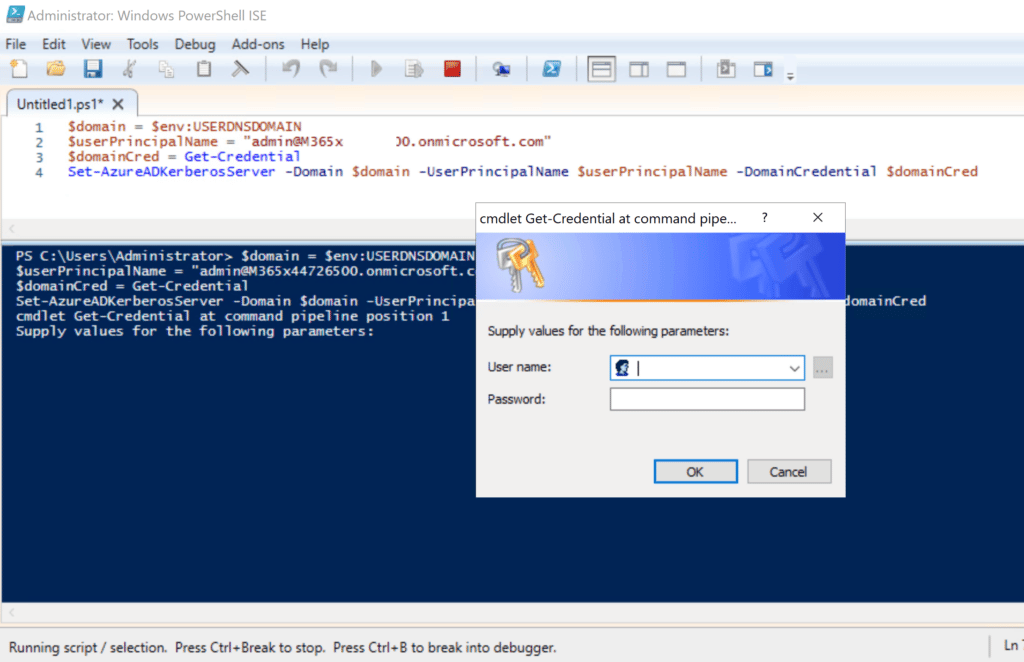
2. Run the following
# Specify the on-premises Active Directory domain. A new Azure AD
# Kerberos Server object will be created in this Active Directory domain.
$domain = $env:USERDNSDOMAIN

# Enter a UPN of an Azure Active Directory global administrator
$userPrincipalName = "[email protected]"

# Enter a domain administrator username and password.
$domainCred = Get-Credential

# Create the new Azure AD Kerberos Server object in Active Directory
# and then publish it to Azure Active Directory.
# Open an interactive sign-in prompt with given username to access the Azure AD.
Set-AzureADKerberosServer -Domain $domain -UserPrincipalName $userPrincipalName -DomainCredential $domainCred
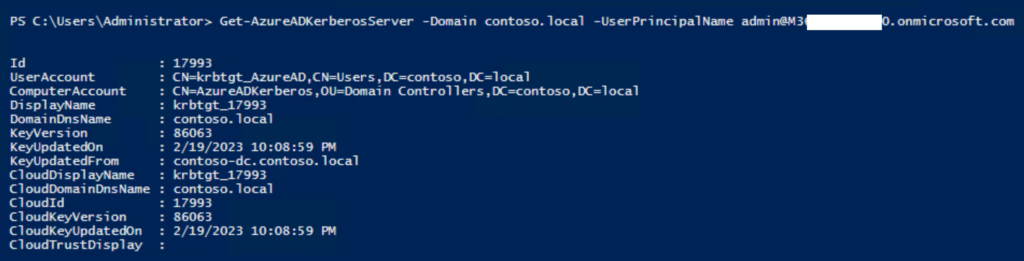
3. Verify that the Kerberos server RODC object was created successfully.
Get-AzureADKerberosServer -Domain $domain -UserPrincipalName $userPrincipalName
4. Also verify that the krbtgt user account was created (it is intentionally disabled)
Configure Cloud Key Trust using Intune
We can either use a GPO or push a configuration from Intune. If you are interested in using a GPO, read more here. In this post we will push the configuration from Intune (this is the way).
Ensure the client devices are a minimum of Windows 10 21H2 / Windows 11 Pro or Enterprise SKU. Perhaps consider using an Intune Filter for targetting.
1. Create a configuration profile
Assuming you don’t already have an existing policy for Windows Hello for Business, we will add it in it’s simplest form using the Settings Catalog.
2. Settings catalog profile
Go to the windows configuration profiles area and click “Create profile”
Select the “Windows 10 and later” platform along with the profile type “Settings catalog” and click “Create“

Give it an appropriate name and description and click “next“.
Now, start adding settings by clicking on the “Add settings button”.

The list of settings is LOOOONG, so, you want to do a search for “Windows Hello for Business” and click on the appearing category name “Windows Hello for Business” when it returns the result. Now we start by selecting the following settings (this is a minimum):

- Use Cloud Trust For On Prem Auth
- Use Passport for Work (User)
A few things to note here…
One is, that Passport for Work is the name in the CSP for “Windows Hello for Business”, it is a leftover form Microsoft rebranding. So, don’t get stuck on that. Speaking of rebranding, “Cloud Trust” and “Cloud Kerberos Trust” are the exact same thing, just another rebranding.
Second thing is that we selected a policy setting with the text “(User)” in it. This indicates that the user is the target. even if you assign to a device, this policy will be a user scoped policy on that device. This takes precedents over any other policies that might be targeted to the device. For Windows Hello for Business in Intune, the rules of precedents is “Tenant wide settings” over “User” and lastly “Device”.

Lastly we enable the settings and move on to the next part.
3. Assignments
Assign the profile to your desired group. You can target either users or devices according to your own preference or policy in-house.

4. Test the policy worked
Now we are assuming that the policy has applied from Intune…
At this stage, after a synced user logs in using WHfB, verify that a partial TGT has been issued using the command:-
klist cloud_debug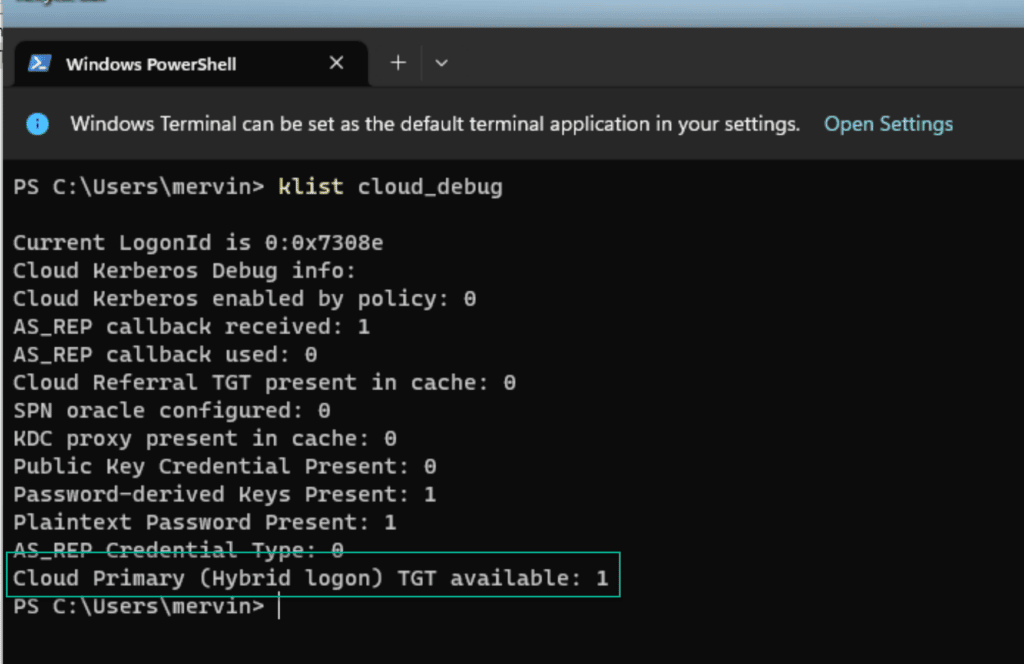
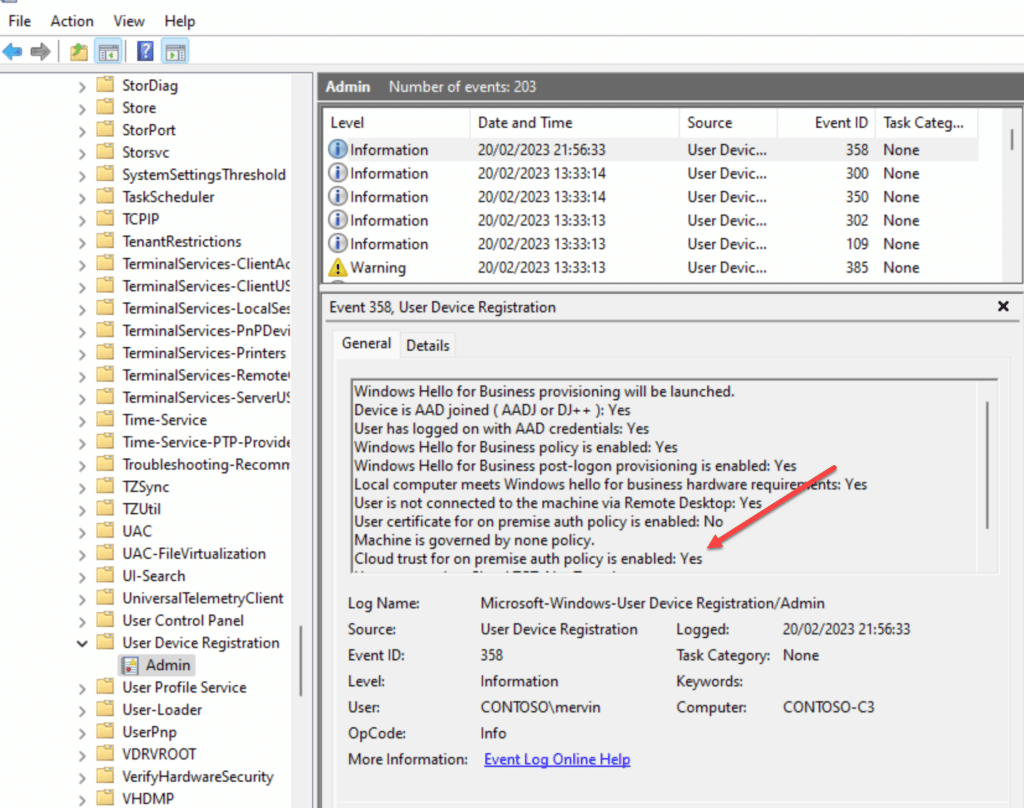
You can also be verify in the event log if the policy has been set successfully on the client.
If you don’t see the Cloud Primary TGT, then you might not have gotten a new token from Entra ID, and you can force that process by running the command line (as the user):
DSREGCMD /REFRESHPRTThen wait a bit and issue the command:
DSREGCMD /STATUSYou should be able to see the “SSO” part has the following values set:
OnPremTgt : YES
CloudTgt : YES
Summary
In part 2 of this mini series we looked at how to configure Cloud Kerberos Trust. In Part 3 we will dive a little deeper into some of the moving parts and help with some troubleshooting tips. Stay tuned for more fun!


Sadly it doesn’t work.
This is the most frustrating thing I have ever tried to setup.
In the event viewer we see Cloud Trust for premise auth policy is enabled: Yes
WhfB is enabled, YES
hardware reqs: Yes
But in cloud_debug
Clout TgT stays 0
In dsregcmd /status we see
OnPremTgt: NO
CloudTgt: Yes
We see in the registry that the config from intune was set , all the settings are okay.
*if* I connect with compnay VPN, then in klist I also see the kerberos.microsoft.com
So that also seems to be working.
But OnPremTgt always stays at no, and I can’t enable a pin or anything.
I see lots of setting up pointers – which is great and I can say they work – I set ours up 2 years ago – the only issue I’m finding is now we’ve migrated the tennant to a new global tennant – Yaaaay – didn’t do a bad job actually the one problem I have is I cannot seem to create a new Kerberos in the new tennant – nowhere does it show how to remove the old tennant kerberos link – any advice would be great as Microsof Learn really isn’t of much use.
The powershell cmdlets that you use to set it up with can also be used to destroy it with.
Example:
# Define parameters
$domain = “yourdomain.com”
$domainCred = Get-Credential -Message “Enter Domain Admin credentials”
$cloudCred = Get-Credential -Message “Enter Microsoft Entra Global Admin credentials”
# Remove the AzureAD Kerberos Server
Remove-AzureADKerberosServer -Domain $domain -DomainCredential $domainCred -CloudCredential $cloudCred
When I try to run this command, “Set-AzureADKerberosServer -Domain $domain -UserPrincipalName $userPrincipalName -DomainCredential $domainCred”
I get this error: “Set-AzureADKerberosServer: Unexpected exception thrown. Action: GetKerberosDomainSyncConfigAsync, Exception: Operation is not supported on this platform.
I’m running this on our domain controller that is using Windows Server 2016. We are hybrid where Azure AD Connect runs on its own dedicated server. We’ve been on this set up for years and it all works great. We are now trying to push out WHfB and I’ve heard we need this in place to ensure local network drives will still be able to be used.
I’ve tried removing the AzureADHybridAuthenticationManagement module and reinstalling with no luck. Get-AzureADKerberosServer gives me the same error. Tried a simple reboot and updating powershell to 7.5.1 as well. Same results. I’m at a loss. Searching in Copilot and google hasn’t returned any results that fixes this issue.
Do you have any idea?
This has been happening at a few customer sites for me as a consultant as well. You need to run the command from the server where Entra Connect is installed, then it works (in my case at least)
I am not seeing Use Passport for Work (User) in my settings catalogue when setting up the Configuration Policy in Intune. Is there another policy we can select that will fulfil the same purpose?
They just changed the names to actually be Windows Hello for Business. Just search that in Settings Catalog and you will be good.
Great article!
Just for your information.
I’ve just done a setup. But the settings “Use Passport for Work” & “Use Passport for Work (User)”, isn’t in the portal anymore.
Looks like they are renamed to “Use Windows Hello for Business (Device)” & “Use Windows Hello for Business (User)”
I also found this post about it on reddit.
https://www.reddit.com/r/Intune/comments/1evm872/use_passport_for_work_settings_missing/
Yes. Things change and the article is rather old now, but still valid for learning. Thanks for the update so others can see it.
How would you configure this for multiple tenants? Users are synced from a single domain to different tenants based on UPN.
That a very special use case. I dont think it is possible. as you would need a kerberos signing key for each tenant, and there is only support for creating one per. AD domain afaik.
Super useful post – Thanks. I wish Microsoft would write articles like this.
A perfect blog!
Just followed all instructions. Endpoint Devices configuration status is green, but on a specific workstation the OnPremTgt is still on “No” instead of “YES”. Even after DSREGCMD /REFRESHPRT.
In the Eventlog ID 358 the Cloud Trust for on-premise auth policy is Enabled is set to “YES”
I don’t understand that.
Hi!
Is it necessary to have line of sight to your domain controllers for this to work?
Hi!
Is it necessary to have line of sight connectivity to your domain controllers for this to work?
Yes. The Cloud TGT gets exchange for a full TGT at the Domain Controller.
If both OnPremTgt and CloudTgt results are YES is it safe to say that the computer has migrated to cloud Kerberos and is now in use?
I am getting this error for #2 Set-AzureADKerberosServer; Any idea?
Set-AzureADKerberosServer : Failed to read secrets from the domain .
At line:1 char:1
+ Set-AzureADKerberosServer -Domain $domain -UserPrincipalName $userPri …
+ ~~~~~~~~~~~~~~~~~~~~~~~~~~~~~~~~~~~~~~~~~~~~~~~~~~~~~~~~~~~~~~~~~~~~~
+ CategoryInfo : NotSpecified: (:) [Set-AzureADKerberosServer], DirectoryServiceException
+ FullyQualifiedErrorId : Microsoft.AzureAD.Kdc.Service.DirectoryServiceException,Microsoft.AzureAD.Kdc.Management.SetAzureADKerberosServer
Very thorough tutorial, thanks a lot guys!! 🙂
Thx for the excellent instructions. But i have a question.
After we enable it we solved our problem when logging in with Windows Hello when printing to our on premise printer but we it created another problem. We have an onpremise application that uses msapproxy.net. When logging on that application prompts the user for pin or other WHFB options. If the user tries to login with, for example, PIN, the user get the error 401 – Unauthorized: Access is denied due to invalid credentials. Logging in with UPN and password still works.
Do we have to make additional configurationchange to make this work?
With App Proxy apps you have to be a master of the authentication flow and consider what happens. the service you are using (app proxy) can be configured in many advanced ways. I have spent days debugging the authentication flows and token exchanges going though, to get different services working. but it should be possible. Just not very easy in some cases (I am available for hire via inciro.com if you want to help me earn a living <3).
Hi Michael,
Thank you for this post. I have a quick question really. I followed this guide initially to setup WHfB with Cloud Kerberos and I am sure originally it was said to set up a OMI setting on intune. Not that it matters, but has this guide been updated?
Thanks
Chris
We might have updated it.. you dont need OMA-URI any more. the Settingscatalog has the Cloud Kerberos option baked in. But there is no problem with leaving the OMA-URI if you have things working.
krbtgt user account NOT created
Okay, i did it. It was the “Enterprise Admin” fault. I needed to create a Domain Admin Account on the child domain to get it working.
Have U seen this error before?? it is when i try to install in child domain??
Set-AzureADKerberosServer : The Azure AD Kerberos Server object in Active Directory is missing required properties. Property: UserAccount.SecondaryKrbTgtNumber Value:0
At line:1 char:1
+ Set-AzureADKerberosServer -Domain $domain -CloudCredential $cloudCred …
+ ~~~~~~~~~~~~~~~~~~~~~~~~~~~~~~~~~~~~~~~~~~~~~~~~~~~~~~~~~~~~~~~~~~~~~
+ CategoryInfo : NotSpecified: (:) [Set-AzureADKerberosServer], DirectoryObjectValidationException
+ FullyQualifiedErrorId : Microsoft.AzureAD.Kdc.Service.DirectoryObjectValidationException,Microsoft.AzureAD.Kdc.Management.SetAzureADKerberosServer
yes. Run the command from you Entra Connect server (which I hope you figured out, but saying it here for others)
Sorry for the late replies. I did not know there was so many comments laying around in here, and life has been – busy – to put it mildly.
How would you configure this for multiple domains in a forest ?
at the forest level, or one config for each child domain ?
Hi Kenneth,
You would need to configure the AzureAdKerberos connection for each domain as they have different kbrtgt encryption.
How would you go about doing that?
We have 1 forest and 1 sub domain.
We also have azure ad and azure IaaS.
Hi there, when i try to configure for the child domains, i get this error:
Set-AzureADKerberosServer : The Azure AD Kerberos Server object in Active Directory is missing required properties.
Property: UserAccount.SecondaryKrbTgtNumber Value:0
Do i have to make a special move to get it working for the child domains? I tried it with the AD Enterprise Admin. Not with a dedicated Domain Admin of the Child Domain. Could this be the problem?