In this second post on how to deal with the scenario of converting from BIOS to UEFI, we’ve come to Dell. This series of post consists of the following:
- Convert from BIOS to UEFI during Windows 10 deployments with ConfigMgr Current Branch – Introduction
- Convert from BIOS to UEFI on Dell systems with ConfigMgr Current Branch – Part 1
- Convert from BIOS to UEFI on HP systems with ConfigMgr Current Branch – Part 2
- Convert from BIOS to UEFI on Lenovo systems with ConfigMgr Current Branch – Part 3
I recommend that you read the introduction for this series before you continue, since it describes the new capabilities of ConfigMgr Current Branch regarding the native support for BIOS to UEFI conversion. In this post, I’ve also included how to activate and enable the TPM chip for Dell systems due to the fact it requires a special order of steps to be taken for it to function properly when combined with the BIOS to UEFI conversion.
Prepare required packages
We need to create a package for Dell Command Configure (formerly known as CCTK). In Dell Command Configure, you can still leverage the cctk.exe file to configure individual settings in addition to apply a complete ini file with your configuration. The process of creating a Dell Command Configure package in ConfigMgr has already been very well described by Mike Terrill, so I’ll not copy his excellent work. Instead, follow Mike’s instructions from the following blog post:
How to create a Dell Command-Configure Package in ConfigMgr
In my environment, I’ve named my Dell Configure Command package as ‘Dell Command Configure 3.1.0.250’. I suggest that you do the same when following along in this post. As a friendly reminder, distribute the package to your Distribution Points.
This package will be used to configure the settings on the Dell systems so that we can make the actual configuration switch from BIOS to UEFI.
Task Sequence configuration
As for the task sequence configuration, the steps below are part of a native ConfigMgr task sequence. MDT integration is not described in this post, but I’d assume that with the layout of steps below you’ll be able to figure out how to incorporate the same configuration into a MDT integrated task sequence, if that’s what you’re using.
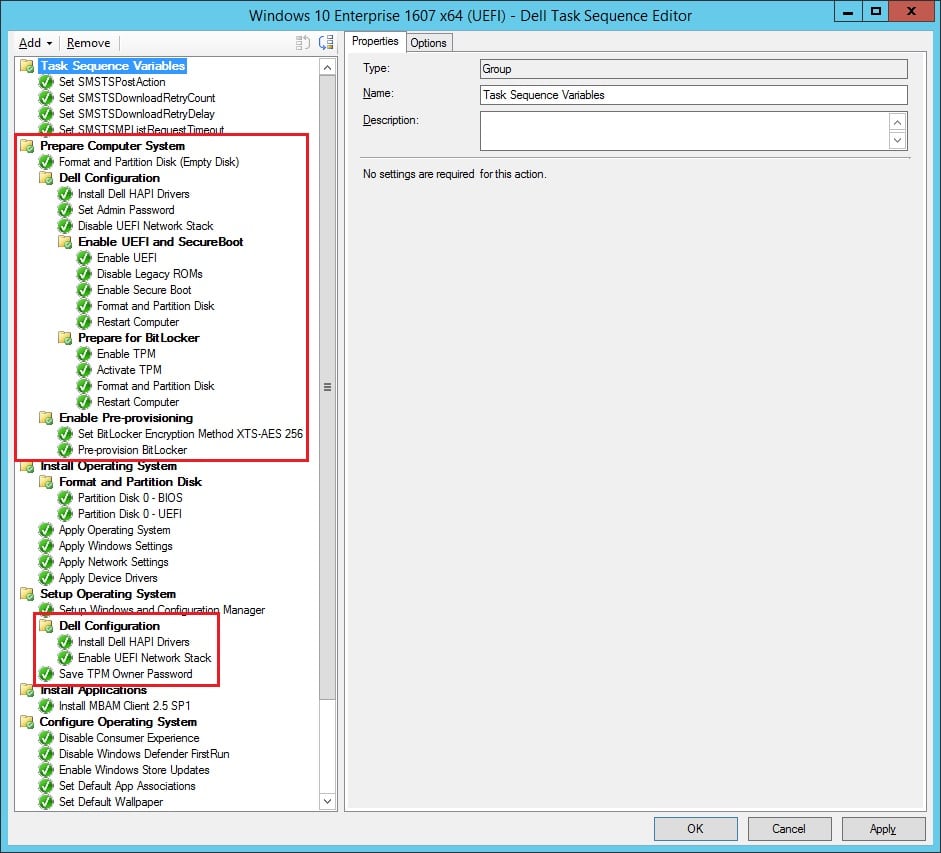
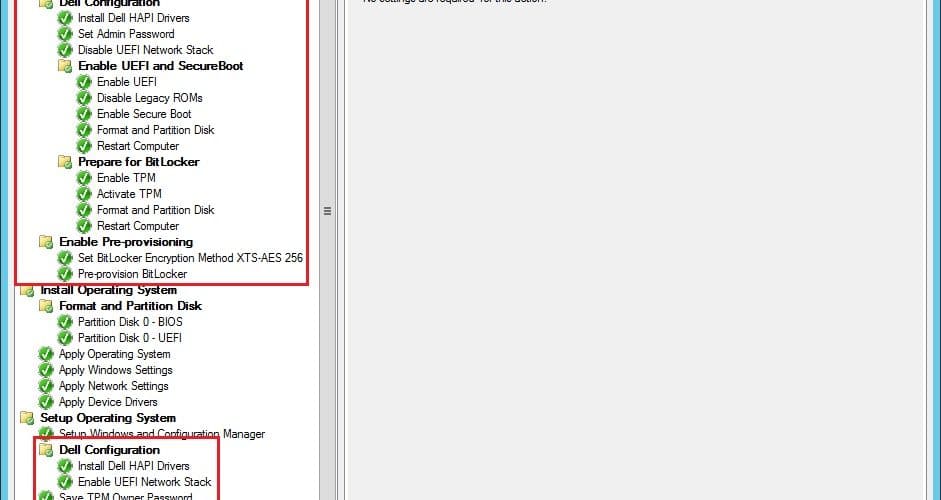
Below are the individual steps for a successful BIOS to UEFI conversion including enabling and activating TPM for Dell systems.
NOTE! Since WordPress converts a double dash (- -, had to add a space character here) into a single dash, all steps below that reference the cctk.cmd file in the Command line should contain a double dash for each parameter passed along.
Format and Partition Disk (Empty Disk)
| Type | Format and Partition Disk |  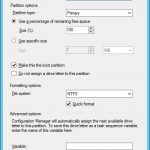 |
| Disk selection | Disk number: 0 Disk type: MBR | |
| Volume | Partition type: Primary Size: 100% File system: NTFS Quick format: Yes |
Dell Configuration
| Type | Group |  |
| Condition
| WMI Query: Namespace: root\cimv2 Query: SELECT * FROM Win32_ComputerSystem WHERE Manufacturer like ‘%DELL%’ |
Install Dell HAPI Drivers
| Type | Run Command Line | 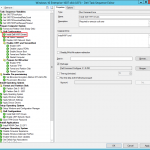 |
| Command line | InstallHAPI.cmd | |
| Package | Dell Command Configure 3.1.0.250 | |
| Condition | None |
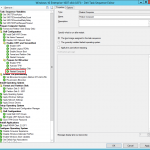
Set Admin Password
| Type | Run Command Line | 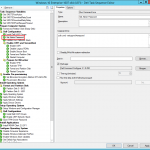 |
| Command line | cctk.cmd –setuppwd=PASSWORD | |
| Package | Dell Command Configure 3.1.0.250 | |
| Condition | None |
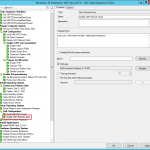
Disable UEFI Network Stack
| Type | Run Command Line | 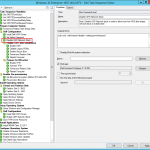 |
| Command line | cctk.cmd –uefinwstack=disable –valsetuppwd=PASSWORD | |
| Package | Dell Command Configure 3.1.0.250 | |
| Condition | None |
Enable UEFI and SecureBoot
Enable UEFI
| Type | Run Command Line | 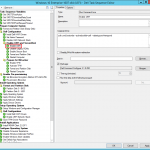 |
| Command line | cctk.cmd bootorder –activebootlist=uefi –valsetuppwd=PASSWORD | |
| Package | Dell Command Configure 3.1.0.250 | |
| Condition | None |
Disable Legacy ROMs
| Type | Run Command Line |  |
| Command line | cctk.cmd –legacyorom=disable –valsetuppwd=PASSWORD | |
| Package | Dell Command Configure 3.1.0.250 | |
| Condition | None |
Enable Secure Boot
| Type | Run Command Line | 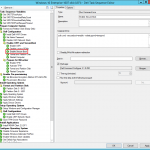 |
| Command line | cctk.cmd –secureboot=enable –valsetuppwd=PASSWORD | |
| Package | Dell Command Configure 3.1.0.250 | |
| Condition | None |
Format and Partition Disk
Restart Computer
Prepare for BitLocker
Enable TPM
| Type | Run Command Line | 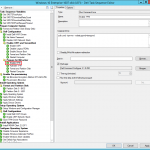 |
| Command line | cctk.cmd –tpm=on –valsetuppwd=PASSWORD | |
| Package | Dell Command Configure 3.1.0.250 | |
| Condition | None |
Activate TPM
| Type | Run Command Line |  |
| Command line | cctk.cmd –tpmactivation=activate –valsetuppwd=PASSWORD | |
| Package | Dell Command Configure 3.1.0.250 | |
| Condition | None |
Format and Partition Disk
Restart Computer
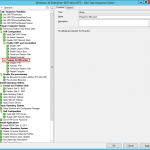
Dell Configuration
| Type | Group | 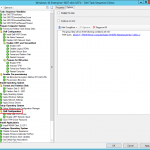 |
| Condition | WMI Query: Namespace: root\cimv2 Query: SELECT * FROM Win32_ComputerSystem WHERE Manufacturer like ‘%DELL%’ |
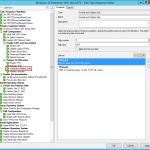
Install Dell HAPI Drivers
| Type | Run Command Line | 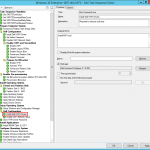 |
| Command line | InstallHAPI.cmd | |
| Package | Dell Command Configure 3.1.0.250 | |
| Condition | None |






Nickolaj,
Thanks for responding. I think my issue is the reboots between steps. I will play with and do additional testing.
On your comment about avoiding MDT TS. I am an IT Manager so I have a lot of hats in my role. Trying to get an OSD TS up and running fast is a requirement and I don’t have the expertise or time to generate OSD TSs from scratch. If you had to go with a ConfigMgr generated OSD TS would you just have it create a normal one or are you saying stop auto generating them all together?
Thank again,
Carlton.
Hi Carlton,
I hope you figure it out with the reboots. Regarding a native ConfigMgr task sequence or using a MDT-integration task sequence, there’s different opinions out there in the community. My opinion is that you should always try to make it as easy for you to manage as possible. If there’s missing functionality required by your organization that’s not in the native task sequence, or that you might have to invest time in developing but it’s already there for a MDT-integrated task sequence, well use that task sequence. But if you’re able to do without the MDT-integration, you should do that. It always comes down to this in my opinion, that you start out with a native sequence.
Regards,
Nickolaj
Nick,
First, let me say things for posting this. We are a Dell shop so this was exactly what I was looking for. I’m modifying a MDT created OSD TS to work with what you have, but the Install Operating System section has a lot of extraneous steps. Could you show the details for that section? Especially the Format and Partition steps?
Thanks again for taking the time to post this!
Carlton.
Hi Carlton,
I don’t have any template for that, simply because I try to avoid MDT integrated task sequences. These days there’s simply not a need for doing that if you’re creating it from scratch. But that’s another debate 🙂
Just make sure that you run these step more or less like they’ve been placed in this guide but before the WIM file is expanded to the system drive and after the initial formatting that’s eventually going to stick.
Regards,
Nickolaj
Thanks for the great guide!
The TPM Activation step is failing for me. I have put in a restart step between enable and activate but it’s not working.
When digging into the SMSTS.log further I can see that it says “To set TPM”:
– Admin password must be set
– TPM must not be owned
– TPM must be deactivated
To check these settings from the F8 command prompt use the following command:
– Wmic /namespace:\\root\CIMV2\Security\MicrosoftTpm path Win32_Tpm get /value
For me the ‘IsOwned_InitialValue=True’
This task sequence was a big help in getting our systems converted. What is odd is that it eventually failed, would only set some settings but failed on disabling the UEFI network stack step and several others with the 3.x CCTK software. What I eventually did was use the newer 4.x version of the cctk tool but created the package differently (see the link below) and runs fine in WinPE. So all the steps was consolidated into one group to set the BIOS settings with UEFI network stack disabled. Also, what I did was create a second multiplatform.cctk file to re-enable the UEFI network stack. The first cctk file in Config\ enables secure boot, tpm, etc.
Task sequence steps consolidated into one group:
Dell Configuration (Group)
Install HAPI Driver CMD Line: HAPI\HAPIInstall.bat
Enable BIOS Password CMD Line: cctk.exe –setuppwd=password
Lockdown BIOS – All Systems CMD Line: cctk.exe -i “Configs\multiplatform.cctk” –valsetuppwd=password
Format and Partition Disk as above
Reboot
Here is the way I created the dell cctk package from 4sysops.com
https://4sysops.com/archives/dell-bios-update-with-sccm-and-dell-command-configure/
I get a 800700002 error in the task sequence
I’m running into an issue after the first reboot right before the “Prepare for BitLocker” group. Once it reboots, it boots back into WinPE, but I get an error “Unable to read task sequence configuration disk” when the task sequence is “Initializing hardware devices…”. It appears that the NIC is not functioning properly at this stage. I tried updating to newest BIOS, adding newest NIC drivers to the boot image, but no luck. FYI this is an Optiplex 7050. Any possible help?
any resolution i am having the same issue
Hi!
Is there a chance you could post an export of the TS?
Mikael
Hi,
I was wondering when you would be posting parts 2 and 3??
Regards
Michael
Is there something out there like this for MDT 2013 UD2??
Any chance you can share the task sequence with us for a download?
I just finished a multi reboot TS in Dells . I ran into the same issue with multi-partition computers, Deleting all partitions and multi formatting helped me out, I will be more than happy to share the TS if you need a copy.
Ammon,
Could you please send me the task so I can compare to mine? I’m also getting no OS found.
Thanks,
-Bruce
brucesa @gmail.com (no space)
Please do!
With ADK1703 and CM1706, the second TSUEFIDrive-based Reboot Computer step fails for me on Dell laptops. The first one after the UEFI BIOS steps works just fine. The second one after the TPM settings cause a “No bootable device found” error. Is TSUEFIDrive dependent on there being a “Windows Boot Manager” option in the UEFI menu and not just the physical harddrive listing?
This was an excellent article once i got my head around it! Im not expert but always getting better with SCCM so for me this was a life saver after purchasing a new set of laptops with TPM 2.0 on.
Why is it that you’re disabling the UEFI network stack? Don’t you need that to boot to PXE once you enable UEFI?
yes please tell us why u are disabling UEFI stack. My task sequence fails at Restart Computer.
Disabling the UEFI network stack, or by virtue of the CCTK command in the step ensuring that the UEFI network stack is disabled, is very important for the conversion step from BIOS to UEFI. 1E has a tool that does some of this, but if you have SCCM 1607 and above, you can leverage the “TSUEFIDrive” variable in the volume for EFI. Then put your restart step after that, then the final format step with your EFI and and OS volumes. The variable tells tsenv.exe to hold and allow the boot image to “stage” on that first reboot to come back and finish with the UEFI formatting. Rebooting to UEFI network before the conversion is complete will cause the task sequence to fail. Like this man:
1. Format and partition disk with two volumes – EFI (enter “TSUEFIDrive” variable at the bottom in the properties) and then the rest as OS volume
2. Restart to WinPE (Boot image staged from “TSUEFIDrive” variable)
3. Final Format and Partition Disk step with EFI as first volume then recovery, OS, etc.
Then the rest of your task sequence. IF you can get through the Format-reboot-format steps you’re home free. Email me at [email protected] if you need further assistance. Good luck!
Hi Robert,
Where did you put the final format section?
I have a few older models of Dells that I still support that don’t support Secure Boot. Is there some logic that needs to be added to not run the CCTK cmd for enabling it or does a simple Continue on Error work?
I would try updating the BIOS for those models. The updated BIOS’s may support the feature.
How exactly do you do this step? “If using usb stick, be sure to add a “Restard in Windows PE” on top of your TS, then add a TS Variable _SMSTSLaunchMode equals “UFD+FORMAT” I thought _SMSTSLaunchMode is read-only.
Some thoughts and comments after experimentations based on your work (thanks for your great work, again)
If using usb stick, be sure to add a “Restard in Windows PE” on top of your TS, then add a TS Variable _SMSTSLaunchMode equals “UFD+FORMAT”
-Be sure to update to latest BIOS version, some CCTK commands won’t work without.
-Be sure to use latest verison of CCTK (3.2 at this time)
Had to add a step (with continue on error) before setting BIOS Admin password, because my customer had a previous password set and sometimes not (sigh)
For TPM Enable/Activate I had to put a Restart Computer between them (E553x non vpro series), but did not have to that for newer 557x series
Lookink forward for part 2 and 3 🙂
Hmmmm so i got all these steps in place and when it does the partition step and reboot to bootimage under the Enable UEFI and secure boot section it fails.
Volume D: is on gpt disk, but the system is MBR
Unable to find a partition on the system disk that can be set as active.
Verfied that UEFI is on and Legacy is disabled. Any ideas? SCCM version is 1610 as well.
Hi Justin,
I have this same issue right now, did you ever figure out how to fix it?
Thanks,
AJ
The key part is three steps:
1. Format Disk with two volumes. GPT Disk – Volume 1 EFI (1 GB, TSUEFIDRIVE variable in the properties) Volume 2 Primary (remaining disk space)
2. Restart to WinPE boot image.
3. Final format of disk volumes.
Thanks Robert, but this is still not working for me…could you share a screenshot of your task sequence that runs this with me please?
My previous comment is actually inaccurate. Here are the three steps:
Step 1:
Format and Partition Disk
GPT
Two Volumes
“Make this the boot disk” UNCHECKED
Volume 1:
Partition Type – Primary
FAT32
Quick Format
1 GB Size
TSUEFIDRIVE in Variable Properties
Volume 2:
Partition Type – Primary
NTFS
Quick Format
100% of remaining space on disk
Step 2:
Restart into Windows PE
This step will leverage the TSUEFIDRIVE variable in the FAT32 properties of volume 1 in the previous format step and stage the boot image. By the way you need to make sure the boot image isn’t larger than 1 GB. Most likely it wouldn’t but I originally made my FAT32 volume 1 500MB and I had a boot image that was slightly bigger than that and the task sequence kept failing. So that’s why I bumped it up to 1 GB! LOL.
Step 3:
Format and Partition Disk
GPT
Four Volumes
“Make this the boot disk” CHECKED
Volume 1:
EFI
FAT32
500 MB fixed size
Volume 2:
MSR
128 MB fixed size
Volume 3:
Partition Type – Primary (Windows)
NTFS
99% of remaining space on disk space
Volume 4:
Partition Type – Recovery
100% of remaining space on disk
Hi Justin,
Did you ever figure this out, I have the same issue after reboot, after enable UEFI it starts the reboot process, downloads the wim, reboots and never goes back in.
I think this is going to be a stupid question, to which I already know the answer… but does the reference image need to have been built on UEFI, not BIOS? I’ve run through your steps (thank you, it’s been so helpful!). The BIOS-to-UEFI conversion goes flawlessly, it reboots in WinPE in UEFI, but then it fails to install the OS because “system partition not set” and “unable to find the partition that contains the OS boot loaders”. I’ve been pulling out my hair to try to figure it out, as the steps you’ve shown are actually pretty simple, and I’ve checked my process time and time again. Hopefully it’s just an issue with the reference image, which I could fix by building it with EFI, not BIOS.
I am on ConfigMgr 1610 with MDT. I have followed the same. I have followed the same steps and tried placing them in two different parts of the Task Sequence. I tried after the “Partition if necessary”, right before “Set variable for Format and Partition Disk (unused)” and right after “Validate” step in the Preinstall > New Computer Only section. It appears to make the BIOS modifications (Enable UEFI, Disable Legacy ROM, Enable Secure Boot, etc.) however the Restart Computer (step configured to “The boot image assigned to this task sequence”) does not appear to run until later. It will Apply the Operating System, Drivers, etc. Eventually it seem to go back to the step to restart the computer into WinPE and the Task Sequence selection screen will come up again.
Any ideas?
We have the same issue. We are using a WinPE USB stick to start the TS. We have to remove the USB stick after the TS policy is downloaded or a reboot in WinPE will start the TS all over again starting with the prompt to select the advertised TS.
Hey There, went through all the steps but when I get to the Command line cctk.cmd bootorder –activebootlist=uefi –valsetuppwd=XXXXXXXX in the TS I keep getting an error. Yet it runs fine from Admin command prompt on the system. the error code I get is an 0x00000005? Any one see this before? Ideas?
Activate TPM step will sometimes fail.
Some of the 7480 laptops we received apparently activate the TPM when the prior CCTK step turns TPM on. So then the actual Activate TPM step will fail.
Hi Brachus,
Thanks for the input. It’s not good how inconsistent Dell sometimes can be with their models.
Regards,
Nickolaj
Great Docu, but it doesnt work for me. Every time i run this, at the end of all steps there is the UEFI screen:
“No bootable device found”
“Hit F1 key to retry boot”
“Hit F2 key for setup utility”
and so on..
Whats my mistake?
Dont work for me either, same problem as ReneF have, Dell system iam trying on, Optiplex 9020 and 9030.
Hi ReneF,
Not sure what could be wrong for you in this particular example. I’d like to highlight though that this is an example of how it could be accomplished. It’s not a one-solution fits all. What models are you working with? Running ConfigMgr 1610?
Regards,
Nickolaj
Yes Configmgr 1610 and Dell Optiplex.
Got it fixed, created a new TS and setit up from the beginning, maybe a typo or somethings i did wrong in first TS.
Thanks for a great blog ! 🙂
Great to hear that it got fixed!
Regards,
Nickolaj
In my case, i have to update the boot image, and every thing was fine… 😉
I have the same problem. What did you update in the boot image?
Great post. Please note Dell Command 3.2 was released earlier: https://www.dell.com/support/home/us/en/19/product-support/product/dell-command-configure-v3.2/manuals
Does this TS assume the use of PXE boot and not USB boot media?
We’re deploying across different subnets and are limited to using USB media. However, after the successful creation of the TSUEFIDrive, some of our systems are rebooting back to the USB media instead of that new drive.
Do you have a way to reorder the UEFI devices?
Hi, looking foreword for part2 and 3. 1 question though; is there a specific reason you enable uefi network stack after OS deployment?
Hey There Nickolaj… I know you haven’t gotten to the Lenovo portion of your series but I recently worked with a client who had Lenovo T460’s that required the UEFI conversion. I looked at the “HTA Solution” Lenovo offered but in the end, I opted for manipulating the WMI manually via PowerShell. Much quicker and efficient from my perspective (not to mentioin the HTA can cause angry AV software without exclusions!
Have you had a chance to look at tjsis and if so, what are your thoughts?
~m
Hello,
Can you please help me with the Lenovo UEFI Conversion. I also tried the HTA but does not seems to work. I would appreciate if you can help me with the Lenovo machines.
Thank ou.
Page not found for “introduction ” link
Thanks, it has been fixed now.
Regards,
Nickolaj